

Boost Your Brand Identity with Vanity URLs for Oracle Autonomous Database via OCI Load Balancer
Deep dive into Vanity URLs


Introduction
If you're looking to boost your brand identity and make your Oracle Autonomous Database more memorable, consider setting up a custom vanity URL. Vanity URLs are easy to read, remember, and distribute, and they can have a positive impact on your search engine optimization. In this article, we'll walk you through the steps to set up a vanity URL for your Oracle Autonomous Database via OCI Load Balancer, using only OCI services managed by Oracle. With a little configuration and a domain name and SSL/TLS certificate, you can have your own vanity URL up and running in no time!
Why are vanity URLs useful?
Applications that are created and published on an Autonomous Database in the Oracle Cloud receive an automatically generated URL. By default, the domain name "oraclecloudapps.com" is used to access APEX service components and their developed APEX apps and REST endpoints. The URL starts with 15 random alphanumeric characters (tenancy ID), followed by the database and data center name.
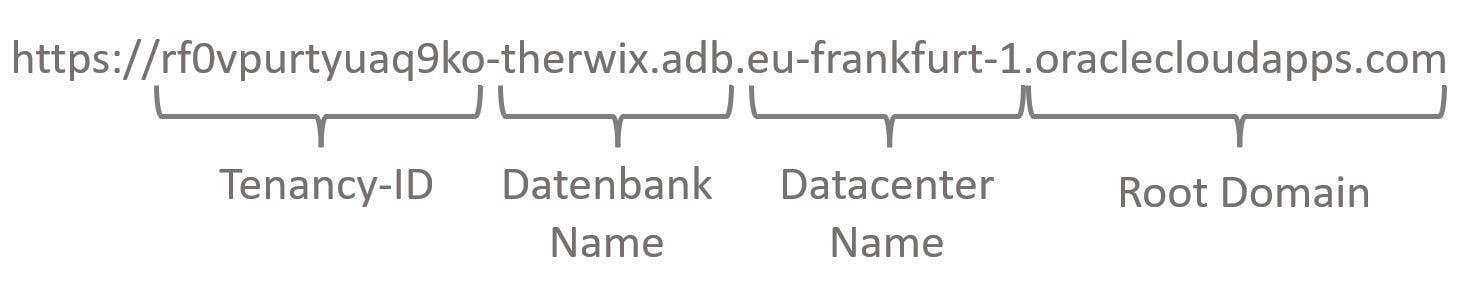
The result is a very long, confusing, and heavy URL that is difficult to remember - let alone distribute them in this way. To provide a solution to this, Oracle introduced vanity URLs for Autonomous Databases in September 2021. They can be configured shortly and added to an ADB for free with minimal effort. All you need is a own domain name and a matching SSL certificate from a provider of your choice.
Setting up a vanity URL
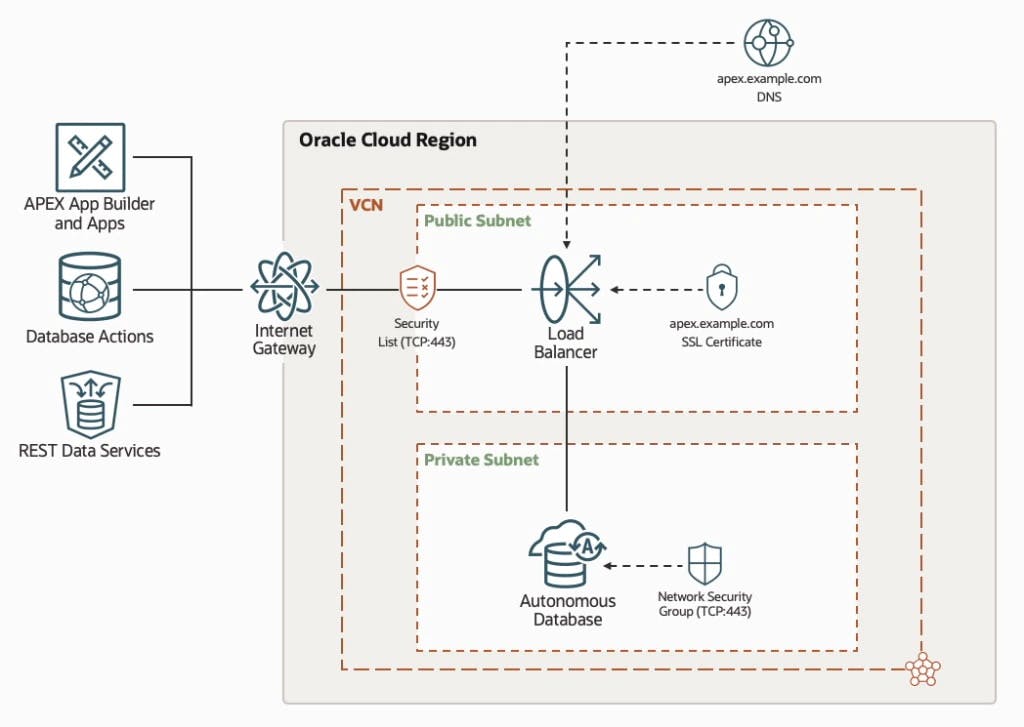
In order to use vanity URLs, a few basic requirements need to be set up in the Oracle Cloud infrastructure. As shown in the diagram below, a Virtual Cloud Network (VCN) with a private and public subnet is required. Within the private subnet, the Autonomous Database is placed. In the public subnet, a load balancer is connected in front of the Database, which acts as an HTTPS reverse proxy server. Communication from the client to the load balancer to ADB is encrypted using an SSL certificate.
Virtual Cloud Network (VCN)
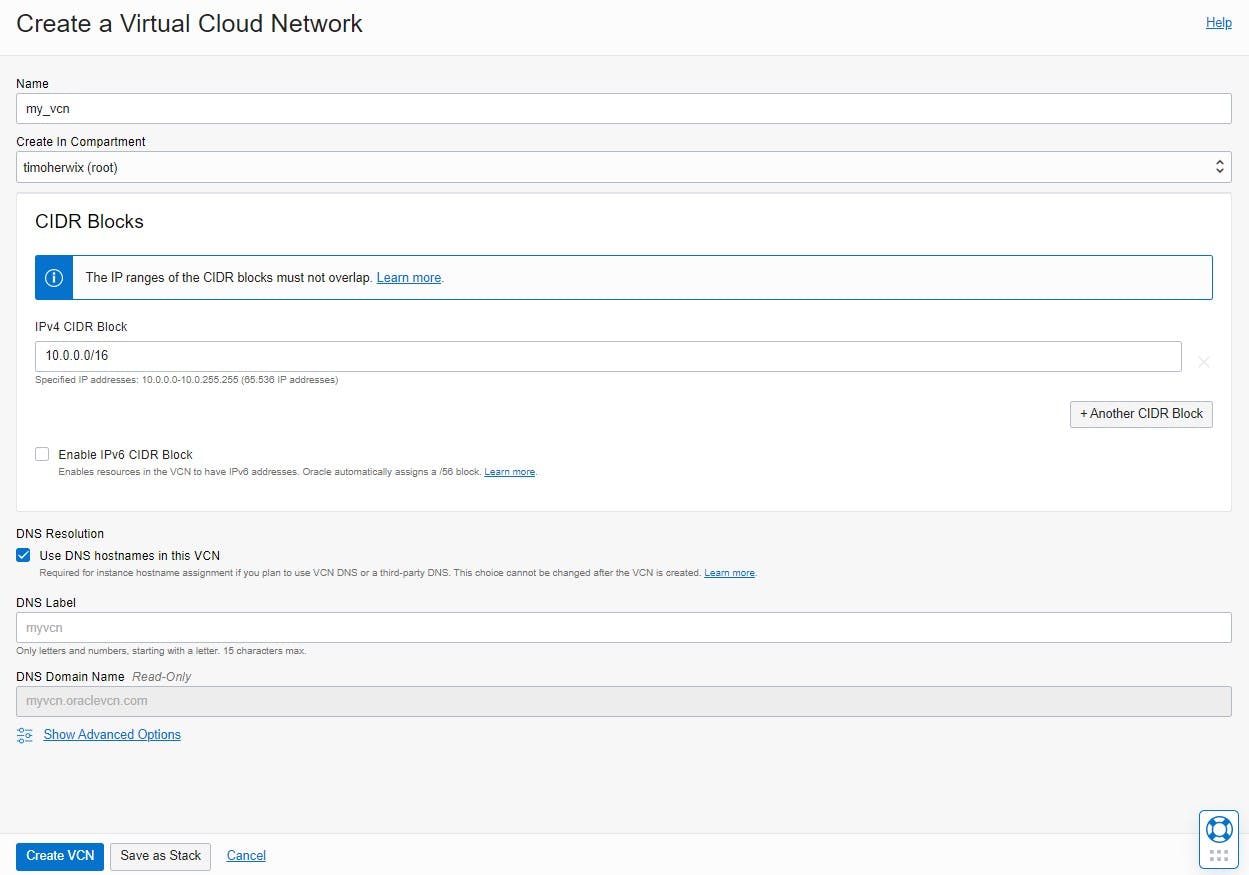
The first step is to set up a VCN for all other cloud resources. For this you have to navigate to "Networking > Virtual Cloud Networks", create a new VCN, give it a unique name, and specify a CIDR block.
After the VCN has been created, a private and a public subnet must be added to it. Each subnet must be given a unique name and a CIDR block. For the Routing Table, the "Default Route Table" can be retained: set the access once to private and once to public. For the DHCP options and security lists, the existing "defaults" must also be selected.
The main difference between a private and a public subnet is that resources with public IP addresses cannot be assigned in a private subnet. This prevents the use of public IPv4 addresses and Internet communication with IPv6 endpoints. This ensures that instances in the private subnet do not have Internet access, even if the VCN has a working Internet gateway and security and firewall rules allow the traffic.

Then a new "Network Security Group (NSG)" must be created to be able to define a set of security rules that are attached to the Autonomous Database afterward.
NSGs are used as a virtual firewall e.g. compute instances, databases and other resources. Unlike security lists, NSGs apply only to selected virtual network interface cards (VNICs) in a VCN, while security lists apply to all VNICs in an entire subnet.
The traffic is controlled by the defined security rules. The rules distinguish between ingress (source) and egress (destination). An ingress rule is used to determine that traffic only comes from the publicly defined IP address where the later-created load balancer is located. It also uses SSL/TLS for traffic and restricts it over the TCP protocol using port 443 (HTTPS). Outbound (egress) everything can be allowed in this example.
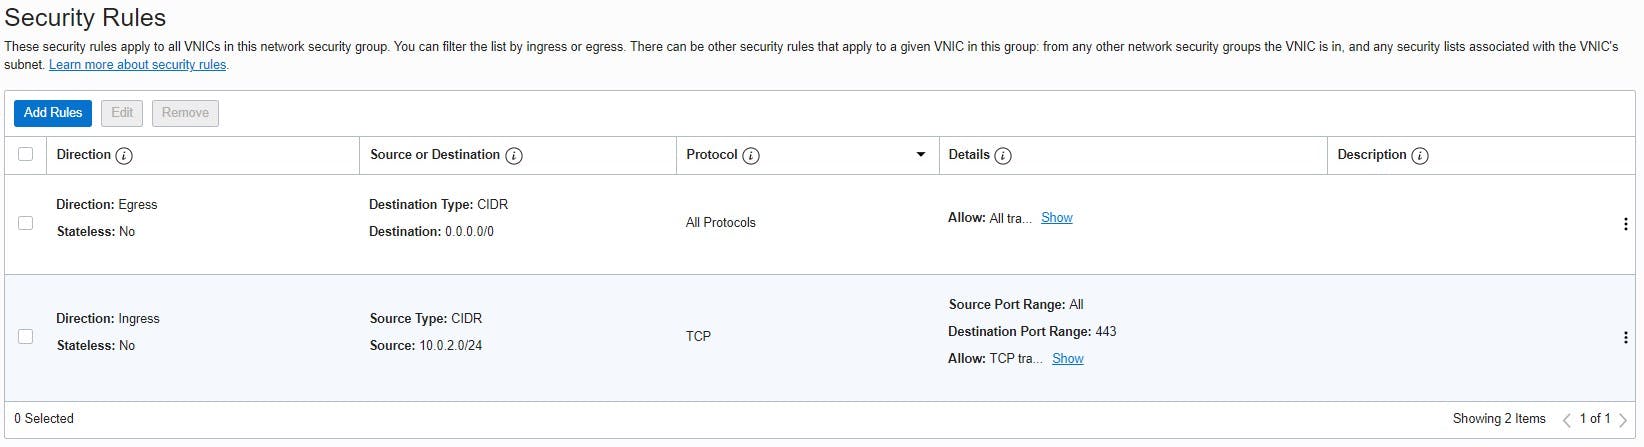
For the load balancer, the automatically created "Default Security List" can then be adjusted under "Security Lists" so that incoming requests (ingress rules) only go through port 443. The public Internet is now able to communicate with the load balancer via port 443. Outgoing (egress) can be allowed again everything in this example.

Finally, an Internet gateway is added to the VCN.
The Internet gateway is a virtual router that provides direct connectivity from the VCN to the Internet.

Each public subnet that uses the Internet gateway must have a routing table rule that specifies the gateway as the destination. This ensures that all outbound traffic in the VCN is sent through the Internet gateway.

Autonomous Database (ADB)
After the VCN has been created, the Autonomous Database can be set up. To do this, you have to switch to "Oracle Database > Autonomous Database" in the navigation and create a new database there. Since this example is aimed at an APEX application, "APEX" can be selected as the workload type.
The "APEX" workload type has slightly restricted functionality, but is cheaper!
The most important and decisive point for vanity URLs is the configuration "Private endpoint access only" so that the ADB is generated with a private IP address and can thus be placed in the previously created private subnet of the VCN. Finally, the previously created network security group is selected for the ADB.
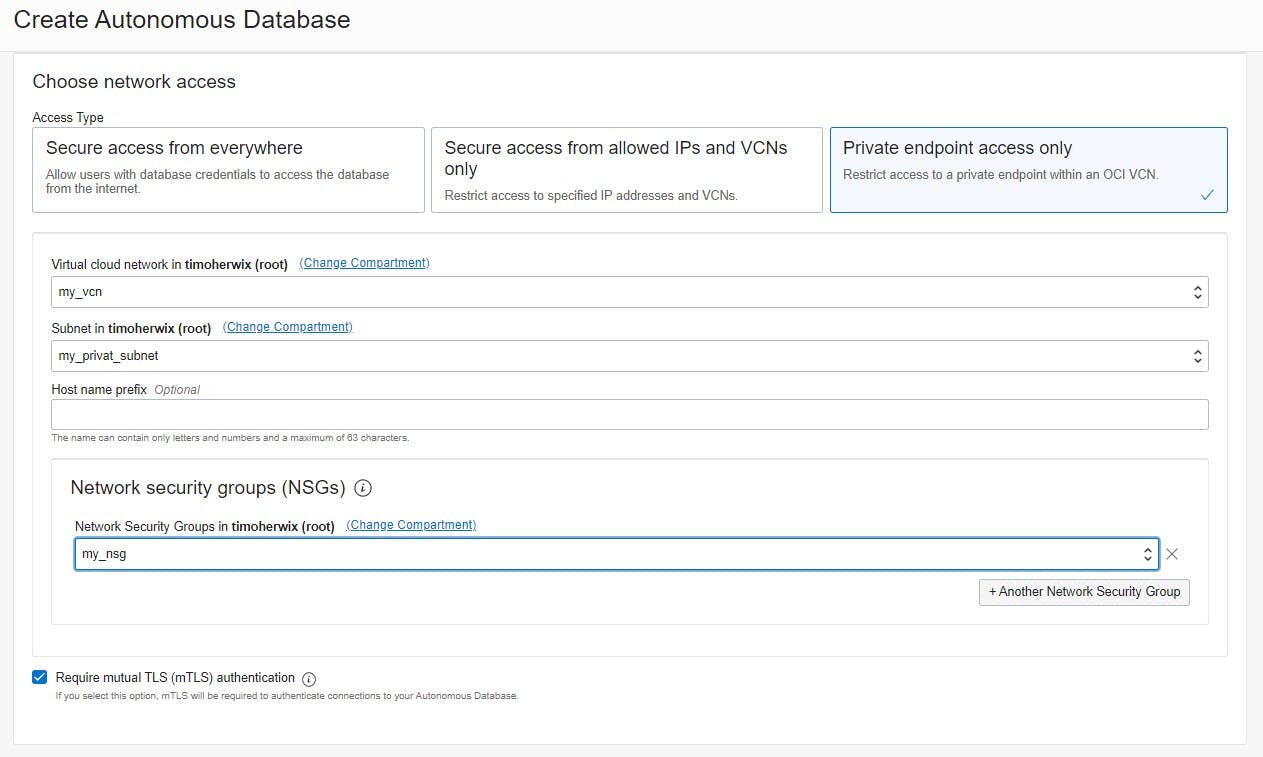
Since the access type "Private endpoint" was chosen when creating the ADB - and the previously created NSG is used - Oracle automatically creates a virtual network card. It enables the connection of the ADB to the selected virtual cloud network and determines how the instance is connected to endpoints inside and outside the VCN.

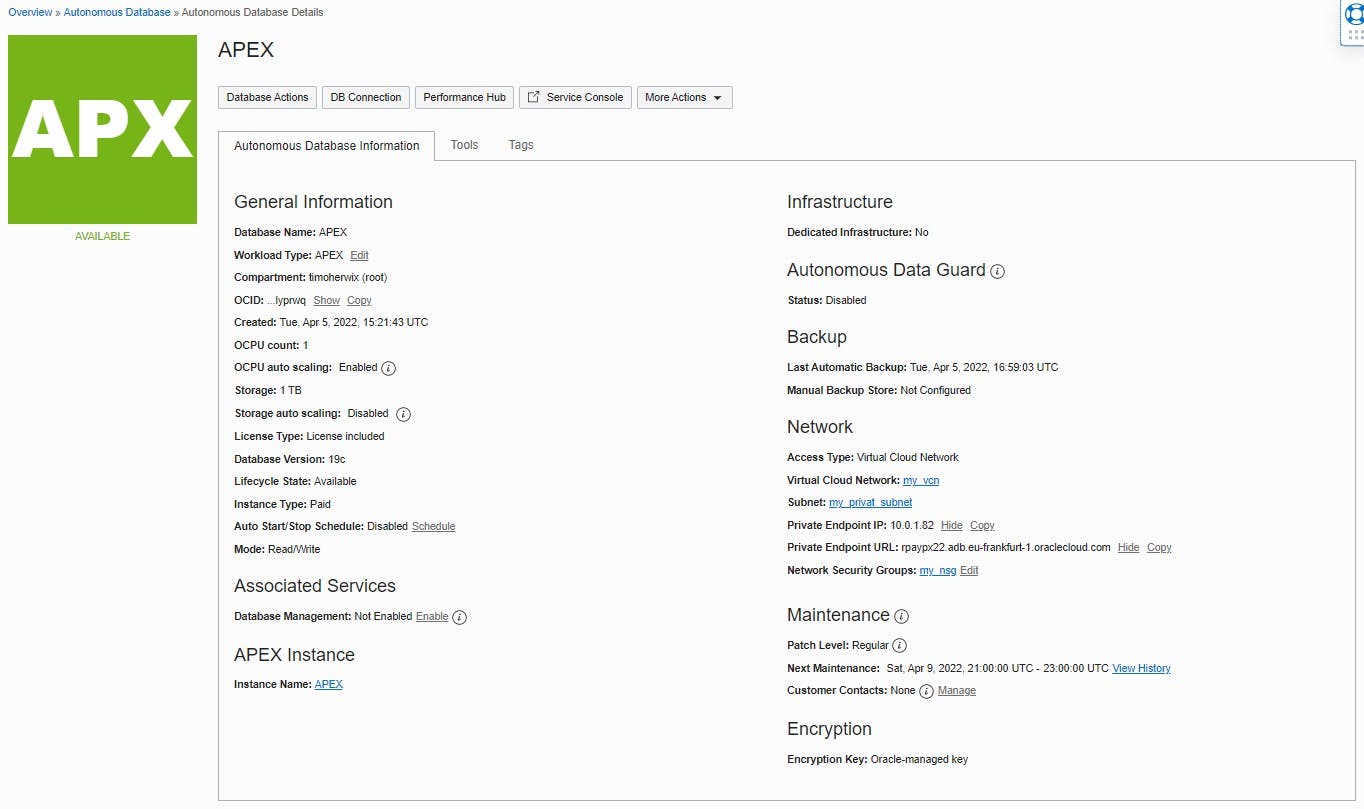
Once the ADB is available, we can move on to the load balancer.
Load Balancer
The load balancer handles load balancing from an entry point to multiple servers accessible in the VCN. They improve resource utilization and facilitate scaling and high availability to ensure application responsiveness.
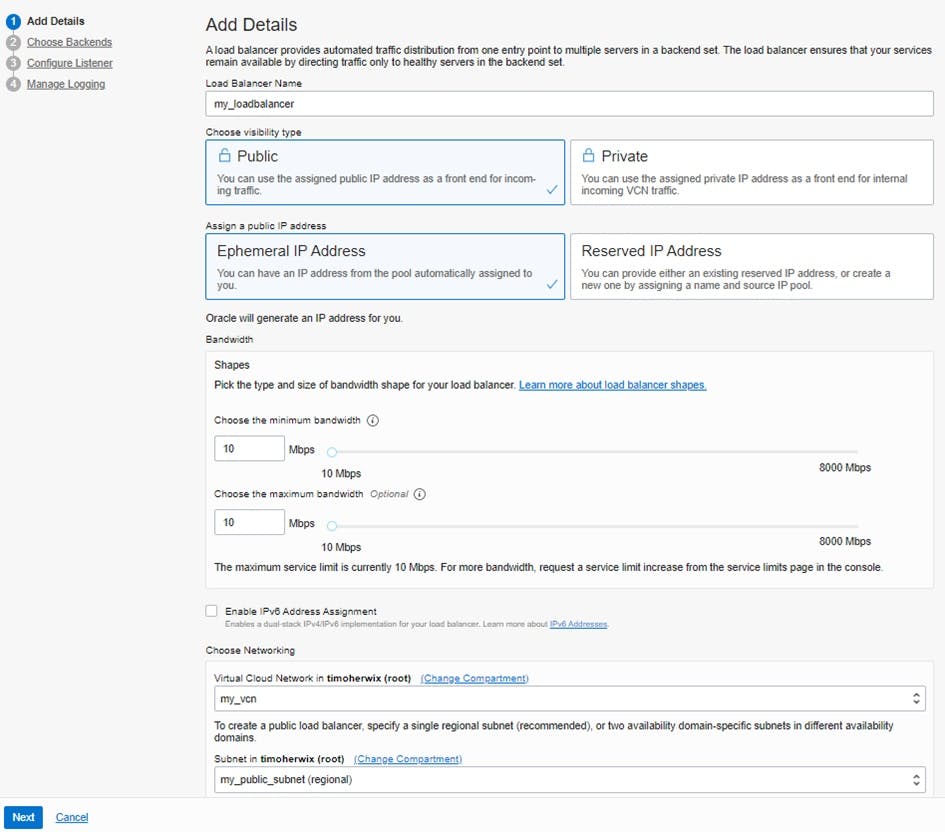
To create a load balancer, first go back to "Networking" and navigate to "Load Balancers". Here, a new Layer 7 load balancer will provision that is specifically intended for HTTP and HTTPS and performs content-based routing.

The first step is to define whether the load balancer is visible public or private. In the case of vanity URLs, a public load balancer is required, which is then placed in the already-created public subnet of the VCN. This gives it a public IP address, which is used later on for the DNS setting of the vanity domain.
If the minimum and maximum bandwidth are set to 10 Mbps, the load balancer does not incur any additional costs!
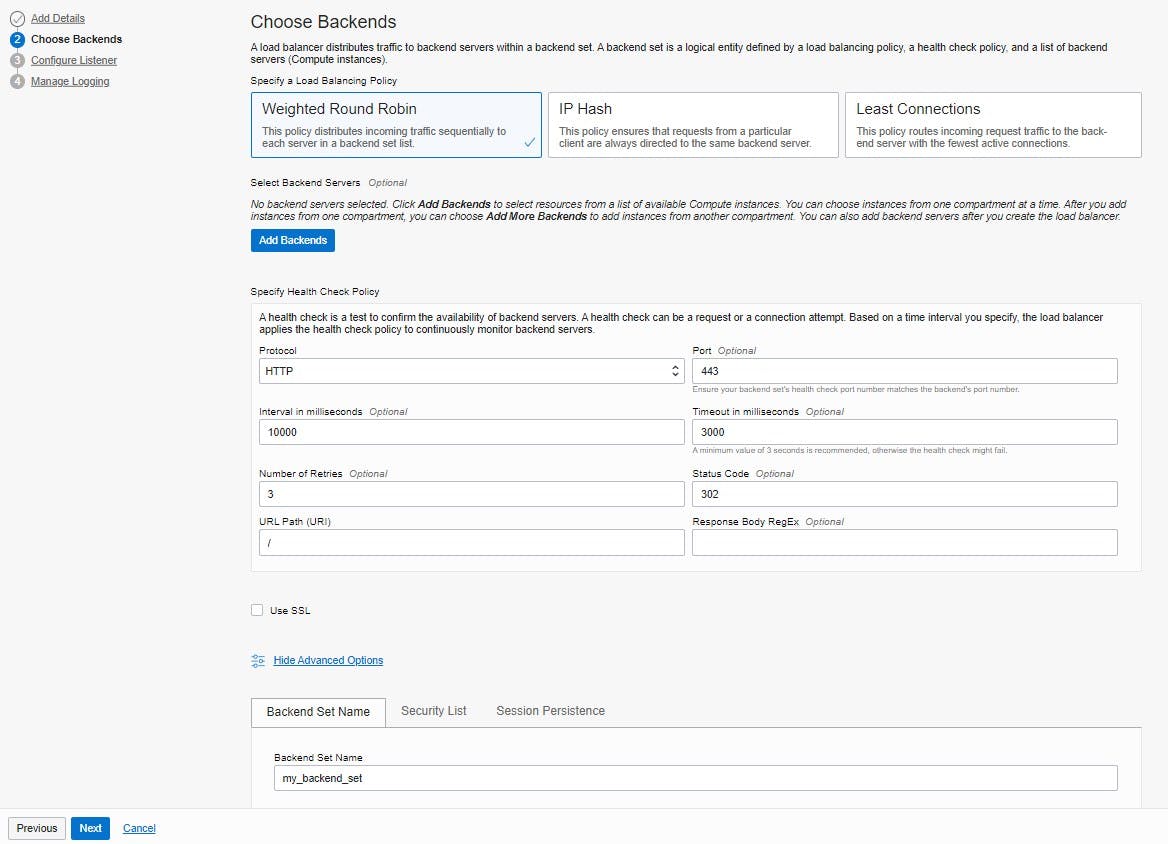
In the next step "Choose Backends" a backend server is added to the load balancer. Load balancers distribute traffic to backend servers in a backend set. A backend set is a logical entity defined by a load balancing policy, a health check policy, and a list of backend servers (compute instances). The default “Weighted Round Robin” policy can be retained as the load balancing policy and the “Select backend servers” option can be skipped for the time being, as this will be configured in more detail later. For specifying the "Health Check Policy", port 443 is entered for the HTTP protocol for the use of HTTPS. The status code can be changed to 302 since URL redirects are to be performed. SSL can also be skipped for the time being. Now you have to enter a "Backend Set Name" under "Advanced Options", which creates an empty backend set with a name that is easier to recognize later.
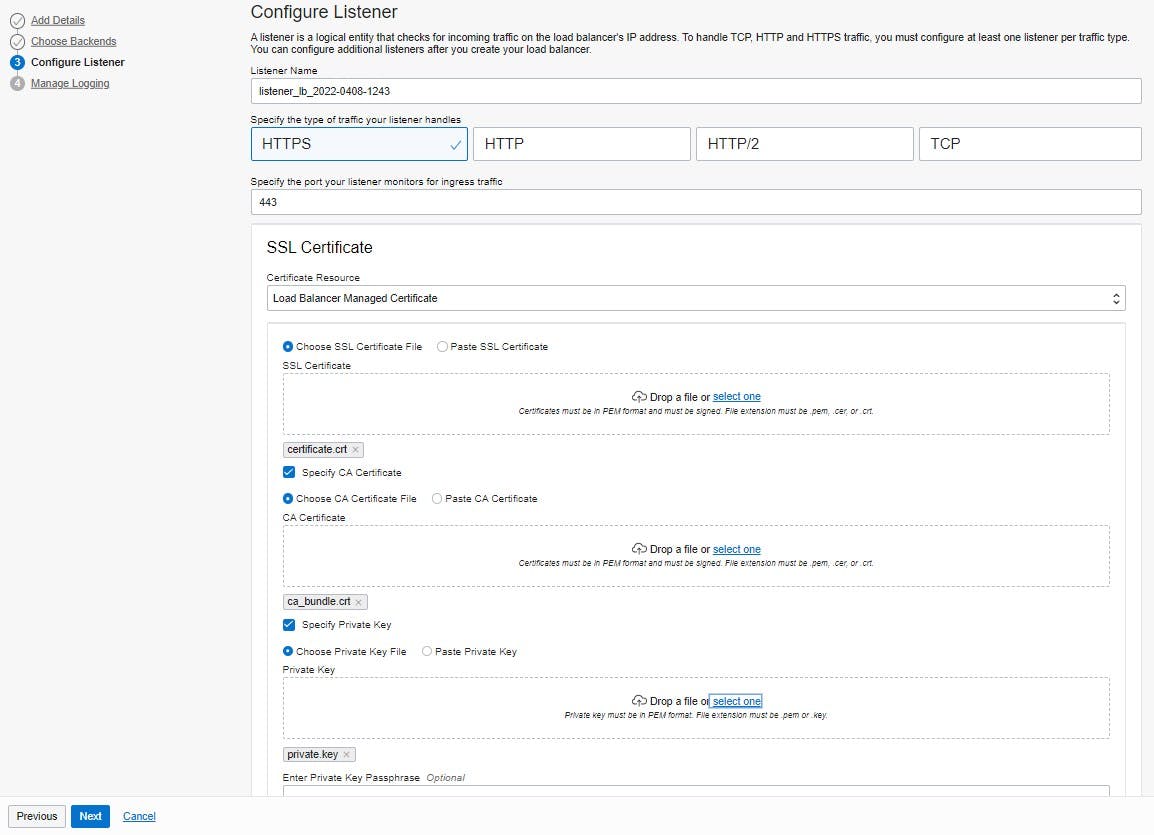
The next step is to configure a listener for the load balancer. This must be of type HTTPS with port 443. In addition, the certificate bundle has to upload for the vanity domain. The bundle should typically include an SSL certificate, a CA certificate, and a private key.
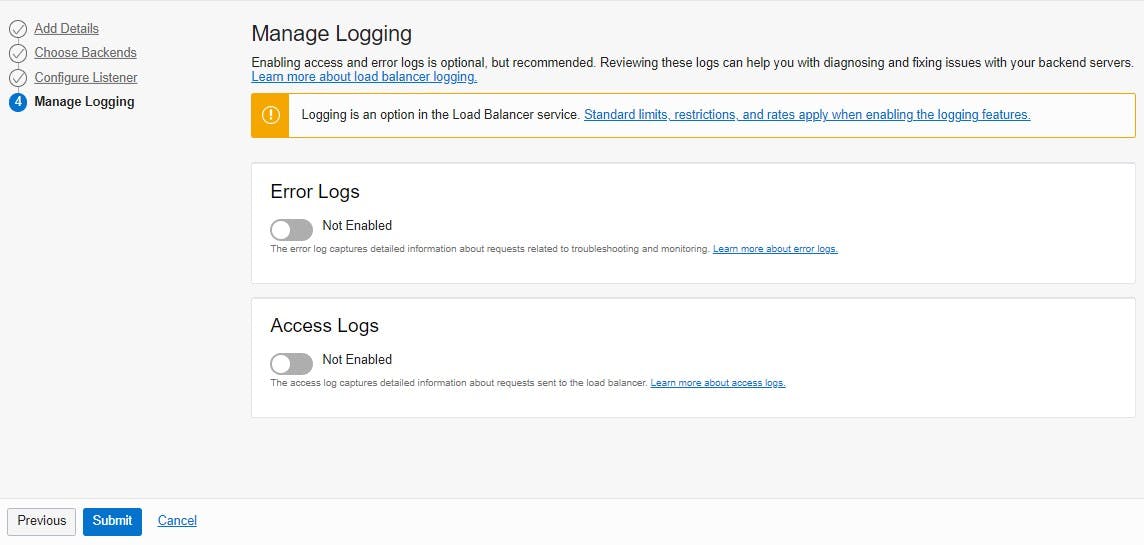
The last step is to manage logging. To keep the focus on vanity URLs, logging can be skipped in this tutorial.
Now the load balancer is provisioned and will be available shortly. The public IP address of the load balancer should be noted because it will be needed later on. In this example, it is "130.162.240.65".
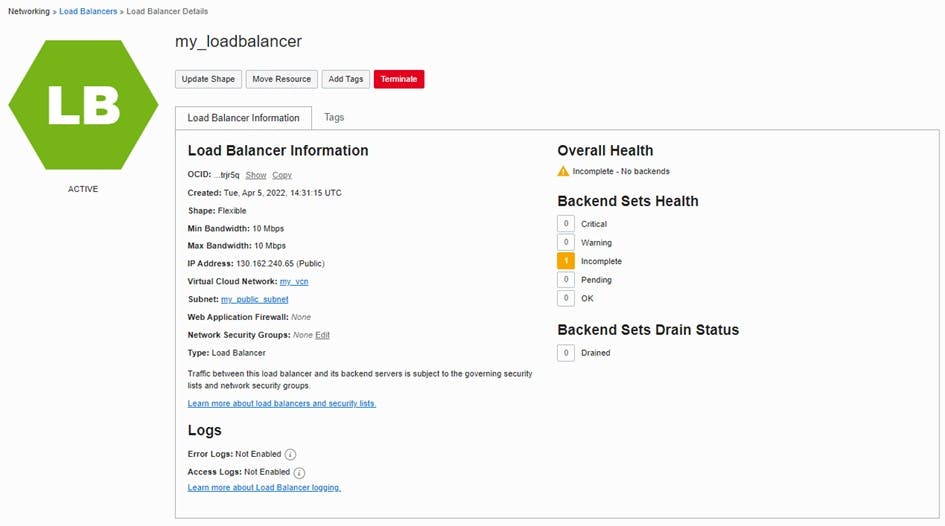
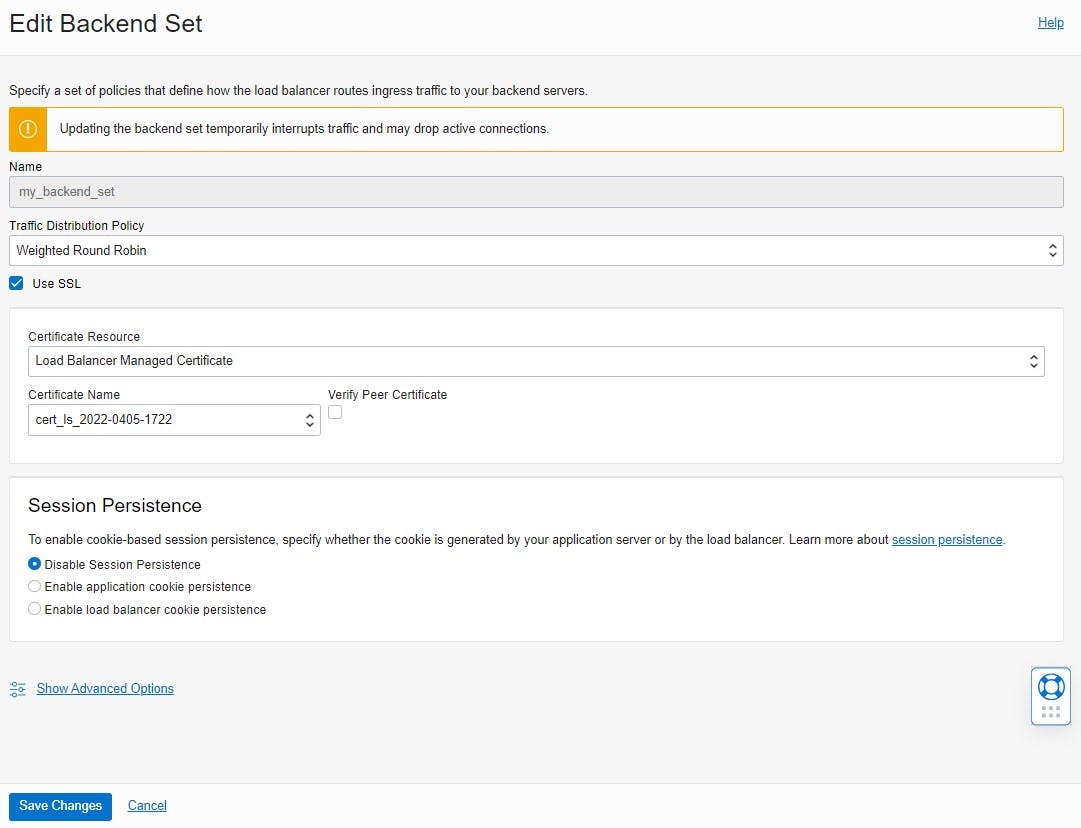
As soon as the load balancer is active, it will be displayed that the Backend Sets and Overall Health are incomplete. To configure the backend set, the detail view of the backend must be clicked and edited. To set up SSL the Use SSL checkbox should be checked to ensure that communication between the load balancer and the ADB is encrypted. The same certificate bundle that was used for the listener can be selected under "Certificate Name".
The certificate does not play a significant role here anymore, since it is a trusted Oracle-to-Oracle connection in the same data center. It is only important that SSL is selected.
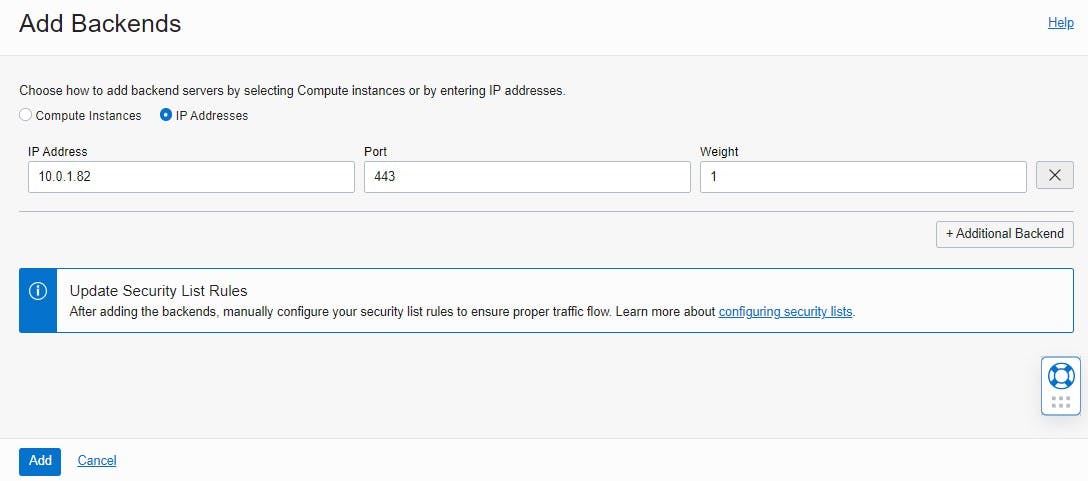
Finally, a backend server is added to the backend set. For this, a backend is added under Resources. Then select the "IP addresses" option as the backend server and enter the private IP address of the Autonomous Database and Port 443.
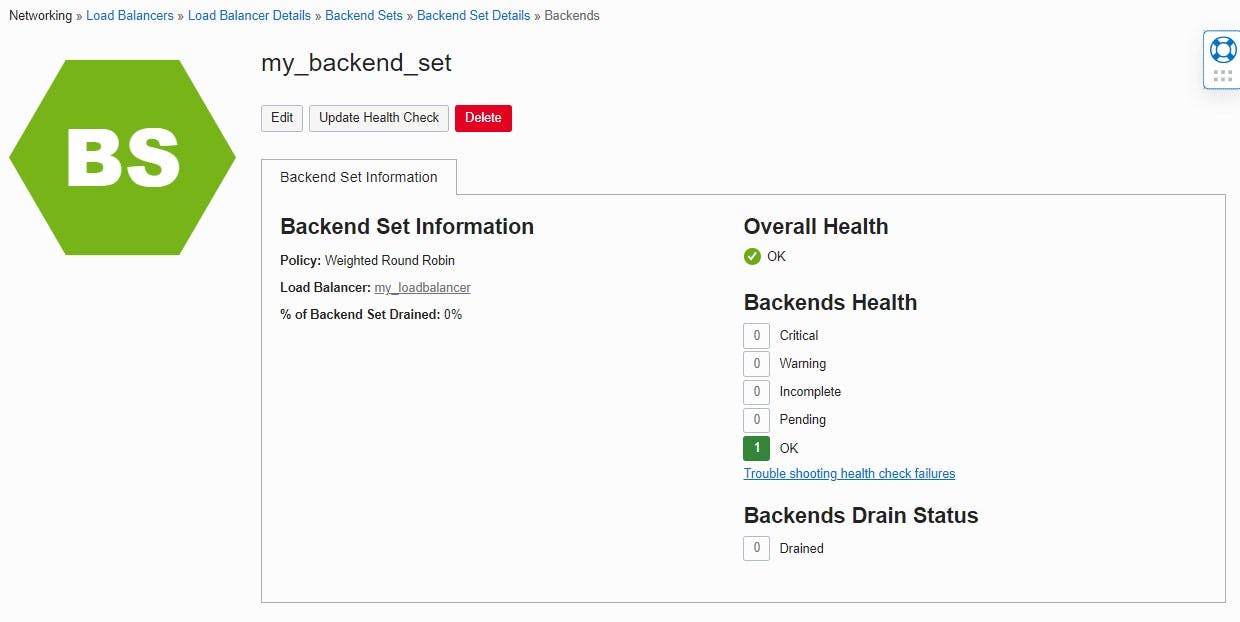
If everything has been configured correctly, the status of the backend health check changes to "OK". This indicates that the load balancer is successfully communicating with the ADB.
DNS setting
Finally, an "A" record must be created in the DNS settings of the preferred domain provider and the public IP address of the load balancer must be mapped to the domain.
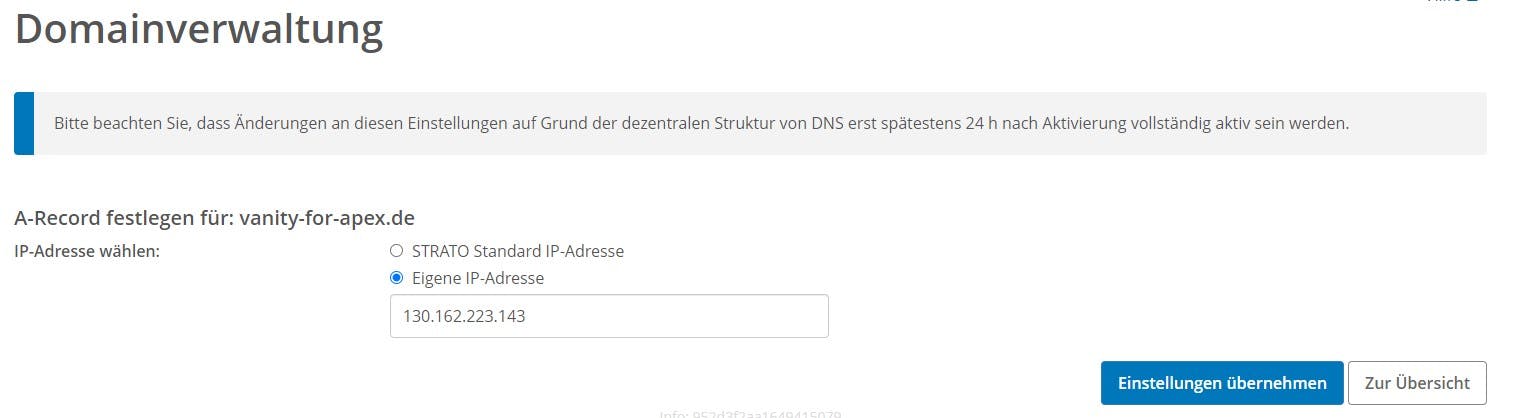
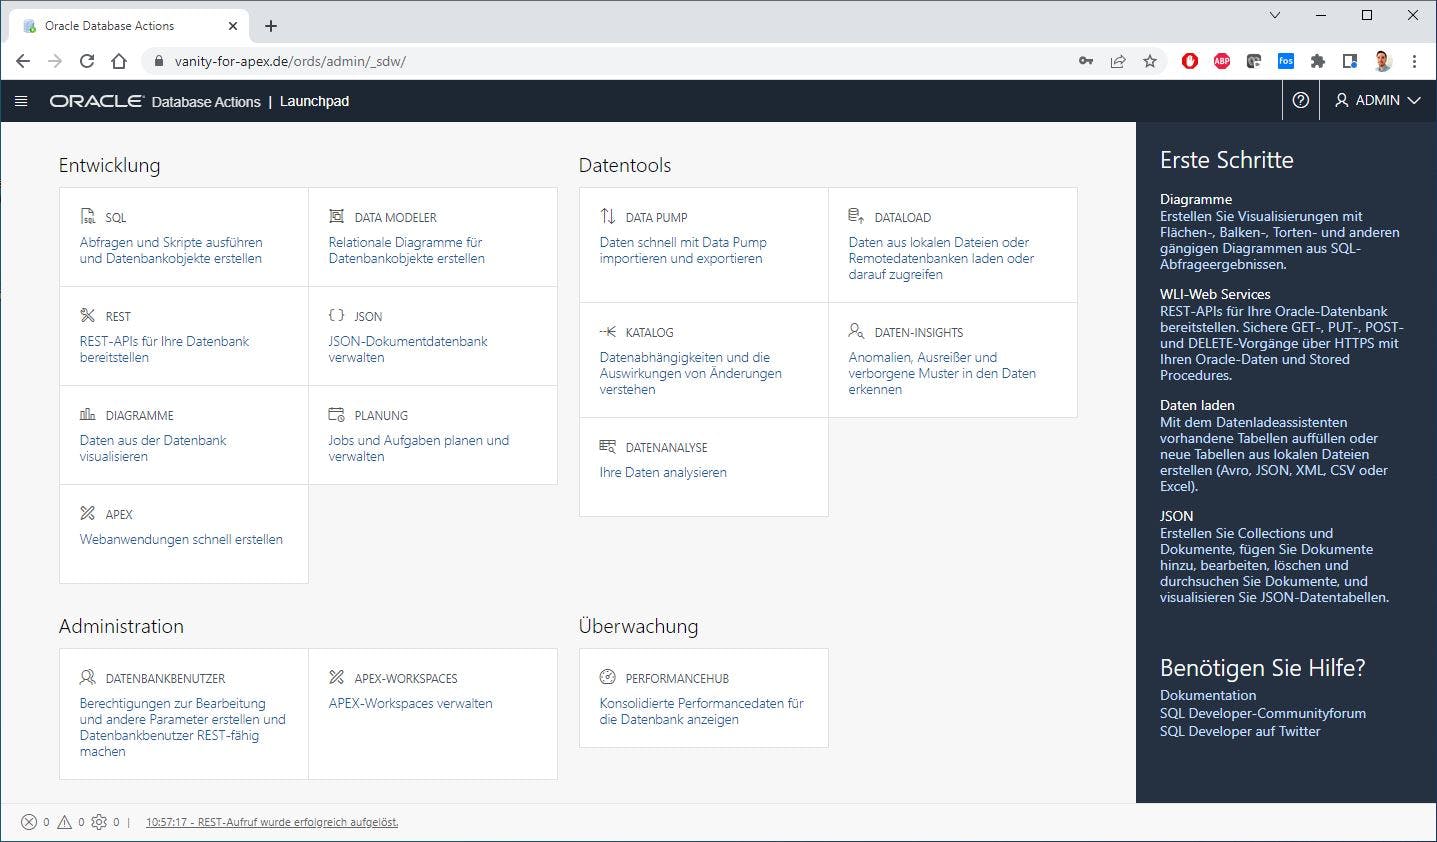
From now on, the vanity URL can be accessed in the web browser 😎
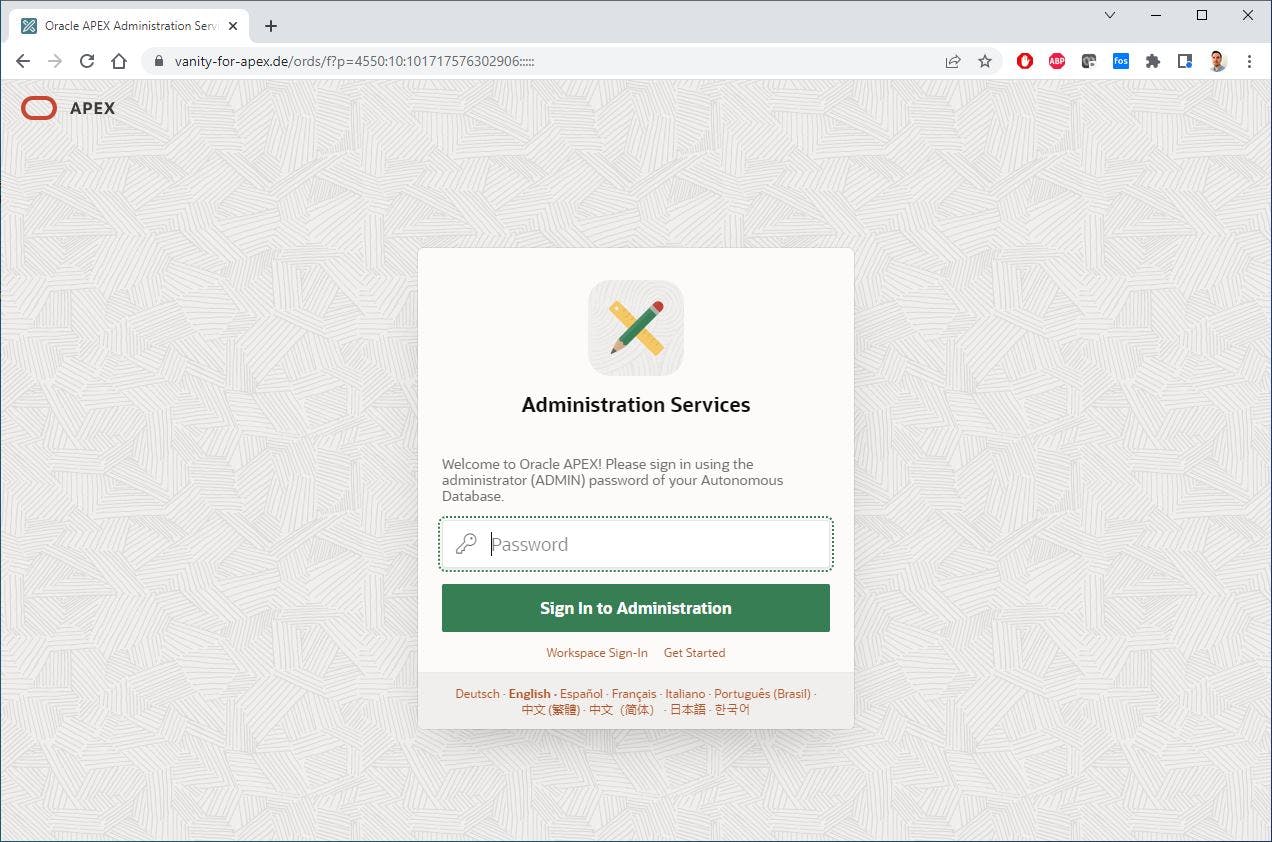
If the URL is extended as follows "vanity-for-apex.de/ords/admin/sign-in", you get to the Oracle Database Actions.
Summary
✔️ Use only OCI services managed by Oracle
✔️ Social Sign-on works
❌ Cannot be implemented in a Free Tier
❌ The renewal of the certificate is not automated
Conclusion
In conclusion, setting up a custom vanity URL for your Oracle Autonomous Database via OCI Load Balancer can significantly boost your brand identity and improve your search engine optimization. By following the steps outlined in this article, you can easily create a memorable and easy-to-remember URL for your ADB. However, it's important to note that this feature is not available in the free tier and the certificate renewal process is not automated. Nonetheless, using standard OCI services managed by Oracle, you can configure vanity URLs with minimal effort and cost.