


How to create a Clone of your Always Free ADB using OCI REST APIs
First step with Infrastructure as a Service (IaaS)


Introduction
Read how to create a clone of your Always Free Autonomous Database (ADB) in Oracle Cloud Infrastructure (OCI) using REST APIs. This blog post provides step-by-step instructions on how to generate an RSA key pair & API key fingerprint and a shell script for the requests. With this approach, you can more or less back up your data and APEX applications and restore them in a second Free Tier ADB environment, even though OCI only performs incremental backups on Free Tier instances and doesn't allow you to restore from those backups.
Cloning Options
There are three types of cloning options to choose from, namely full, refreshable, and metadata. However, refreshable clones are not ideal for APEX application usage due to their read-only nature, while metadata clones do not include app data. As a result, we will focus on full cloning, which is available across all ADB workload types.
When creating a full clone, there are two options available to you: you can either create it from a running or stopped service instance, or from a backup. The process of creating a full clone is quite simple - you just need to use a dialog that is similar to the one you would use for setting up new instances. The only difference is that you will need to specify the type of clone you want (in this case, a full clone), the geographic location where it will be run (OCI Data Region), and the source you want to clone from (either a service instance or one of its backups).
Instead of using the wizard, the REST API call can be used to run this process.
API Reference and Endpoints
The Oracle Cloud Infrastructure APIs are typical REST APIs that use HTTPS requests and responses. For links to the Oracle Cloud Infrastructure API reference and a list of the regional API endpoints, see API Reference and Endpoints.
API Version
The base path of the endpoint includes the desired API version (for example, 20160918). Here's an example of a POST request to create a new ADB:
POST /20160918/autonomousDatabases
Motivation
It is important to have a backup solution for your database in Free Tier instances to ensure their suitability for production use. OCI offers incremental backups but they cannot be used for restoration unless you upgrade to a paid instance. Backing up and restoring your environment is up to you when using a free tier in a production environment, which is a significant disadvantage. However, you have the option to clone your active database onto a secondary Free Tier ATB environment, where all of your data and applications will be securely stored. This will allow you to use the cloned database in the case of a system failure.
Roadmap
Create an OCI User in your OCI tenancy with the required privileges to create and manage OCI resources
Create an RSA key pair in PEM format and add an API Key fingerprint
Upload your private RSA PEM key to your OCI user
Create a JSON template file containing the data you want to POST
Create a Shell Script for the POST request
To be real with you, it might seem like a big project at first. However, the cool thing is that once you're done, making additional API calls will only need minor tweaks.
Create an OCI User
To keep the tutorial simple, we will skip this step and use our Admin user instead. However, we would always recommend creating users with appropriate permissions. You can learn more about creating users here.
Create an RSA key pair and API Key fingerprint
Navigate to the Resources menu, locate and select the API Keys link, and click the Add API Key button. To create an encryption key pair using the OCI Console, select the Generate API Key Pair option. To obtain the private key, simply click the Download Private Key button. If required, you can also download the public key by clicking the Download Public Key button. It is important to securely store the private key to ensure its safety. Finally, click the Add button to complete the process.

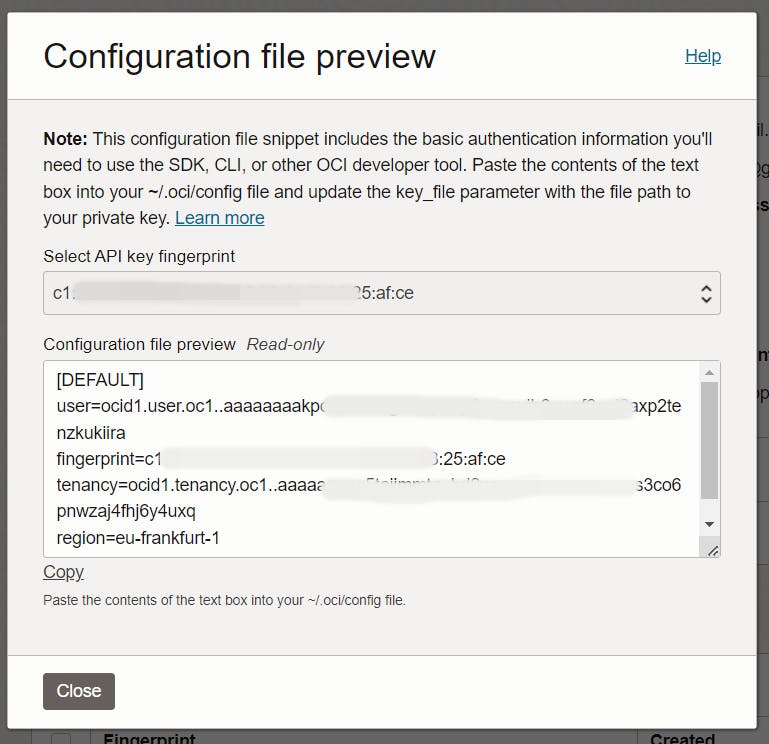
Once the key pair has been created, the OCI Console will display a configuration file preview. The file snippet includes the required parameters and values you'll need to create your configuration file. Copy and paste the configuration file snippet from the text box into a text document or somewhere you can easily find it later.
The initial prerequisites have been completed. Now, the next step is to upload the generated private key.
Upload your private key
Log in using the user account that you previously created.
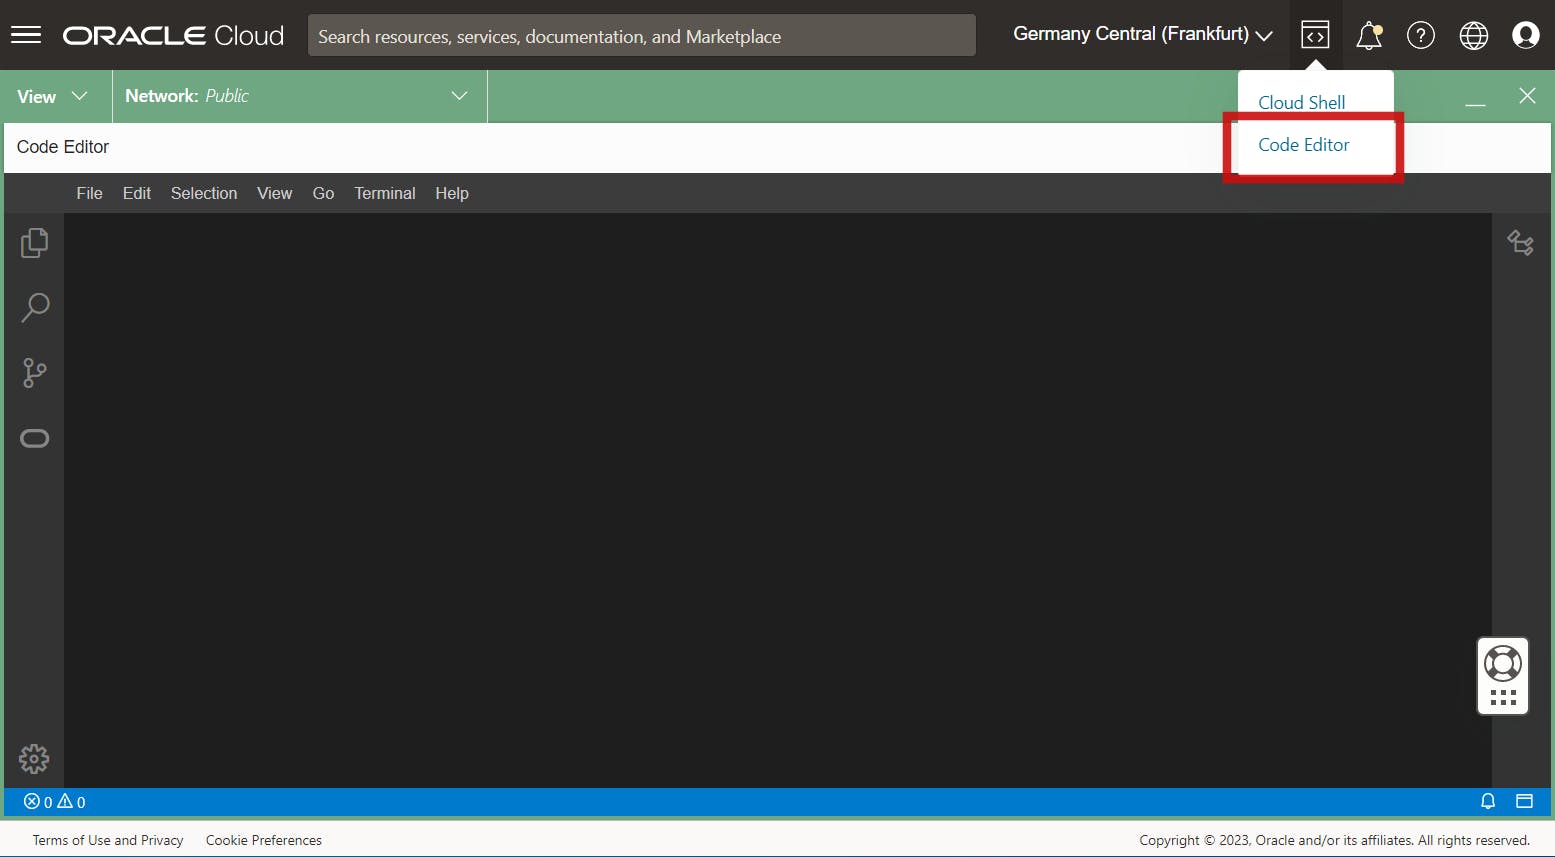
Let's begin by connecting to our Instance if you have logged in with the user you want to use for creating the API requests. In this example, we used the OCI Code Editor.
Ensure that the User is authorized to access the Cloud Shell!
allow group <group> to use cloud-shell in tenancy
allow group <group> to inspect compartments in tenancy
Policy 1: Allow the usage of Cloud Shell
Policy 2: Allow usage of VS Extension for Code Editor
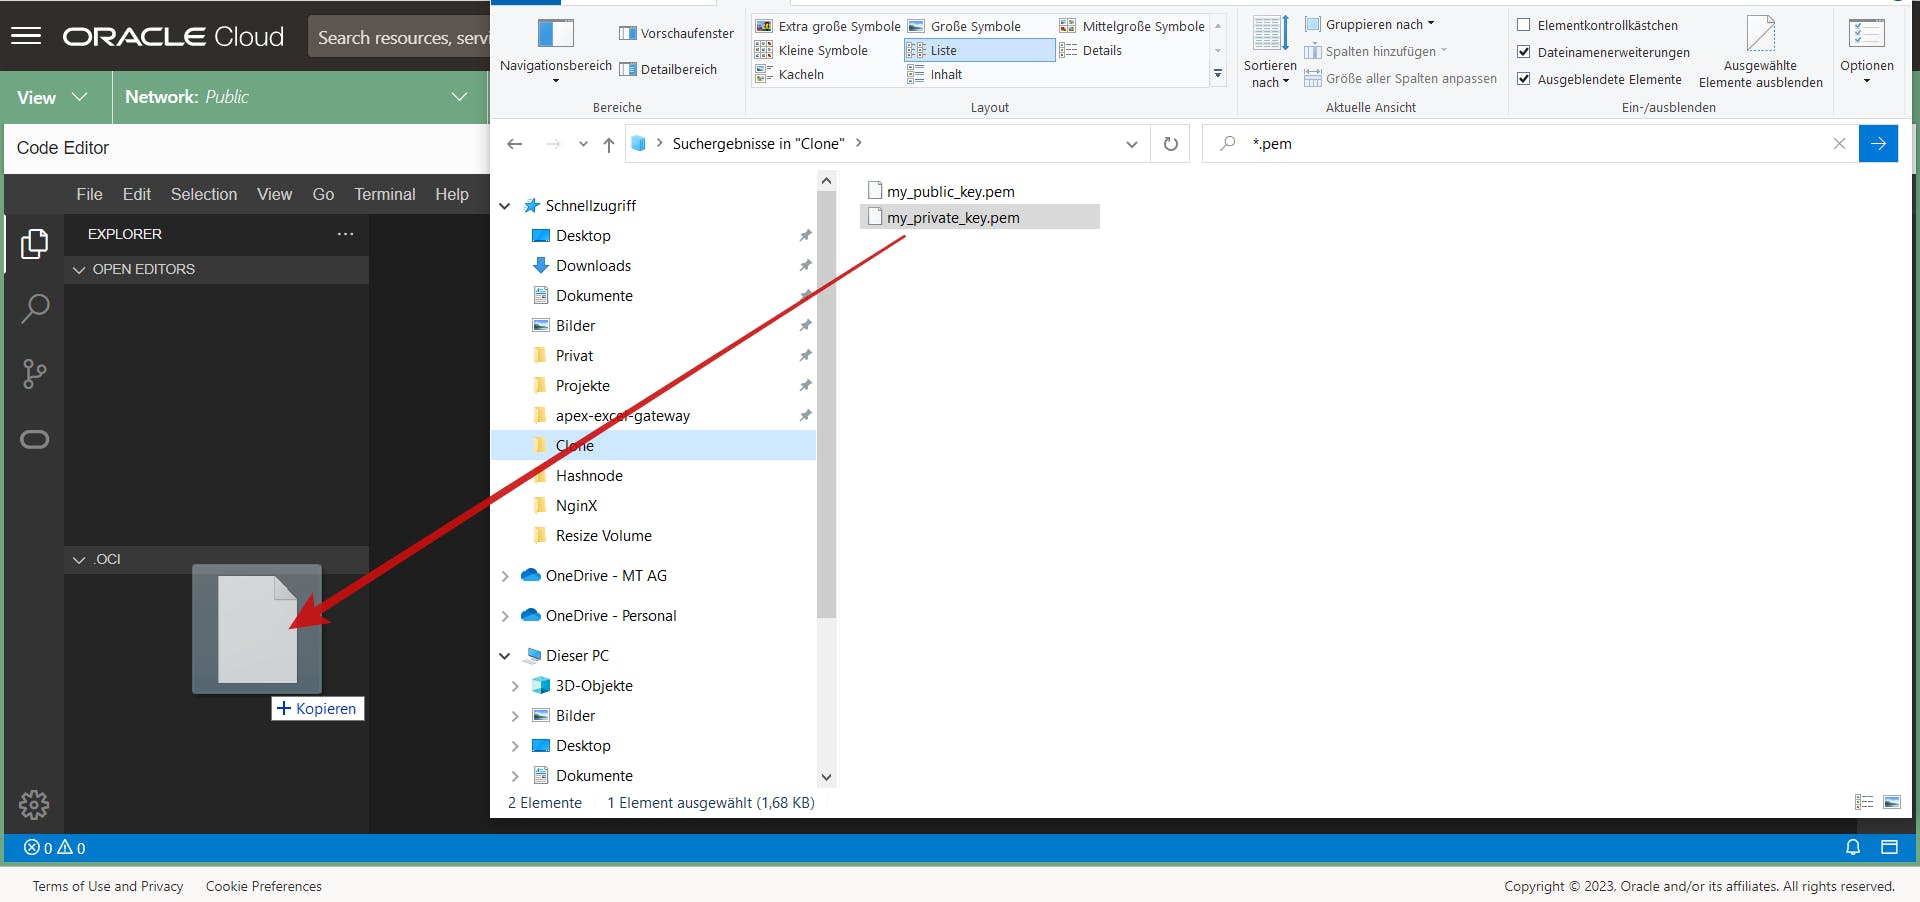
Once we've successfully connected to our Cloud Shell machine, we can upload the private key. It needs to be saved in the .oci folder, which should be created if it doesn't already exist. Click on File and then Open to see a list of existing folders. Choose the .oci folder and open it. Now, simply drag and drop the key into the explorer to upload it without any hassle.
In most cases, you do not need to upload the public key.
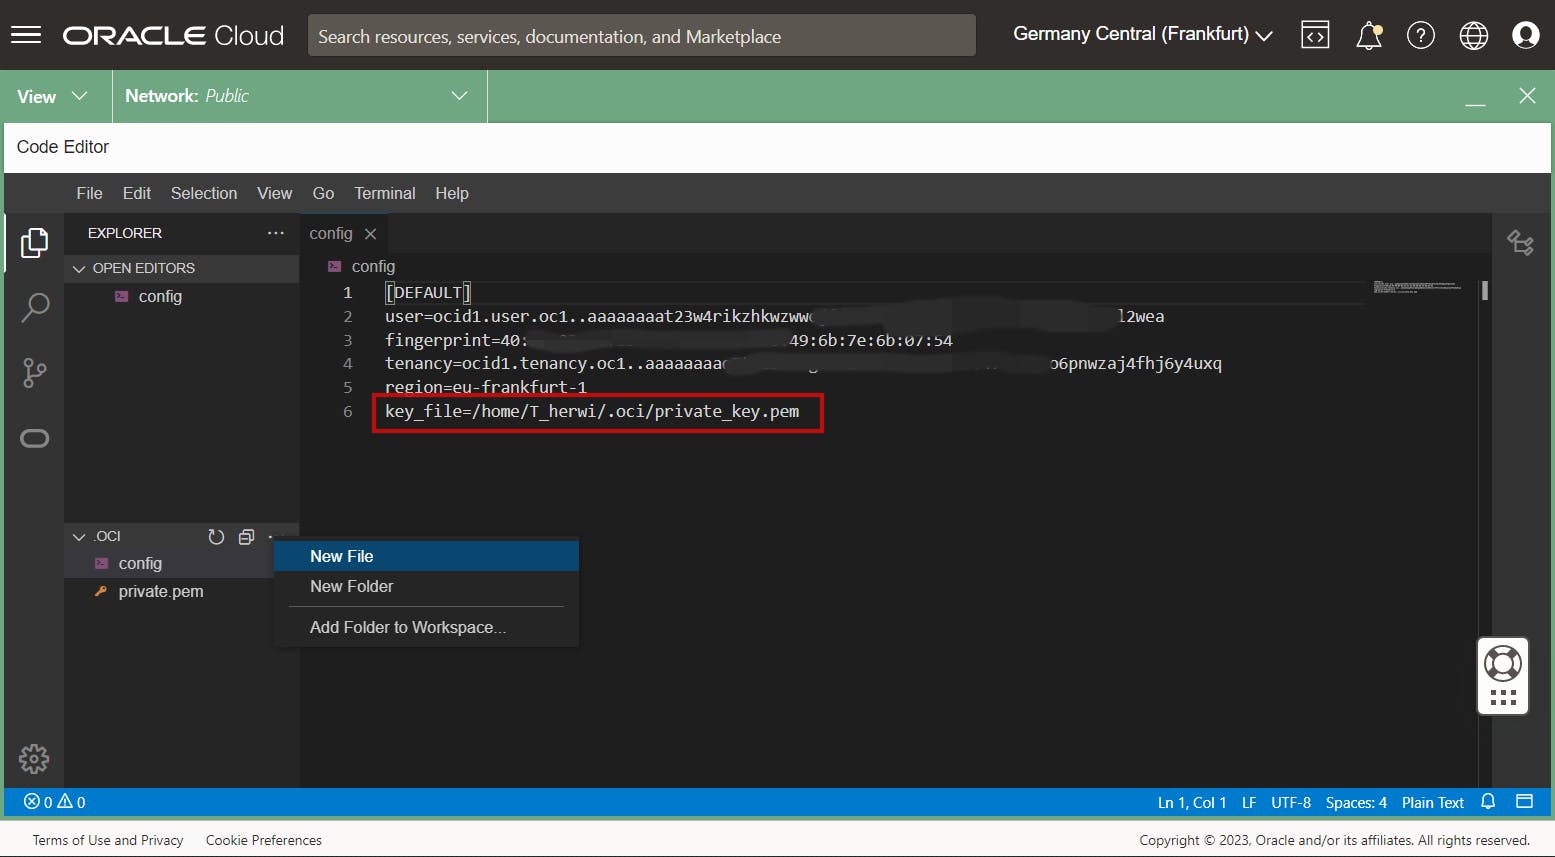
Now we have to create the config file. You may remember that when we generated the API Key, we copied and pasted the configuration preview. Now, we need to copy and paste the configuration file snippet from the text box into your ~/.oci/config file. First, click on New File and name it config. Then, paste the configuration in and replace the path to your private keyfile with the name of your private key.
That's it at this point. The next step is to prepare the API call.
Create a JSON template file
Go Back to the root folder of your User and create a new folder there e.g. oci_api. Then, create a new file named request.json and copy/paste the following:
{
    "compartmentId" : "ocid.compartment.oc1..<unique_ID>",
    "displayName" : "CLONE",
    "dbName" : "CLONE",
    "adminPassword" : "<password>",
    "cpuCoreCount" : 1,
    "licenseModel" : "LICENSE_INCLUDED",
    "dataStorageSizeInTBs" : 1,
    "isFreeTier" : true,
    "source" : "DATABASE",
    "sourceId" : "ocid1.autonomousdatabase.oc1.phx..<unique_ID>",
    "cloneType" : "FULL"
}
At this point, we assign the appropriate values to the POST request for cloning an ADB.
Replace the following values:
CompartmentId (The OCID of the compartment of the Autonomous Database)
adminPassword (enter a password for the Autonomous Databases)
sourceId (The OCID of the source Autonomous Database that you will clone to create a new Autonomous Database.)
To have an ADB that is always free, you must ensure that the parameter "isFreeTier" is set to true!
Create a Shell Script for the POST request
Next, create a new shell script file clone_adb.sh and paste the following.
# Configuration Values
# OCID of the tenancy to which API request are sent
tenancy_ocid="ocid.tenancy.oc1..<unique_ID>"

# OCID of the user making the rest call
user_ocid="ocid.user.oc1..<unique_ID>"

# path to the private PEM format key for this user
private_key_file_path="/home/t_herwi/.oci/my_private_key.pem"

# fingerprint of the private key for this user
fingerprint="98:20:79...."

# tenancy endpoint to which the request needs to be sent
host="database.eu-frankfurt-1.oraclecloud.com"

# the json file containing request JSON
body="./request.json"

###-------------------------------------------------------###

# Required Headers for the signing string
request_target="(request-target): post /20160918/autonomousDatabases"

host_header="host: $host"

date=`date -u "+%a, %d %h %Y %H:%M:%S GMT"`
date_header="date: $date"

content_sha256="$(openssl dgst -binary -sha256 < $body | openssl enc -e -base64)";
content_sha256_header="x-content-sha256: $content_sha256"

content_type="application/json"
content_type_header="content-type: $content_type";

content_length="$(wc -c < $body | xargs)";
content_length_header="content-length: $content_length"

# Create the signing string
headers="(request-target) date host x-content-sha256 content-type content-length"
signing_string="$request_target\n$date_header\n$host_header\n$content_sha256_header\n$content_type_header\n$content_length_header"

# Sign the signing string with the Private Key
signature=`printf '%b' "$signing_string" | openssl dgst -sha256 -sign $private_key_file_path | openssl enc -e -base64 | tr -d '\n'`

# The curl request
curl -X POST --data-binary "@request.json" https://$host/20160918/autonomousDatabases \
    -H "date: $date" \
    -H "x-content-sha256: $content_sha256" \
    -H "content-type: $content_type" \
    -H "content-length: $content_length" \
    -H "Authorization: Signature version=\"1\",keyId=\"$tenancy_ocid/$user_ocid/$fingerprint\",algorithm=\"rsa-sha256\",headers=\"$headers\",signature=\"$signature\""
Let's explain what this script does on each line:
To simplify their usage in scripts, define the variables for Tenancy and User OCIDs, API Signing key fingerprint, Private Key file path, host, and request body JSON file path. You can locate these values in the configuration file generated upon creating an API signing key.
 # OCID of the tenancy to which API request are sent
 tenancy_ocid="ocid.tenancy.oc1..<unique_ID>"

 # OCID of the user making the rest call
 user_ocid="ocid.user.oc1..<unique_ID>"

 # path to the private PEM format key for this user
 private_key_file_path="/home/t_herwi/.oci/my_private_key.pem"

 # fingerprint of the private key for this user
 fingerprint="98:20:79...."

 # tenancy endpoint to which the request needs to be sent
 host="database.eu-frankfurt-1.oraclecloud.com"

 # the json file containing request JSON
 body="./request.json"
The following code section defines the headers that you need to generate the signing string. You need to define these headers in an appropriate format that will be used in conjunction with your signing string. Headers are dependent on your request type.
 # Required Headers for the signing string
 request_target="(request-target): post /20160918/autonomousDatabases"

 host_header="host: $host"

 date=`date -u "+%a, %d %h %Y %H:%M:%S GMT"`
 date_header="date: $date"

 content_sha256="$(openssl dgst -binary -sha256 < $body | openssl enc -e -base64)";
 content_sha256_header="x-content-sha256: $content_sha256"

 content_type="application/json"
 content_type_header="content-type: $content_type";

 content_length="$(wc -c < $body | xargs)";
 content_length_header="content-length: $content_length"

 # Create the signing string
 headers="(request-target) date host x-content-sha256 content-type content-length"
 signing_string="$request_target\n$date_header\n$host_header\n$content_sha256_header\n$content_type_header\n$content_length_header"
The next code block is the signature generation, created from your signing string
 # Sign the signing string with the Private Key
 signature=`printf '%b' "$signing_string" | openssl dgst -sha256 -sign $private_key_file_path | openssl enc -e -base64 | tr -d '\n'`
The final segment is the actual use of the signature and all of the other details that you set and sends to the API endpoint.
 # The curl request
    curl -X POST --data-binary "@request.json" https://$host/20160918/autonomousDatabases \
        -H "date: $date" \
        -H "x-content-sha256: $content_sha256" \
        -H "content-type: $content_type" \
        -H "content-length: $content_length" \
        -H "Authorization: Signature version=\"1\",keyId=\"$tenancy_ocid/$user_ocid/$fingerprint\",algorithm=\"rsa-sha256\",headers=\"$headers\",signature=\"$signature\""
Run the Shell Script
To execute the script, open a new terminal in your code editor and enter the following command:
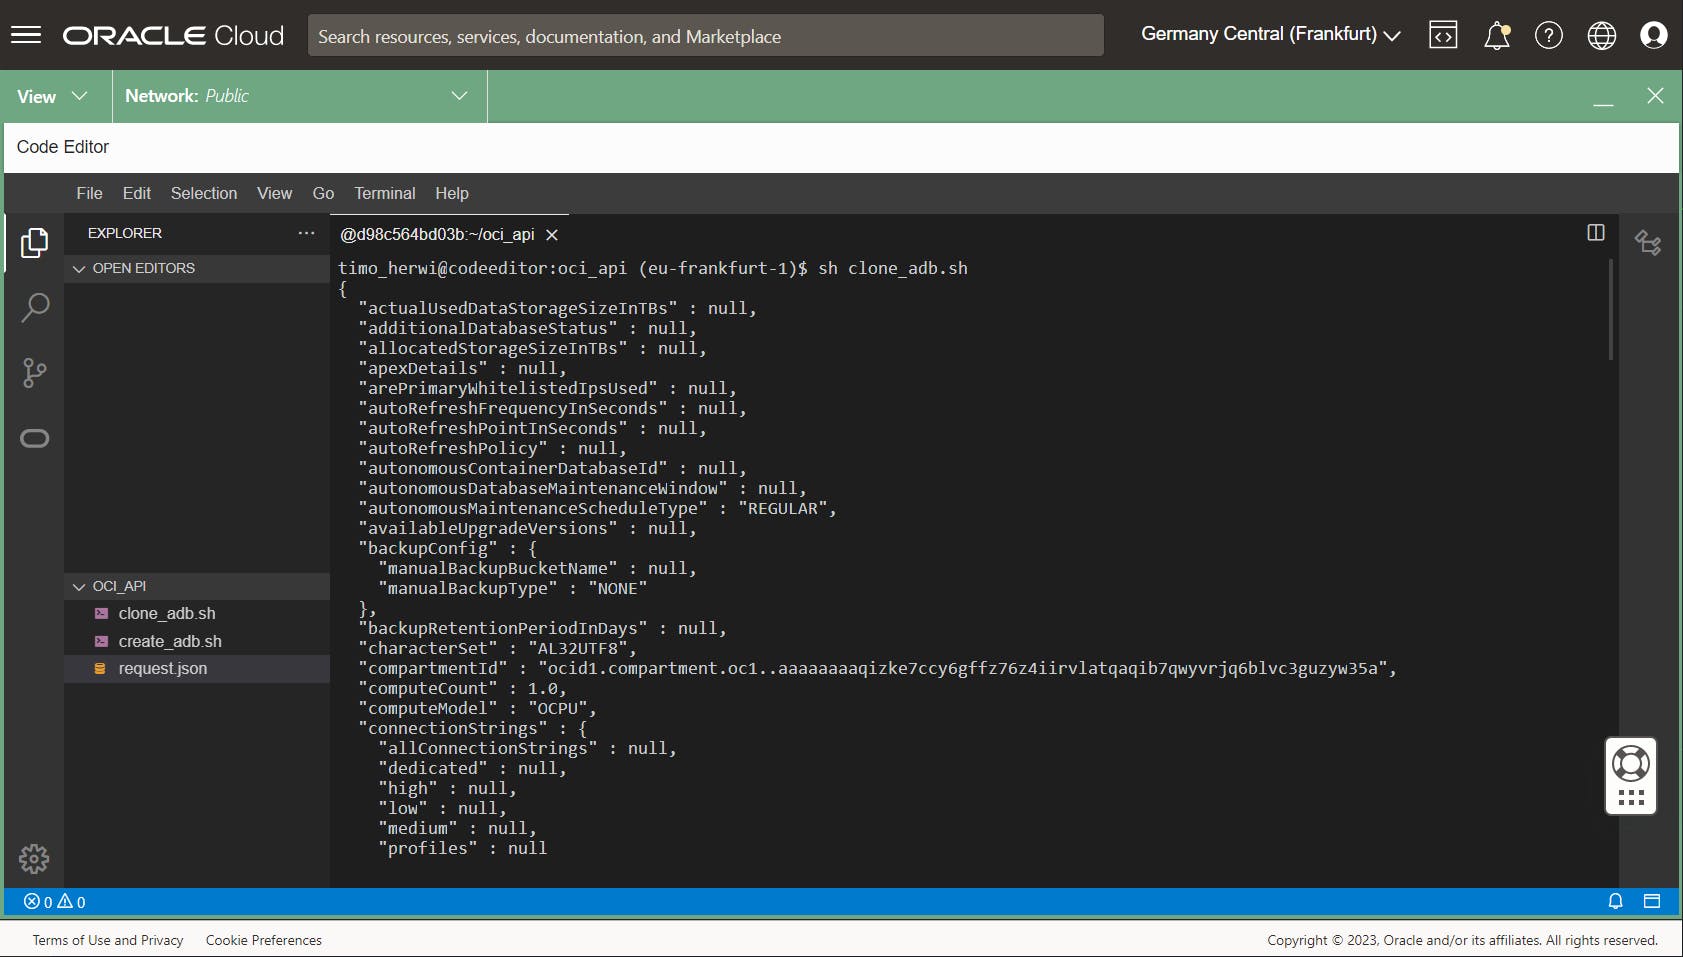
sh clone_adb.sh
If this script executes successfully, it will generate a JSON Object that contains all details of the recently created Autonomous Database.
Minimize the Editor and navigate to "Oracle Database > Autonomous Databases". You'll notice that a new ADB has been created.
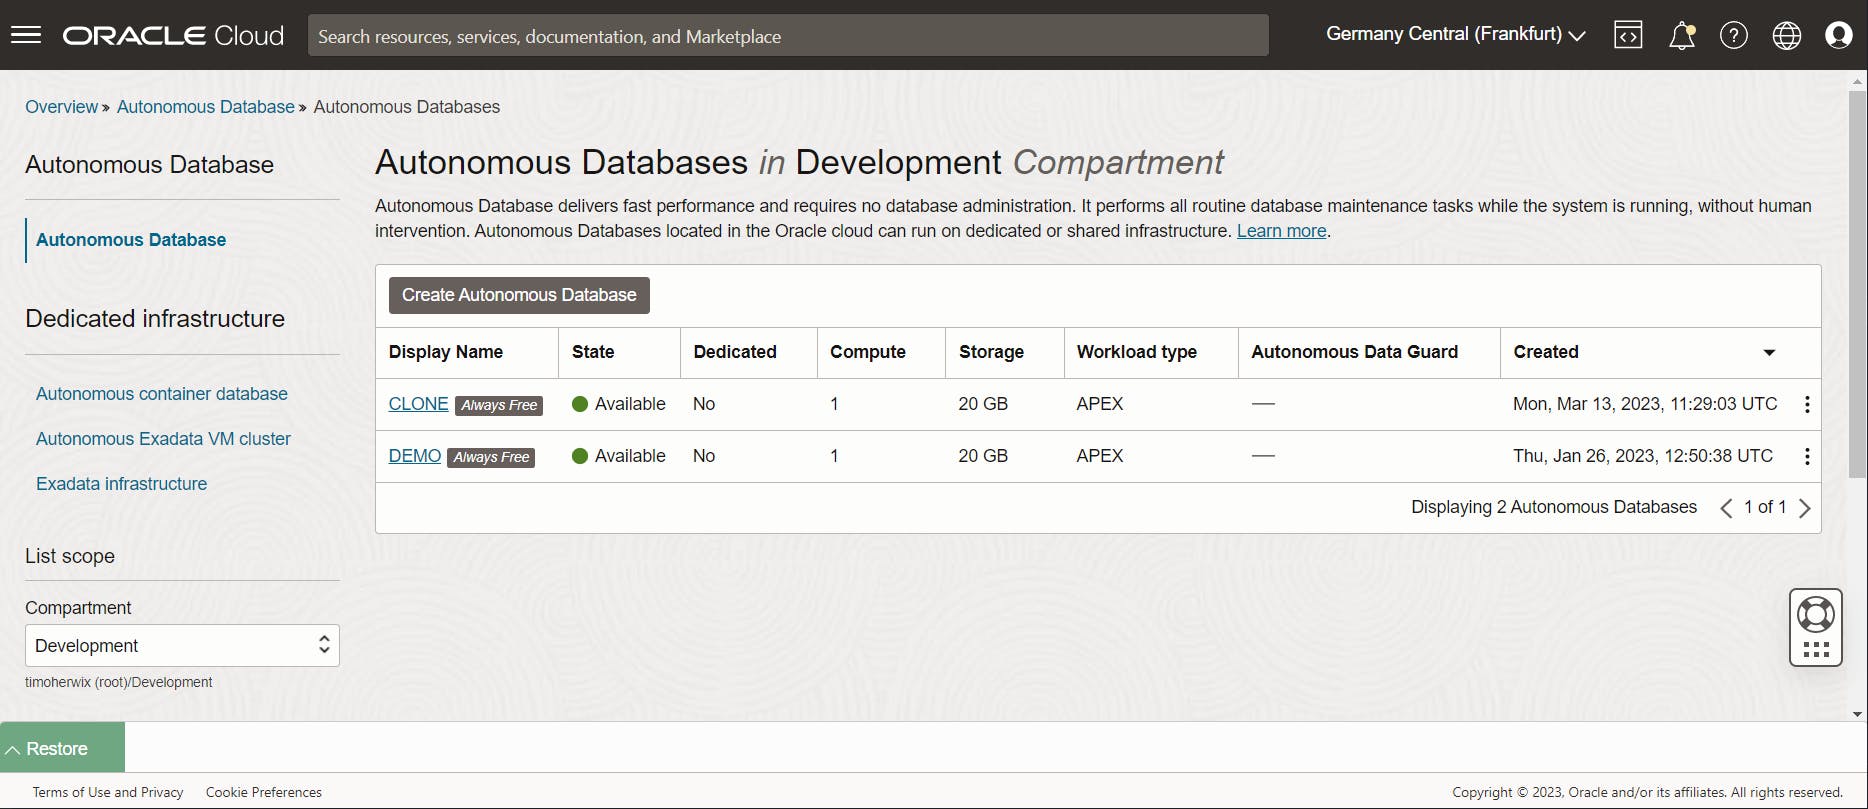
Click the ADB name to view the details. as you can see the Clone Source is the database that was used for cloning.

Conclusion
In conclusion, creating a clone of your Always Free Autonomous Database in Oracle Cloud Infrastructure using REST APIs is a useful way to back up your data and APEX applications and restore them in a second Free Tier ADB environment. The next step would be to automate this process, such as scheduling a daily cron job to execute it. So, this process can help ensure that you have a quick and easy backup option for your database in a production-ready architecture.