


Introduction
In today's fast-paced digital world, software plays a crucial role in our daily lives, powering everything from mobile apps and websites to complex enterprise systems. However, the reliability and quality of software cannot be taken for granted. This is where software testing comes into play. Software testing is a vital process that helps identify bugs, defects, and vulnerabilities in software applications, ensuring they meet the highest standards of performance and reliability.
In this article, we will explore the importance of software testing and its role in delivering high-quality software solutions. We will also talk about one of the tools used for testing low-code applications and go through a step-by-step demo.
Why software testing is important
Software testing is a critical part of the software development lifecycle (SDLC). It helps ensure that the application meets user needs, works properly and performs as expected. It also ensures that new features are developed according to specifications and that changes made to existing features do not break any existing functionality. Software testing also helps developers to identify and fix bugs before they release the software.
Here are some benefits of testing:
Ensuring Functionality and Performance
Enhancing User Experience
Detecting and Fixing Bugs
Ensuring Security and Reliability
Cost and Time Savings
So in the end, when you plan for the next project, think again about planning for writing tests during the development process and never underestimate the importance of the tests.
Low Code Testing (LCT)
many big enterprise companies nowadays are going toward low coding platforms for many reasons. Oracle APEX is one of the most popular and powerful low-code frameworks and it is adopted by many big companies. So, companies that use APEX need a testing tool for testing their critical applications and here is where LCT comes in. LCT stands for Low Code Testing, it is a testing tool developed using the Oracle APEX platform, and it runs in an Oracle APEX environment so it has access to the metadata of the applications run in the same workspace which makes it very powerful when it comes to test APEX applications.
Demo
In this demo, we will show you step-by-step how to write simple test cases using the LCT tool. For this demo, we will use the sample database application that comes by default in any Oracle APEX workspace.
Writing a Test Case
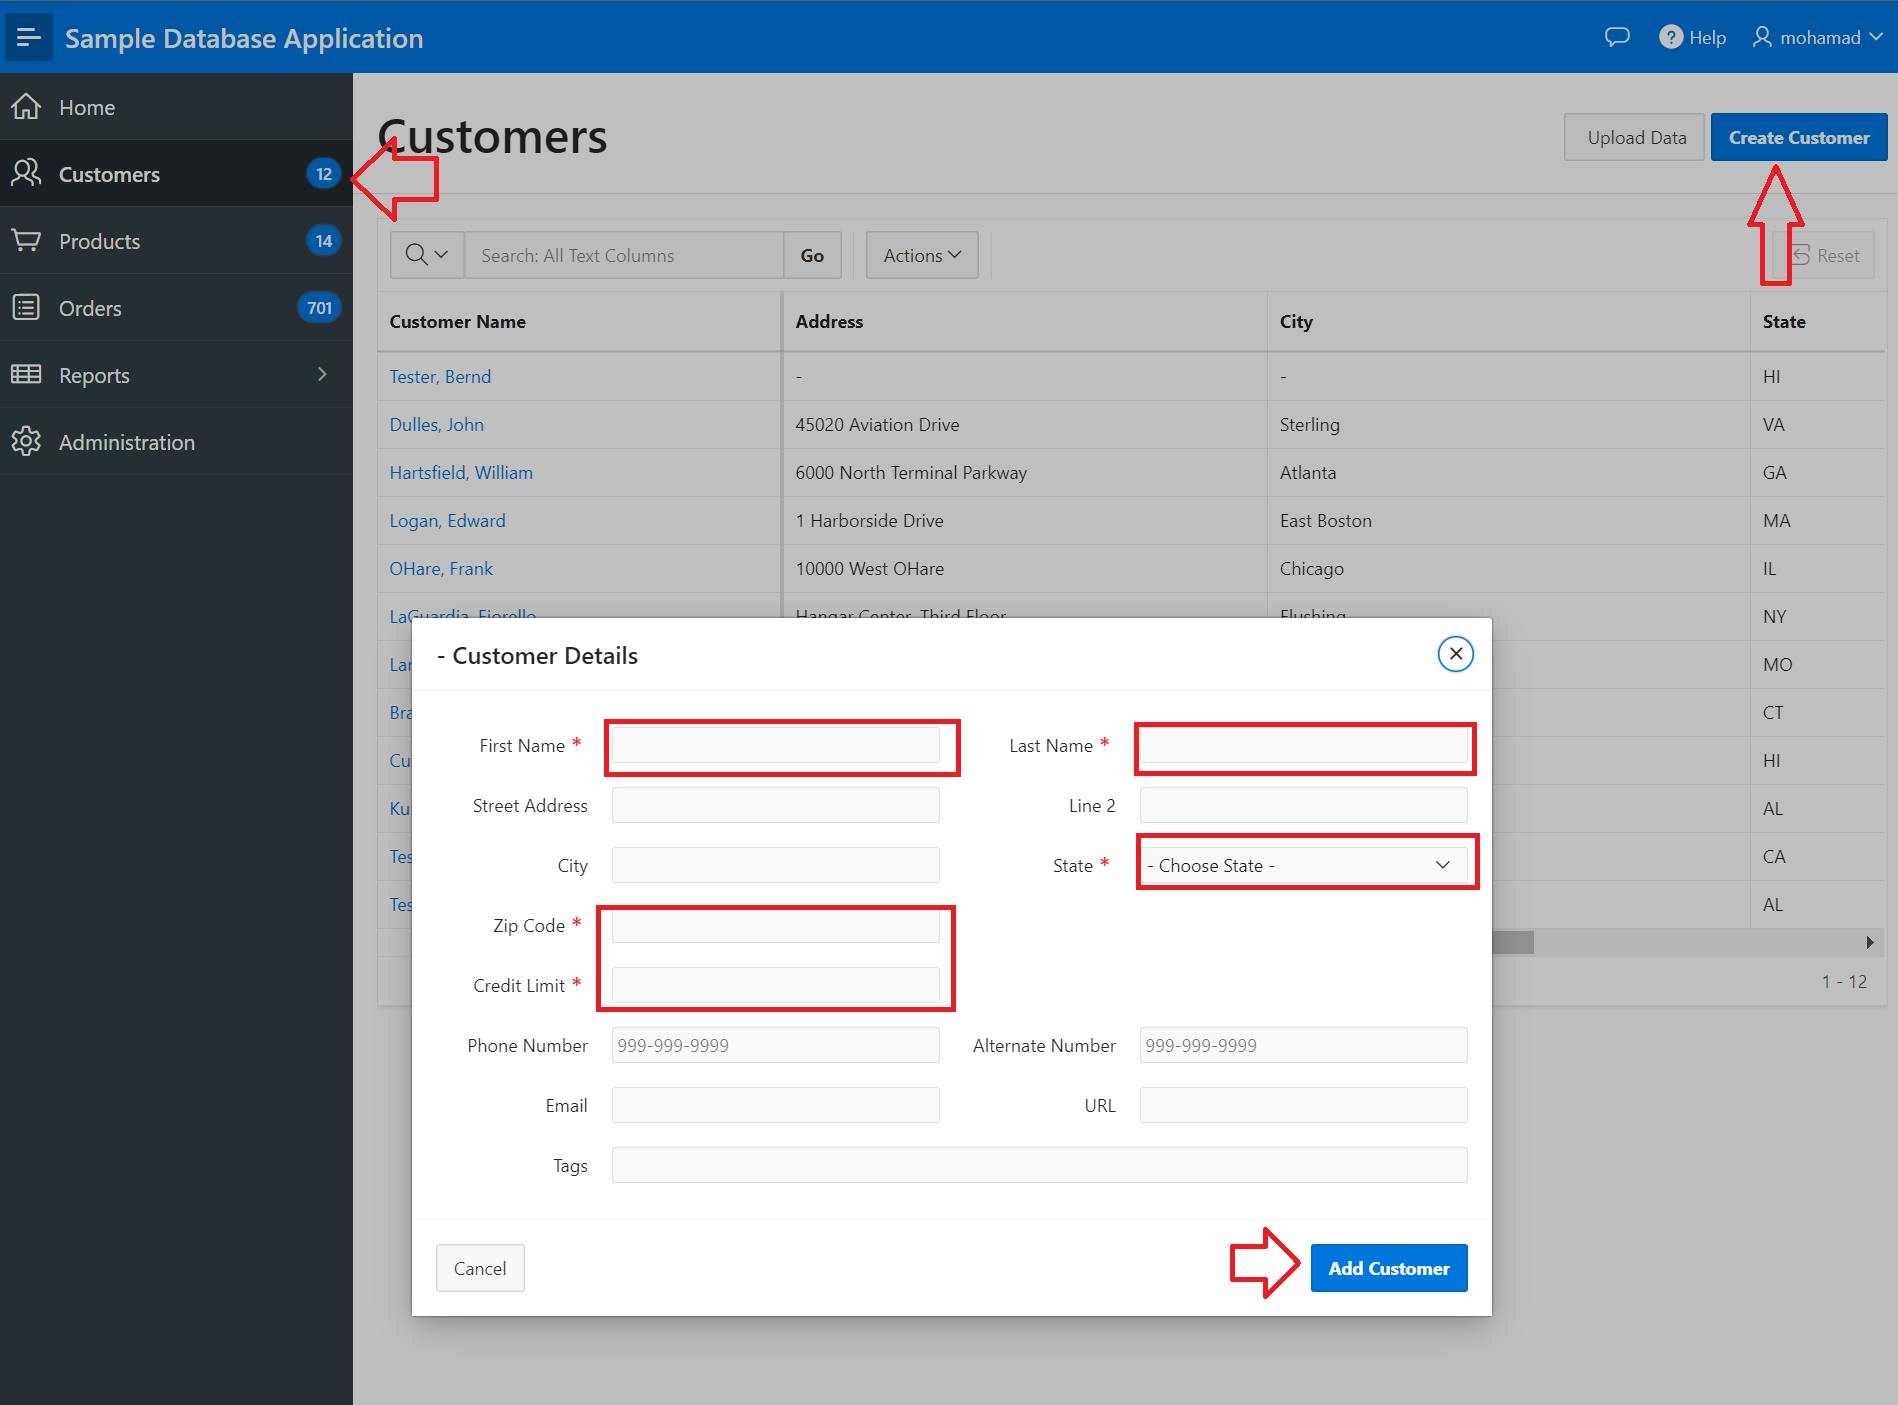
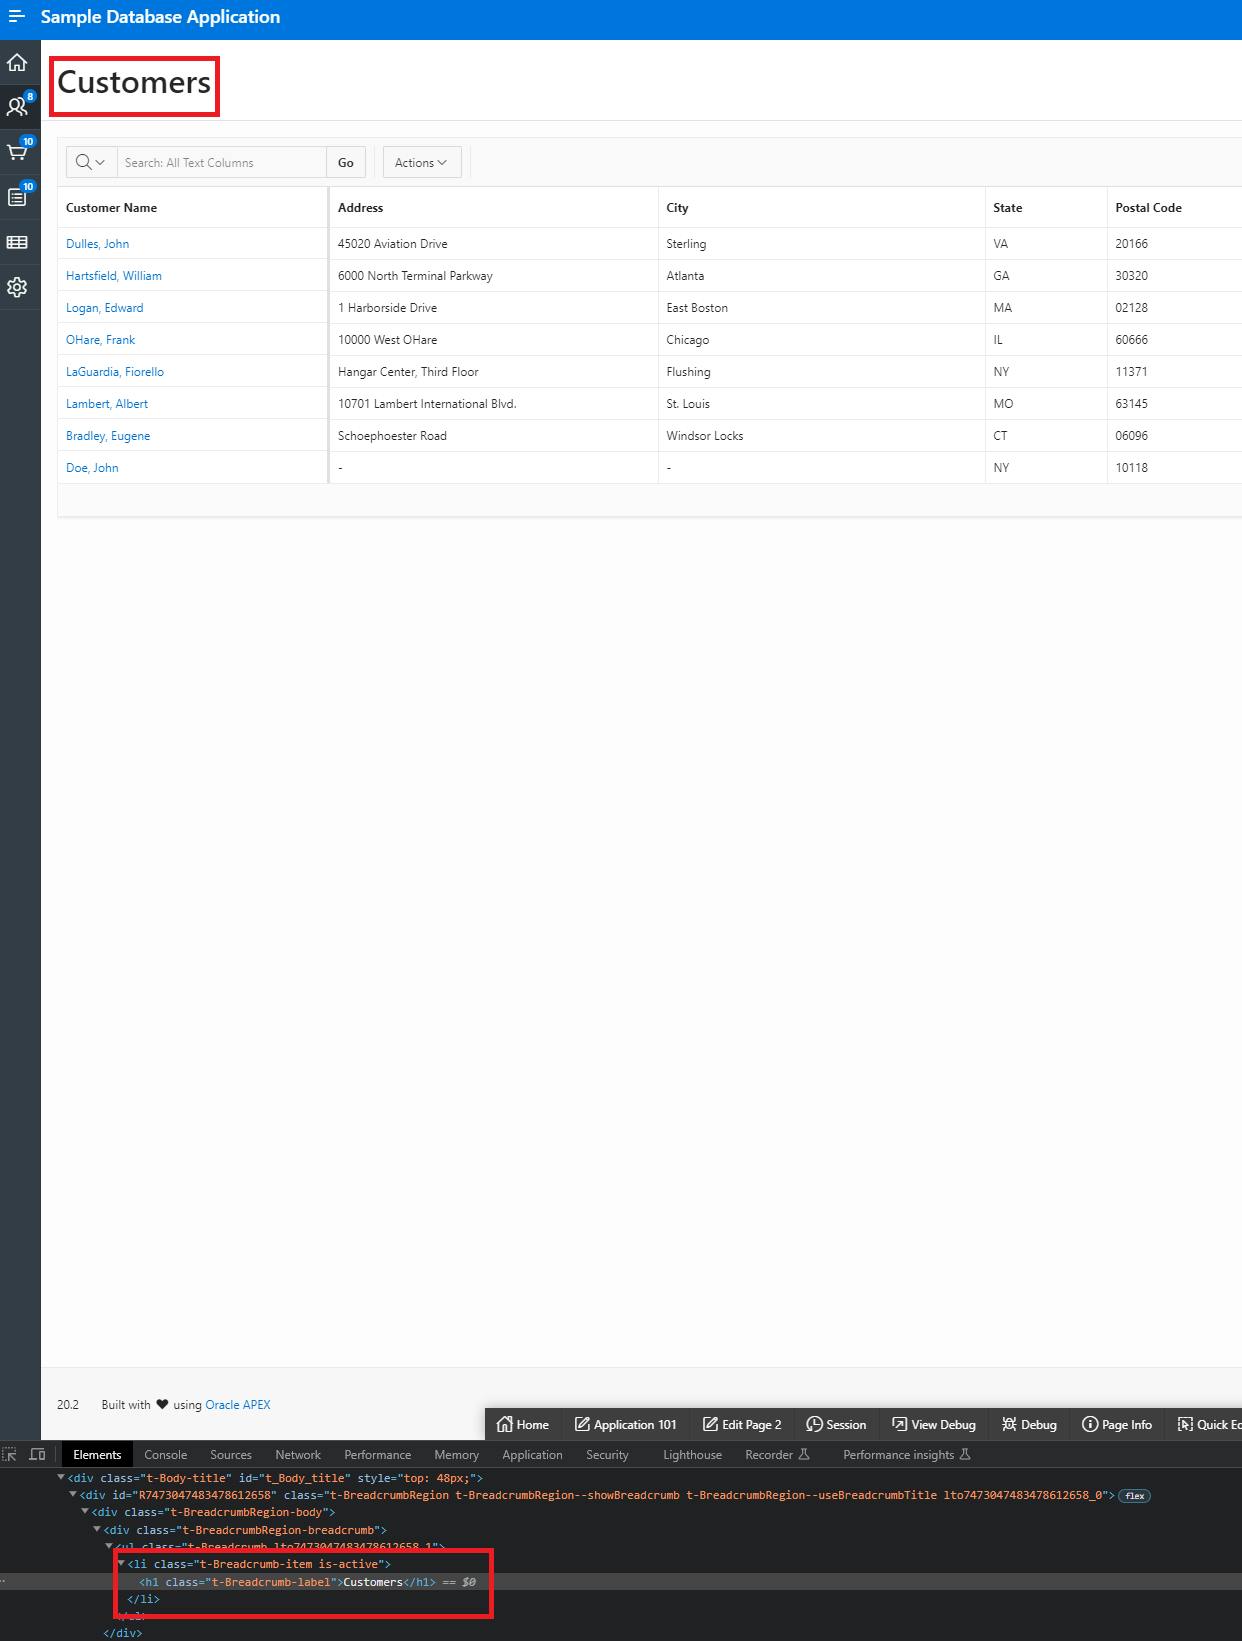
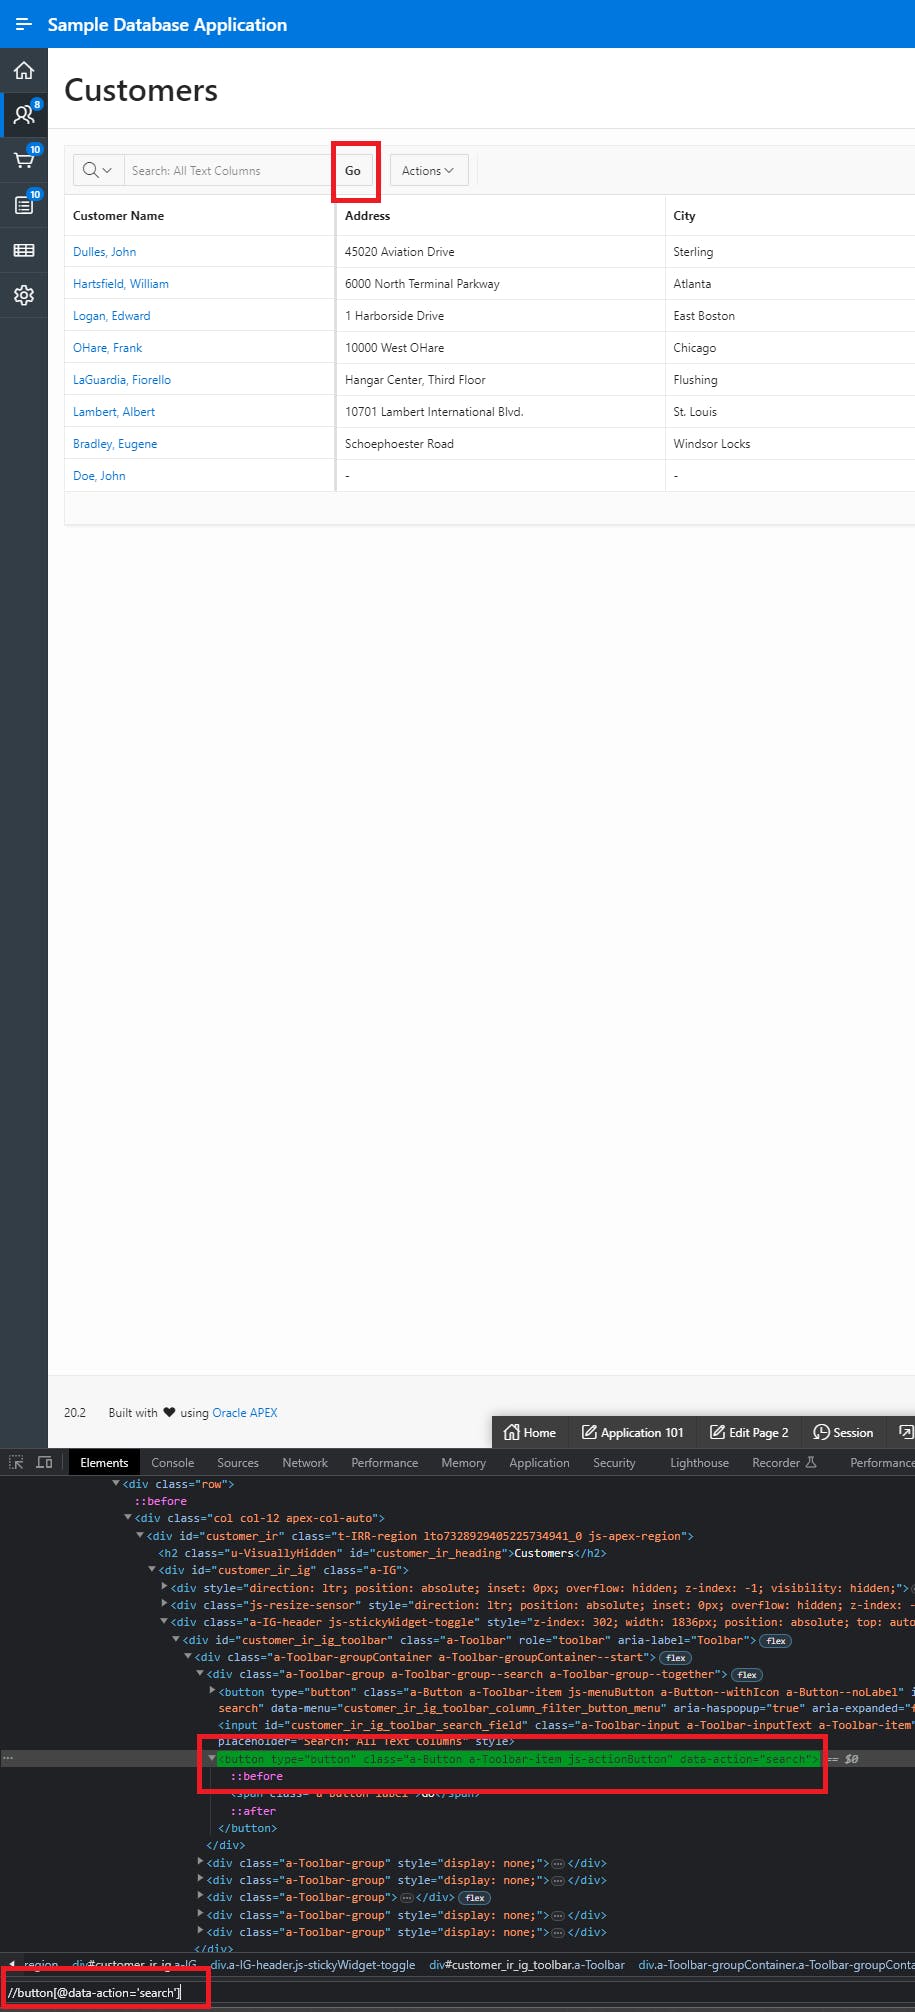
In the first test case, we will try to login into the sample database application, navigate to the customers' page and try to add a new customer. Here is how the customers' page looks like
Here are the steps we need to follow to add a new customer:
Navigate to the login page
Login into the application
Navigate to the "Customers" page
Click the "Create Customer" button
Fill in some required fields
Click the "Add customer" button
So let's do that :).
Login Test-Case
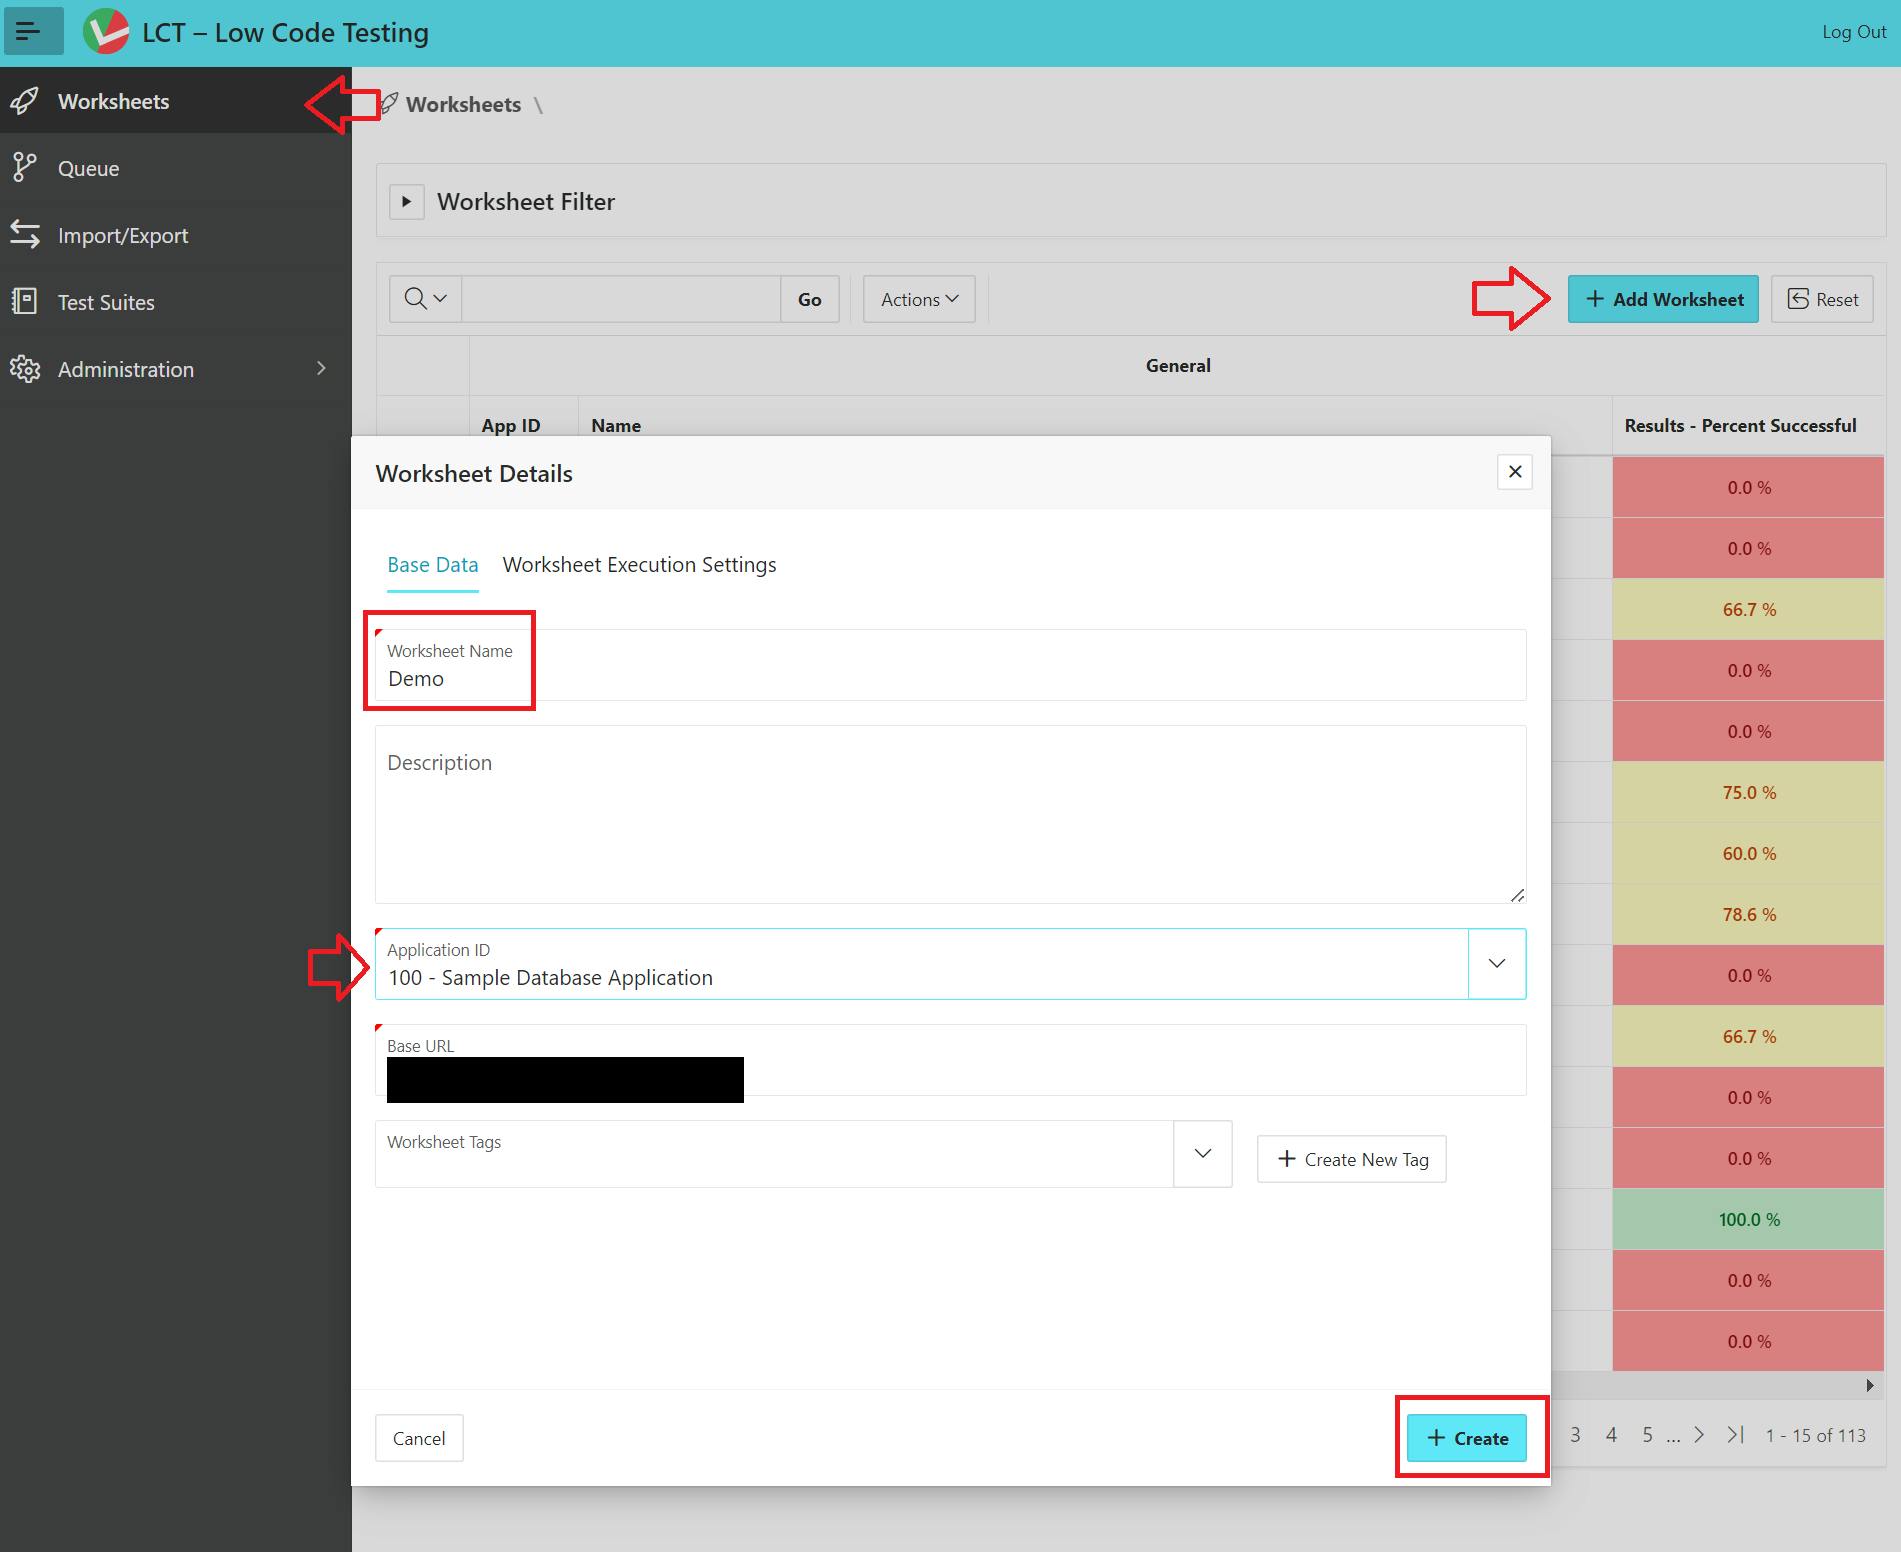
We launch our LCT tool and create a new worksheet, give your worksheet a name and select the sample database application from the dropdown list (Because LCT has access to your APEX metadata workspace, you will find all your application listed in the dropdown), then click create button.
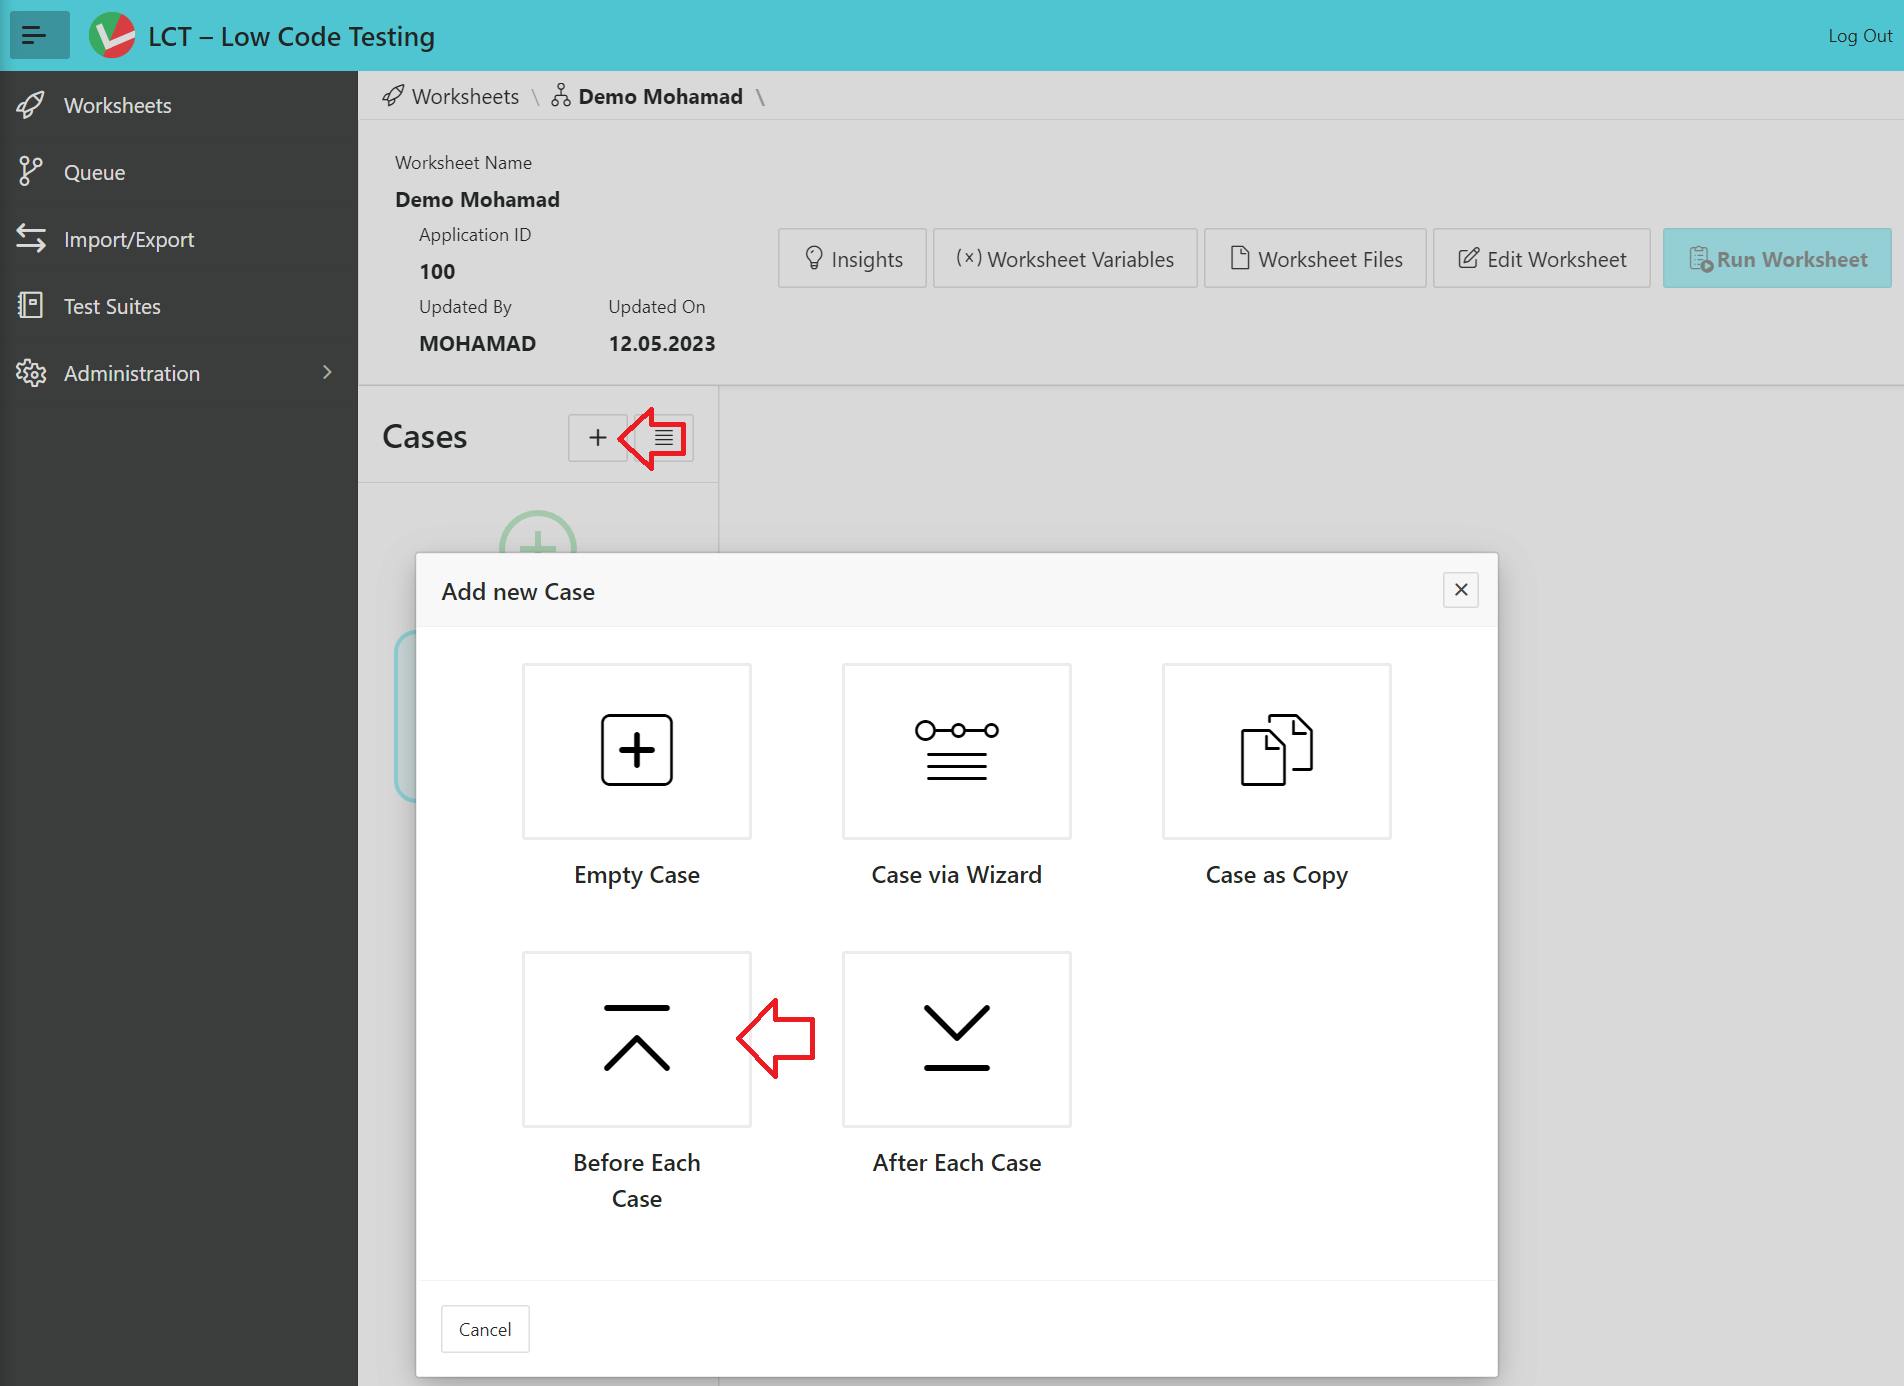
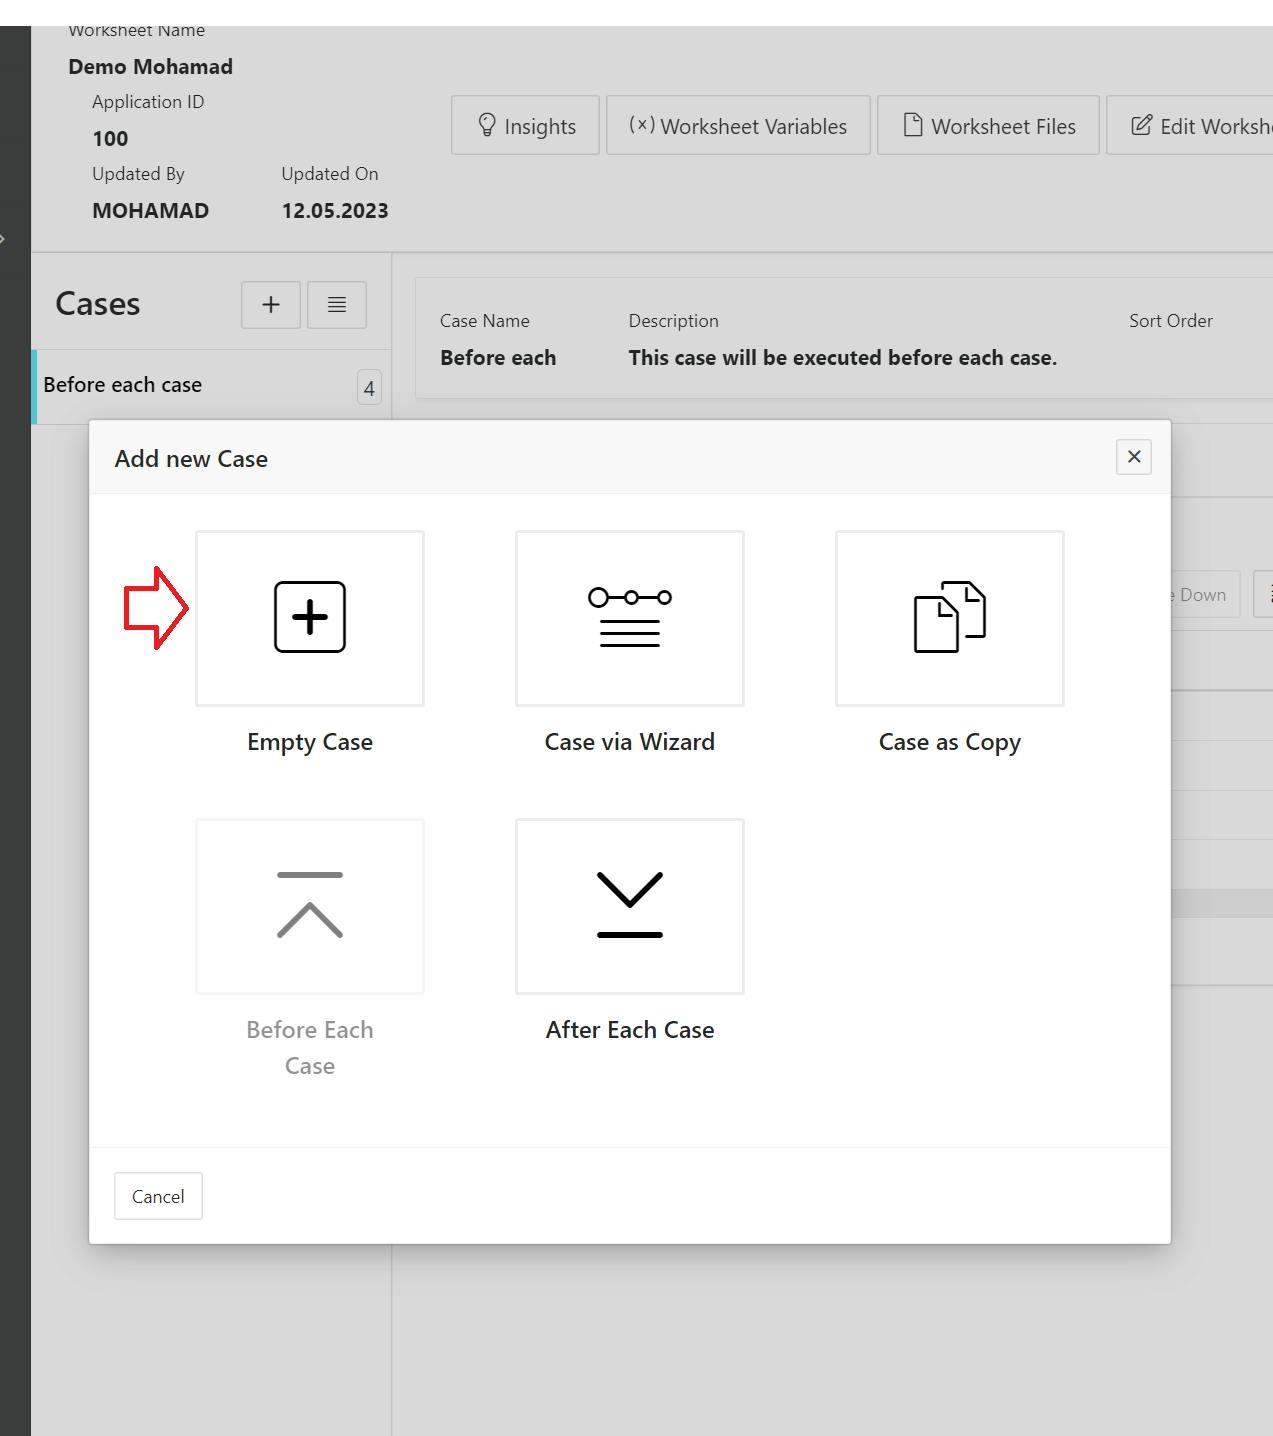
Navigate into the worksheet you just created and add a new case. As we mentioned before, our first step is to navigate to the login page and log in to the app, since this process will be repeated for each case we create in the worksheet, we will create a Before each case.
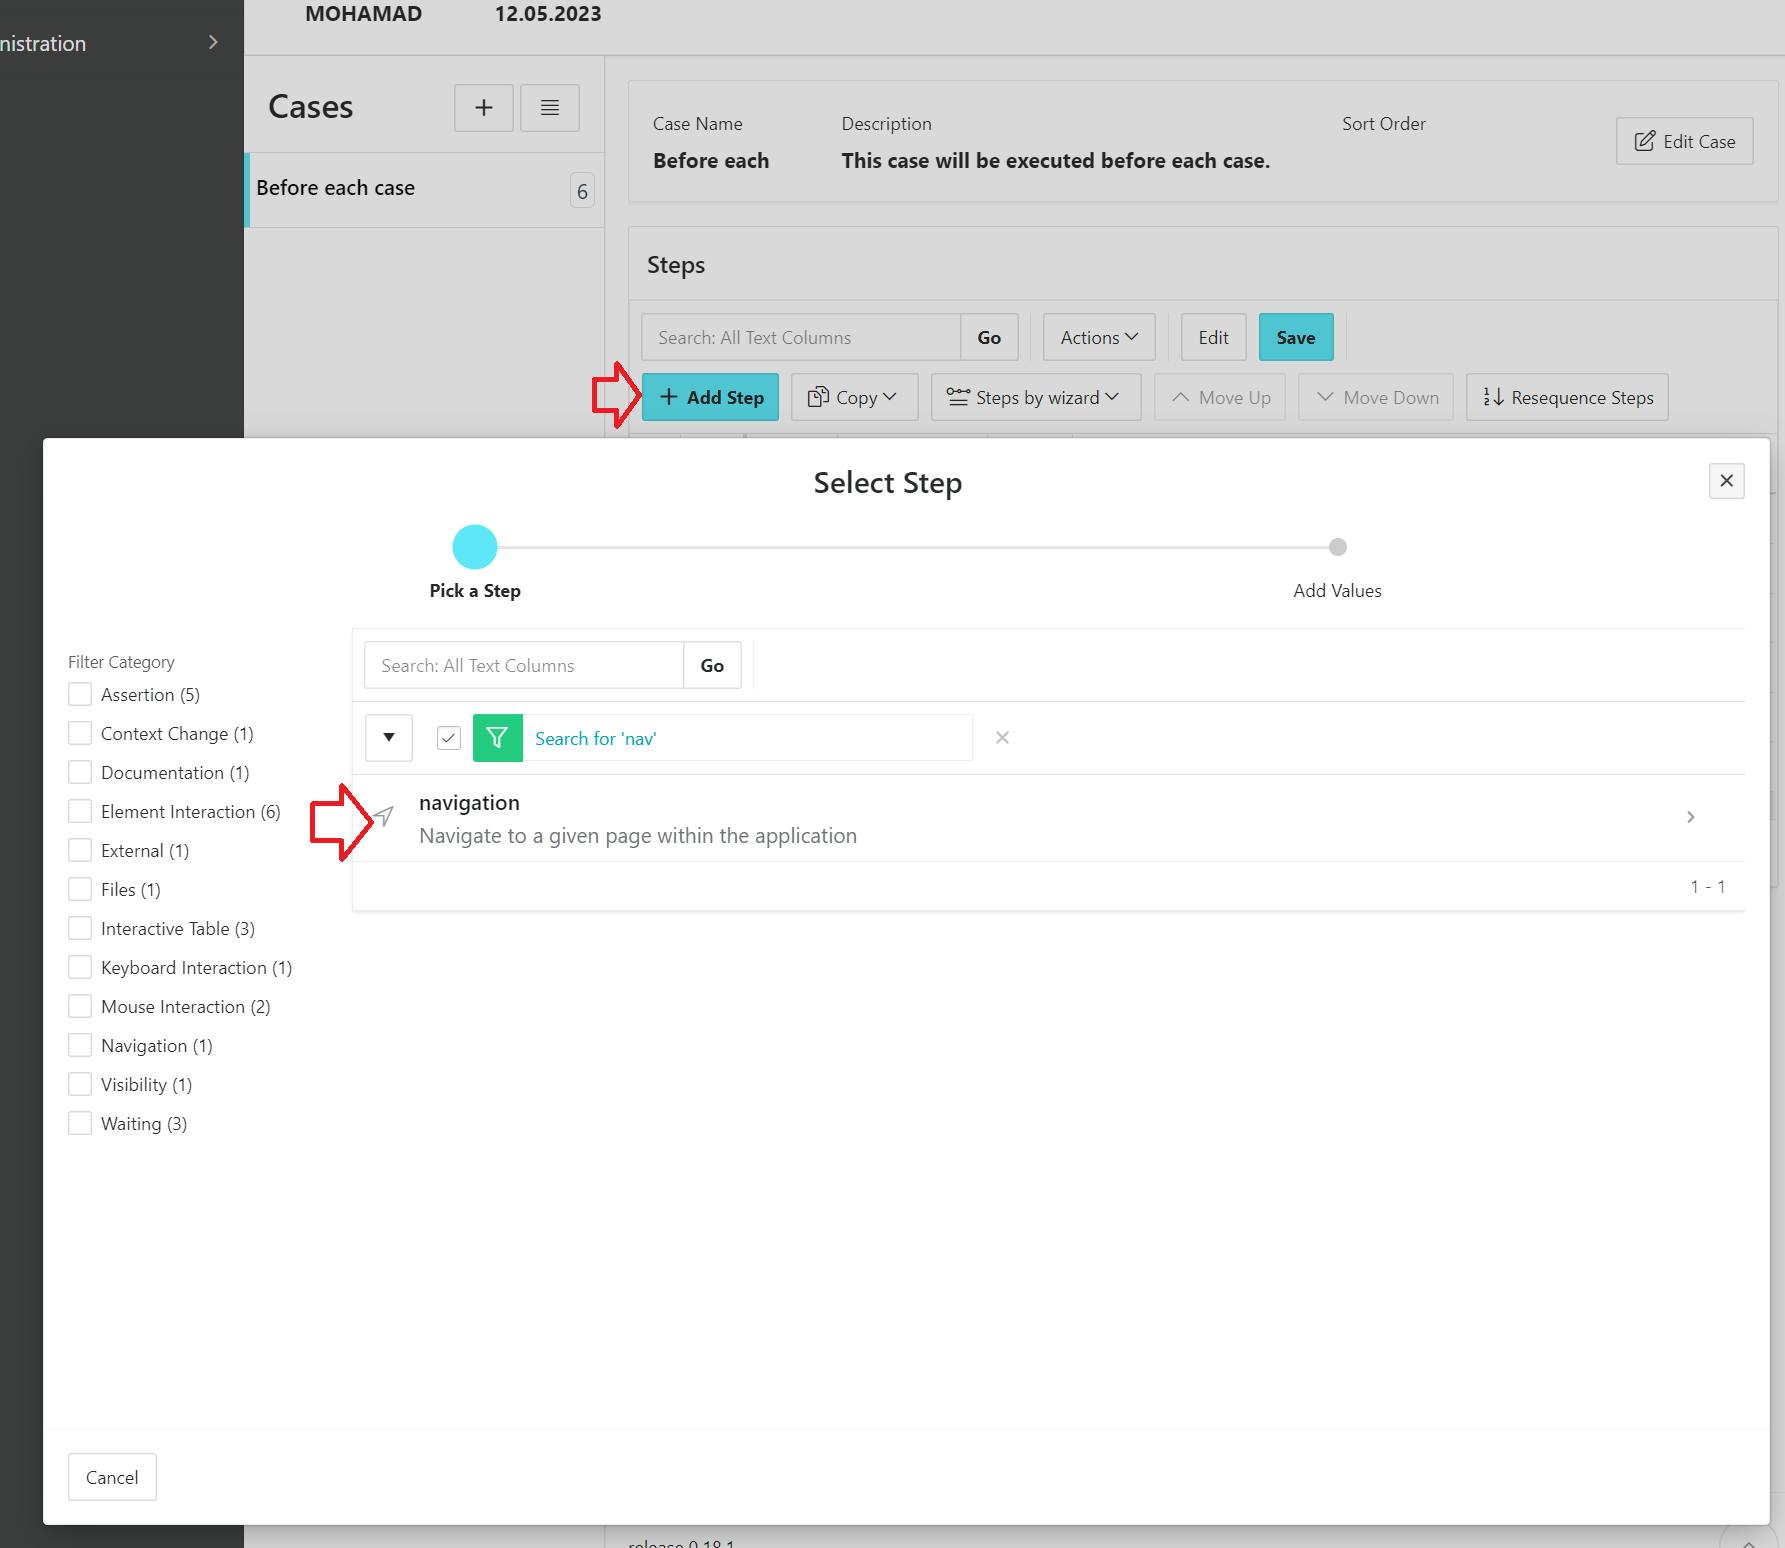
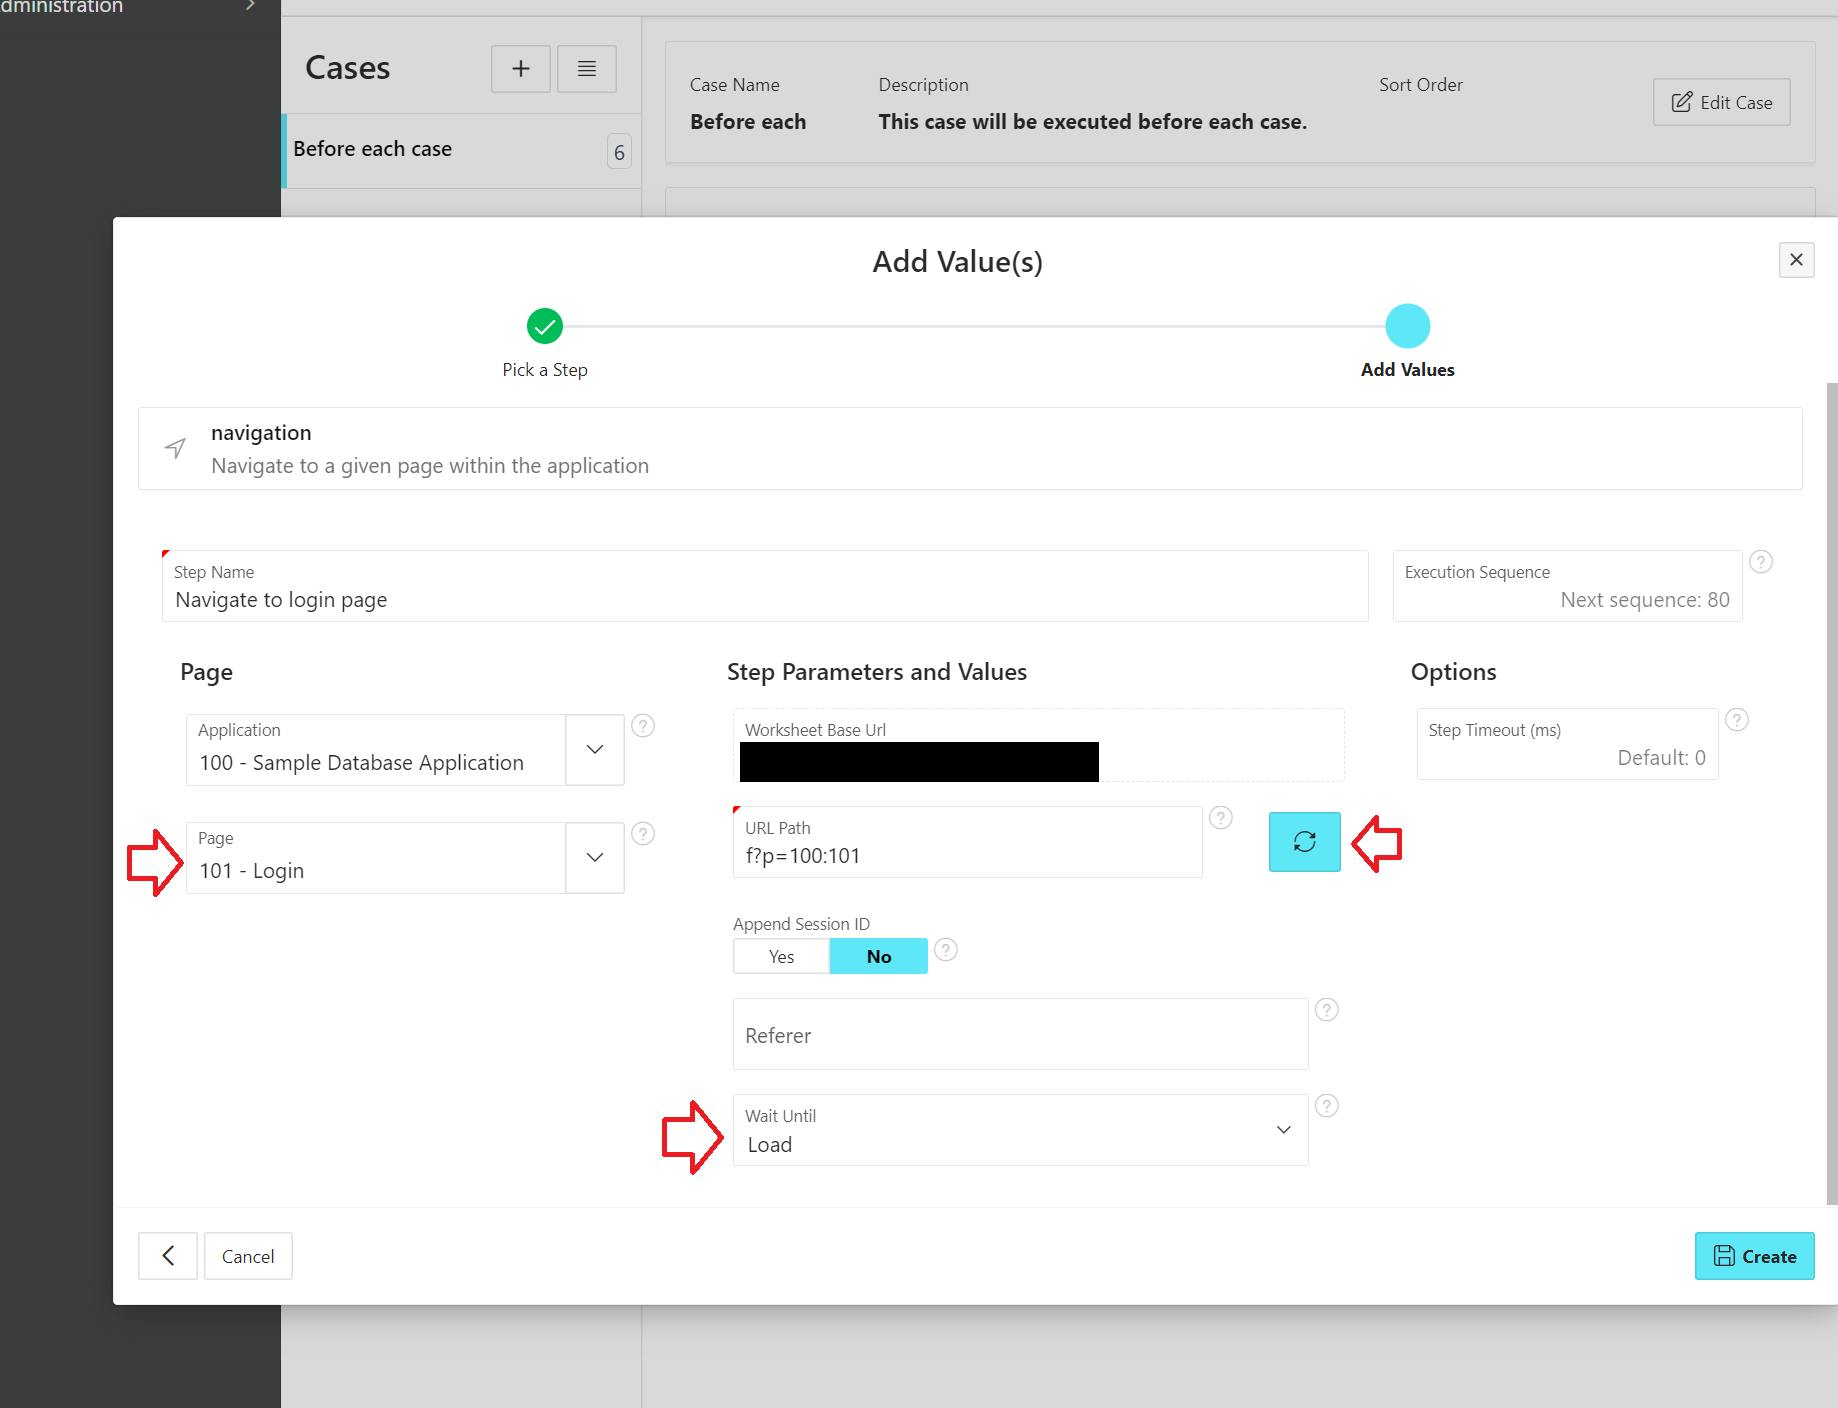
Before we start interacting with the login page items, we need first to navigate to that page, so our first step will be navigating to the login page and waiting until it loads. Click the add step button and search for the "Navigation" helper.
On the next page, select the login page and click the generate URL path button then click "Create".
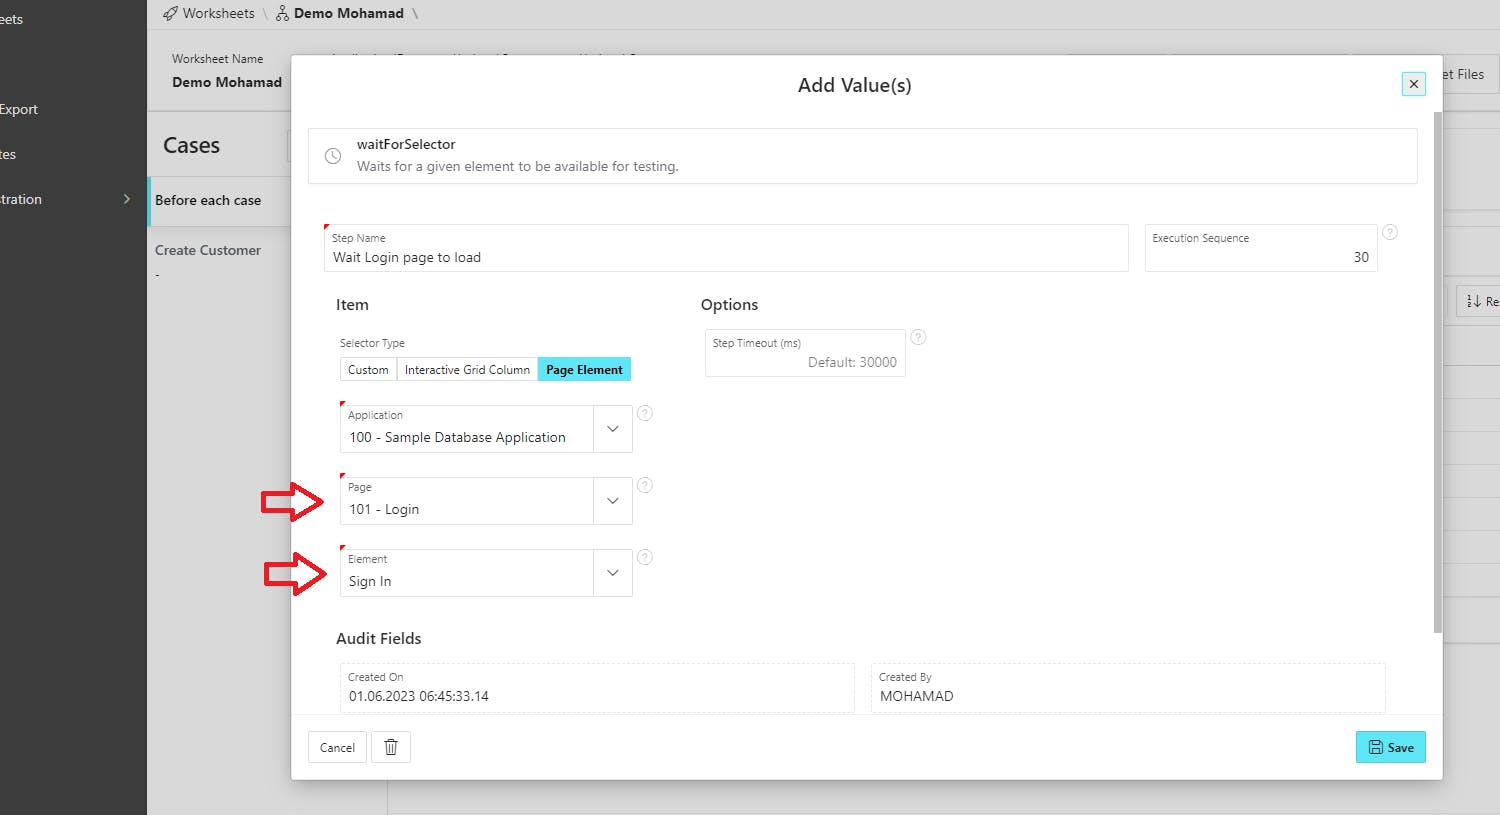
To make sure the login page has been successfully loaded, we add a "waitForSelector" step. In this step, we are waiting for the "Sign in" button on the login page.
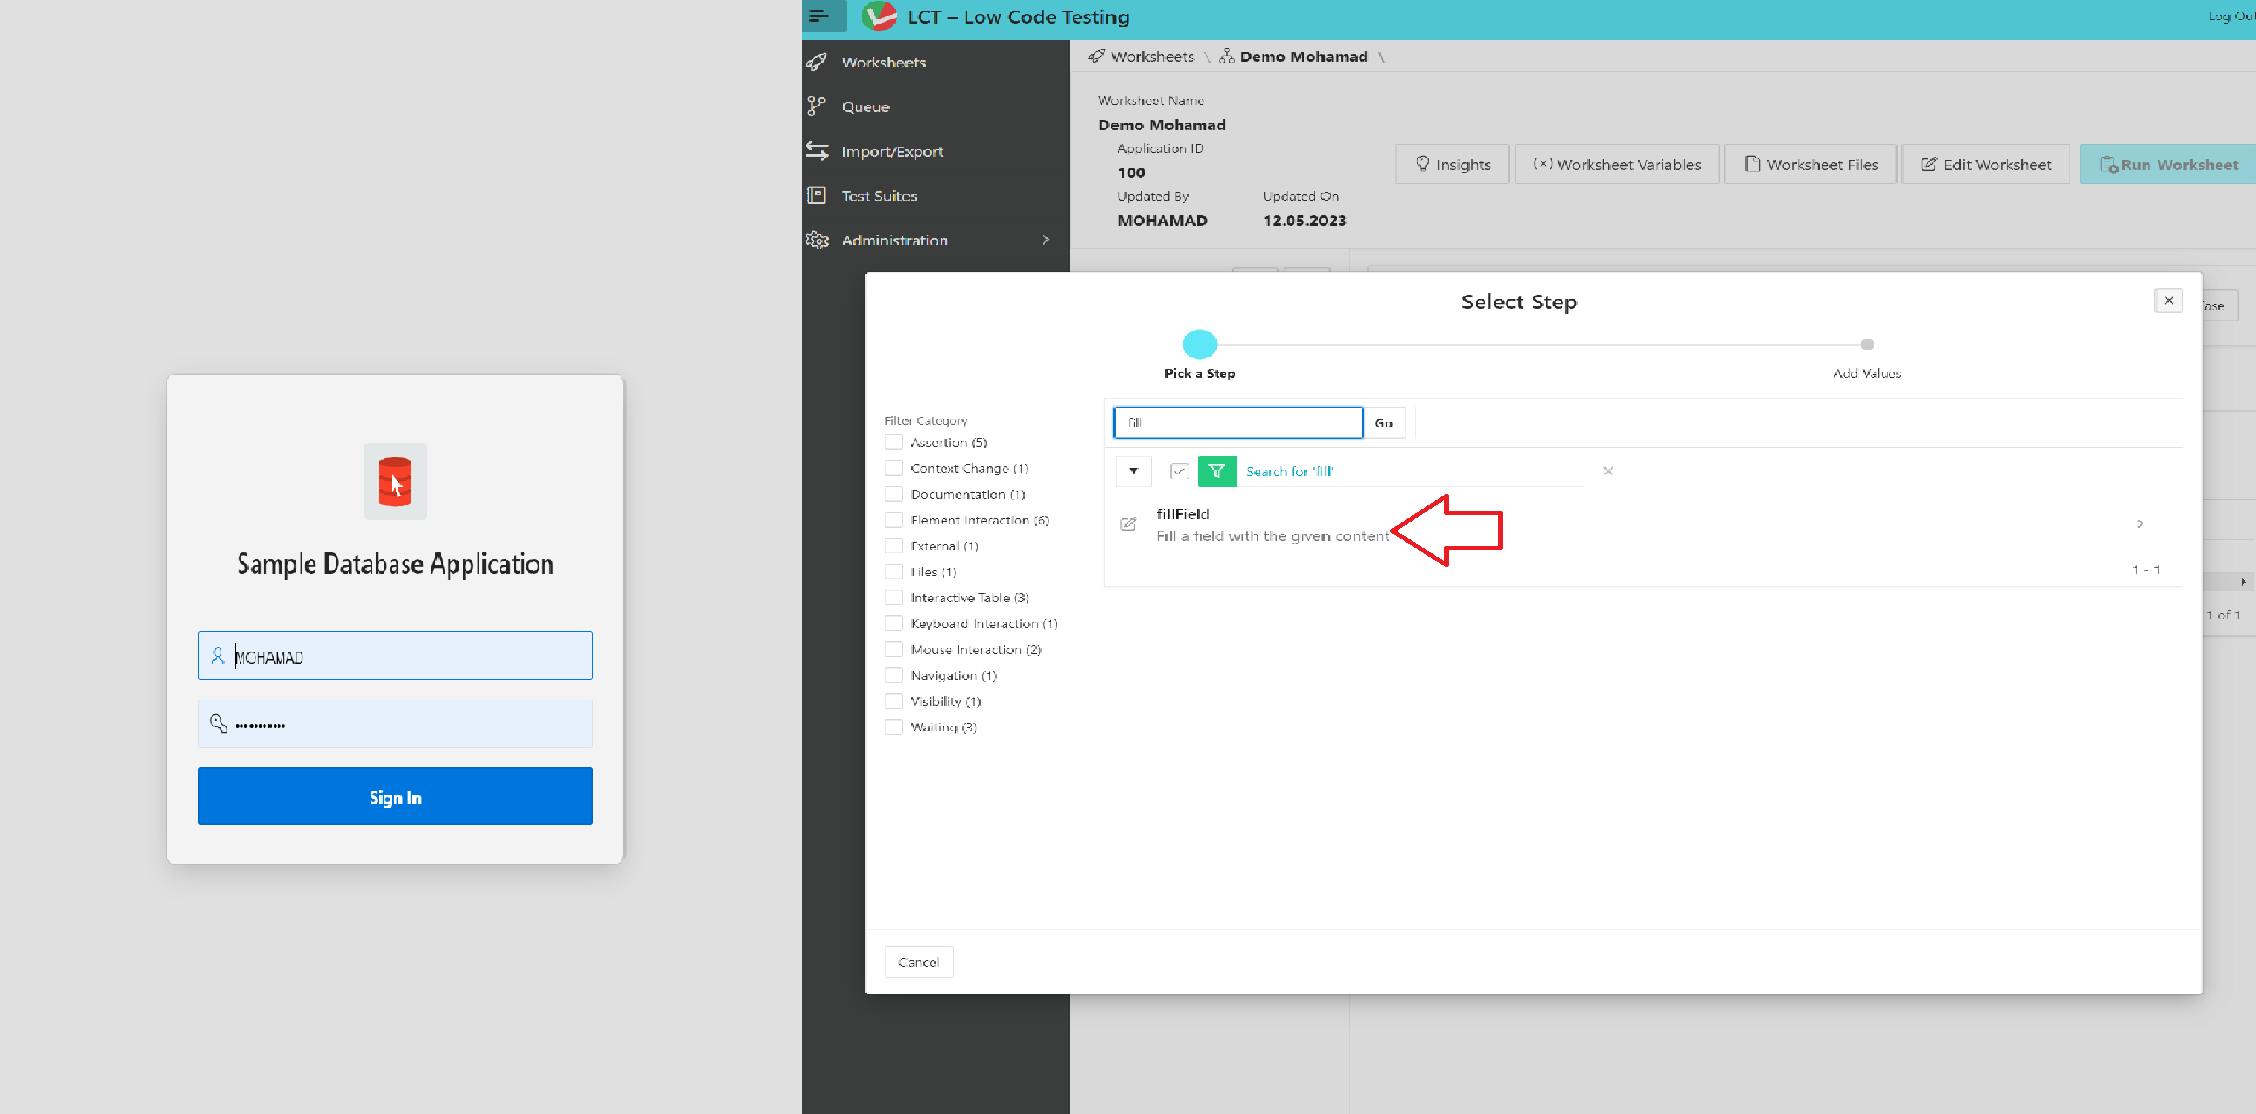
After the login page has been loaded, we can start filling in the login form, for each element in the login form we will create a step.
Add a new step for the username and search for the "fillField" helper
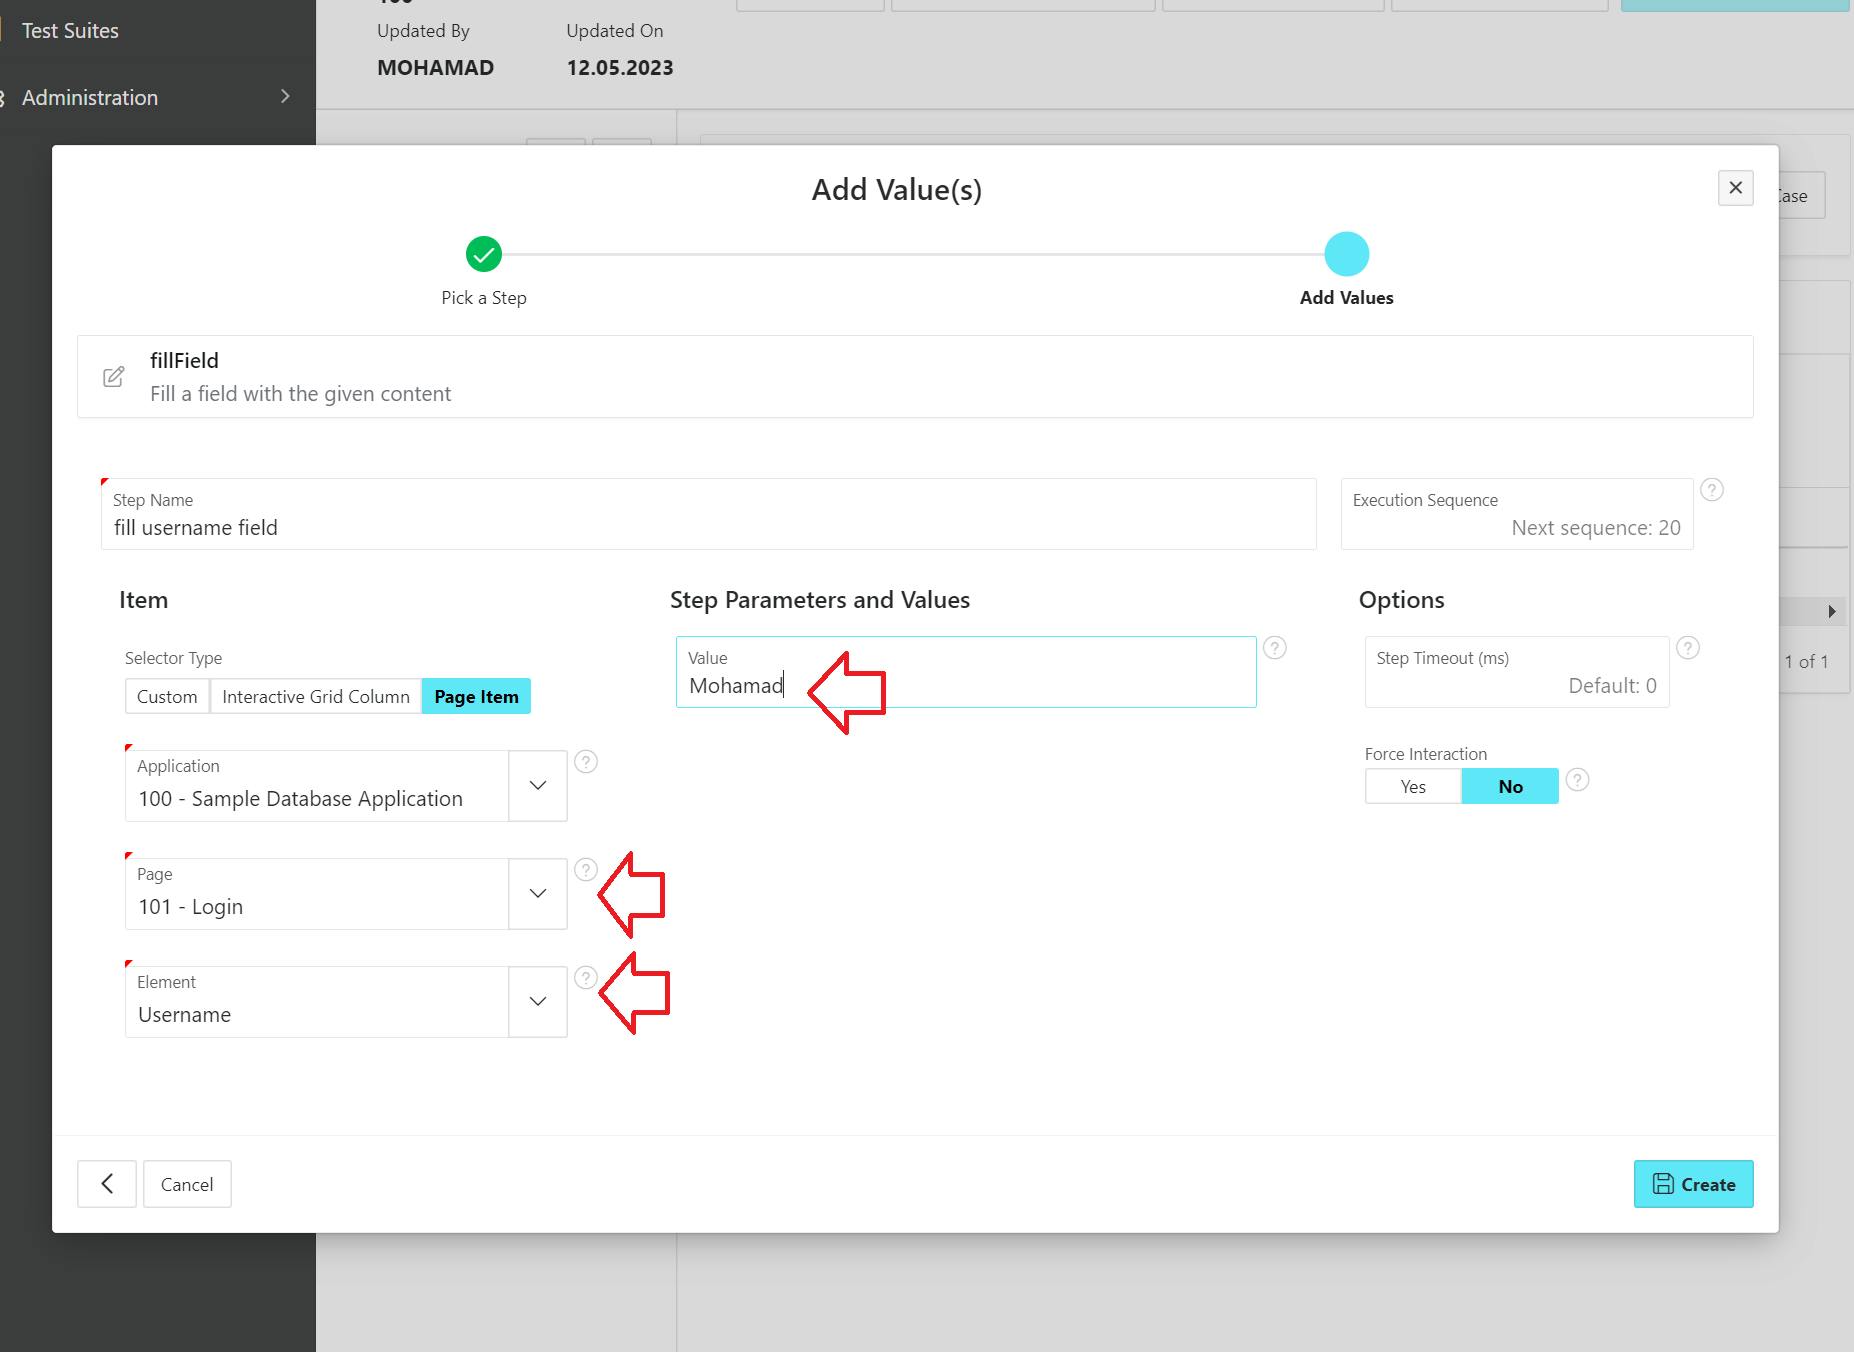
Select the login page from the dropdown list and select the username element, then give the item a value and click Create.
Do the same for the password field and after you finish add a new step and search for the click helper.
Select the "Sign in" button on the next page. Because the sign-in action will send us to the home page, make sure to choose "Yes" from the "Click triggers network request/navigation" switch button and then click Create.

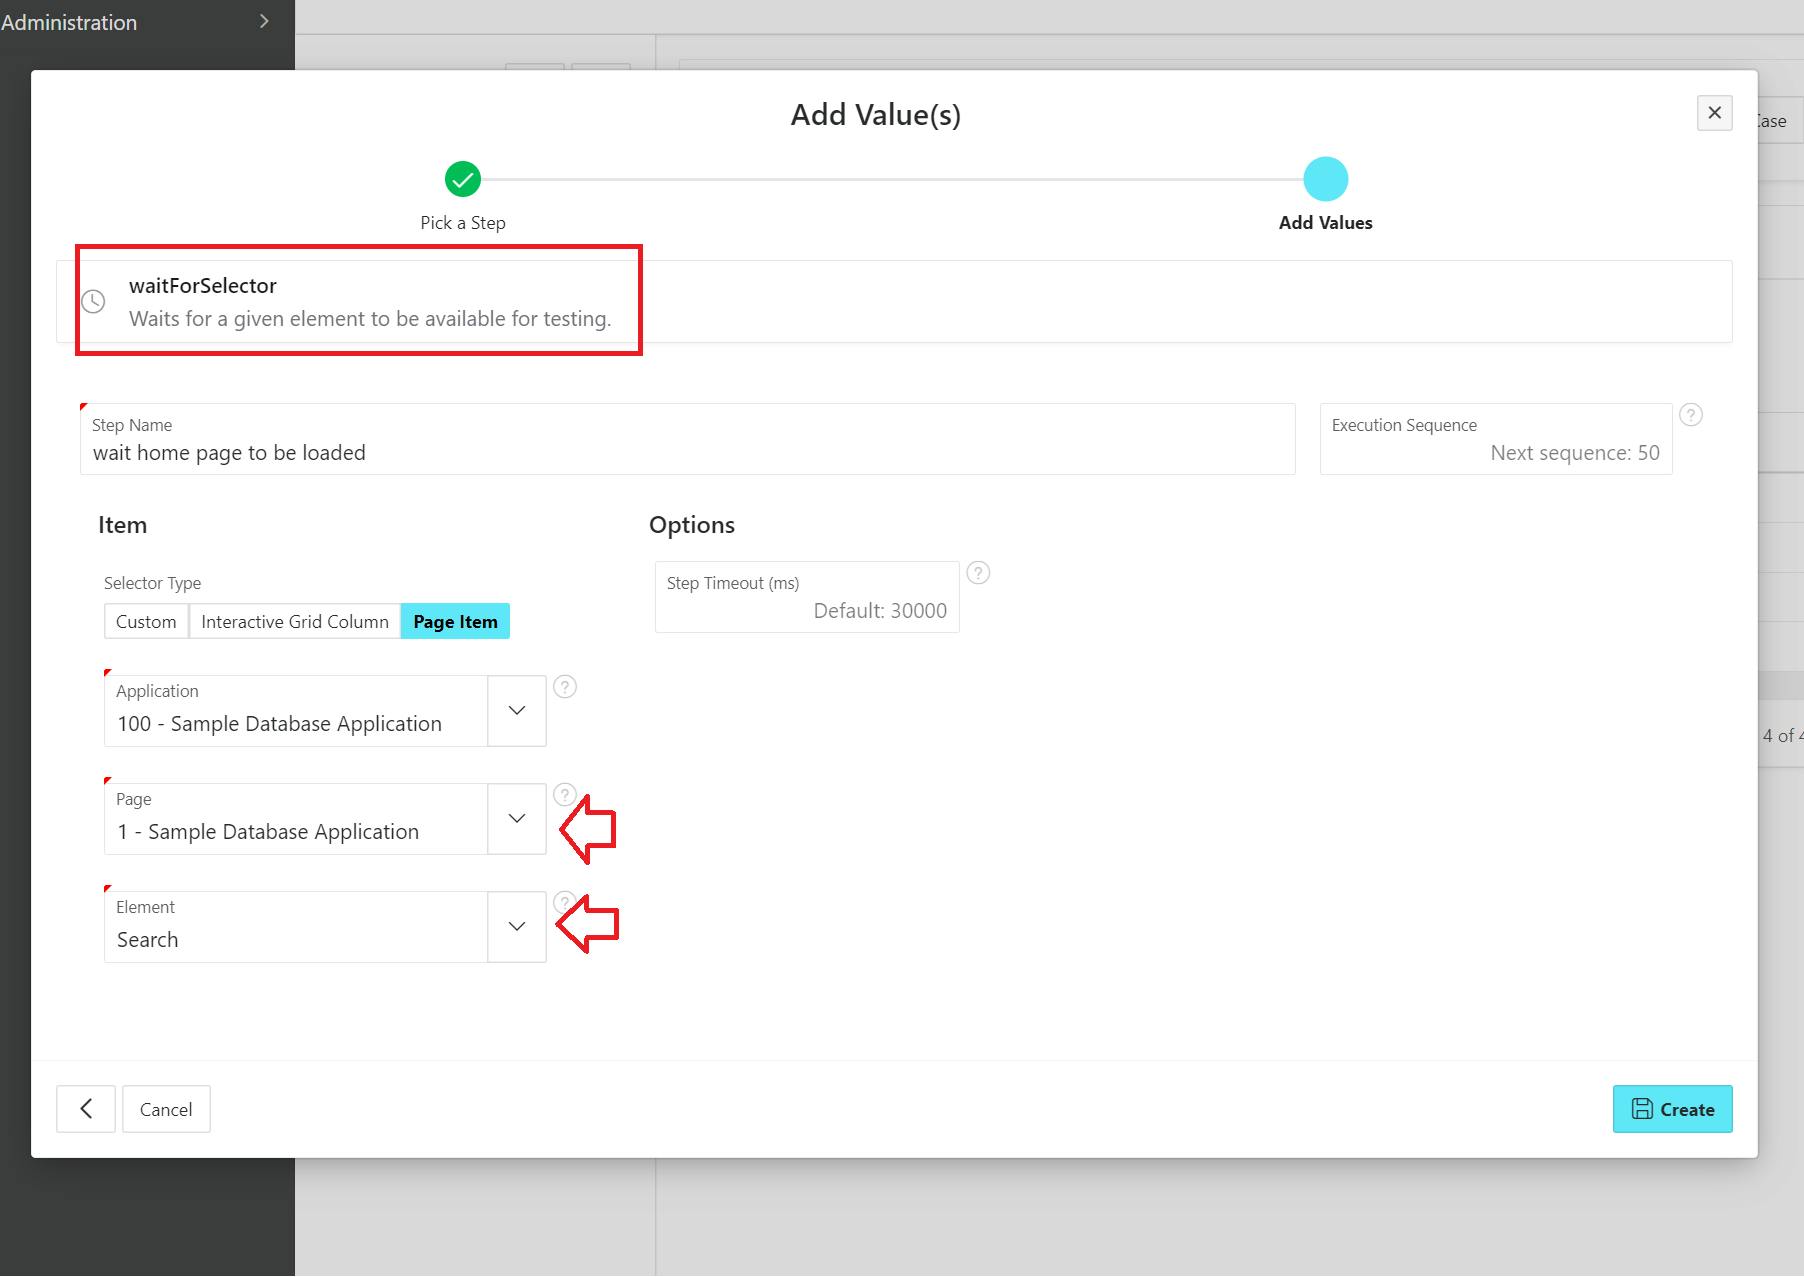
The last step in this case is waiting for the home page to be loaded, after we log in to the app we need to make sure the home page is loaded so we can continue to the next cases. For that add a new step and search for "waitForSelector", on the next page choose the home page in your sample app and select any element to wait for.
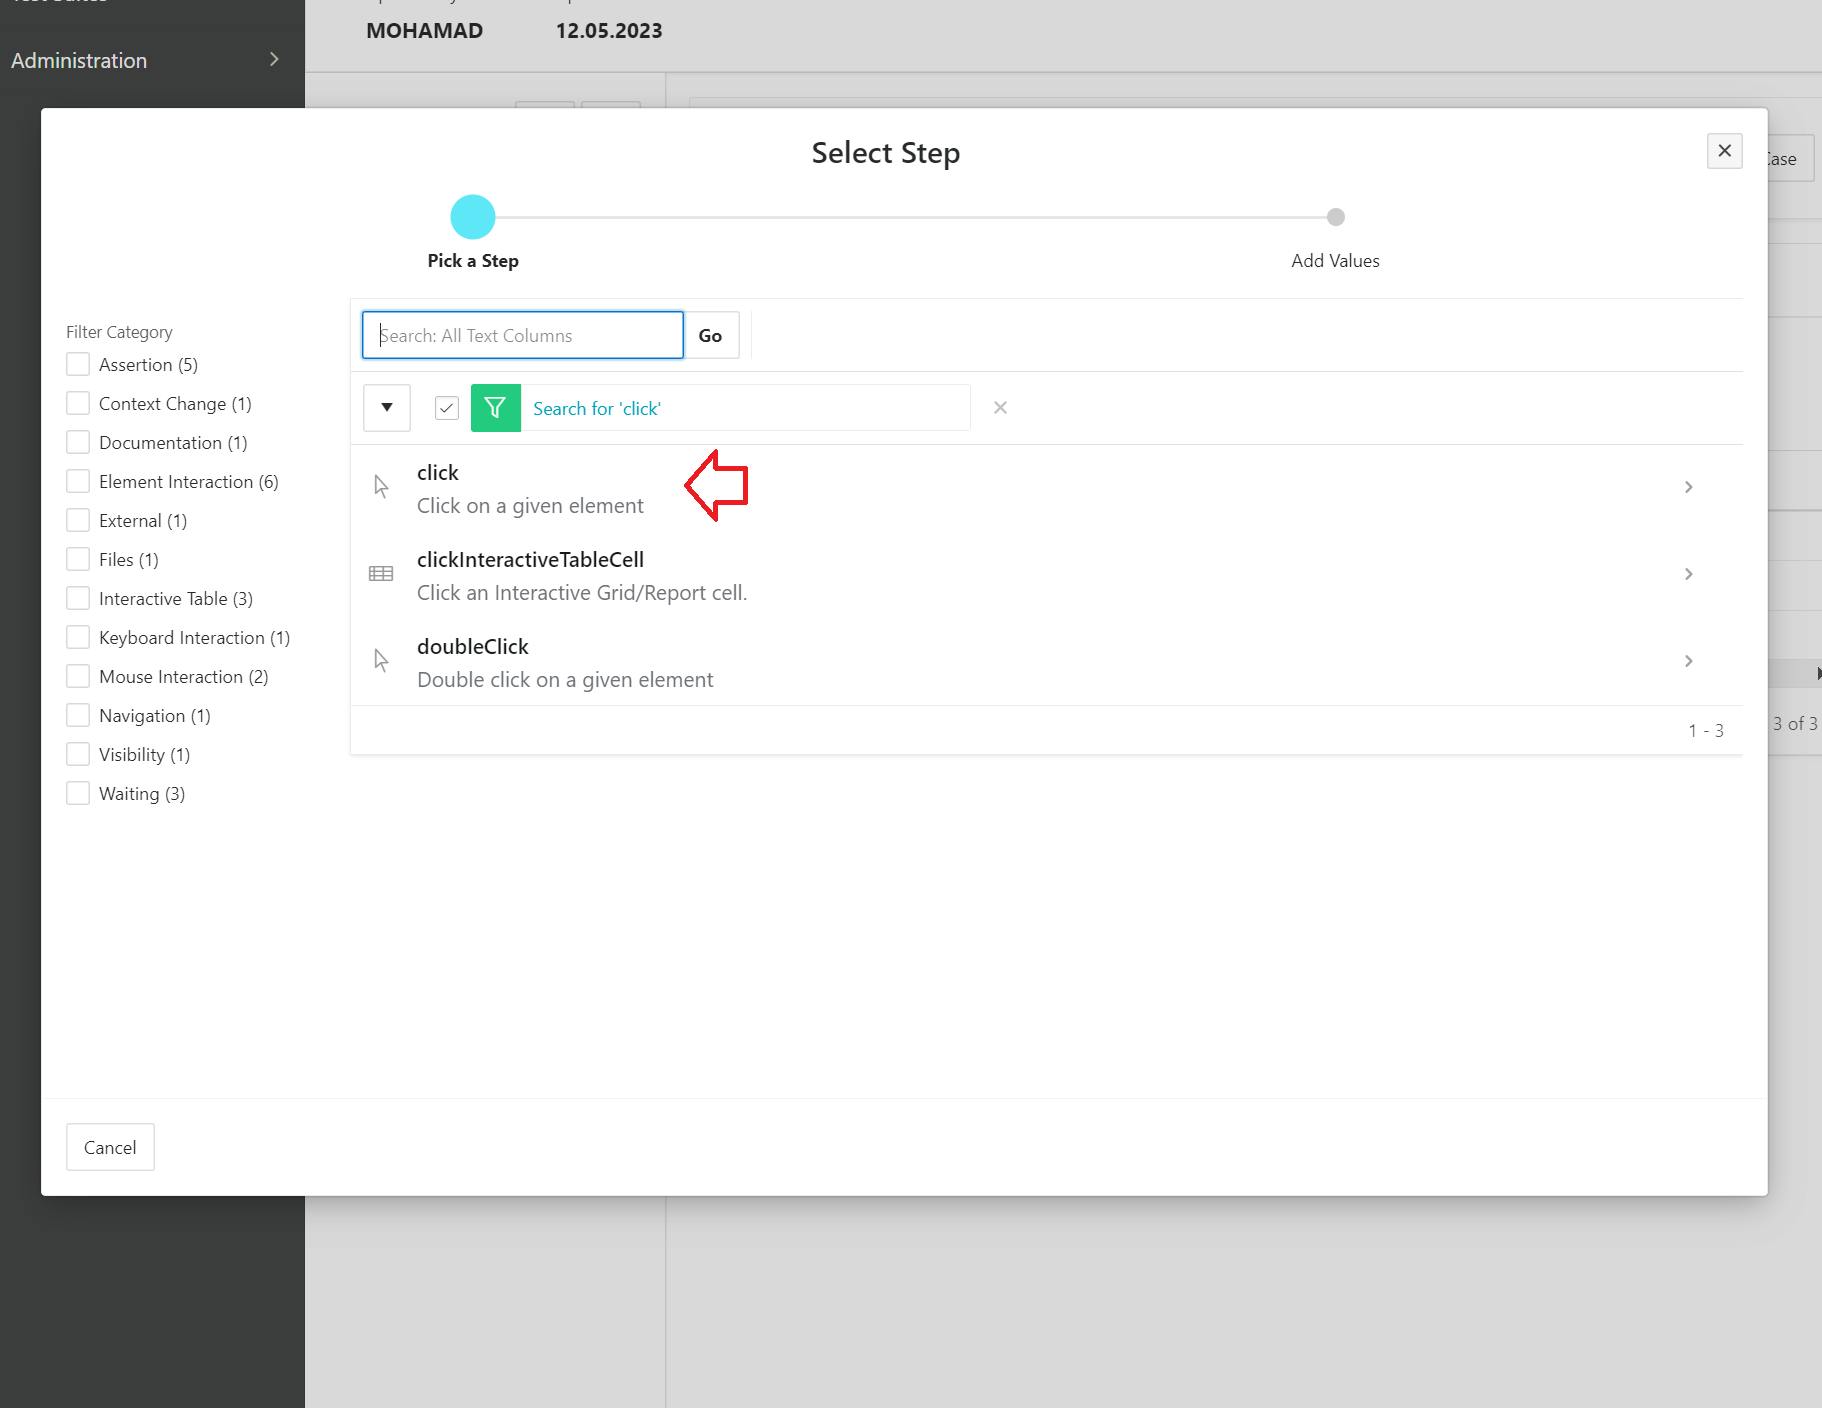
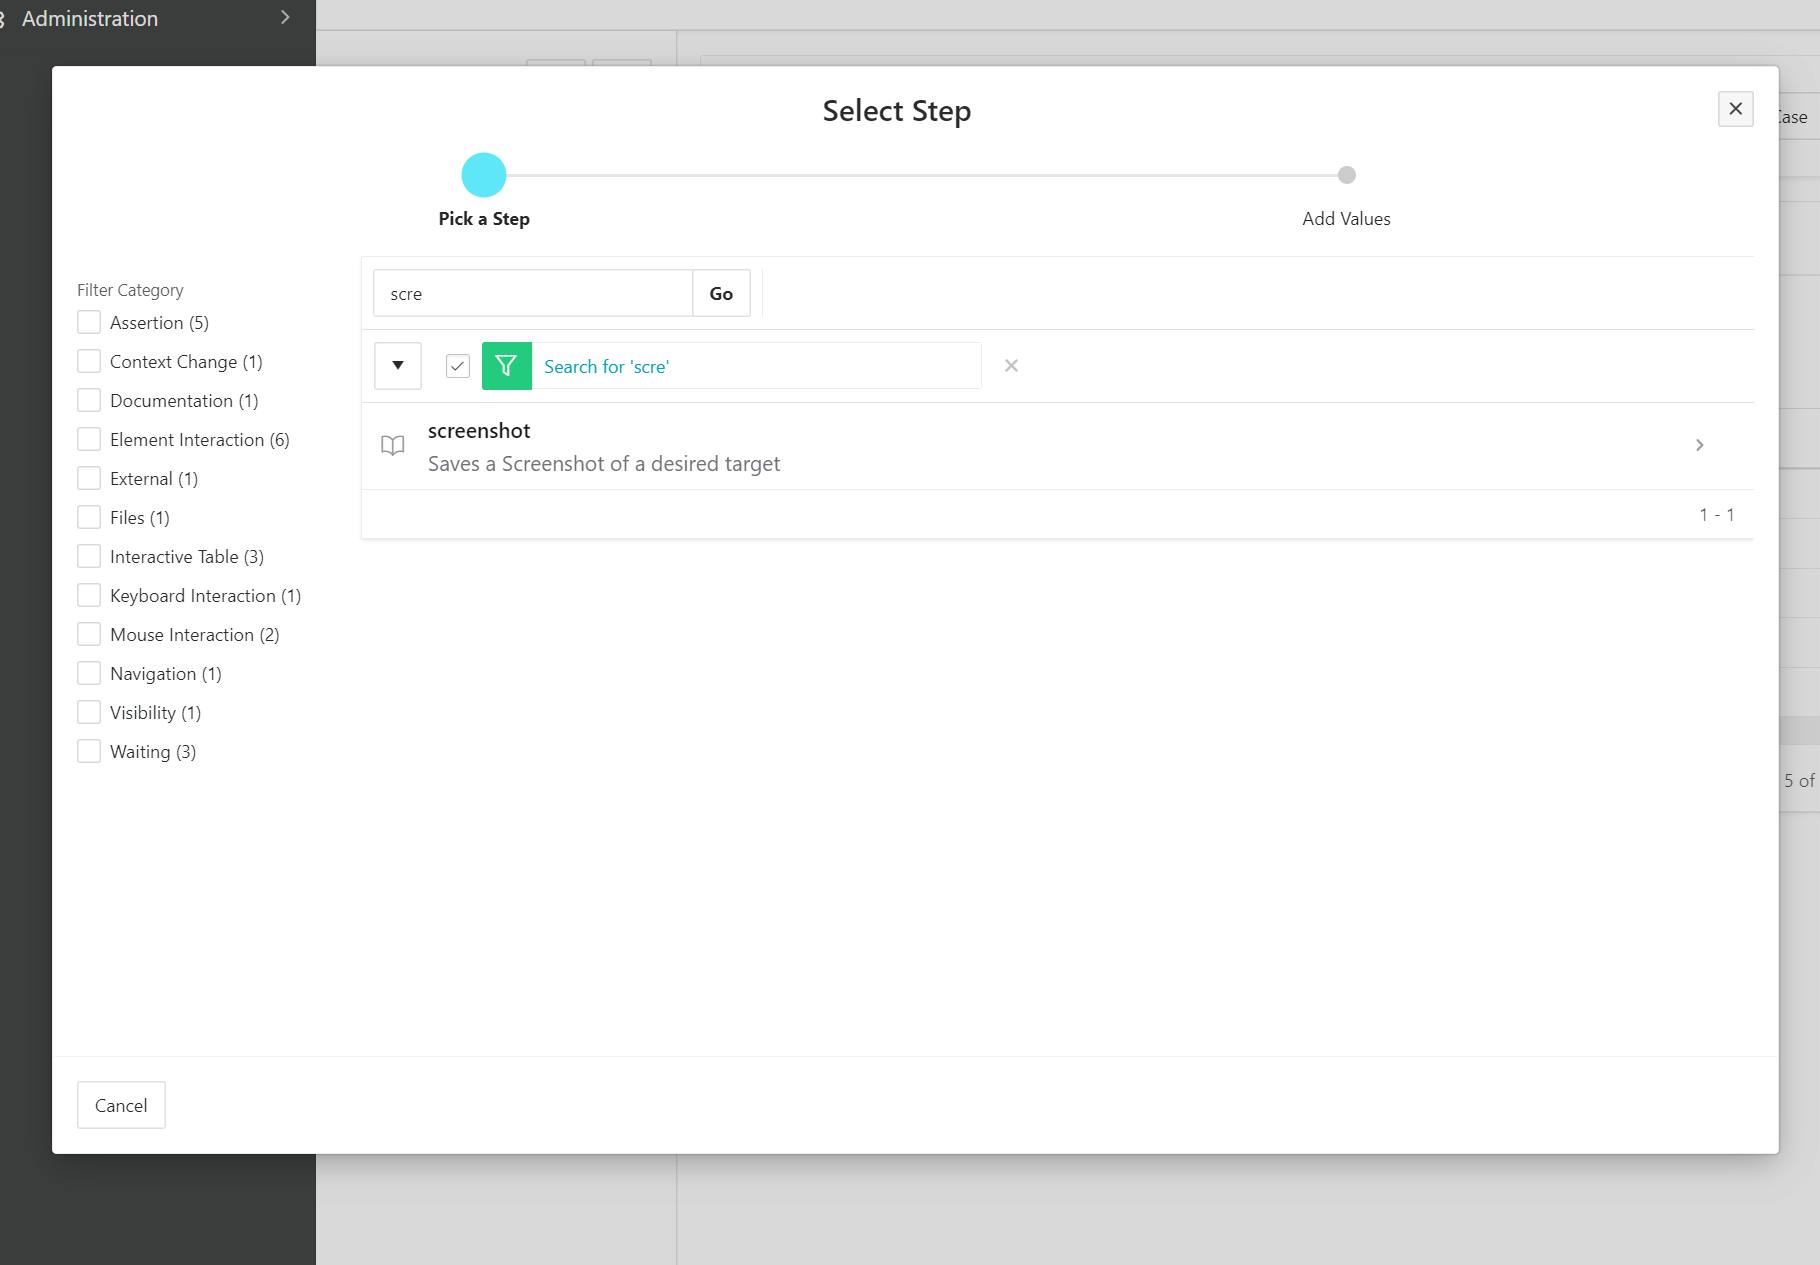
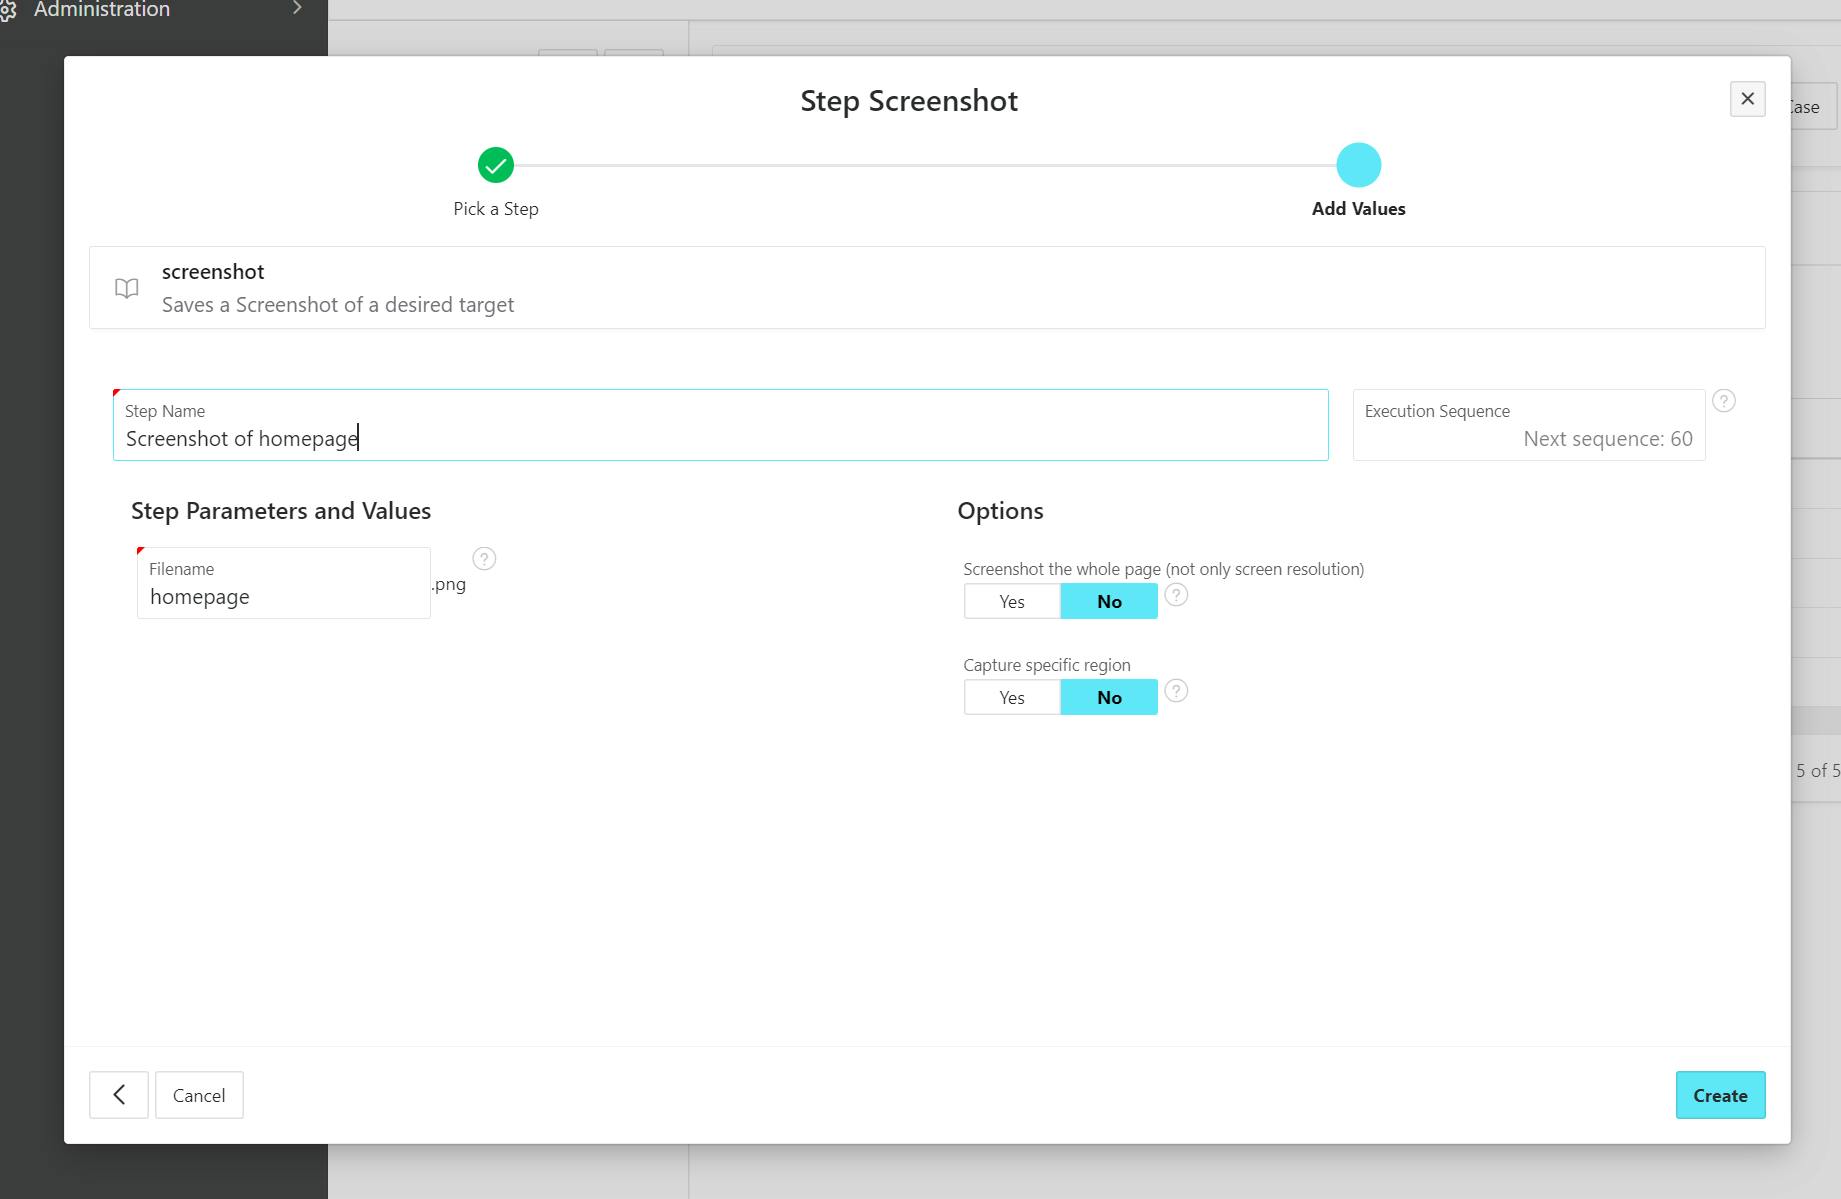
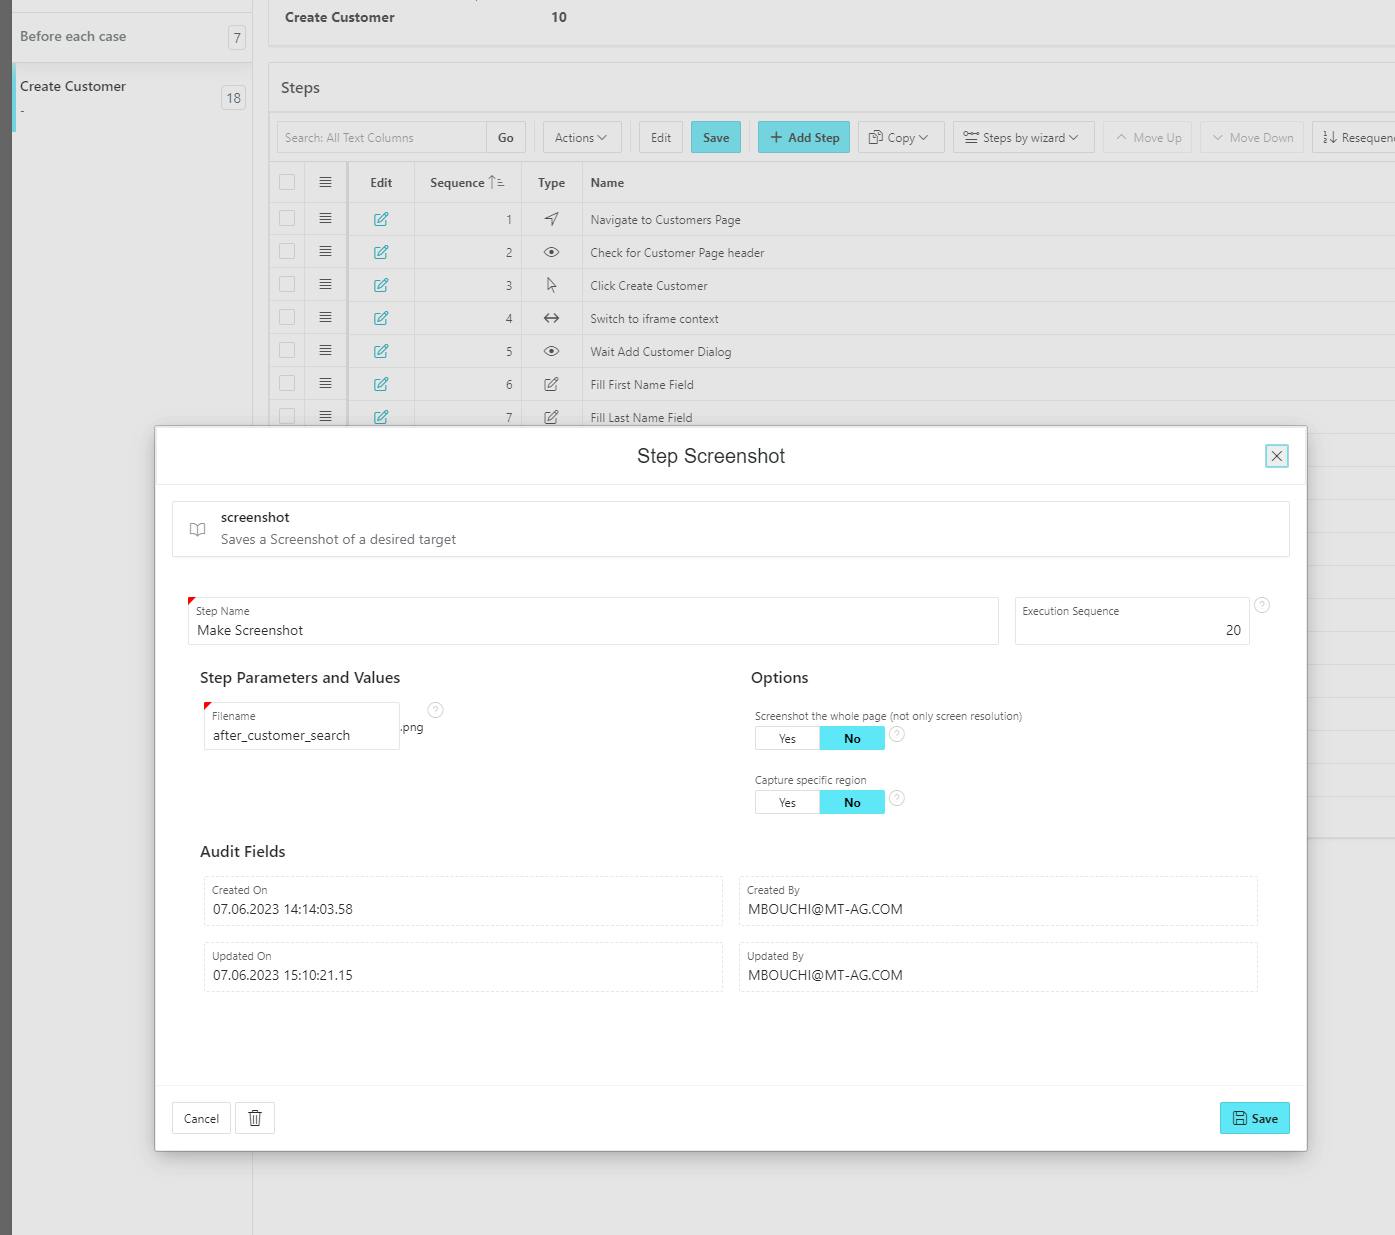
You can optionally add a step at the end of the case to take a screenshot and confirm that you are on the home page. To do that, add a step and search for the "screenShot" helper
Give your screenshot a name and click "Create".
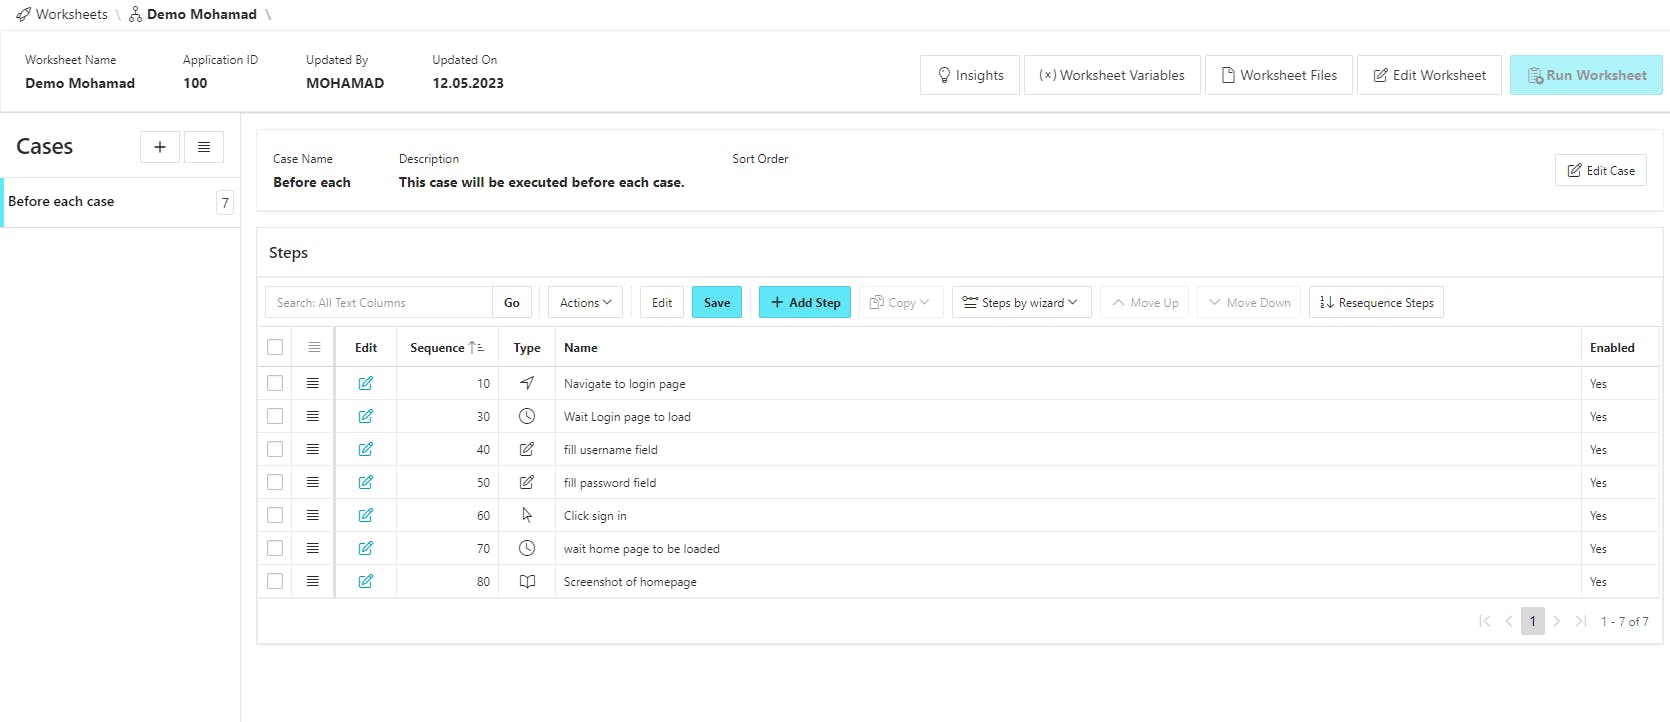
Your "Before each case" should have seven steps at the end.
Create User Test-Case
Next, add a new empty case, give it a name and click Create. This case would be for testing the create customer workflow.
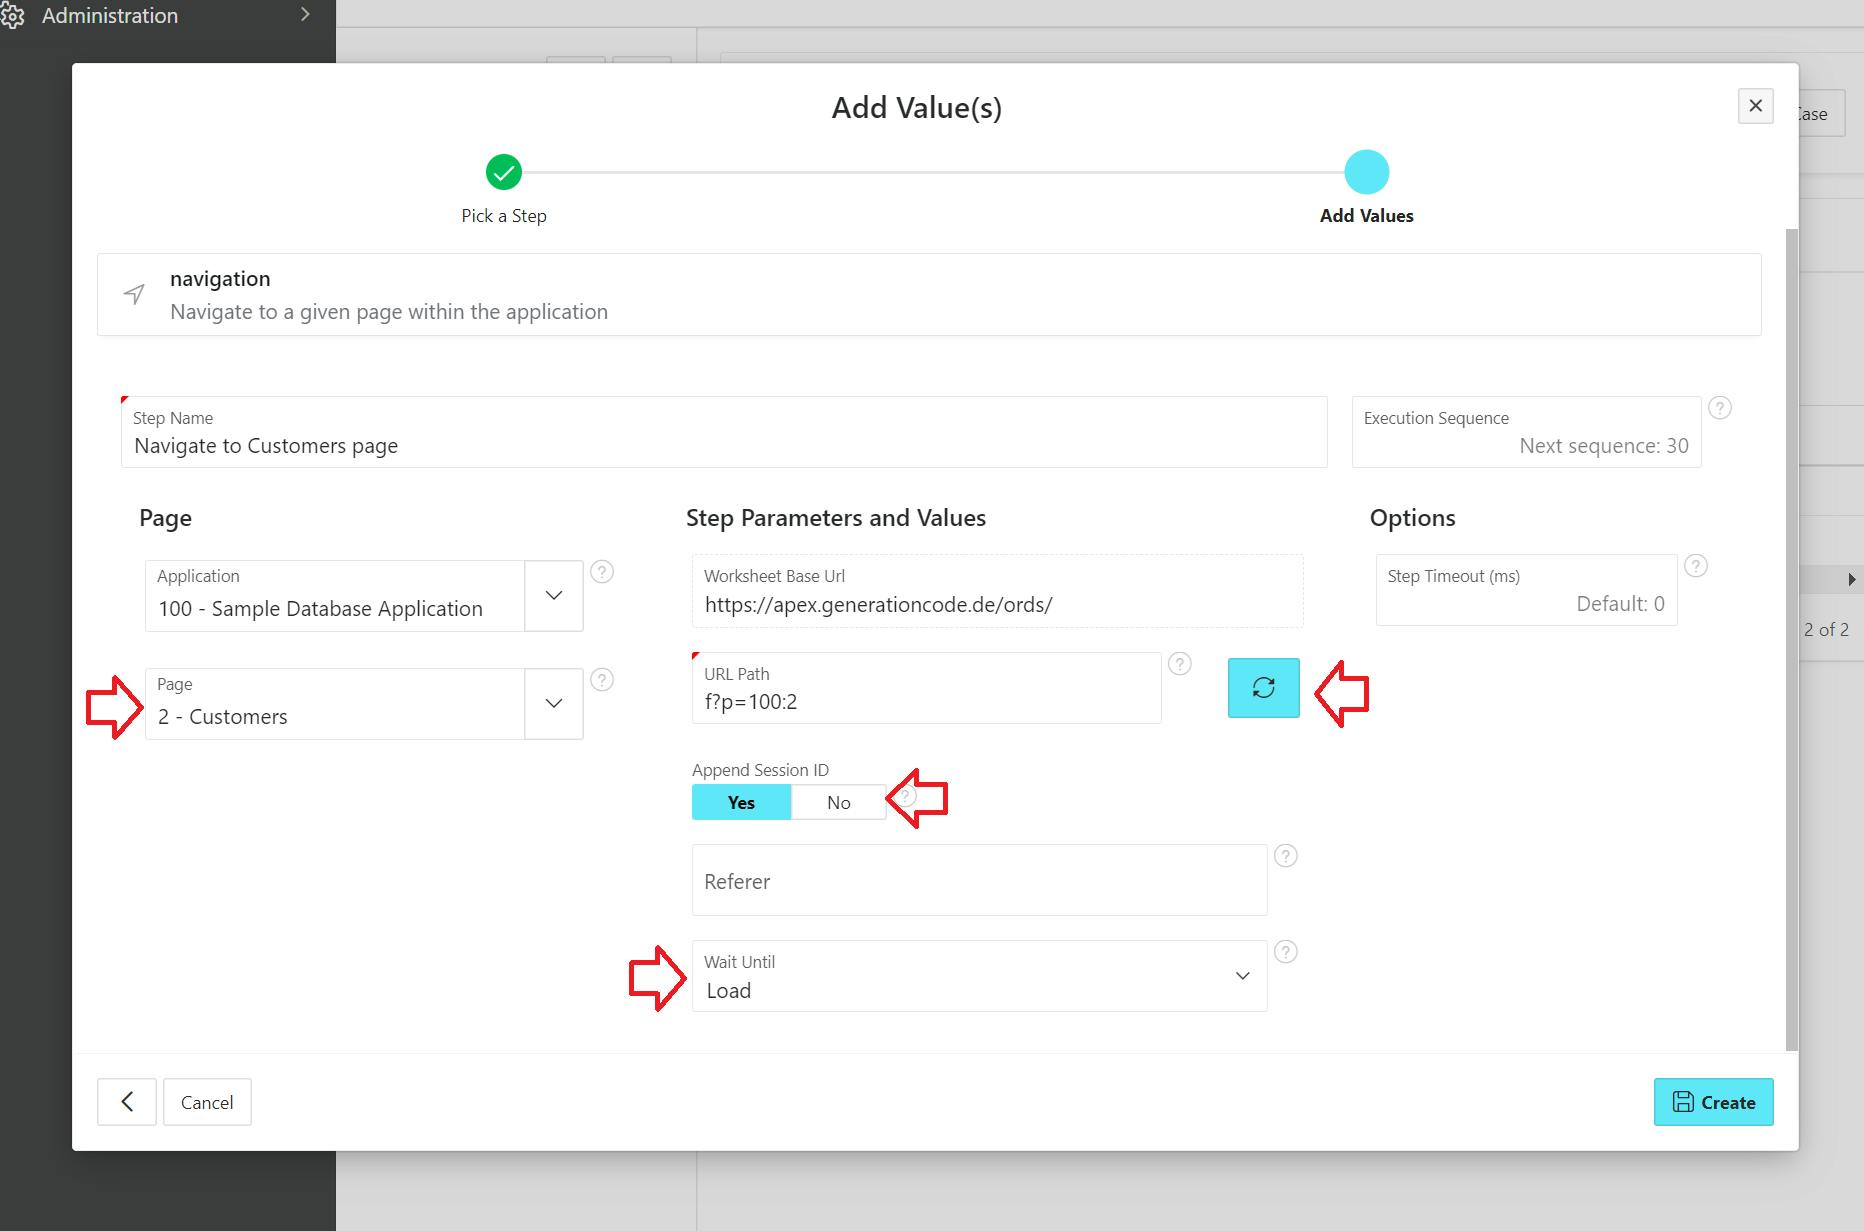
The first step here is to navigate to the Customers page, so add a new step and search for the "Navigation" helper then choose the "Customers" page from the dropdown list and make sure to append the session ID by choosing "Yes" from the switch. Click Generate URL path and then click "Create".
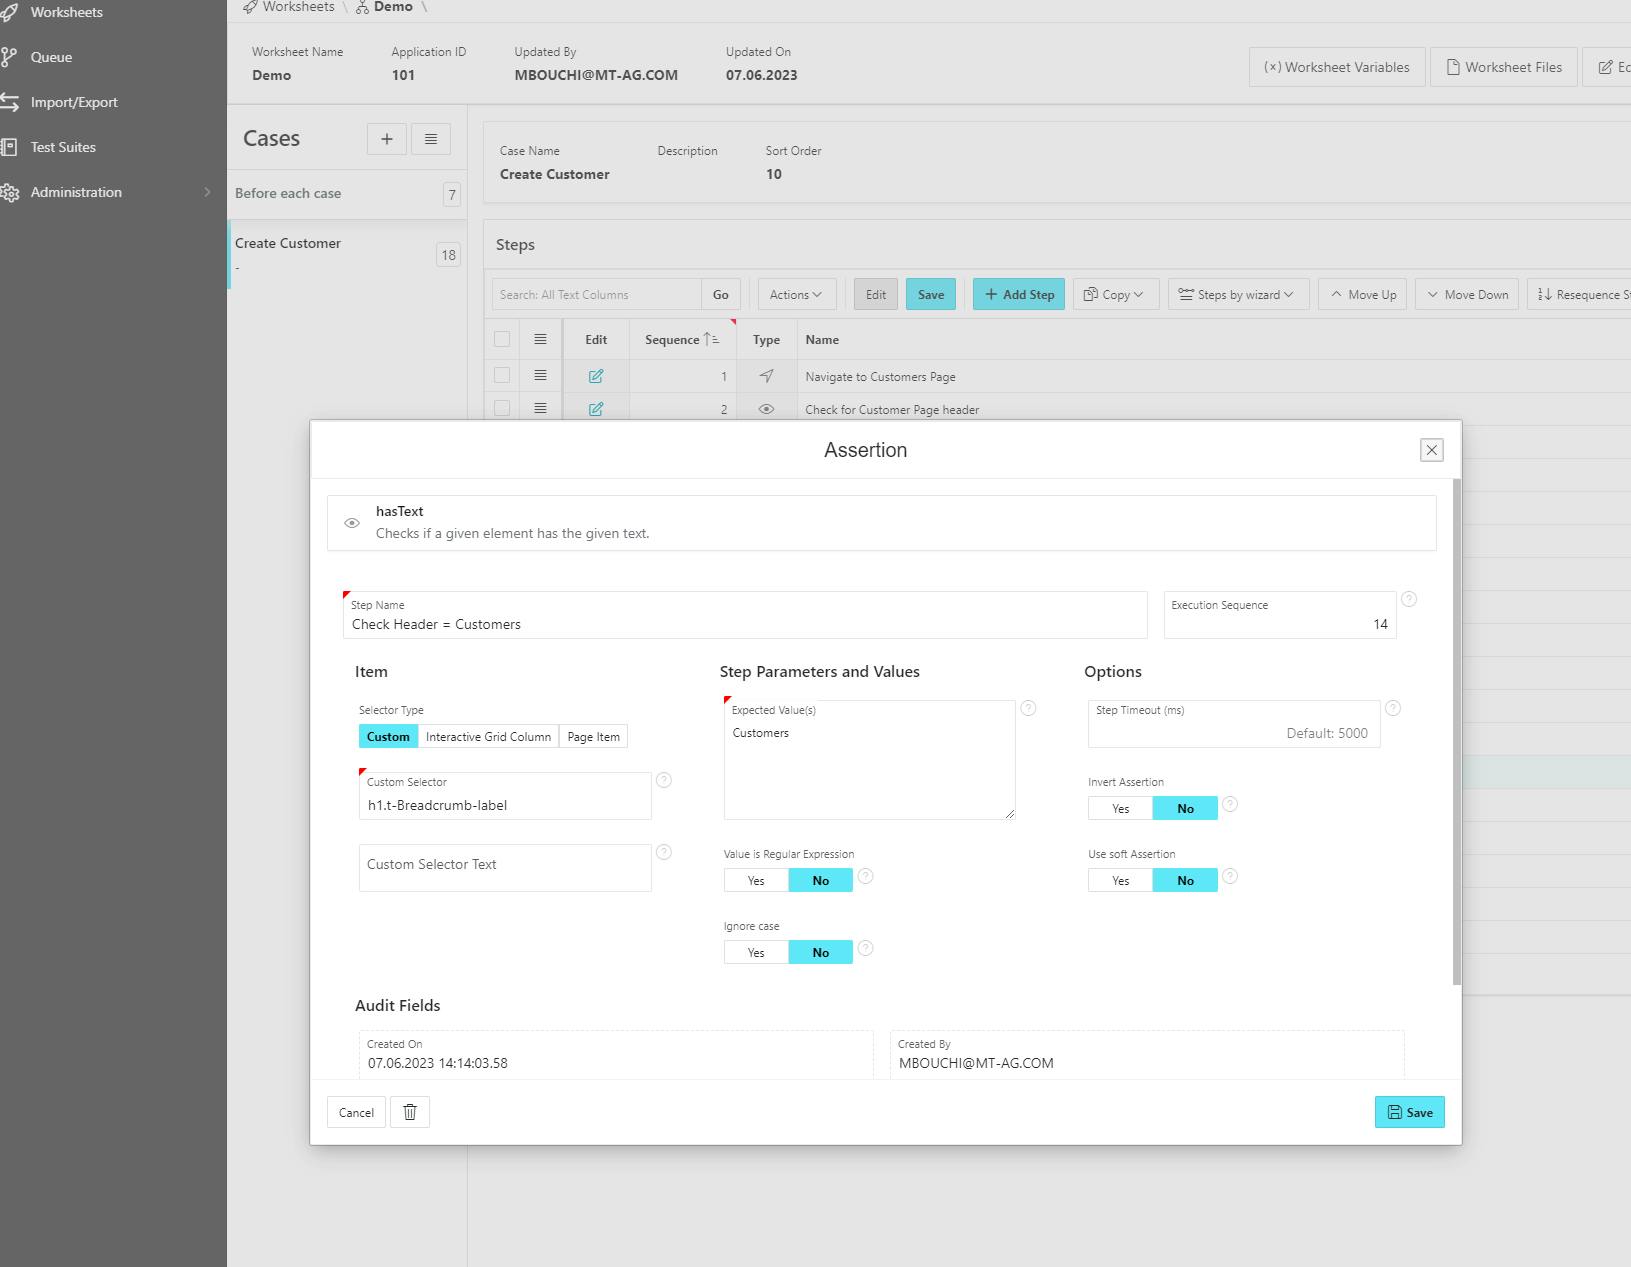
Again let's wait till the "Customers" page is fully loaded, this time we wait for a custom selector (You can get the selector using the browser DevTool).
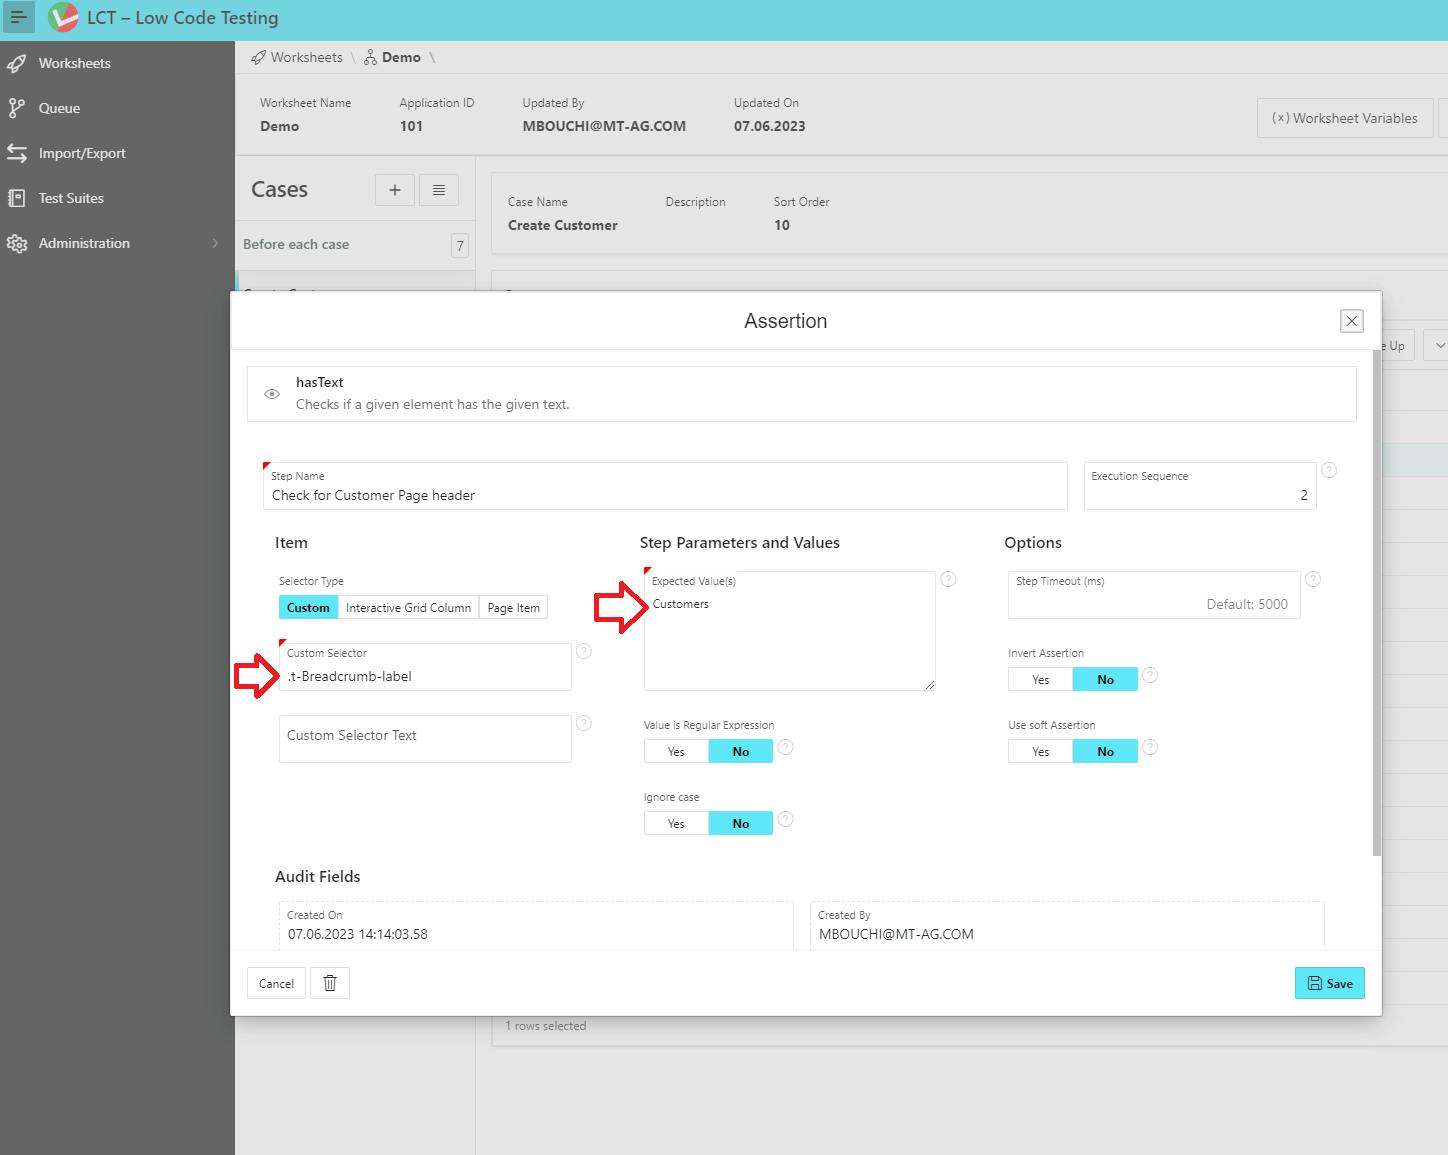
Notice, here we are waiting for the "Customer" word in the breadcrumb.
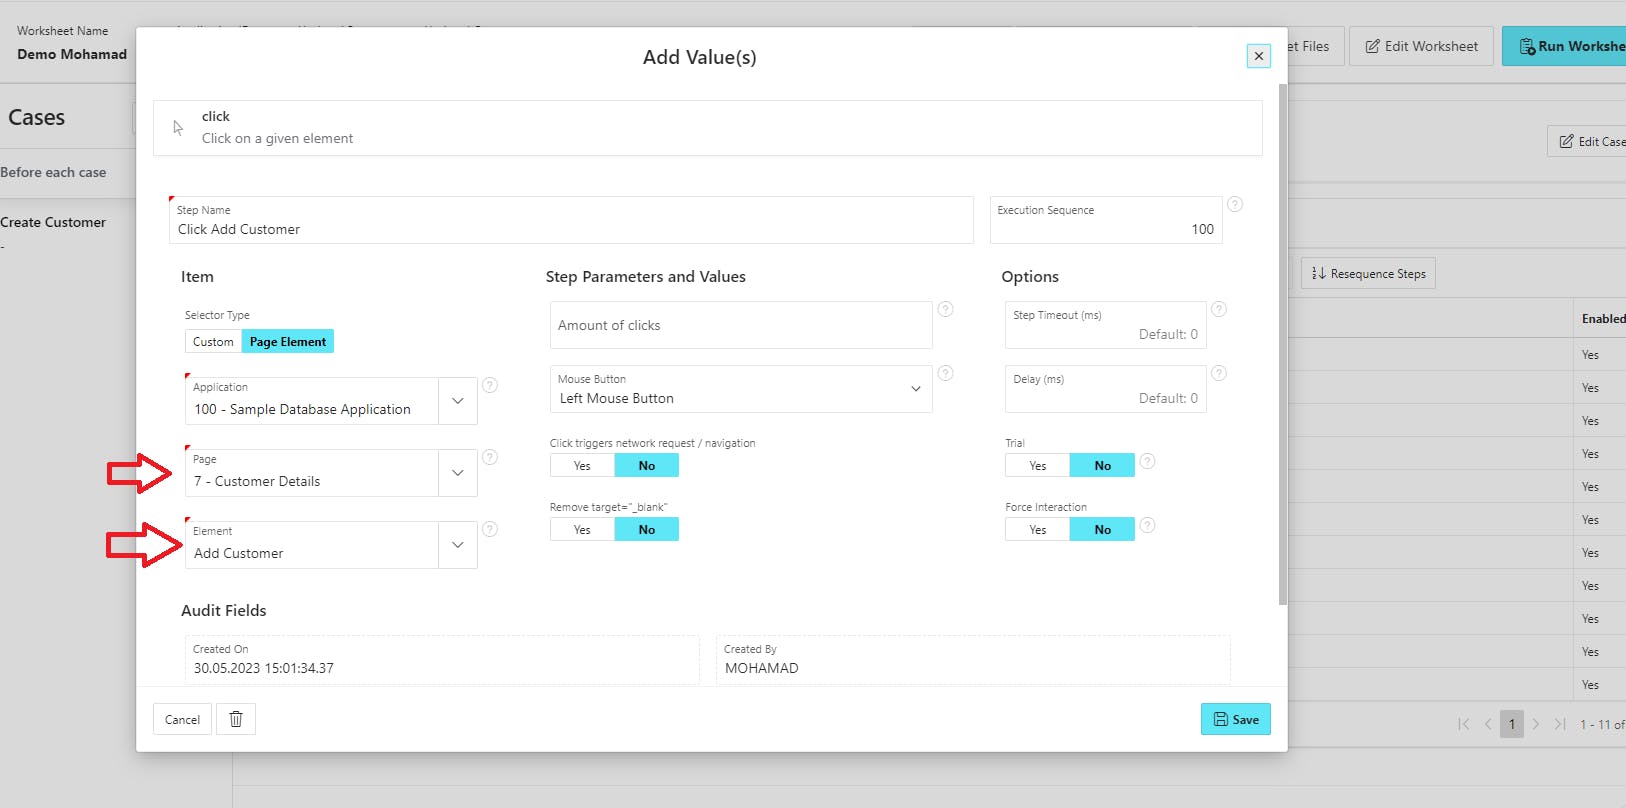
After we navigated to the Customers page, we now will have to click the "Create Customer" button.
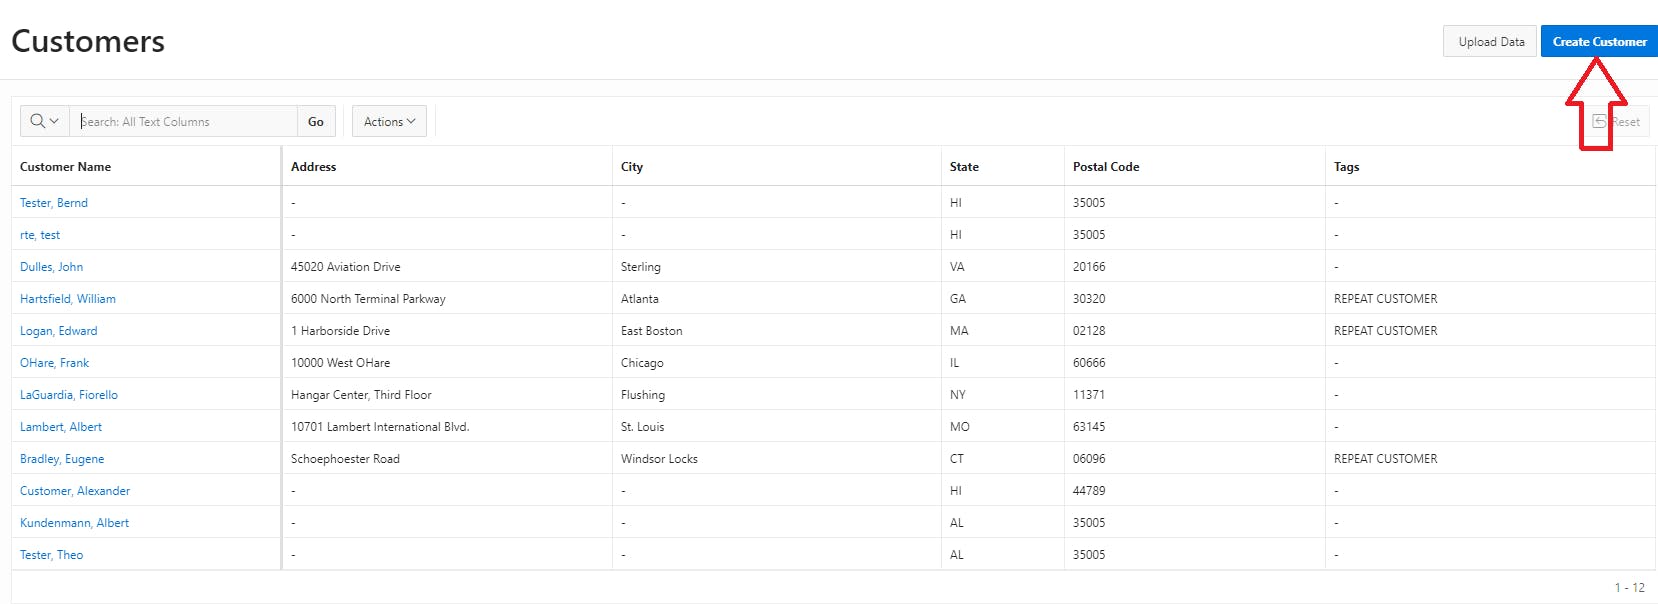
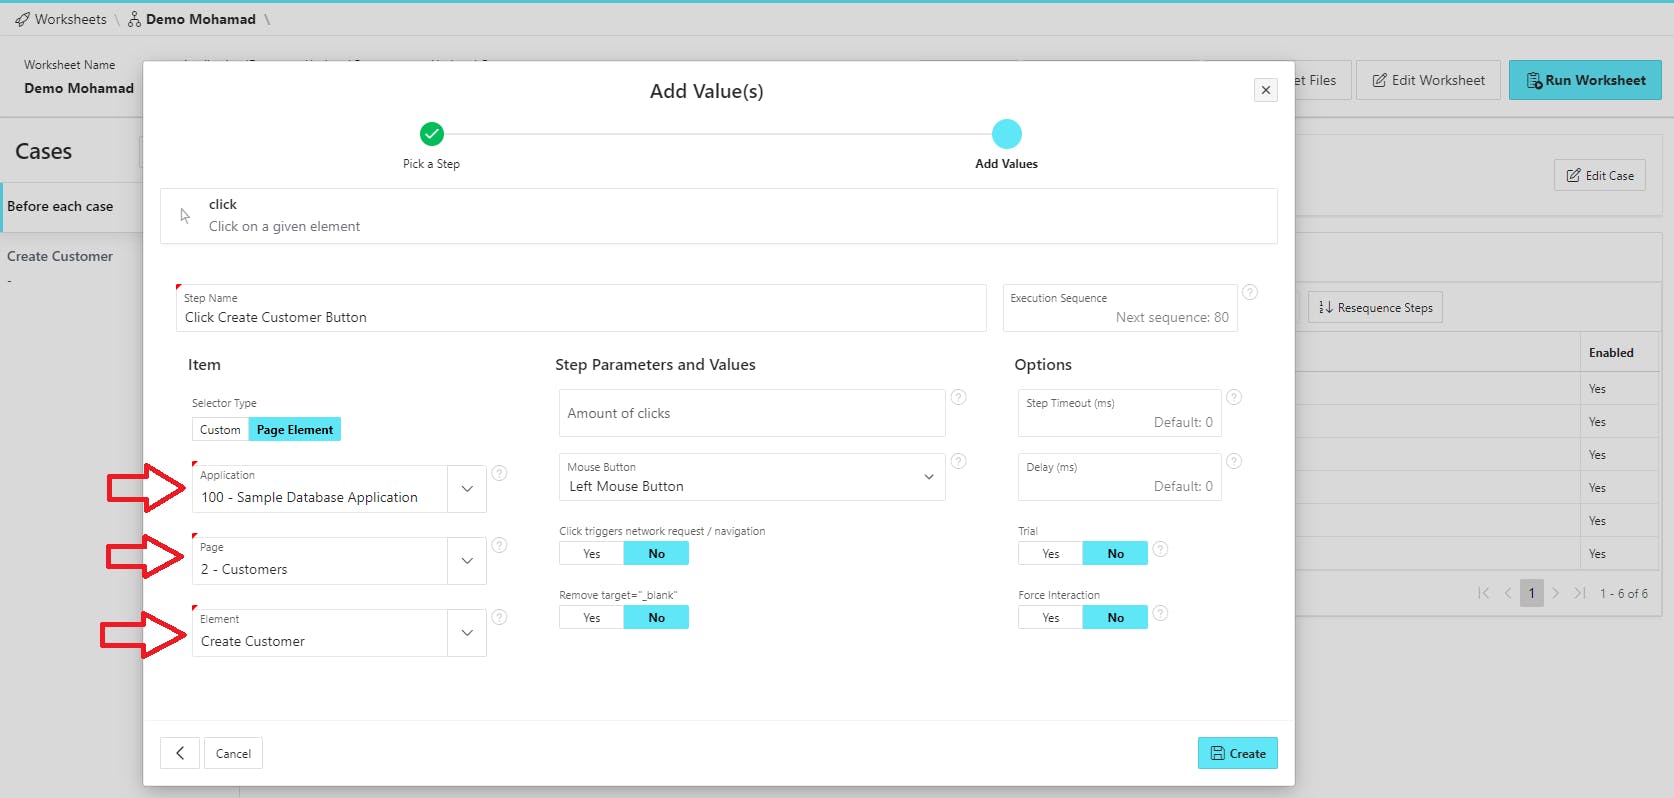
Clicking a button using LCT is as easy as adding only one step. So add a new step, choose the click helper and select the button you want to be clicked from the dropdown menu (Thanks to LCT which allows us access to the metadata of our applications).
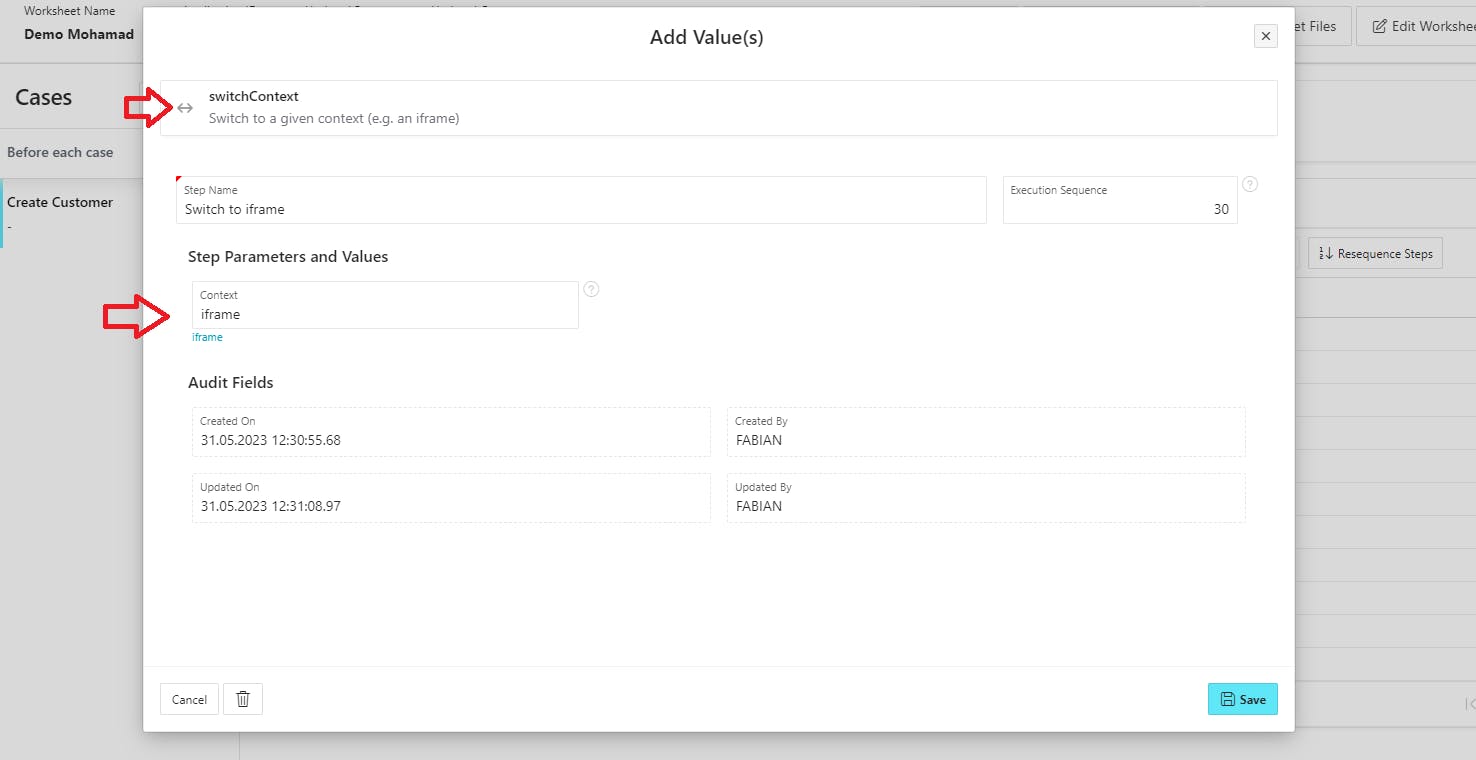
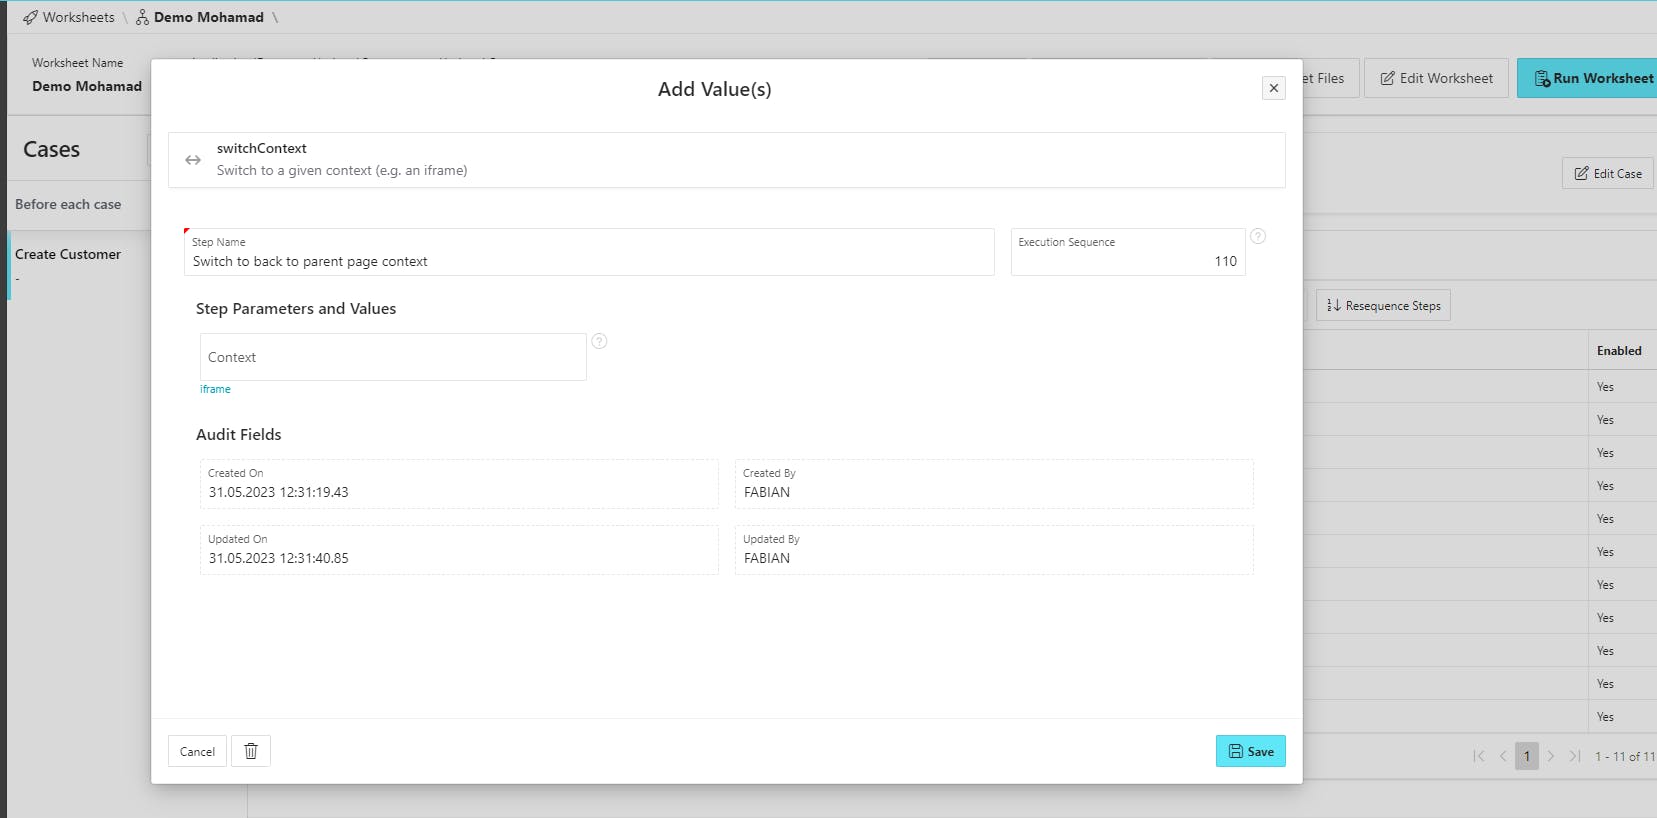
The dialog will open in a new "iframe" so we should switch the context from the parent page to the "iframe" to be able to interact with the elements in the dialog. To do that in LCT we have a "switchContext" helper, so add a new step and search for the helper, choose the context you want to switch into and hit "Save".
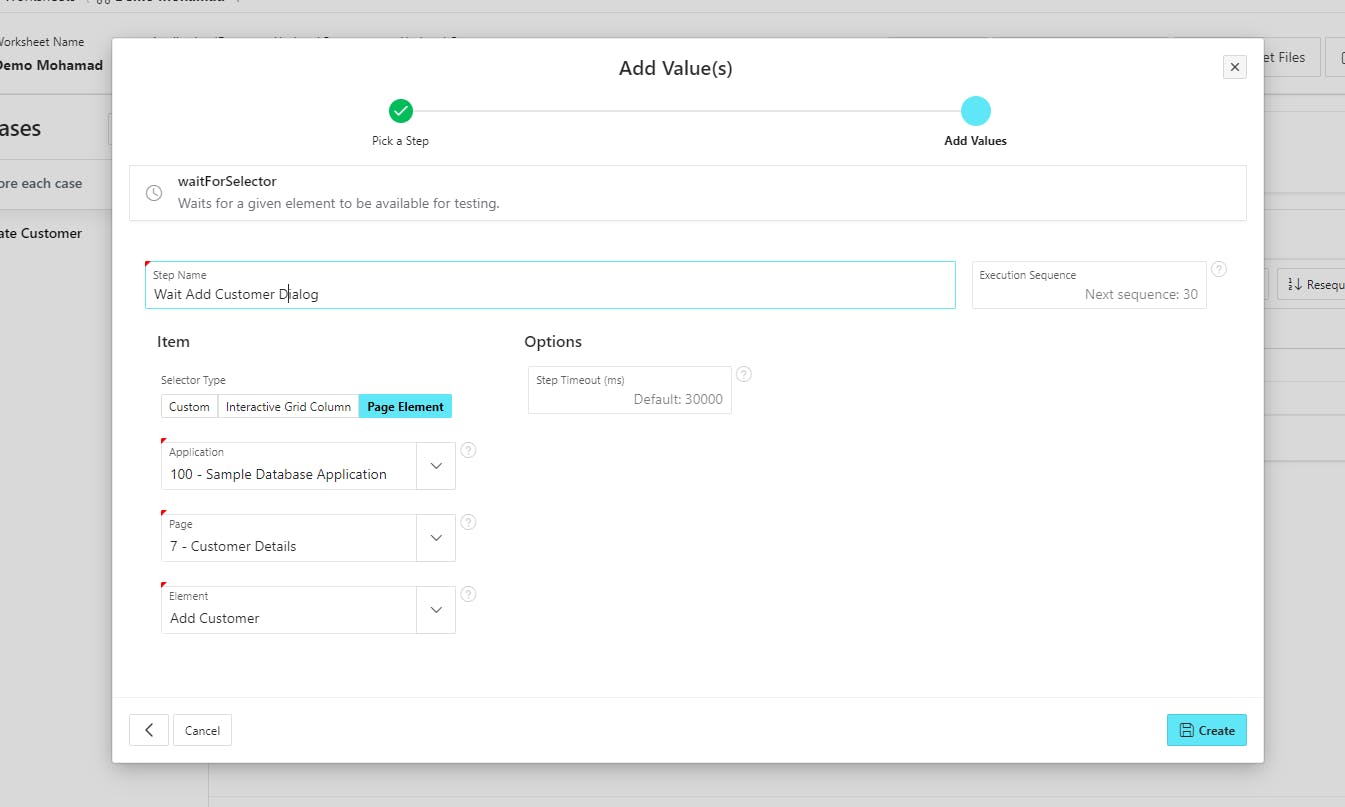
Before we start filling out the new Customer form, we should make sure that the dialog has been successfully loaded.

For that add a new step and select the "waitForSelector" helper and wait for the "Add Customer" button.
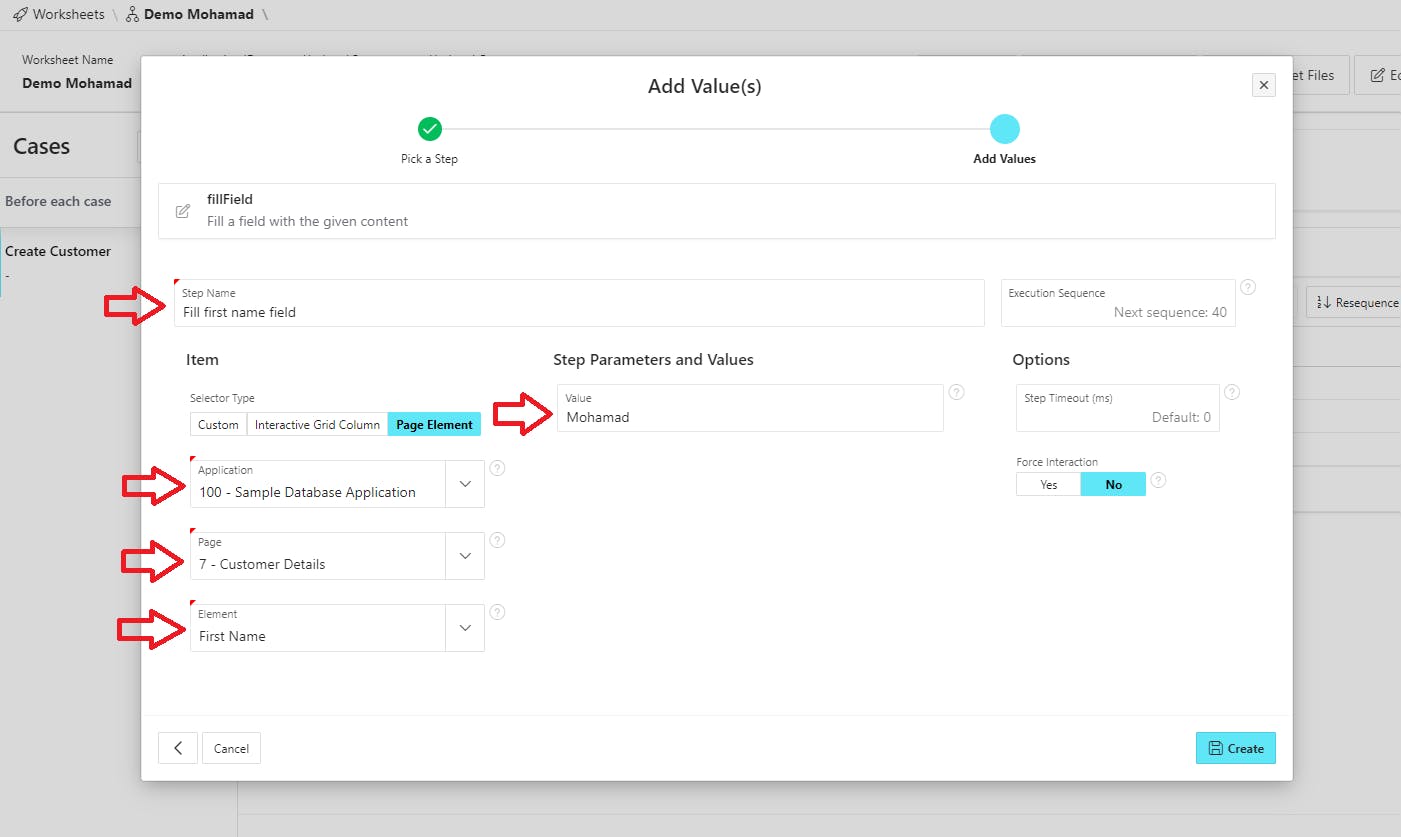
Now we can fill out the form, we will only fill out the required fields. So add a new step and select the "fillField" helper. Give the step a name and select the "First Name" field from the dropdown and give it a value then click "Create".
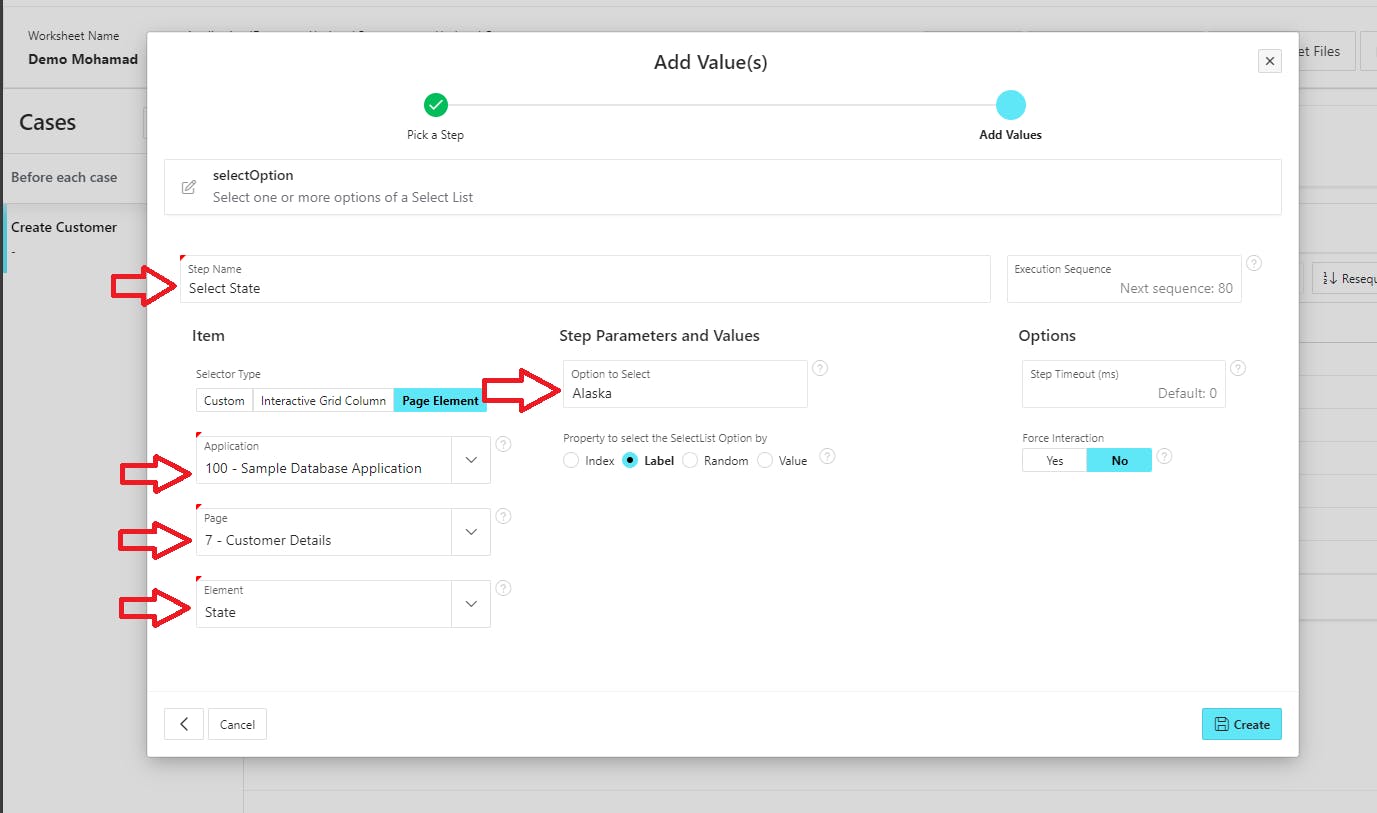
Do the same for all the required fields. For the State field choose the "selectOption" helper because this field is a select list, then choose the "State" element. You can choose an option in different ways, using the index, the value or the label. We will choose an option using the label because it is easier to maintain.
Now we can hit the "Add Customer" button by adding a click step.
In the same way, when we opened the dialog we needed to switch the context to the "iframe", now we will do the opposite, we will switch the context back to the parent page when the dialog closes, but here we leave the "Context" field empty.
We make sure again that the "Customers" page has been fully loaded.
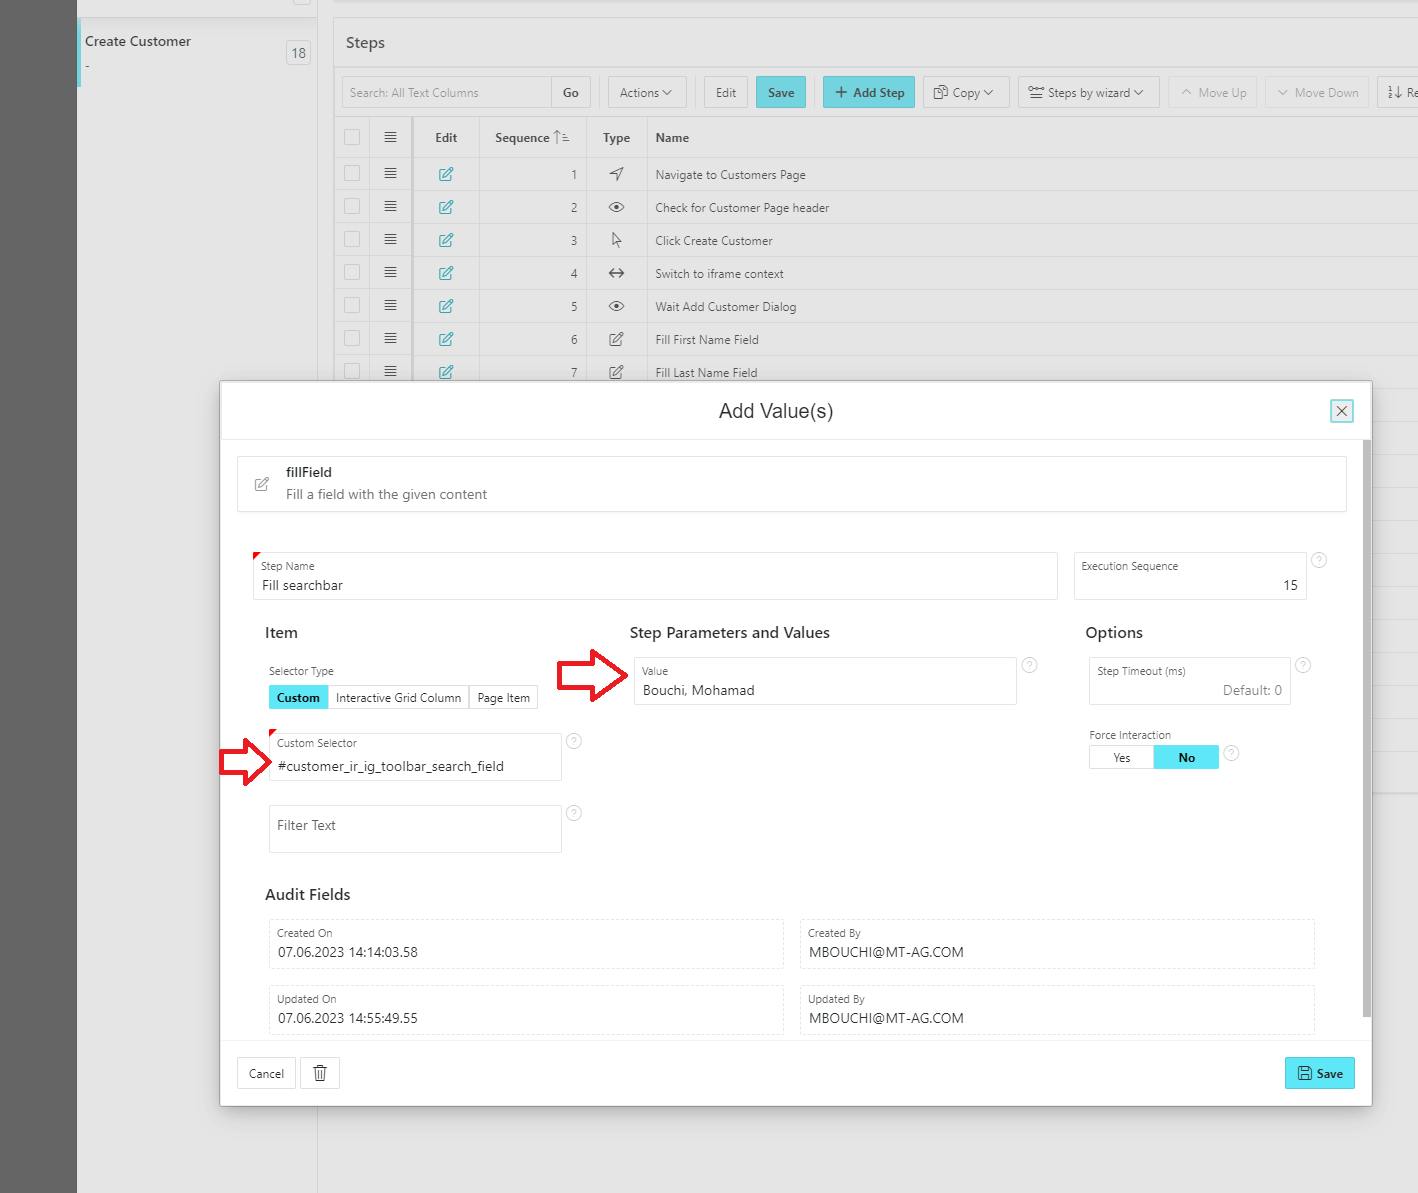
Last step we need to verify that the new customer has been successfully added. To do that we will search for the added customer in the Interactive grid on the "Customers" page. We will access the search field associated with the IG and search for our customer.
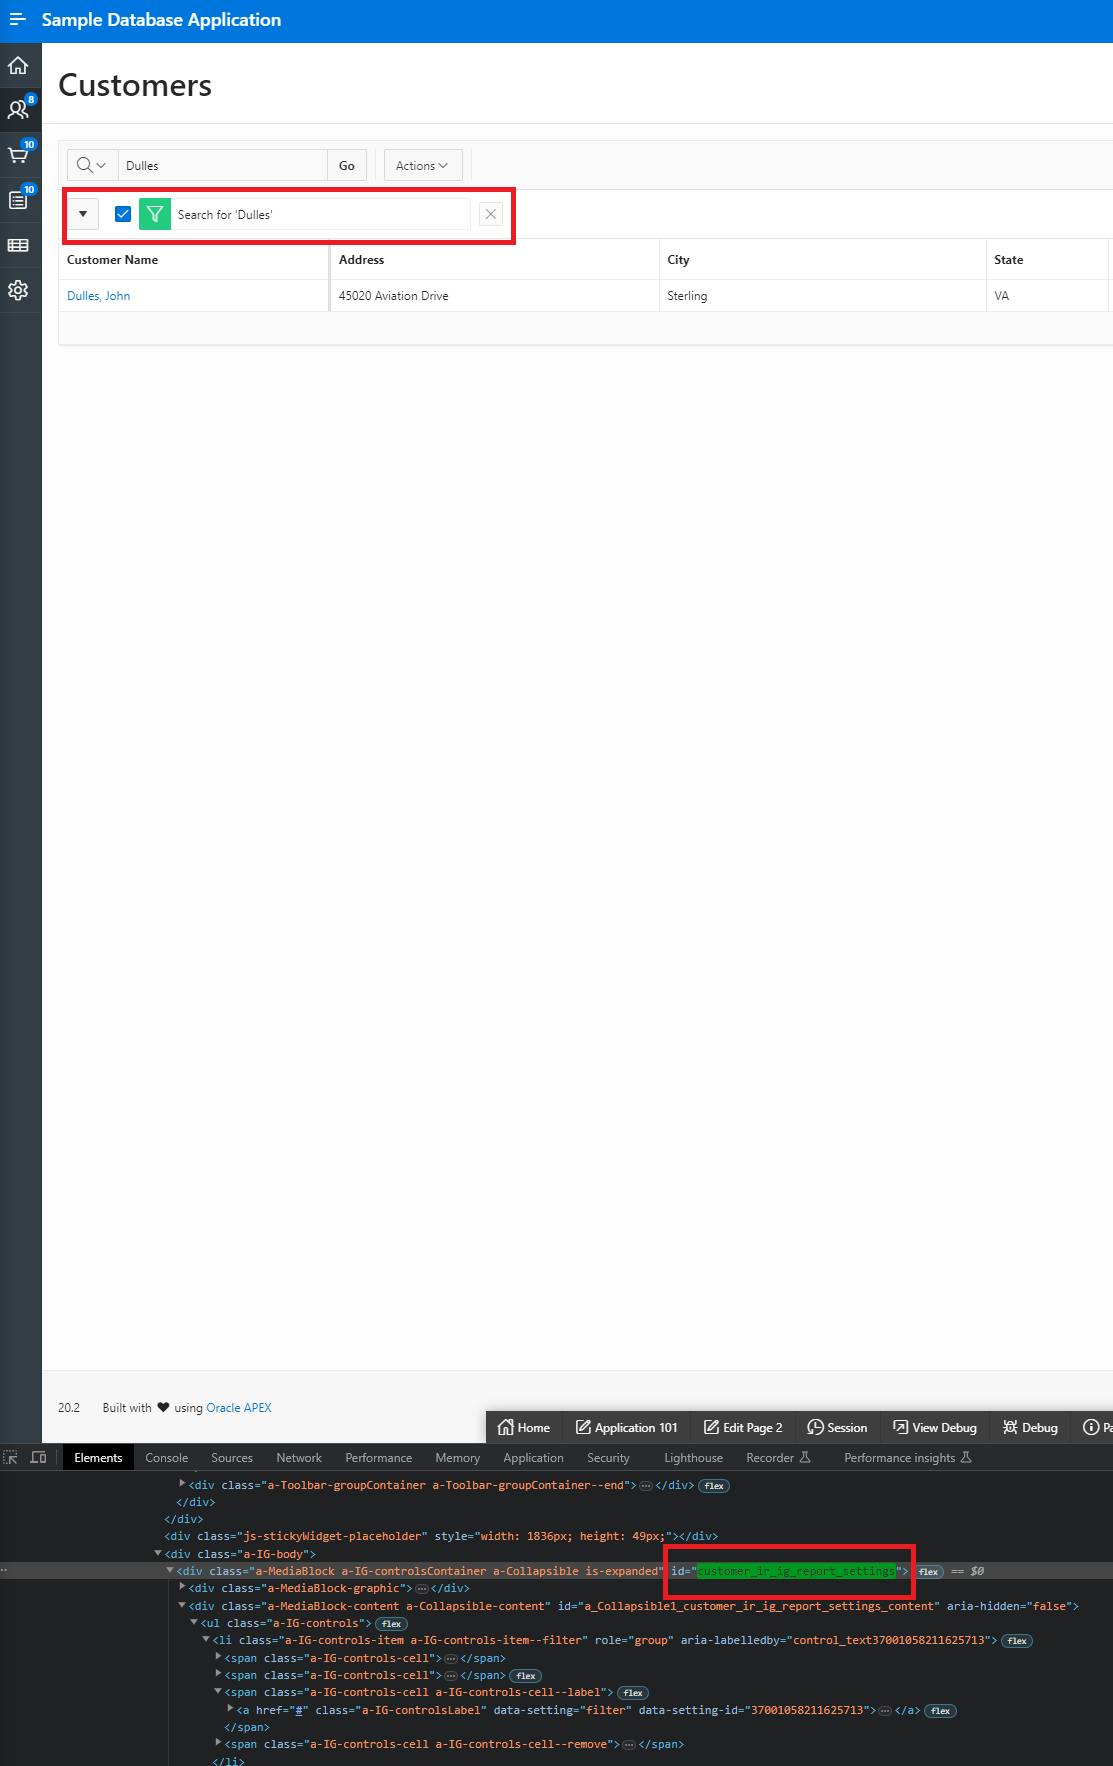
To do that, get the selector of the "Search Field" using the browser dev tool.

We use the static ID of the input element, now add a "fillField" step.
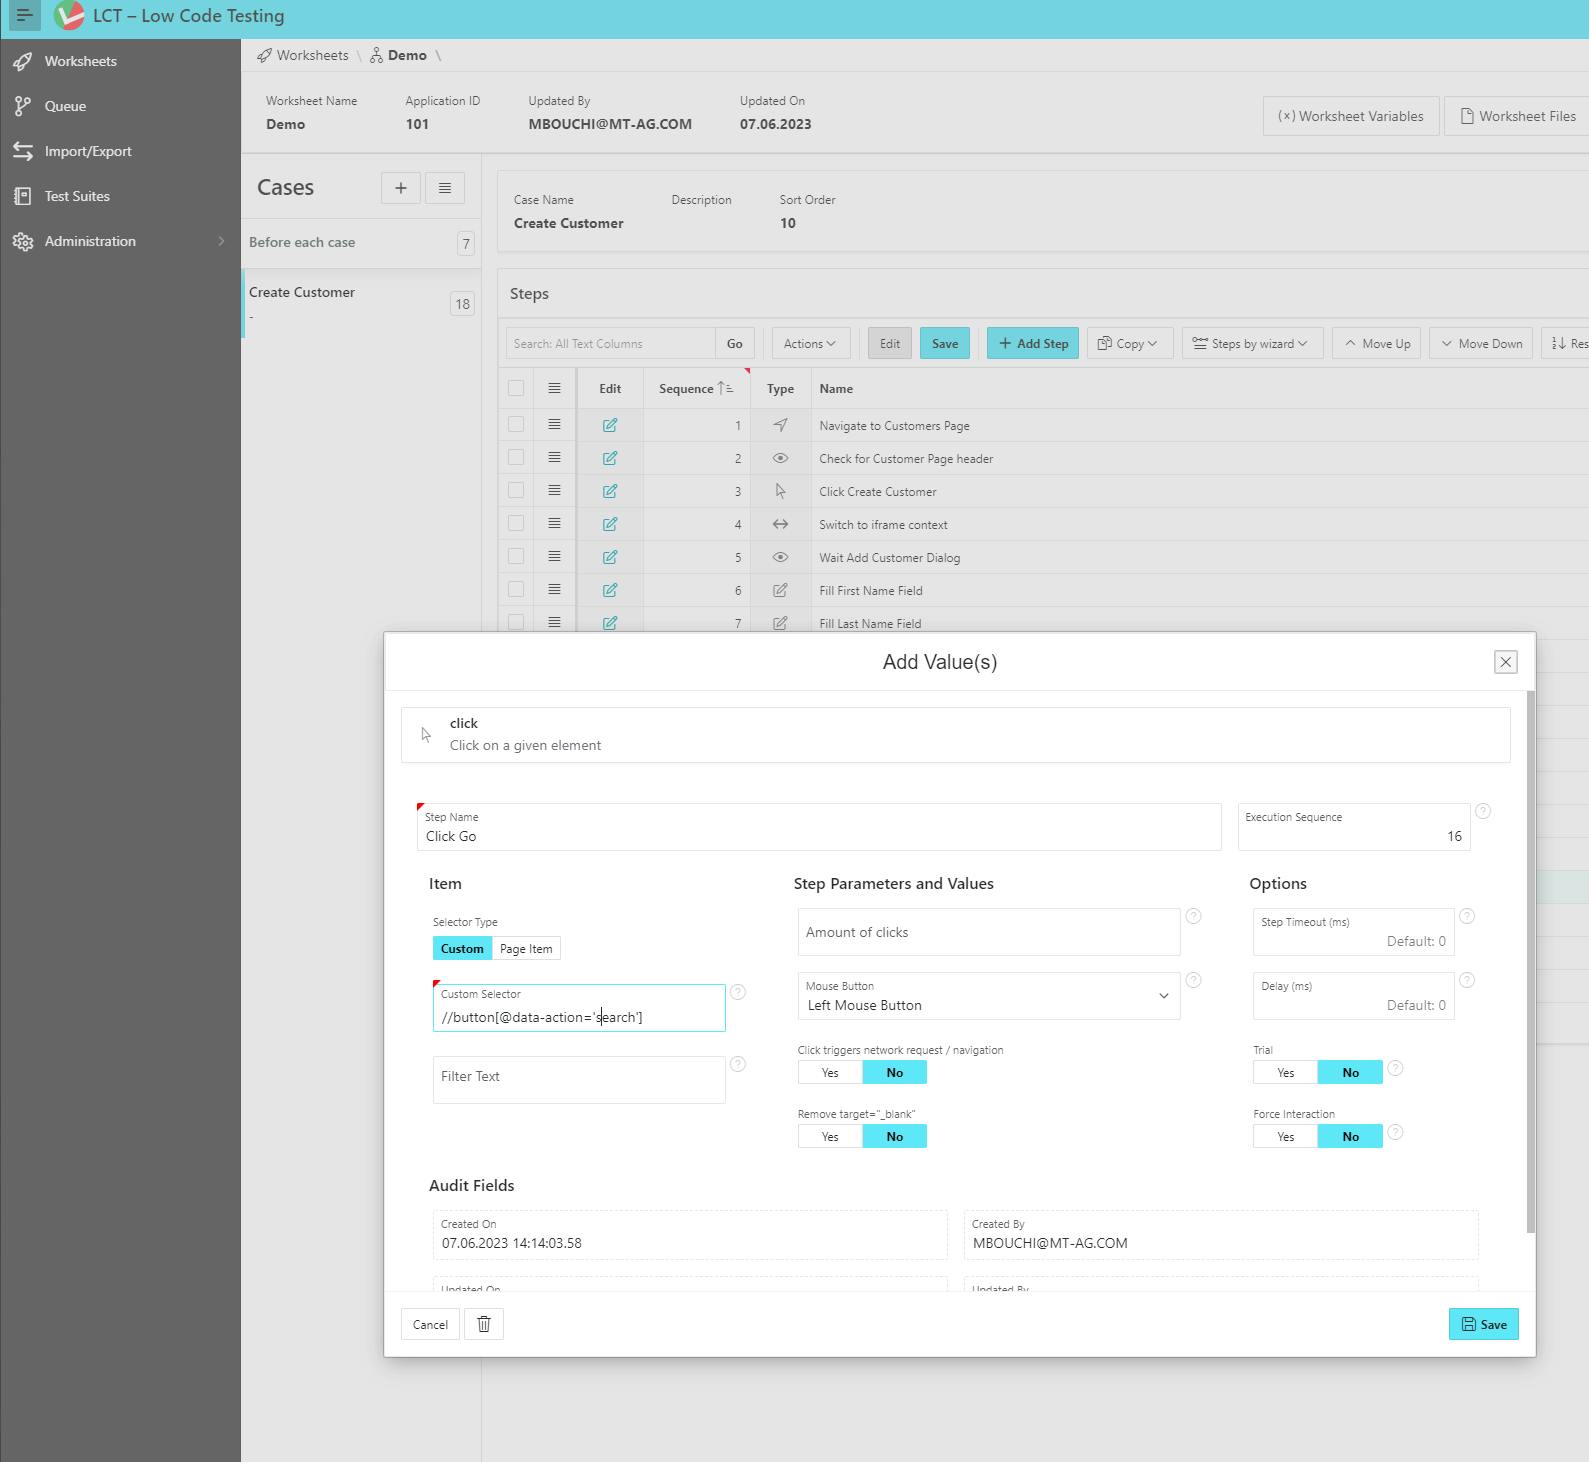
To click the "Go" button that will fire the "Search" process, we also need to get the selector of the button. However, the "Go" button does not have a static ID that we can use, we could use the class selector but instead, we will access the button using the "XPath" selector.
Add a new "Click" step and use "Custom" selector
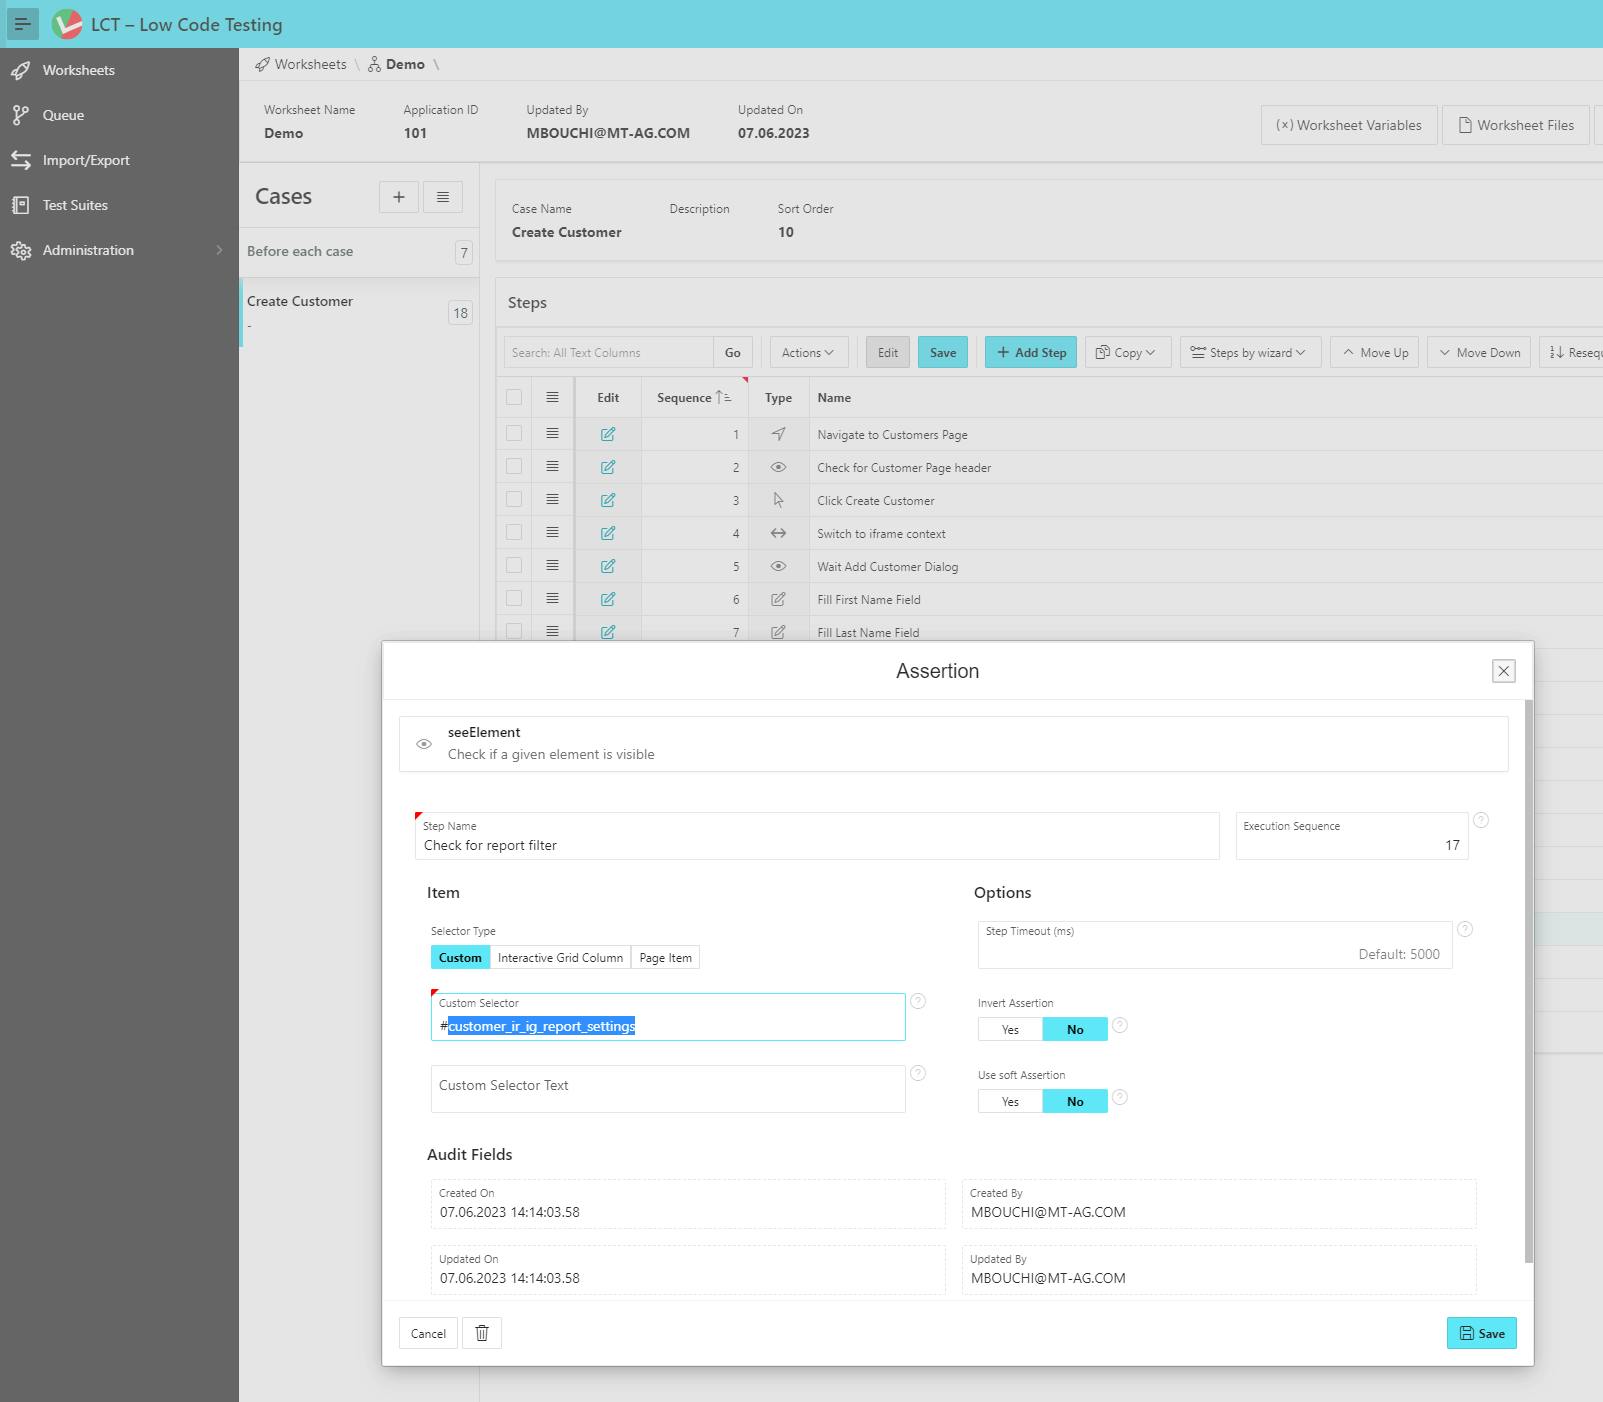
After we click the "Go" button we can additionally check if the filter has been successfully applied by using the "seeElement" helper.
Finally, we check the result of the search, we should get one record back. We will use the "Customer Name" column to check if it has our customer. LCT offers a helper to access a column in an IG, so let's use it. Add a new step and search for "InteractiveTableCellHasText" and fill out the form.
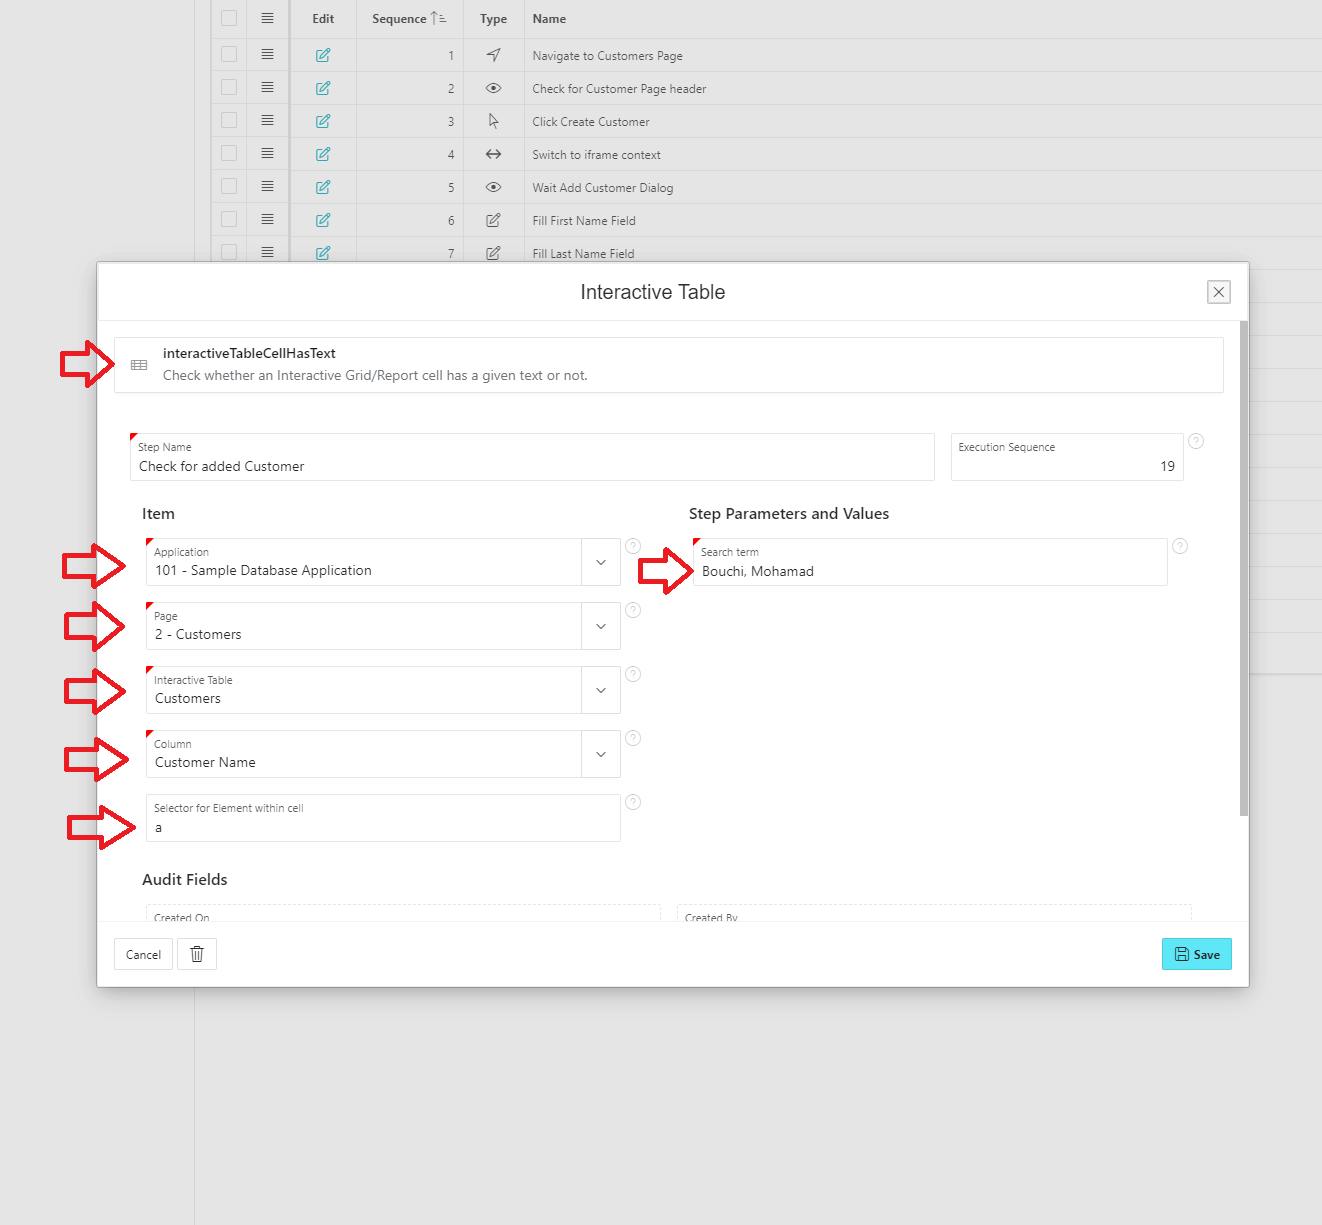
Notice, the Customer name is written within an "anchor" element, so we specify that in our helper.
You can optionally take a screenshot to make sure everything looks like expected.
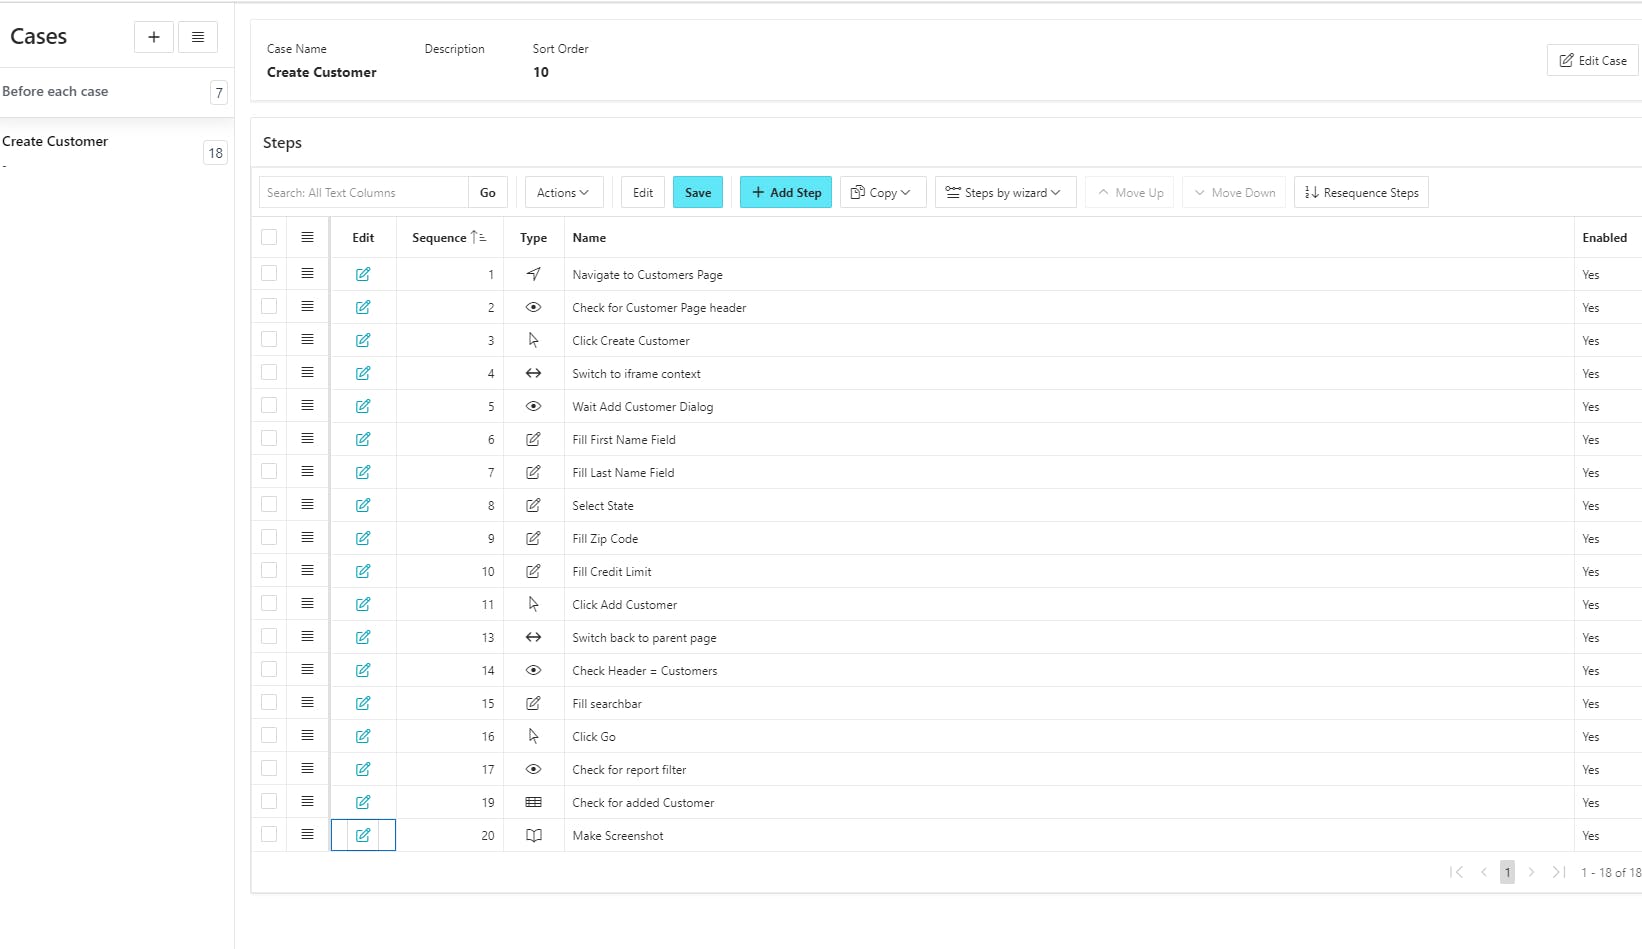
Your "Create Customer" case should look like this
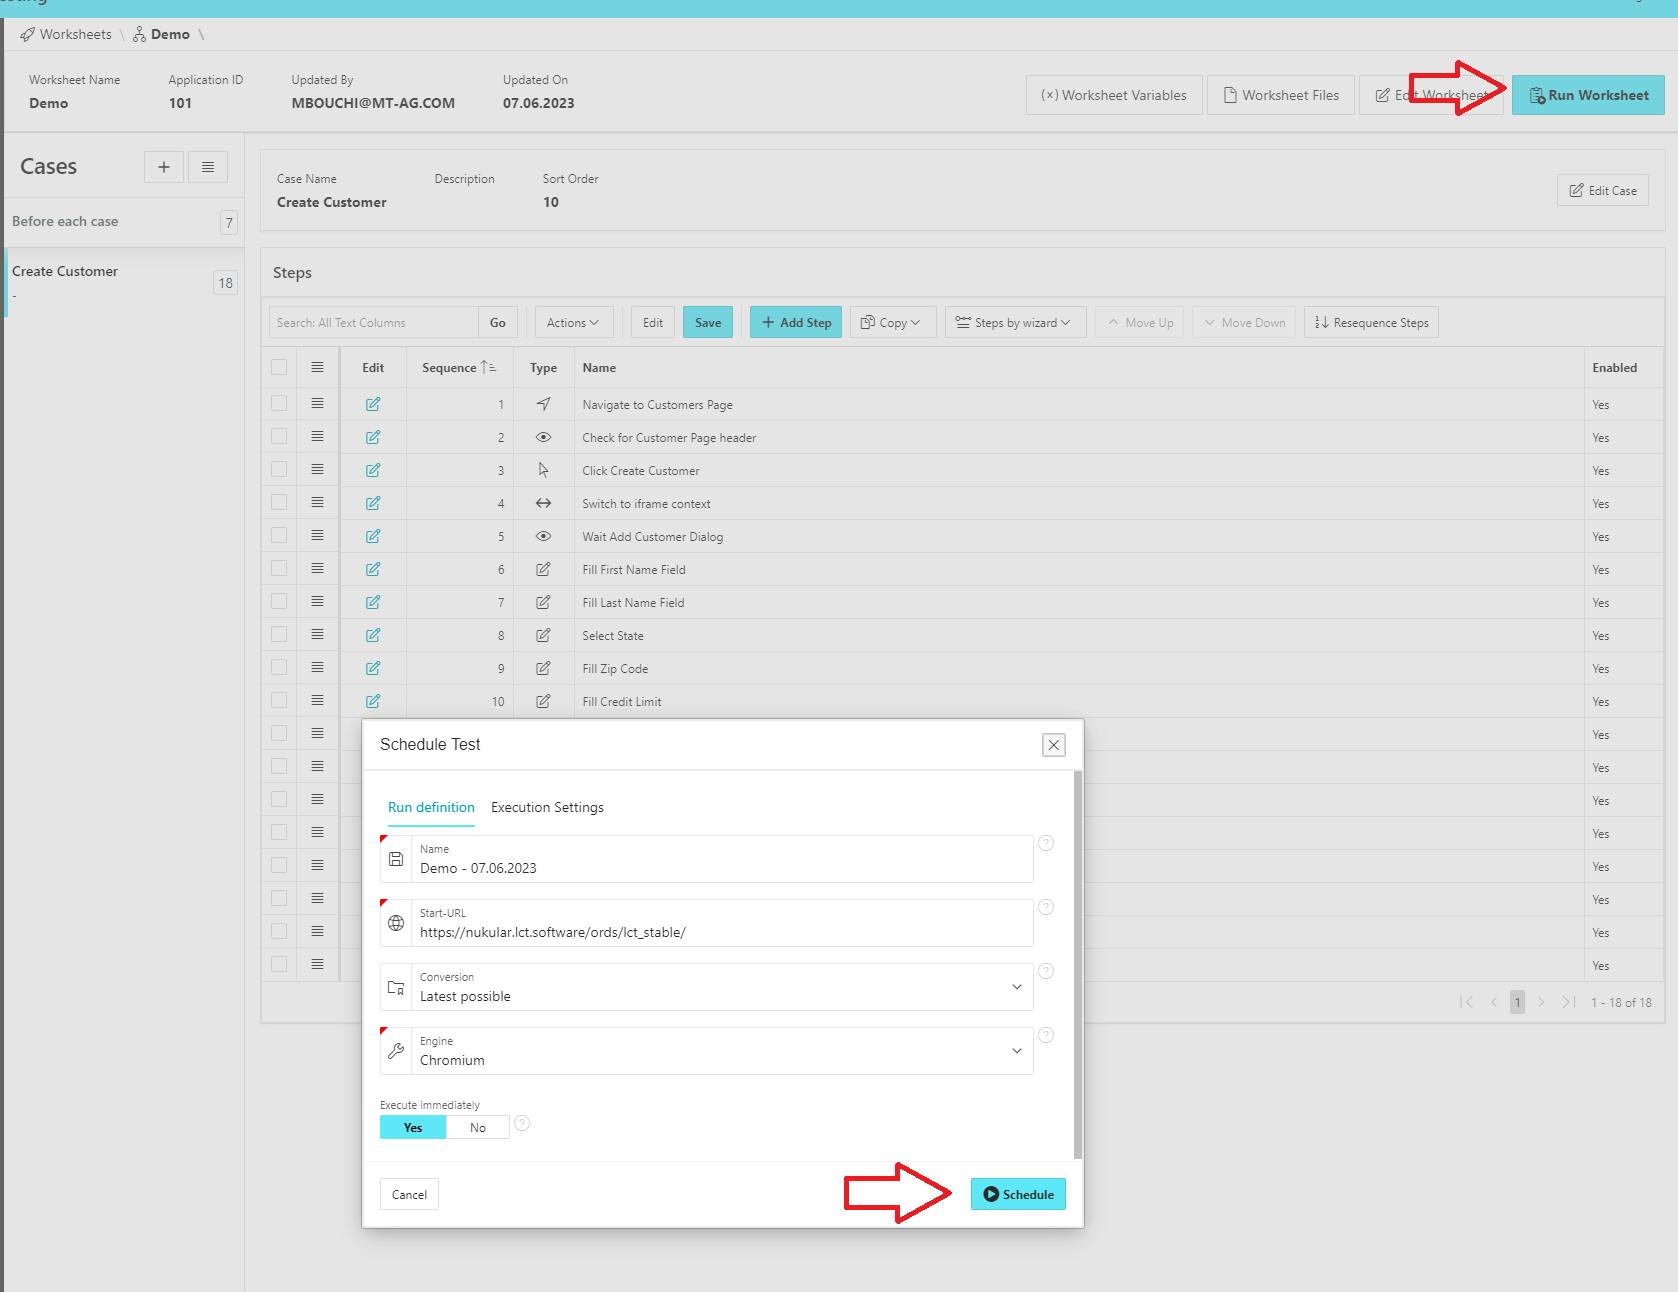
Now, by running the worksheet. LCT will redirect you to the "Queue" page where you can see all your scheduled worksheets.
By clicking the running worksheet, you can see a Livelog on the right side showing you the current running steps. Clicking on the "eye" icon you can view the screenshots you took.
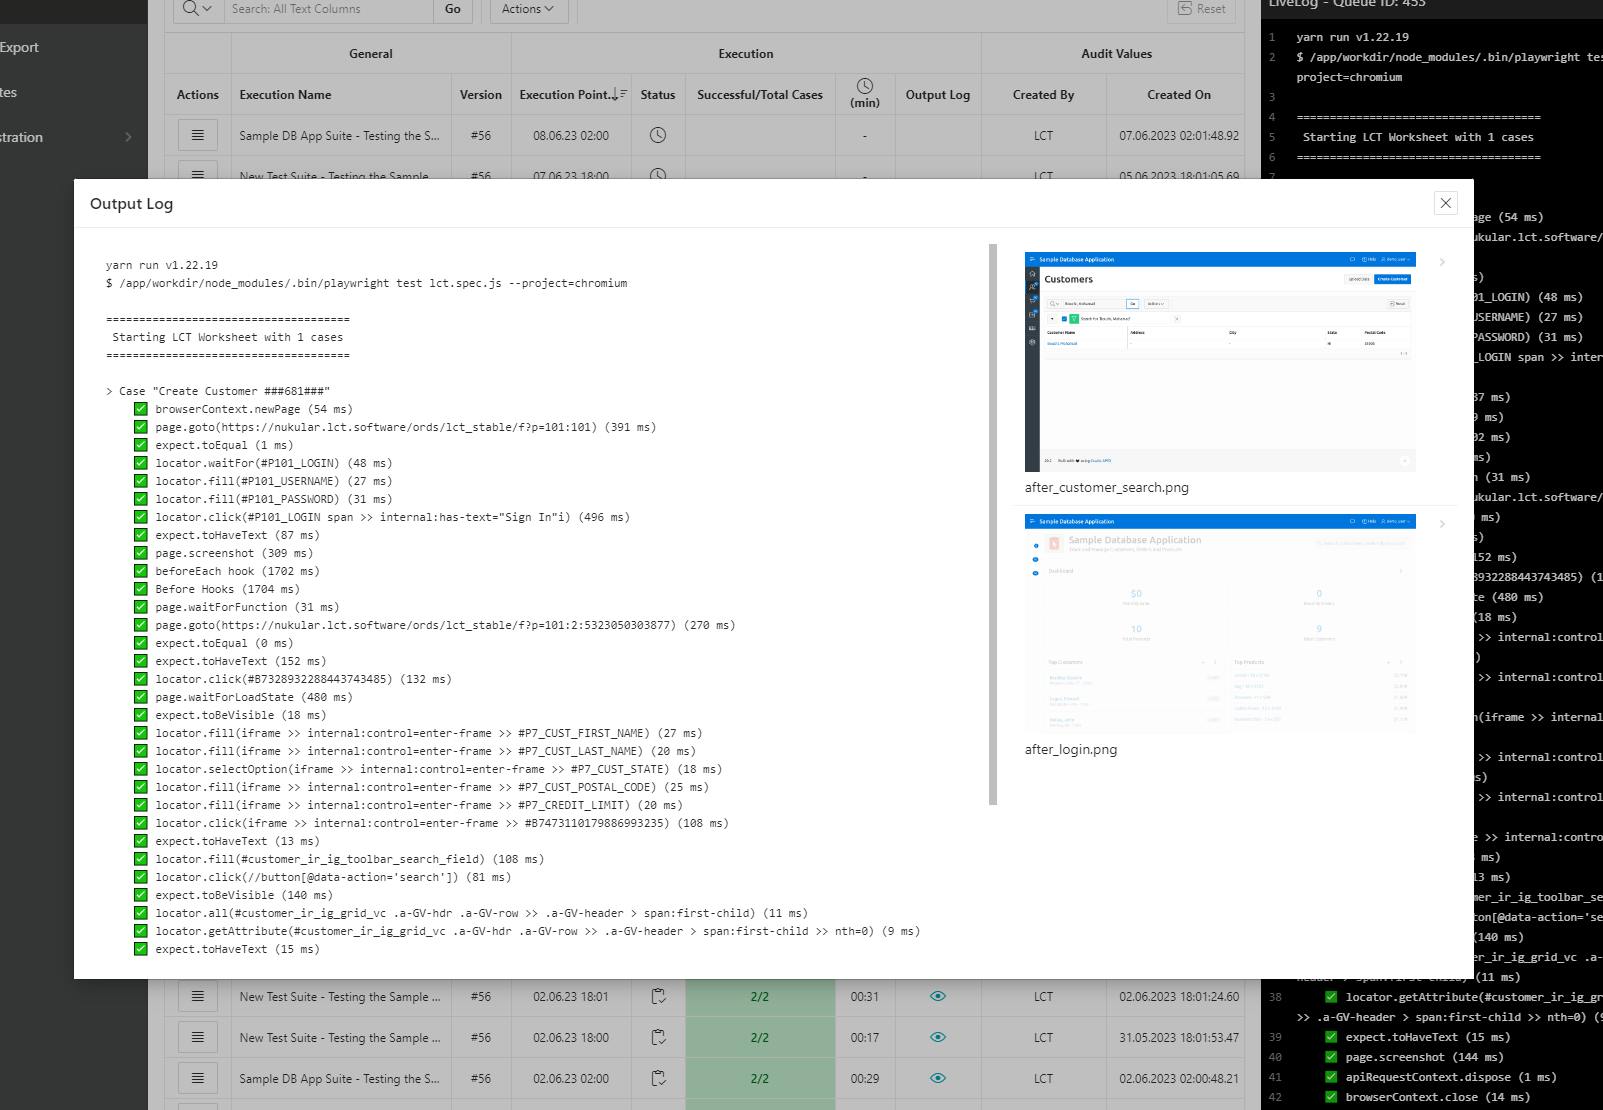
And that's it :) you have successfully created a complete Test scenario for testing the "Create Customer" process.
Conclusion
Software testing is an integral part of the software development lifecycle, ensuring that software applications meet the highest standards of quality, reliability, and security. By conducting thorough testing throughout the development process, organizations can identify and address issues early, enhance user experience, and deliver software solutions that meet customer expectations. As software continues to evolve, the importance of software testing will only grow, making it an indispensable practice for any organization striving to deliver high-quality software products.