


Introduction
With Oracle Cloud Infrastructure, you can provision and manage compute hosts, called Compute Instances. A Compute Instance is a Linux/Windows machine/virtual machine that is created in the cloud with a form that we can use to deploy different services depending on the application requirements. Compute Instances have OCPUs, memory, storage, and boot volume that define the shape of an instance.
There are 3 types of Instances in OCI
Bare Metal (BM) Instance
Gives a dedicated physical server for the Highest performance and strong isolation.
Virtual Machine (VM) Instance
Runs on top of Bare Metal hardware. There is a hypervisor on top of the Bare Metal server to virtualize it in smaller VMs. Ideal for running applications that do not require the performance and resources of an entire physical machine.Dedicated VM Host
Is a combination of Bare Metal and a Virtual Machine. In this multiple VMs are running on Bare Metal and the whole server is dedicated to a single tenant.
Free Tier
With the free cloud tier, you get 2 AMD-based Compute VMs, each with 1/8 OCPU and 1 GB of memory.
Provision an Instance
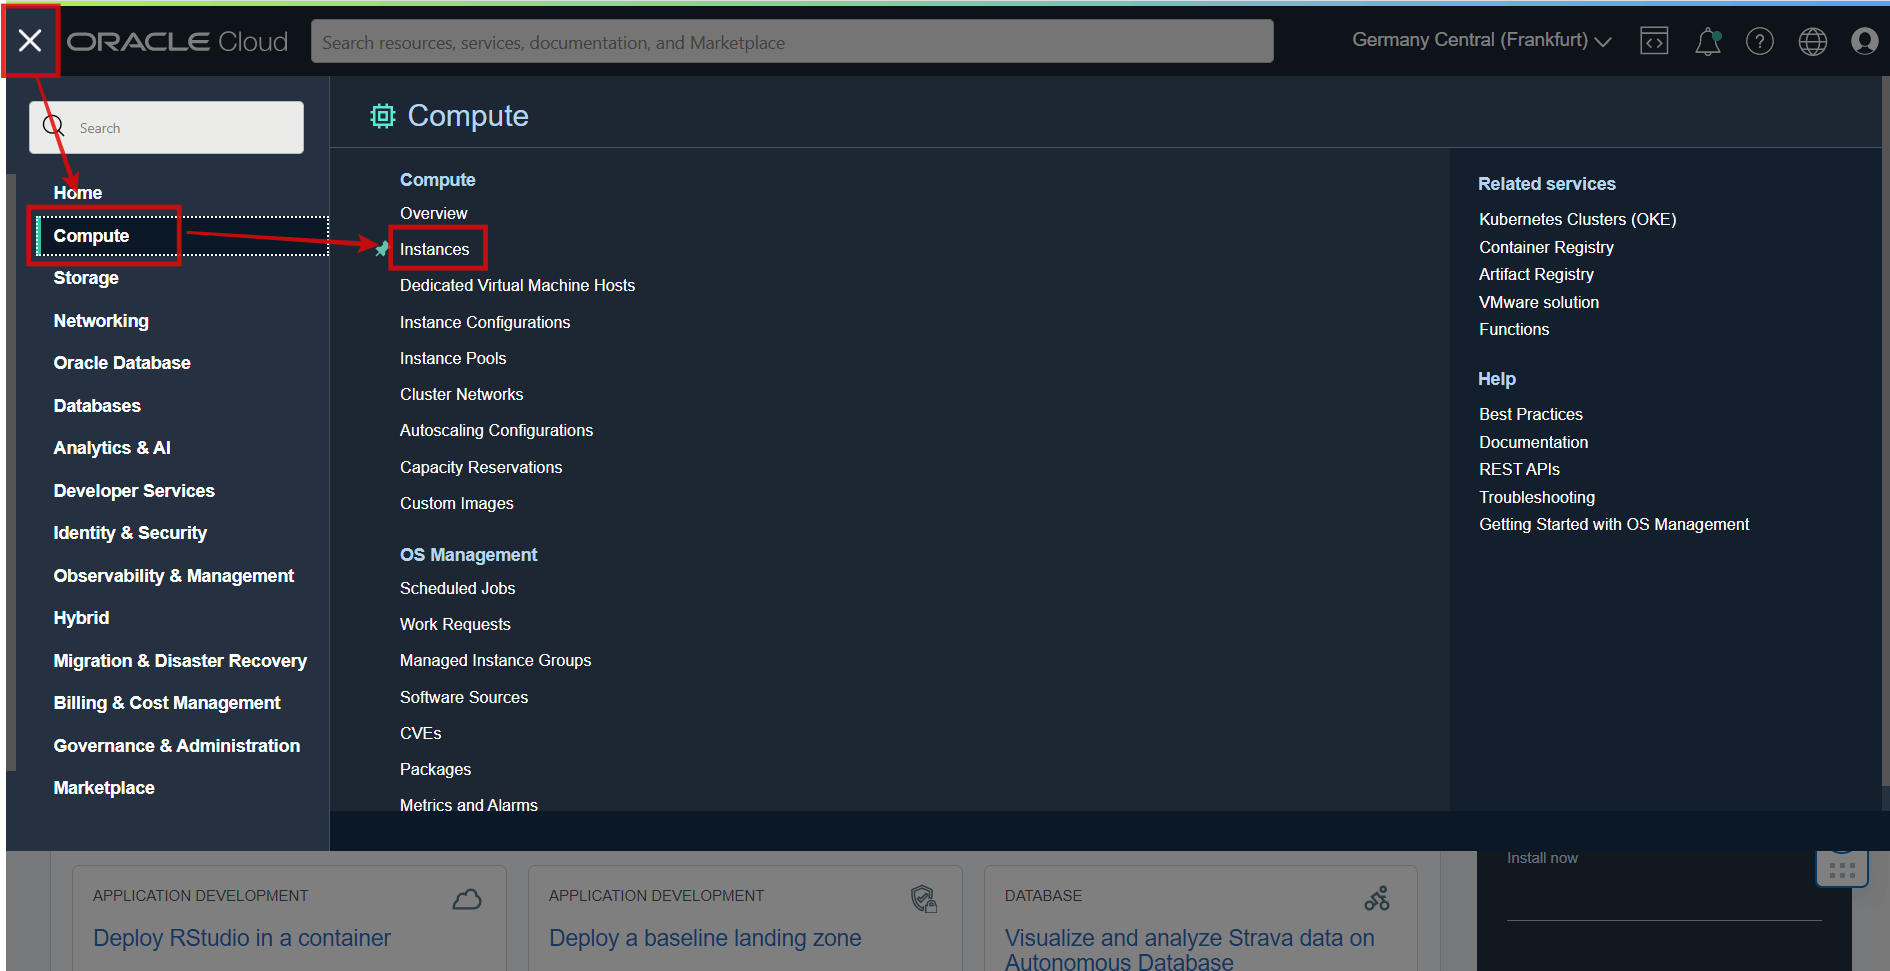
You can create two types of instances: a Linux instance and a Windows instance. In this example, we will create a Linux instance. To do this, click the navigation menu and then click Compute. Under Compute, click Instances.
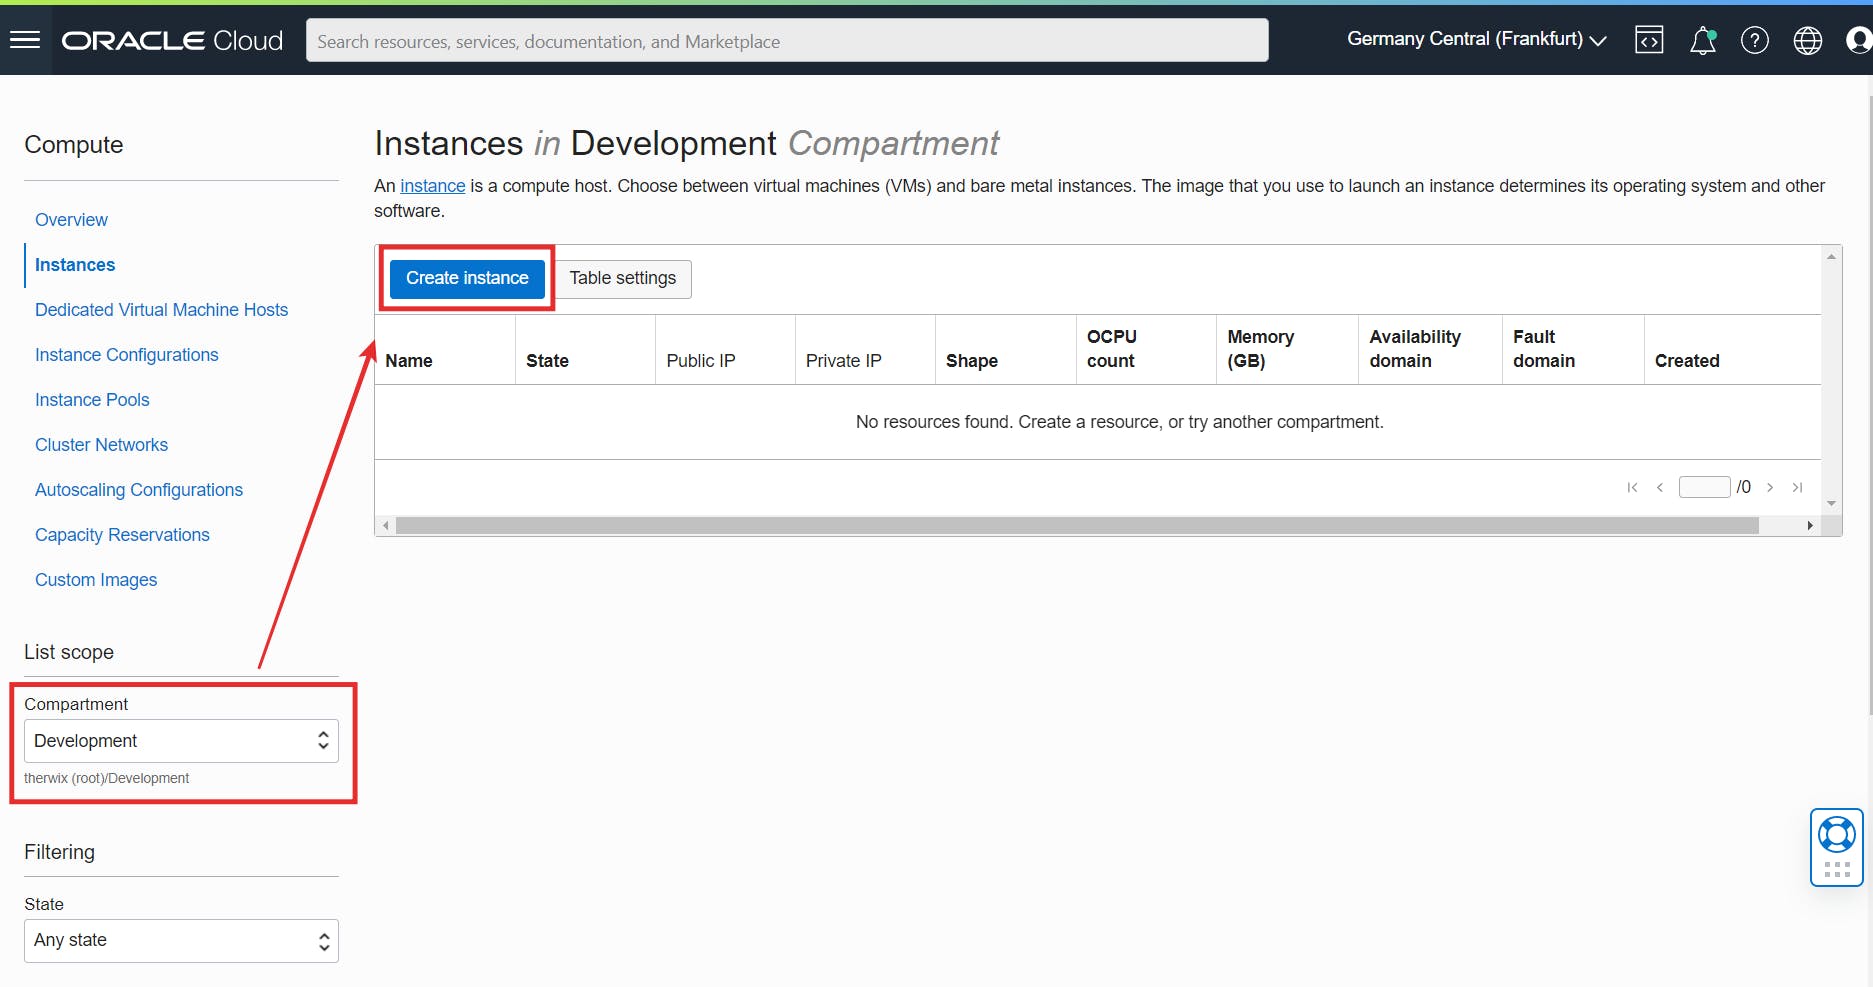
Before creating the new instance, make sure that it is created in the correct compartment. So first select the compartment and then click Create instance.
It is strongly recommended not to create new resources in root compartment!
Now the dialog for configuring the compute instance opens. First enter a name for the instance, for example my_first_vm. In the Placement section, accept the default availability domain and in the Security section, accept the default settings.
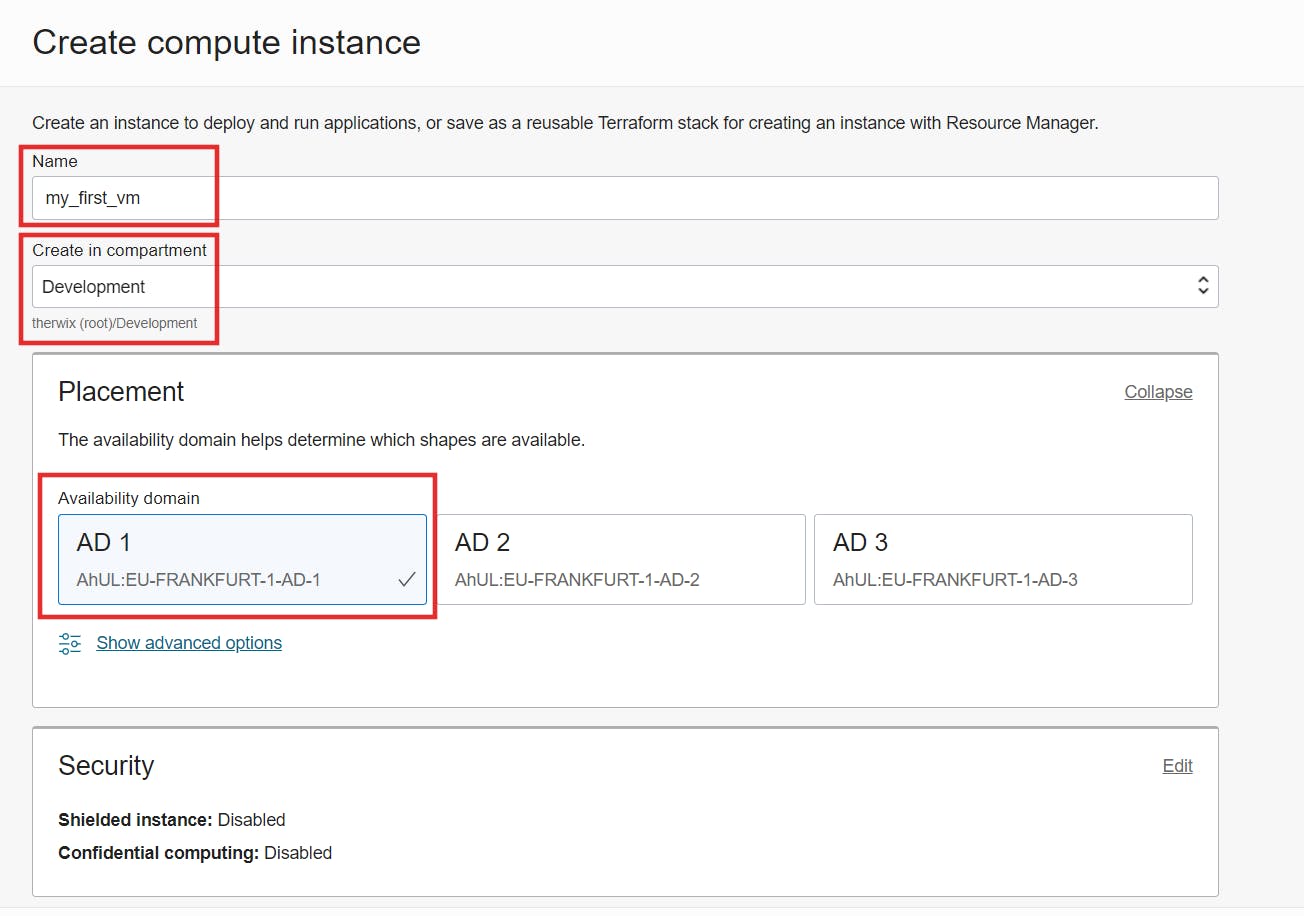
Image and Shape
In the Image and Shape section, accept the default Oracle Linux setting in the Image section.
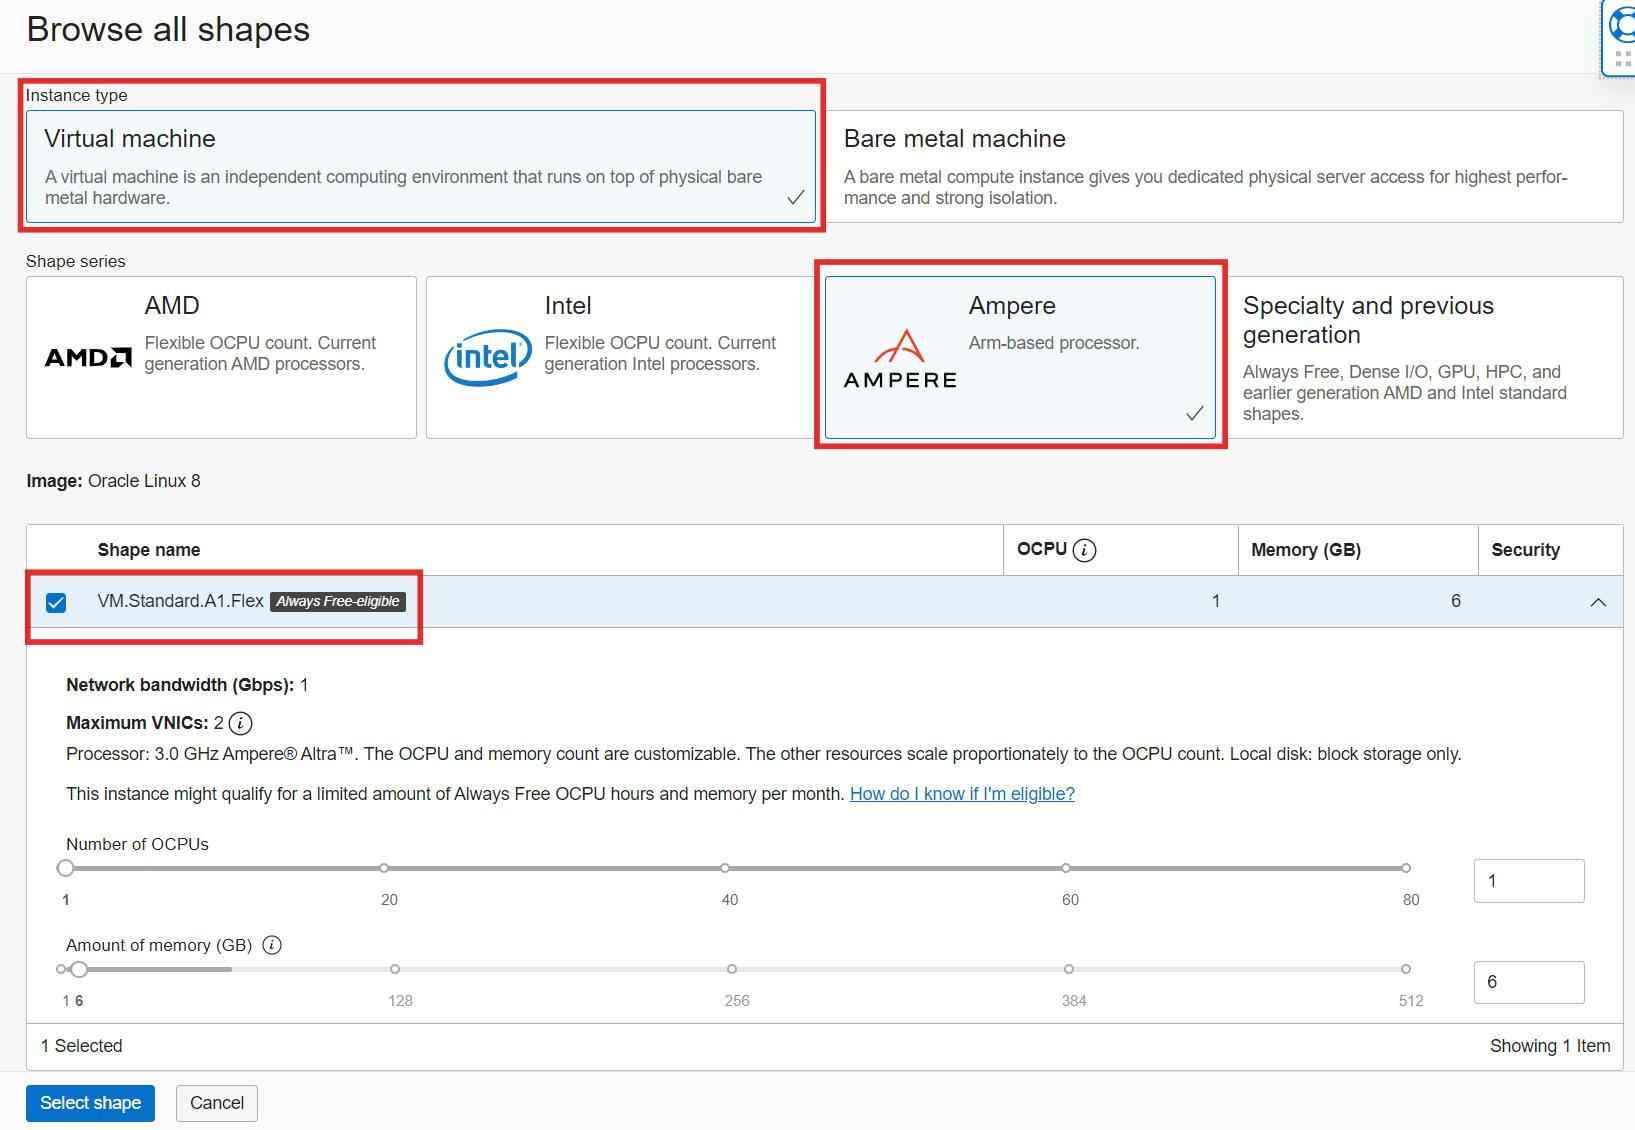
In the Shape section, click Change shape and make the following selections:
For the Instance type, accept the default
Virtual machinesetting.For the Shape series, select the following options:
To create an Always Free-eligible
AmpereA1 Compute instance with an Arm processor, select Ampere and then select the flexible shapeVM.Standard.A1.Flex. Accept the default value for OCPUs (1 OCPU). Click Select Shape.
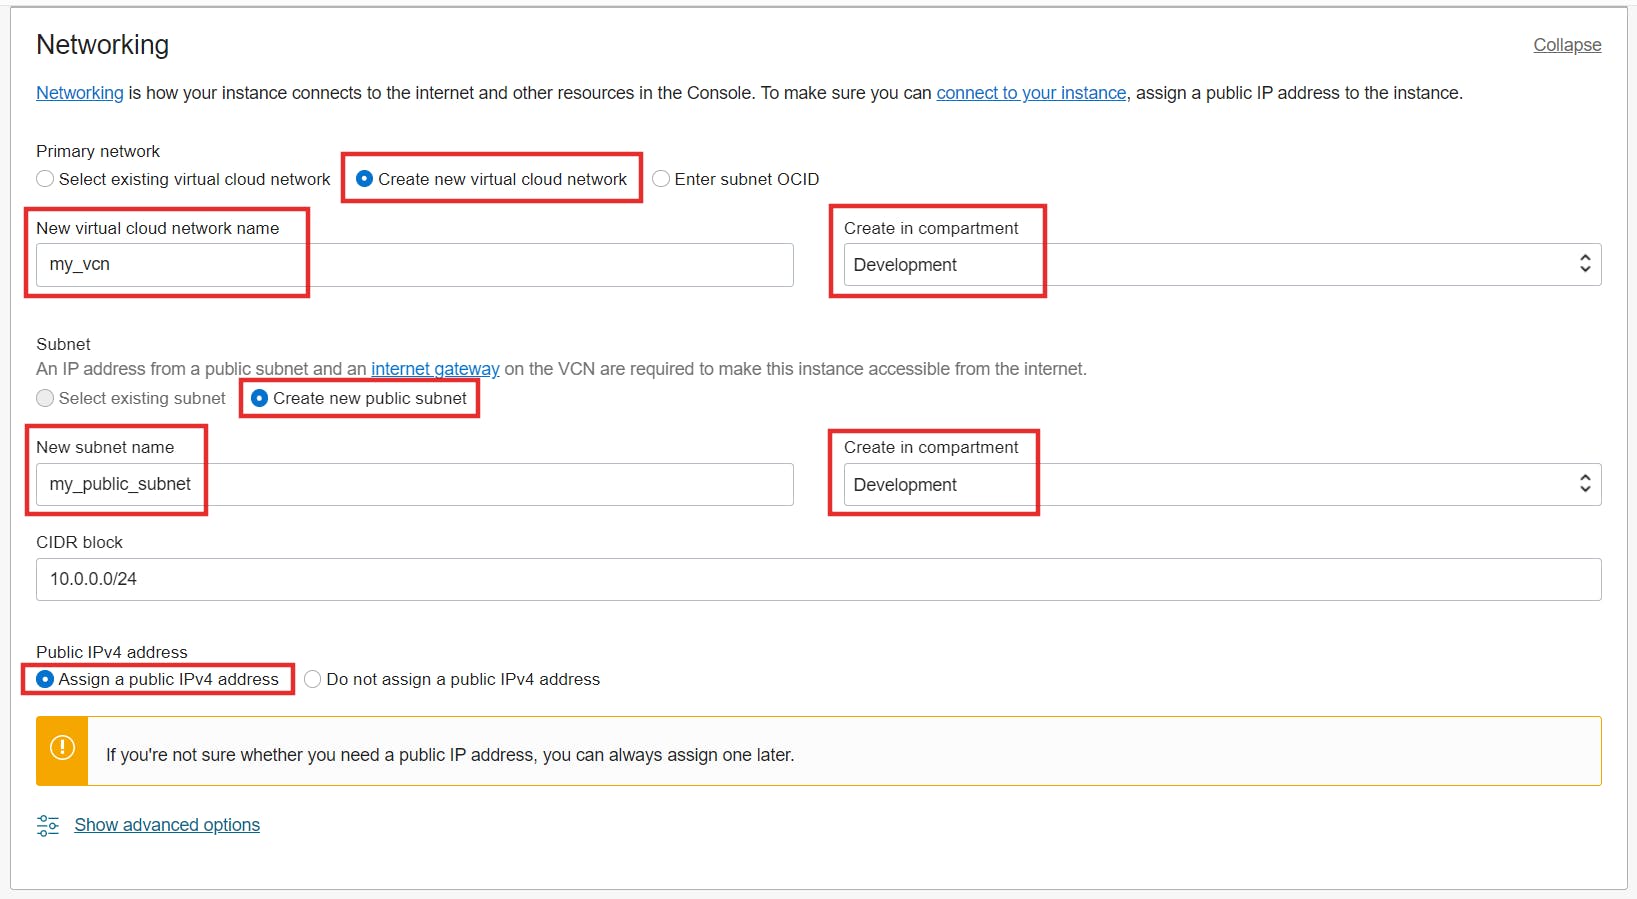
Networking
In the Networking section, configure the network details for the instance:
First, we start with the Primary network. If you have already created a virtual cloud network you can select it in Select existing virtual cloud network. Otherwise, you can also create a new one here by selecting Create new virtual cloud network. Enter a name for the new virtual cloud network, e.g. my_vcn.
Make sure that it is created in the correct compartment!
For Subnet, you can also select the option Select existing subnet if it already exists. Otherwise, you can also create a new one by selecting Create new public subnet. Enter a name for the new public subnet e.g. my_public_subnet.
Again, make sure it is created in the right compartment!
Finally, select the Assign a public IPv4 address option. This creates a public IP address for the instance that you need to access.
SSH Key
In the Add SSH keys section, create an SSH key pair or upload your own public key if you already have one.
In this example, we will generate a new key pair. So select Generate a key pair for me and then click Save private key, and then save the private key to your computer. Also, save the public key by clicking Save public key.
Anyone who has access to the private key can connect to the instance. Keep the private key in a safe place!

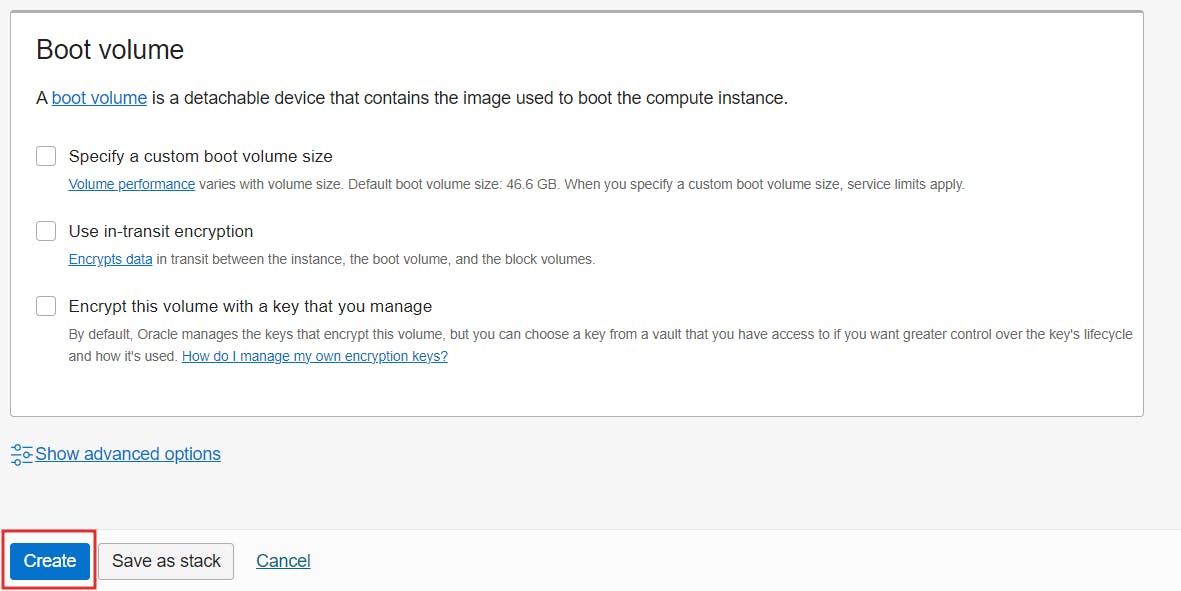
Finally, in the Boot Volume section, leave all options unchecked and click Create to provision the new instance.
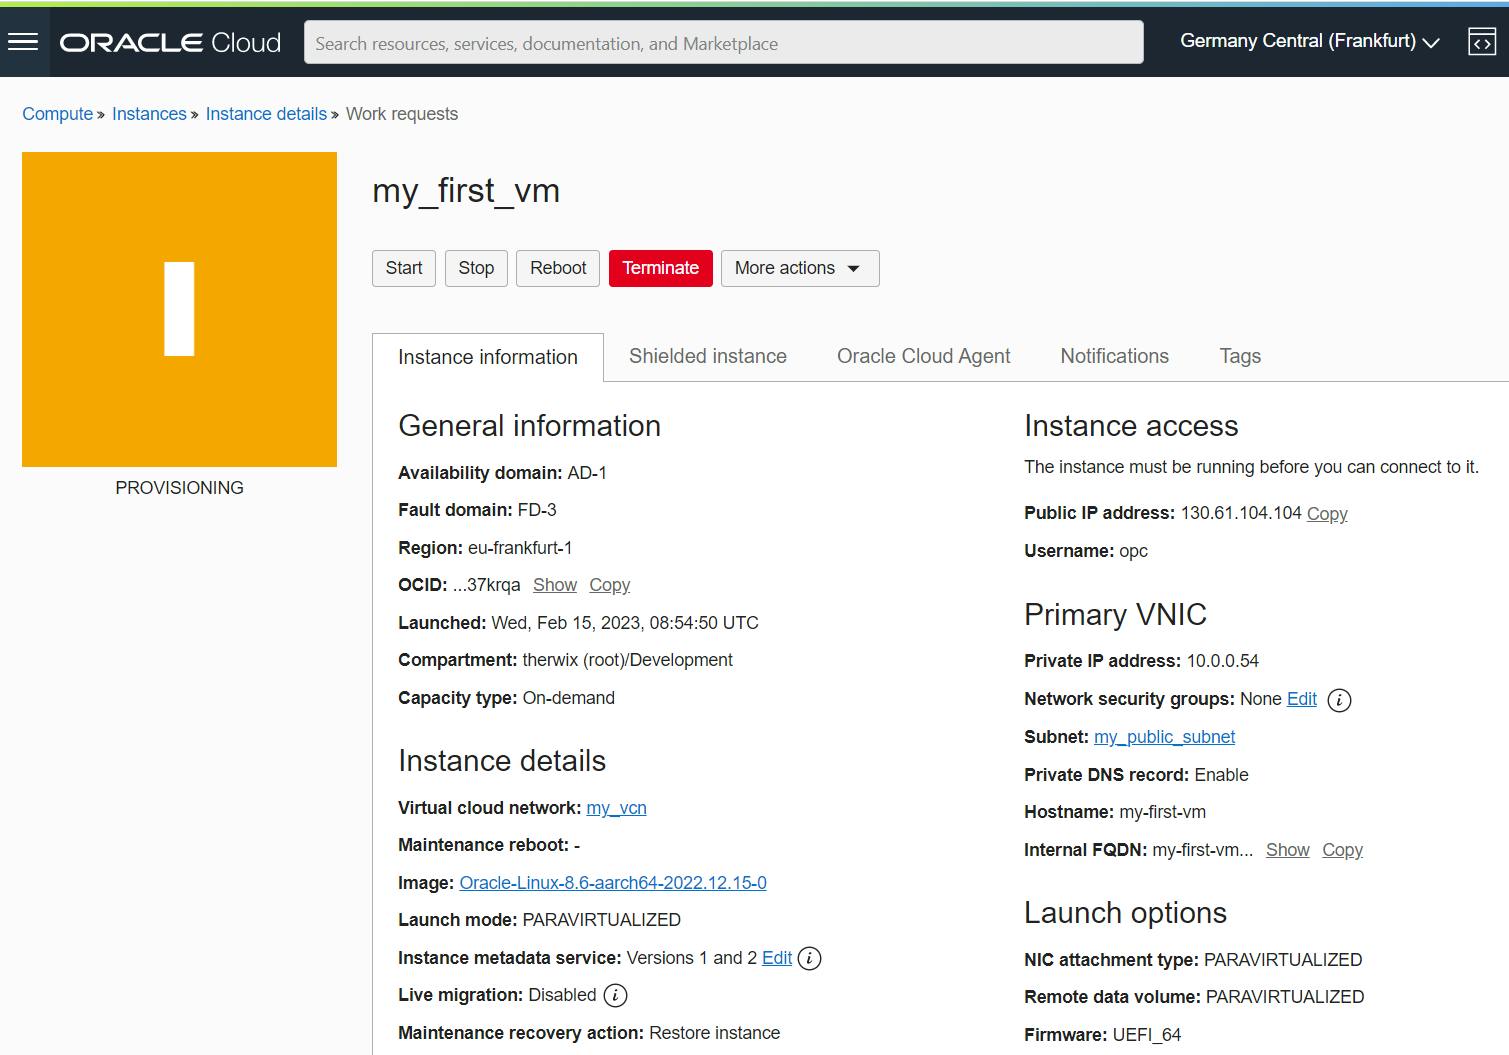
That's it! Your new instance is created and ready to use shortly.
Conclusion
As you have seen, it is very easy and quickly done to create your own VM. Oracle Cloud Infrastructure offers several ways to configure and scale a VM. This way, a VM can be provisioned for every use case and preference in no time.
Read in the next post how you can now access the VM.