Introduction
As promised, here's most of what you need to know about sending email with Oracle APEX. Let's move on to topic number six.
Background
In this blog post we would like to show you how to display tabular data in an email template. Surely there are several approaches, but with this one described here we have already achieved good goals. Our approach here is that we generate HTML code for a table using PL/SQL code. And now we’ll show you how we solved it ;-)
Let´s start by creating (or modifying) a demo app
To avoid having to create a new application again, let's take the demo app from the previous blog post.
First, we add a new email template to this application. The easiest way is to copy the existing "Hello World" template (btw. another great feature of APEX 21.2). To do this, go to "Other Components" in the "Shared Components" section, select "Email Templates" and click "Copy". Then select "Hello World" under "Copy Email Template" and name it for example "Hello Report" ("New Static Identifier" will be generated automatically).
When this is done, the template must be edited. For that, go to the template details and replace the body html code with the following HTML code.
<p>Hello #CONTACT#,</p>
<p>this is an email sent from <strong>Oracle APEX</strong>.</p>
<br>
#REPORT!RAW#
<br>
<p>Best Regards</p>
Line number four is new with the placeholder #REPORT# and the appended "!RAW" for HTML escape. In this placeholder we will insert the HTML code for the tabular data.
For this we need a new "hidden" page item, which we will add on page 1 in the "Send email" region. For example, name it "P1_TABULAR_DATA".
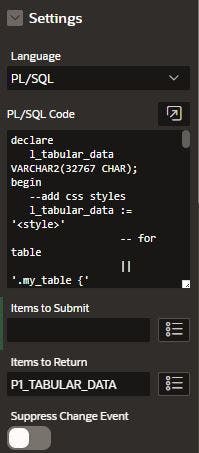
Then we need a new dynamic action that will be executed when the page loads. Just name it e.g. "Create Tabular Data". Create a true Action that execute Server-Side-Code and enter the following PL/SQL Code.
declare
   l_tabular_data VARCHAR2(32767 CHAR);
begin
   -- add table header
   l_tabular_data := l_tabular_data || '<table>'
                  || '<tr>'
                  || '<th>EMPNO</th>'
                  || '<th>ENAME</th>'
                  || '<th>DEPTNO</th>'
                  || '<th>DNAME</th>'
                  || '</tr>';

   -- add table data
   for rec in (select empno, ename, deptno, dname from emp_dept_v)
   loop
      l_tabular_data := l_tabular_data || '<tr>'
                     || '<td>' || rec.empno || '</td>'
                     || '<td>' || rec.ename || '</td>'
                     || '<td>' || rec.deptno || '</td>'
                     || '<td>' || rec.dname|| '</td>'
                     || '</tr>';
   end loop;

   -- close table
   l_tabular_data := l_tabular_data || '</table>';

   :P1_TABULAR_DATA := l_tabular_data;
end;
Note: For the tabular data, the tables EMP and DEPT and the corresponding view EMP_DEPT_V are required. You can install them under the sample datasets.
As you can read in the PL/SQL code, the HTML code for a table is generated. In the first step, the headers are written and then the data is written using a for loop. Finally, the HTML code is set into the page item.
The last step required here is to select "P1_TABULAR_DATA" as item to return.
So, all preparations are done!
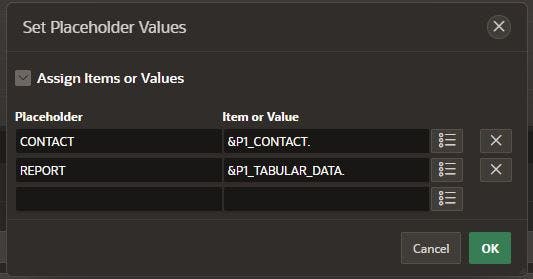
In order to use the new template, we need another process on page 1. So copy the process "Send Email" and name it, for example, "Send Email with tabular data". Then change the email template to "Hello Report" and add another placeholder -> REPORT / &P1_TABULAR_DATA.
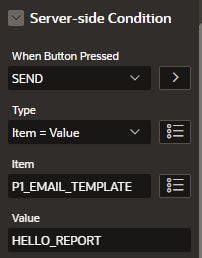
To be consistent with the other processes, we will set the "Server Side Condition" so that this process is only executed when the "Send" button is clicked and the "Hello Report" email template is selected. Therefore, go to "Server-Side-Condition" and select "Send" as "When Button Pressed". Then set "Item = Value" as the type, "P1_EMAIL_TEMPLATE" as the item, and "HELLO_REPORT" as the Value.
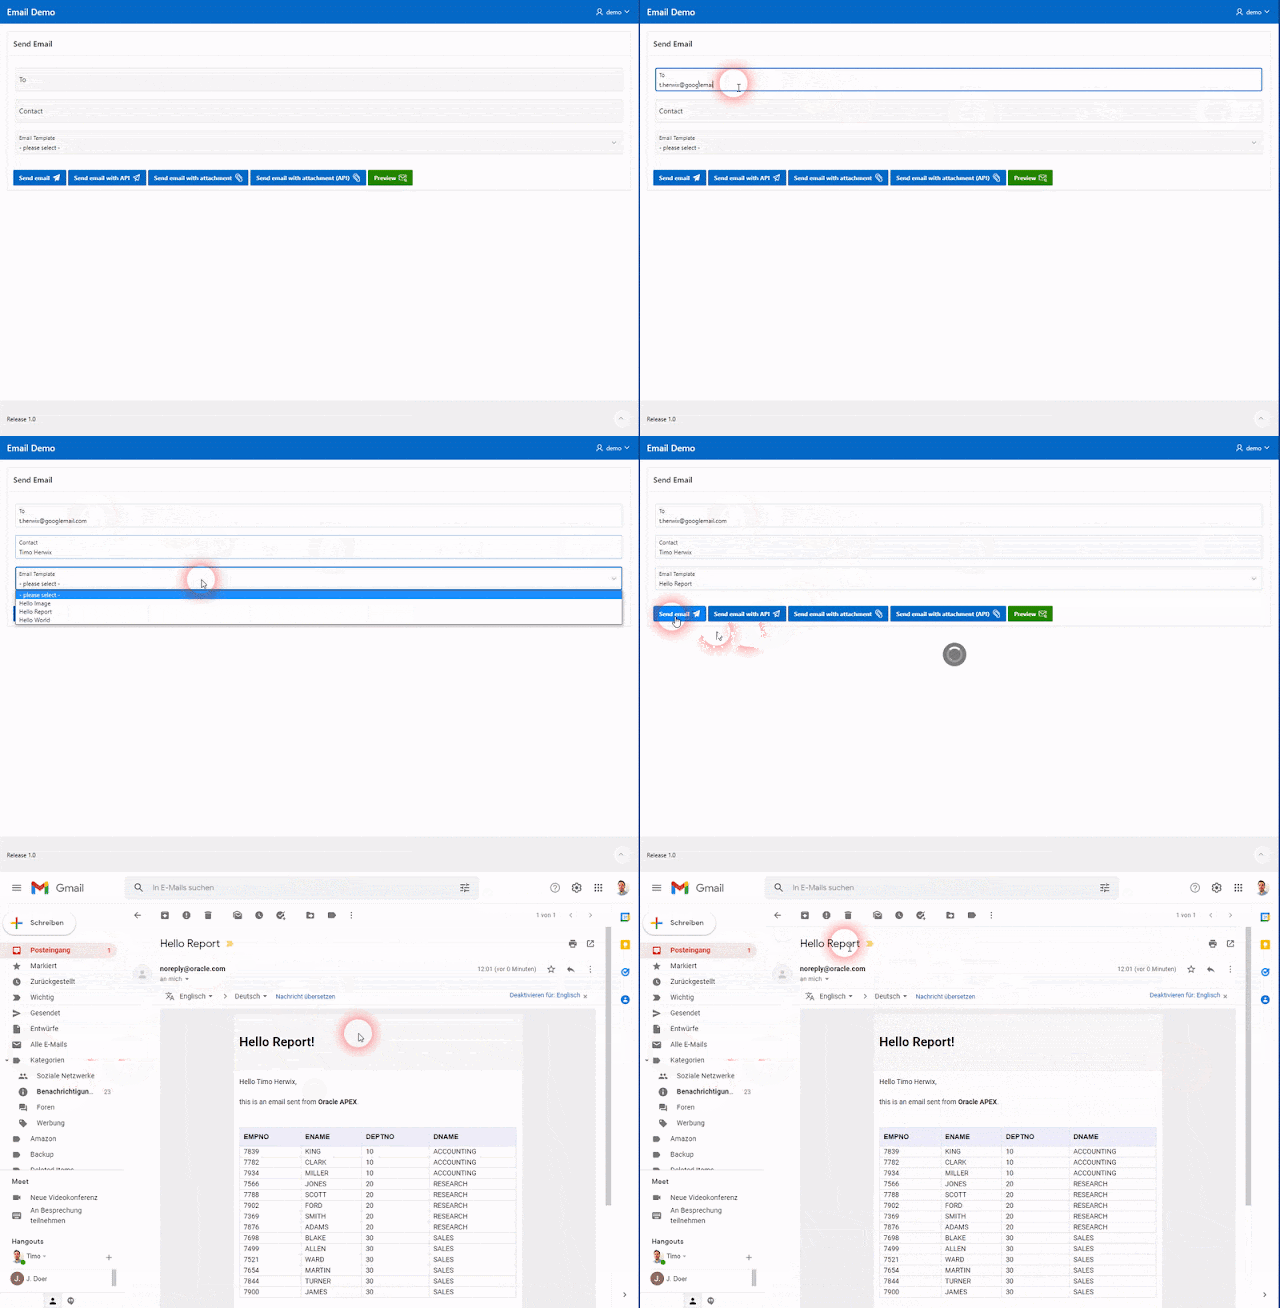
So, that's it... Now let's start the application and try to send an email with a report.
The email should look like this:
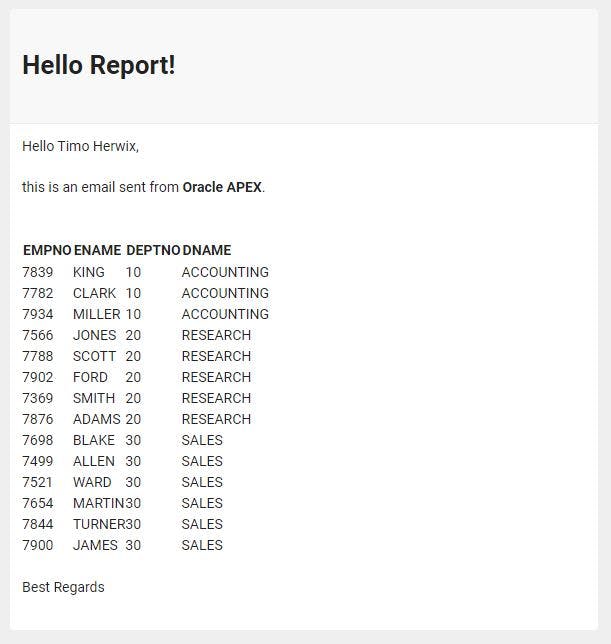
As you can see, we were able to add tabular data to the email template. That's good, but it doesn't look pretty at the moment. To beautify the report a bit and get it in shape, we can add some CSS rules.
Styling
The CSS rules are added when generating the HTML code for the report. To do this, we go into the PL/SQL code from the dynamic action on page load and replace the PL/SQL code to be executed with the following:
declare
   l_tabular_data VARCHAR2(32767 CHAR);
begin
   --add css styles
   l_tabular_data := '<head>'
                  || '<style>'
                  -- for table
                  || '.my_table {'
                  || 'font-family: arial, sans-serif;'
                  || 'border-collapse: collapse;'
                  || 'width: 100%;'
                  || '}'
                  -- for table-header
                  || '.my_table th {'
                  || 'background-color: #eeeeff;'
                  || 'border: 1px solid #dddddd;'
                  || 'text-align: left;'
                  || 'padding: 8px;'
                  || '}'
                  -- for table-data
                  || '.my_table td {'
                  || 'border: 1px solid #dddddd;'
                  || 'text-align: left;'
                  || 'padding-left: 8px;'
                  || '}'
                  || '</style>'
                  || '</head>';

   -- add table header
   l_tabular_data := l_tabular_data || '<table class="my_table">'
                  || '<tr>'
                  || '<th>EMPNO</th>'
                  || '<th>ENAME</th>'
                  || '<th>DEPTNO</th>'
                  || '<th>DNAME</th>'
                  || '</tr>';

   -- add table data
   for rec in (select empno, ename, deptno, dname from emp_dept_v)
   loop
      l_tabular_data := l_tabular_data || '<tr>'
                     || '<td>' || rec.empno || '</td>'
                     || '<td>' || rec.ename || '</td>'
                     || '<td>' || rec.deptno || '</td>'
                     || '<td>' || rec.dname|| '</td>'
                     || '</tr>';
   end loop;

   -- close table
   l_tabular_data := l_tabular_data || '</table>';

   :P1_TABULAR_DATA := l_tabular_data;
end;
Feel free here and create your own style according to your wishes.
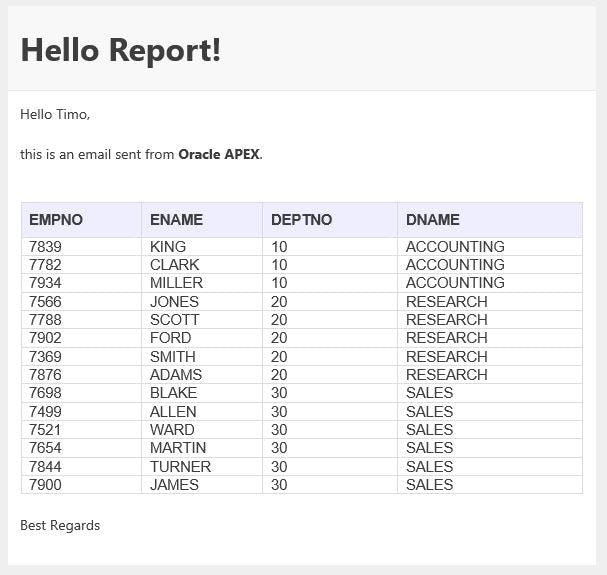
If we run the application again and send us an email with tabular data, it should look like this:
Note
provide a plain text alternative in case the recipient cannot receive HTML emails
a reference to a CSS file is not possible in this case
Here is the demo app for reference.
APEX_MAIL API
You can also use this solution to send email using the APEX_MAIL API.
In this case, add the placeholder "REPORT" to your PL / SQL code.
For example:
begin
    apex_mail.send(
        p_to                 => :P1_TO,
        p_from               => :APP_EMAIL,
        p_template_static_id => :P1_EMAIL_TEMPLATE,
        p_placeholders       => '{' ||
        '    "CONTACT":'     || apex_json.stringify( :P1_CONTACT ) ||
        '   ,"REPORT":'      || apex_json.stringify( :P1_TABULAR_DATA ) ||
        '}'
    );

    apex_mail.push_queue;
end;

