

How to Resize your OCI VM-Volume without downtime

Timo joined Hyand in Ratingen, Germany, as a Senior Consultant in 2019, focusing on Oracle databases and APEX applications. With a background as a Data Warehouse Specialist, he has expertise in Database Administration, performance tuning, and SQL development. Timo is passionate about web development, cloud computing, and the architecture behind it, and became part of the Oracle ACE Community in 2023. He enjoys sharing his knowledge at conferences and through blog posts. When he's not working, you can find him traveling, hanging out with his family, or cooking up something in the kitchen.
Introduction
Are you looking to increase the size of your block and boot volumes on OCI without downtime? In this blog post, we provide step-by-step instructions and screenshots to guide you through the process. By default, the boot size on your compute instance is only 47 GB, but resizing can be done online without affecting running applications, and you don't need a paid version to do it. The process involves selecting the correct resources, editing the volume size, rescanning the disk, extending the partition, and growing the file system. Read on to learn how to resize your OCI VM-volume without downtime.
Some points to note
Resizing block or boot volumes is done online without affecting running applications, which means you don't have to shut down your application and there is no downtime.
This feature is available in all the Oracle Cloud Regions.
You can access this feature for both your currently existing volumes and newly created volumes.
After expansion, scan the disk again to expand the partition.
Let´s start
Log in to your OCI console and first open the Oracle Cloud Shell to check the current size of your VM (or use a terminal).
ssh -i <my-private-key> opc@<my-public-ip>
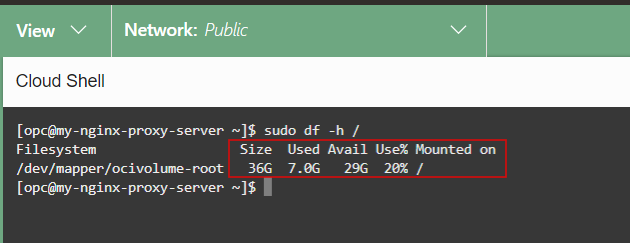
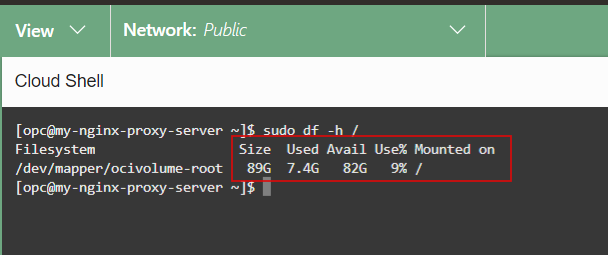
Run the following command to check the size of your VM.
sudo df -h /
Now your current volume size is listed.
Resize your OCI VM-Volume
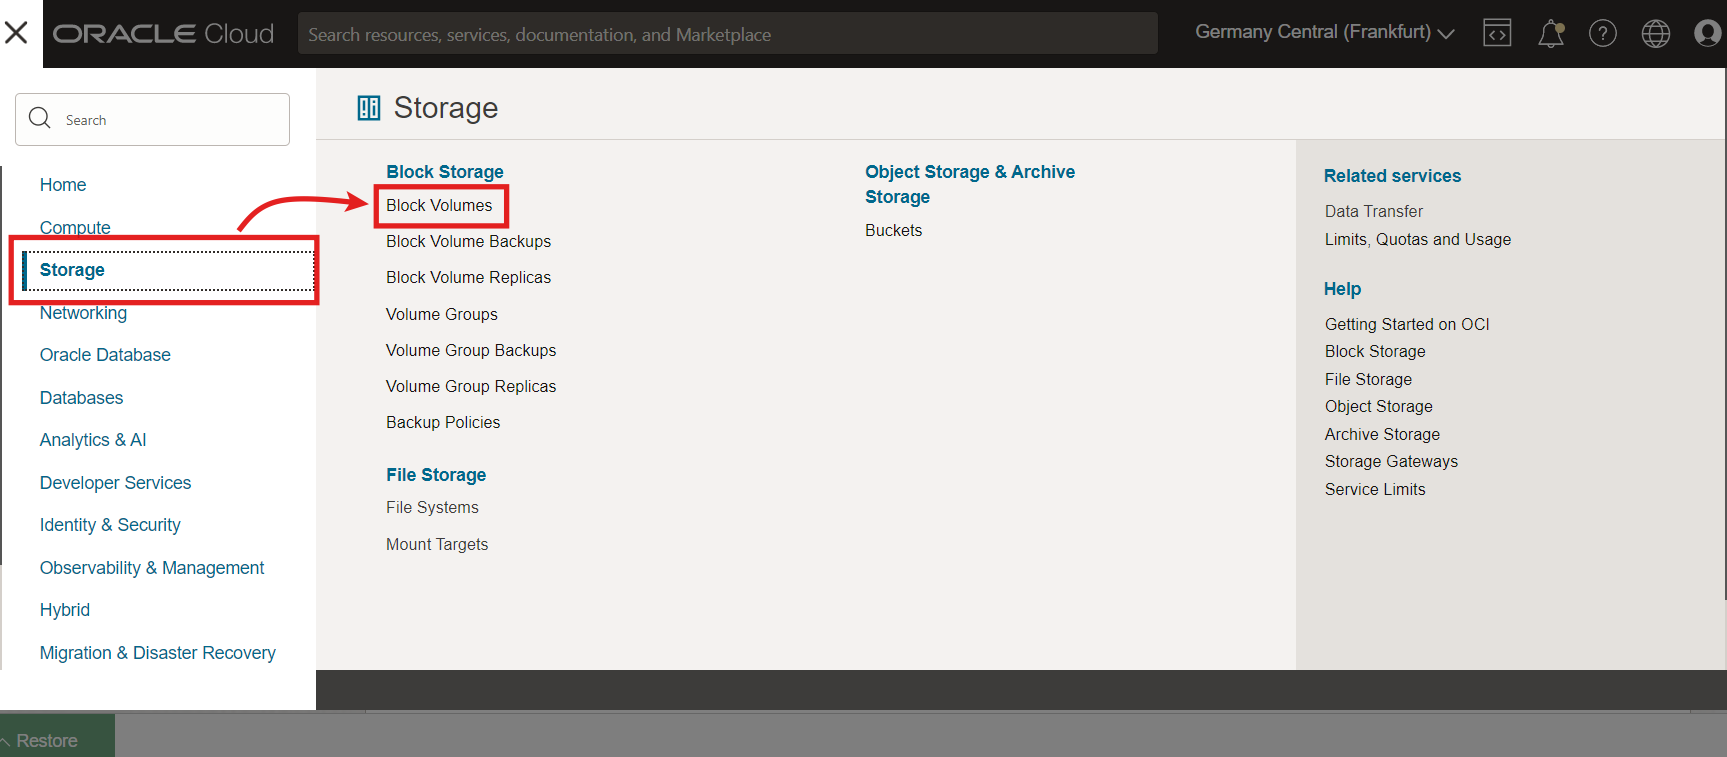
Minimize the Cloud Shell Console and open the OCI navigation menu. Go to Storage and click Block Volumes.
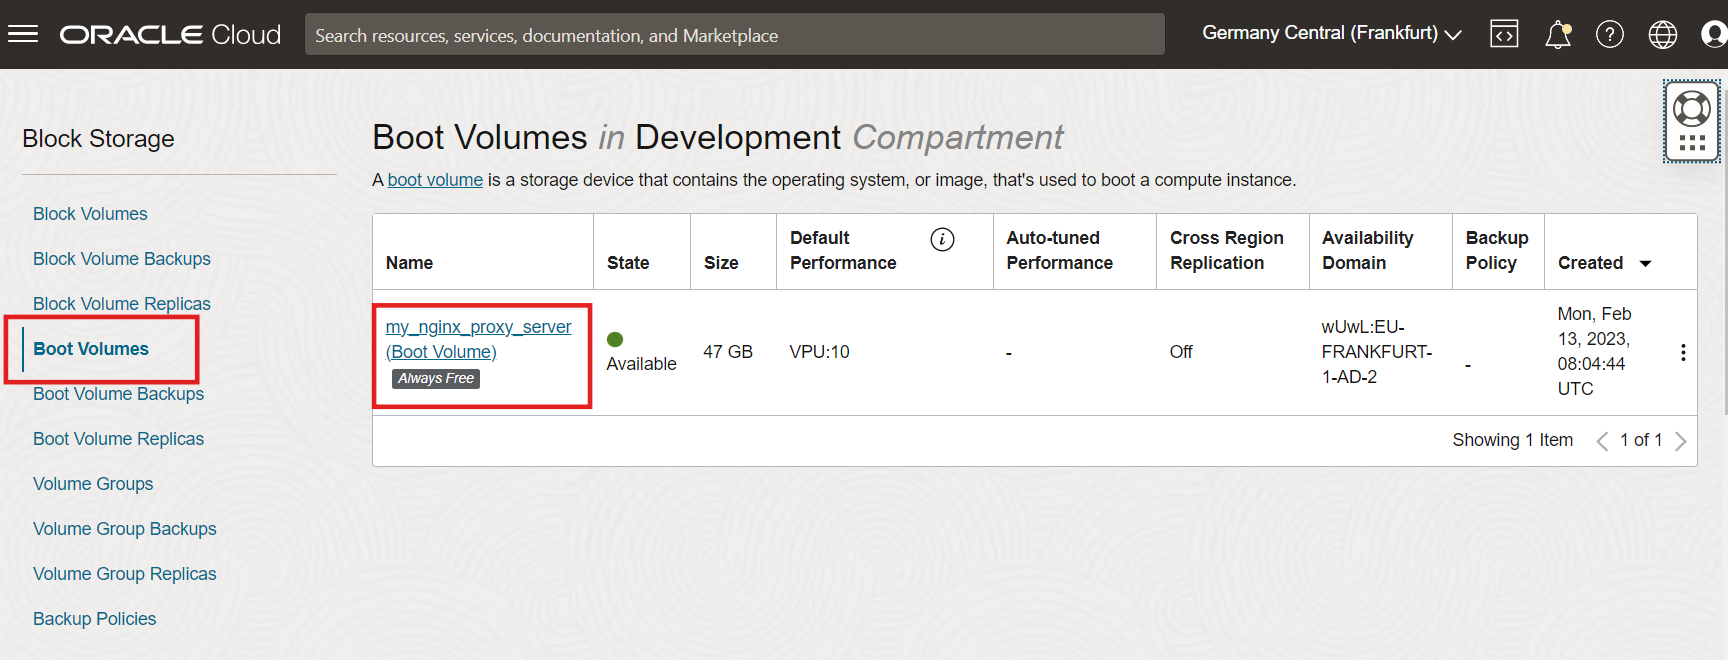
First, make sure that you have selected the correct compartment in which your compute instance is located. From the side menu, click Boot Volumes. Then select the boot volume that has the same name as your Linux instance.
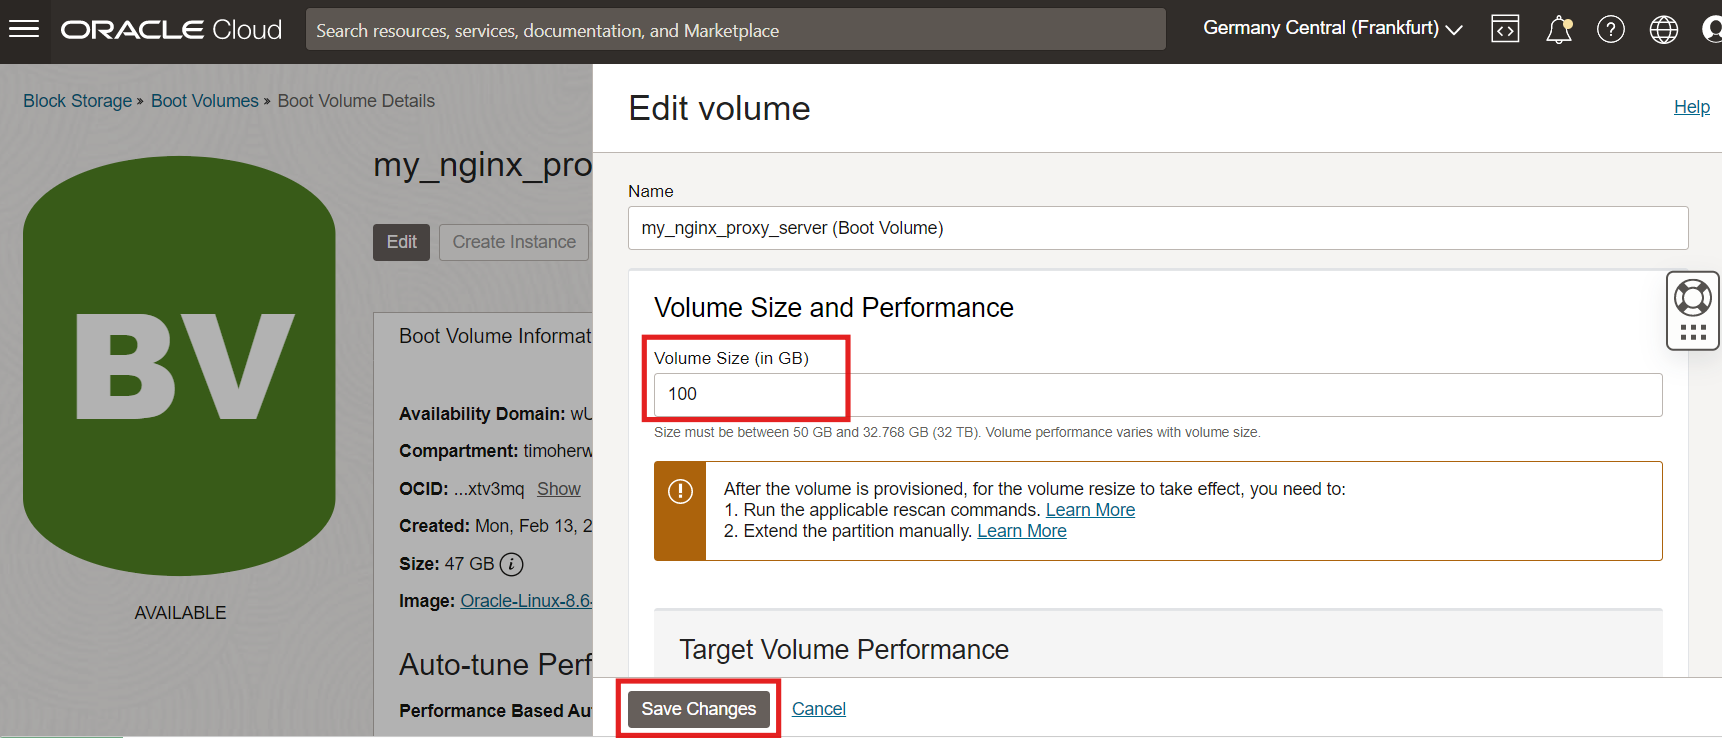
Now click the Edit button to increase the size of the volume. A new window opens where you can specify the new size in VOLUME SIZE (IN GB).
You must specify a larger value than the current boot volume size!
Change the Volume size from 47 GB to e.g. 100 GB and click Save Changes.
This opens a dialog that lists the commands to rescan the disk that you need to run after the volume is provisioned. Click the Copy link to copy the commands and paste this code into a document or somewhere where you won’t lose it. Then click Close to close the dialog.
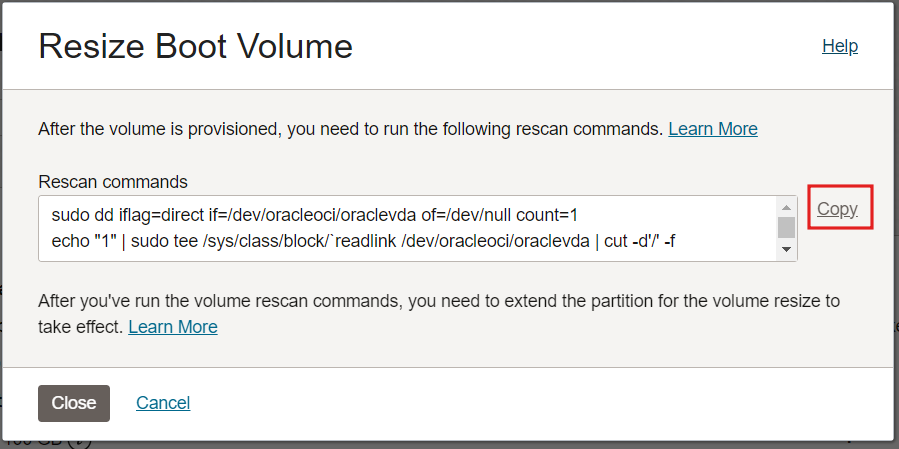
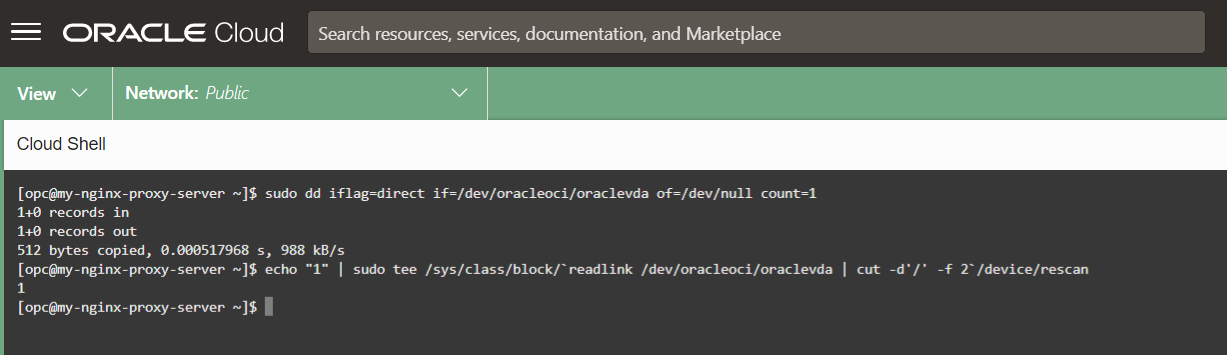
Now reopen the cloud shell or terminal that you minimized in the previous step. Once you are connected to your instance, paste the rescan commands you copied in the previous step into your instance session window and run them.
Extend the partition and grow the file system
Finally, we now need to extend the partition and grow the file system using the oci-growfs operation of the OCI utilities. First, we update oci-utils with the following line of code.
sudo yum update oci-utils
To use the OCI utilities, you first need to start the ocid service.
The
ociddaemon is the service component of theoci-utils. It monitors for changes in the VNIC and iSCSI configuration of the instance and attempts to automatically attach or detach devices as they appear or disappear - for example when they are created or deleted using the Oracle Cloud Infrastructure Console, CLI, or the API.
To start the ocid daemon using systemd and set the ocid service to start automatically during system boot.
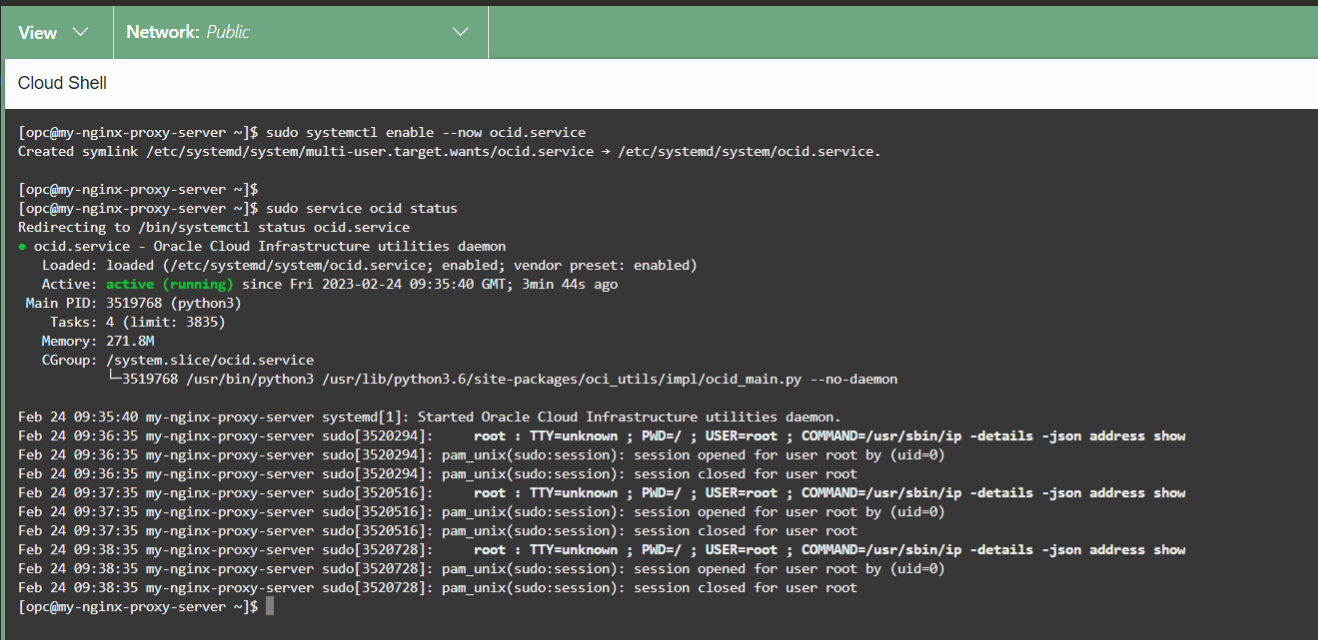
sudo systemctl enable --now ocid.service
Check that the service is active (running).
sudo service ocid status
For example, it should look like this:
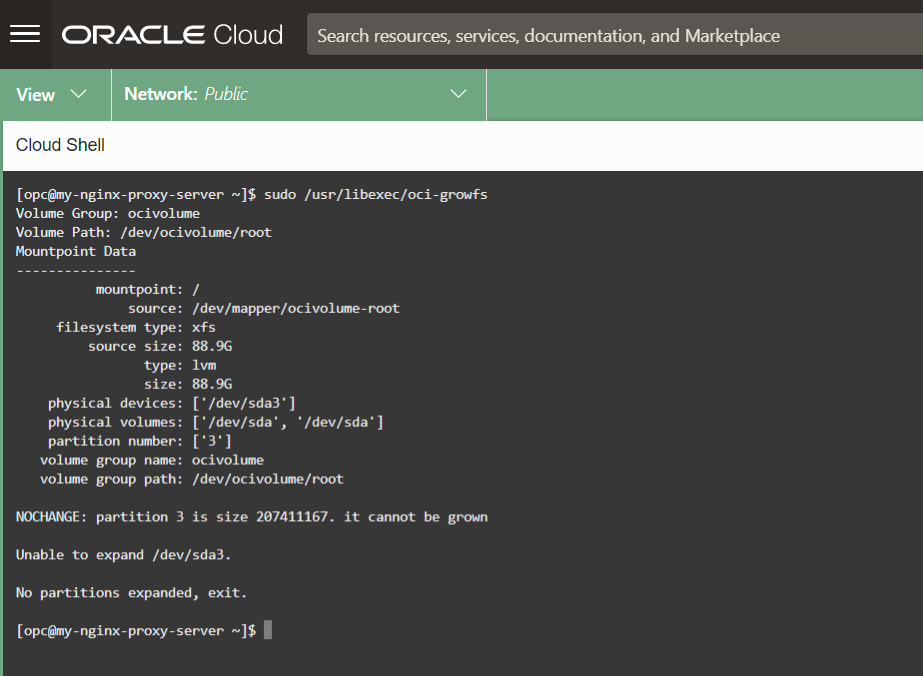
Then run the following command to extend the partition and increase the file system size.
sudo /usr/libexec/oci-growfs
A summary of the command line options is displayed.
Lastly, you can use the following command to check how big your volume is now.
sudo df -h /
The volume size should be about 100 Gb now.
Conclusion
As demonstrated in this article, resizing your OCI VM-Volume is a simple and straightforward process. By following the step-by-step instructions you can increase the size of your block and boot volumes on OCI without affecting running applications. This feature is available in all Oracle Cloud Regions, and you can access it for both your currently existing volumes and newly created volumes. After expansion, scan the disk again to expand the partition and grow the file system using the oci-growfs operation of the OCI utilities. Overall, resizing your OCI VM-Volume is an easy task that can be accomplished quickly and efficiently.


