

Implementing User Access Control in APEX with Oracle Identity and Access Management
Secure Access Made Easy: A Step-by-Step Guide Part 2


Introduction
In the previous blog, we set up Social Sign-In Authentication for your APEX application. Now, everyone in your Oracle Identity Access Management can access your application. But what if you only want a select group of users to have access? No worries - there are a few ways to do this.
The real question is: Where would you like to keep the list of approved users? Since you're already using a Cloud-based Identity Solution like OCI IAM, let's make the most of it and assume you'll manage your users there.
Prerequisites
Before we dive in, please make sure you have completed the following prerequisites listed below. This will enable you to move through this guide seamlessly.
OCI Tenancy ✅
Provisioning an Autonomous Database ✅
Accessing an APEX Instance ✅
Implementing Social Sign-In for your APEX App ✅
Let´s start by denying access to everyone
To ensure no one can access the application, simply go to your OCI IAM and adjust the settings for the application.
Sign in to your OCI tenancy and click on the navigation menu.
Go to Identity & Security, then select Domains.
Choose the default domain and search for the Integrated Applications link in the left navigation menu.
Find your desired application, like My APEX Application, and click on it.
Next, click Edit Application to open the sliding menu.
Finally, under Authentication and Authorization, click the
Enforce grants as authorizationbox.

Save your changes and start a new APEX session. The app will ask you to sign in again, but this time, logging in won't work.

And there you have it! You've successfully blocked access for everyone.
Allow access for Single Users or Groups
To allow a single User or a Group to access your application, you need to assign the application to the user/group. To do this, go back to your OCI Console and navigate to the Users or Groups in your domain. On the left-side menu, you'll find the Integrated Applications link—give it a click. Now, you can assign an app by clicking the Assign Applications button. Search for the application you want to grant access to, click on assign and close the dialog.

Start a new APEX session and you will notice that you have access to your APEX app again.

We've successfully added an extra layer of security to our application. Now, let's move on to define the content of our APEX app using authorization schemes.
Manage User rights in APEX using Oracle IAM Groups
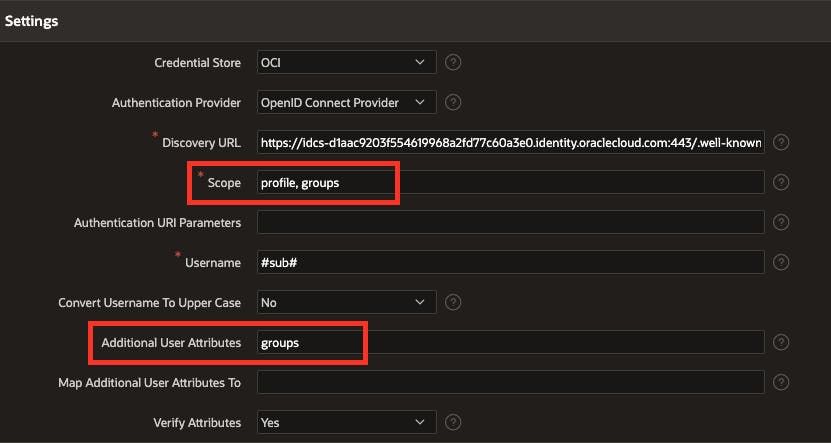
In this chapter, we want to manage user permissions for our APEX application by using authorization schemes in APEX. To accomplish this, we require additional information after authentication, such as the user's group. To do this, return to the APEX App Builder and modify the authentication scheme you created for Social Sign-In within your app. Add the attribute groups to the scope and also add the attribute groups in the additional user attributes.
In the Source section, we're now going to create a PL/SQL procedure that will run after the authentication process.
procedure get_user_groups
as
    l_group_names apex_t_varchar2;
begin
    for i in 1 .. apex_json.get_count('groups')
    loop
        apex_string.push (
            p_table => l_group_names,
            p_value => apex_json.get_varchar2 (
                           p_path => 'groups[%d].name',
                           p0     => i
                       )
        );
    end loop;

    apex_authorization.enable_dynamic_groups (
        p_group_names => l_group_names
    );

end get_user_groups;
This PL/SQL procedure loops through the group array and adds them to the APEX dynamic groups.
In the Login Processing section, enter get_user_groups as the Post-Authentication Procedure Name.

Click Apply Changes.
We're almost done, just one more step to go. This will allow the APEX Authorization Scheme Is in Role or Group to work with the Dynamic Groups that OCI fills in for us.
So, let's go back to Shared Components and click on Security Attributes. Once you're there, look for the Authorization section and change the Source for Role of Group Schemes to Custom Code.

That's it 😉
Create an Authorization Scheme
Now let's create a new Authorization Scheme to manage what different groups can see and do. In this guide, we'll make a simple scheme just for Administrators. Go back to the Shared Components, click on Authorization Schemes and create a new one right there. Choose From Scratch and click Next. Give it a name like IS_ADMIN, select the Scheme Type as Is in Role or Group and the Type Custom. Lastly, enter the group name, which in this case is Administrators.
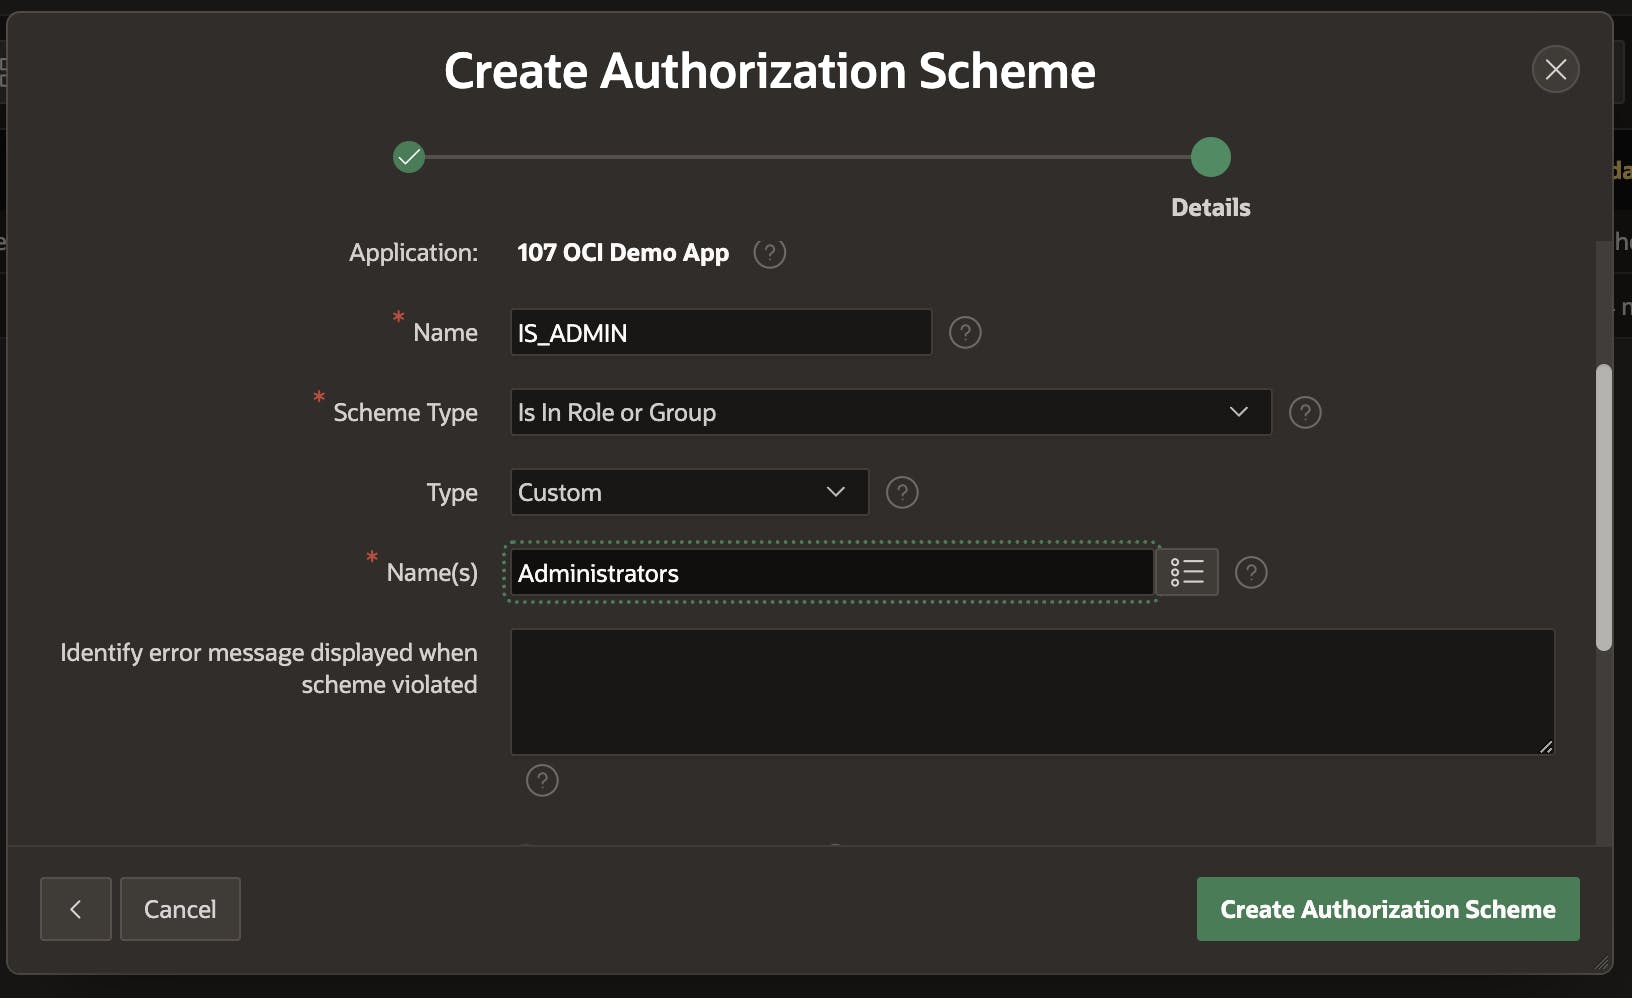
Finally, click Create Authorization Scheme.
Note: Administrators is the Group name in the OCI Identity Access Management.

Add specific Content for the Authorization Scheme
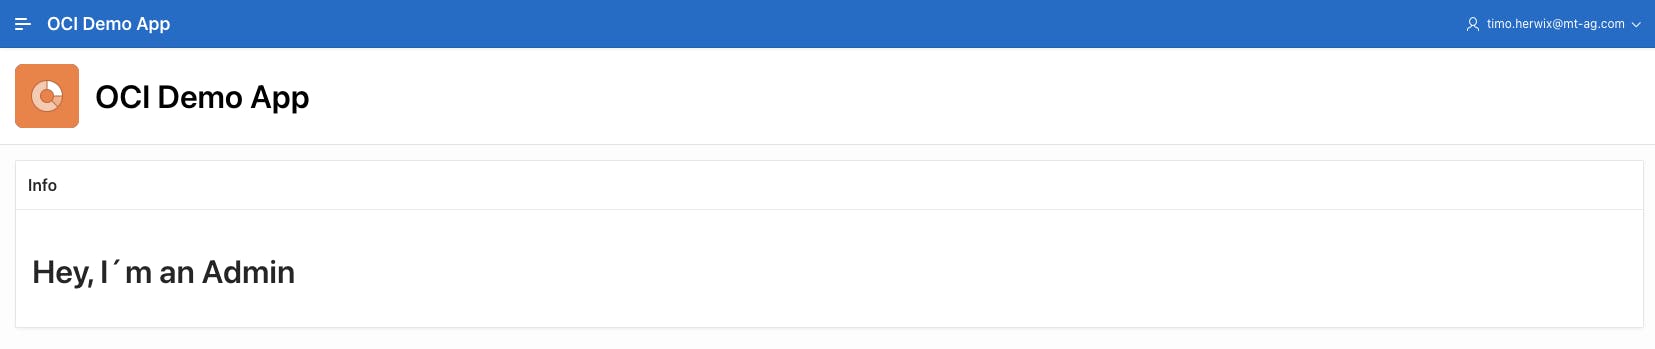
Let's have a look if everything is working smoothly by adding some specific content that only an Admin can access. Navigate to Page 1 in your Application and add a Static Content Region to the Page Body. You can give it a title like Info and enter the following HTML Code:
<H1>Hey, I´m an Admin</H1>
Scroll down to Security and choose the IS_ADMIN Authorization Scheme. This way, only the Administrators group can view this region. Click save and run and verify if everything's working as expected. If all is good, it should look something like this.
To ensure everything is 100% working perfectly, log out and then sign in with a different user who isn't part of the Admin group. If all is well, the region we created earlier won't be visible to them.

With this method, you can effortlessly set up as many roles as you want and link them to any APEX component. All you need to do is make an Authorization Scheme that connects to the matching IAM group 👍
Conclusion
In conclusion, implementing User Access Control in APEX with Oracle Identity and Access Management enhances the security of your application by allowing you to manage user permissions and roles effectively. By following the steps outlined in this guide, you can restrict access to specific Users or Groups, create Authorization Schemes, and tailor content based on User Roles, ensuring a secure and personalized user experience.
In the upcoming blog posts, we will demonstrate how to set up Multi-Factor Authentication and passwordless solutions. Stay tuned 😎