

Mastering Identity Lifecycle Management for OCI IAM and Azure AD
Secure Access Made Easy: A Step-by-Step Guide Part 6


Introduction
In the previous blogpost we have walk you through how to setting up a federation between Azure AD and OCI IAM. But we ran into a small issue. 🤔
For Single Sign-On to work, the same user accounts need to be in both OCI IAM and Azure AD. Naturally, we don't want to do this manually every time. So, our goal is to automate this process. Good news! OCI IAM and Azure AD offer ways to set up identity lifecycle management using the SCIM protocol. Let's dive in!
Prerequisites
Before we get started, please make sure that you've already set up the federation between OCI and Azure AD. If you haven't done that yet, you can read how to do it right here.
OCI Tenancy ✅
Azure AD Account ✅
Setting up a federation between Azure AD and OCI IAM ✅
All set? Let's go! 🚀
Configuring the Identity Lifecycle Management
To set up identity lifecycle management, OCI provides several options. In this article, we'll show you how to configure Azure AD as the main identity store for managing identities in OCI IAM using the app template from the OCI IAM Application Catalog. This way, OCI IAM will pull users, groups, and group memberships from Azure AD right into OCI IAM.
Right now, we've got these users in OCI IAM.

In Azure AD, we've got an extra user that we'd like to sync.
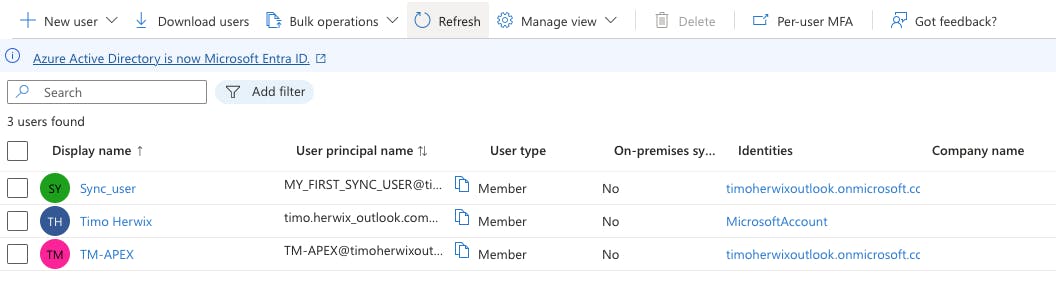
Let's make it happen! 😊
Create an OCI App for Azure AD Synchronization
Log in to your OCI tenancy and click on the hamburger menu. From there, go to Identity & Security, and then choose Domains. Select the default domain and find the Integrated applications link in the left navigation menu and click on it. Now, click Add Application, choose Application Catalog, and click Launch app catalog.
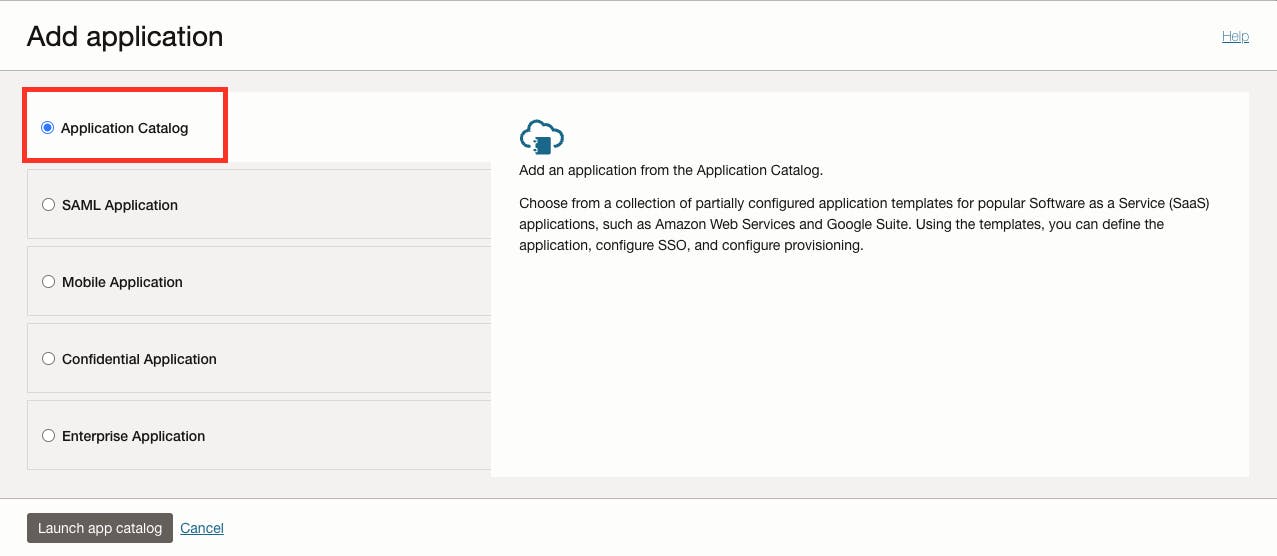
Next, search for the Microsoft Azure application template and click on the Microsoft Azure Card.

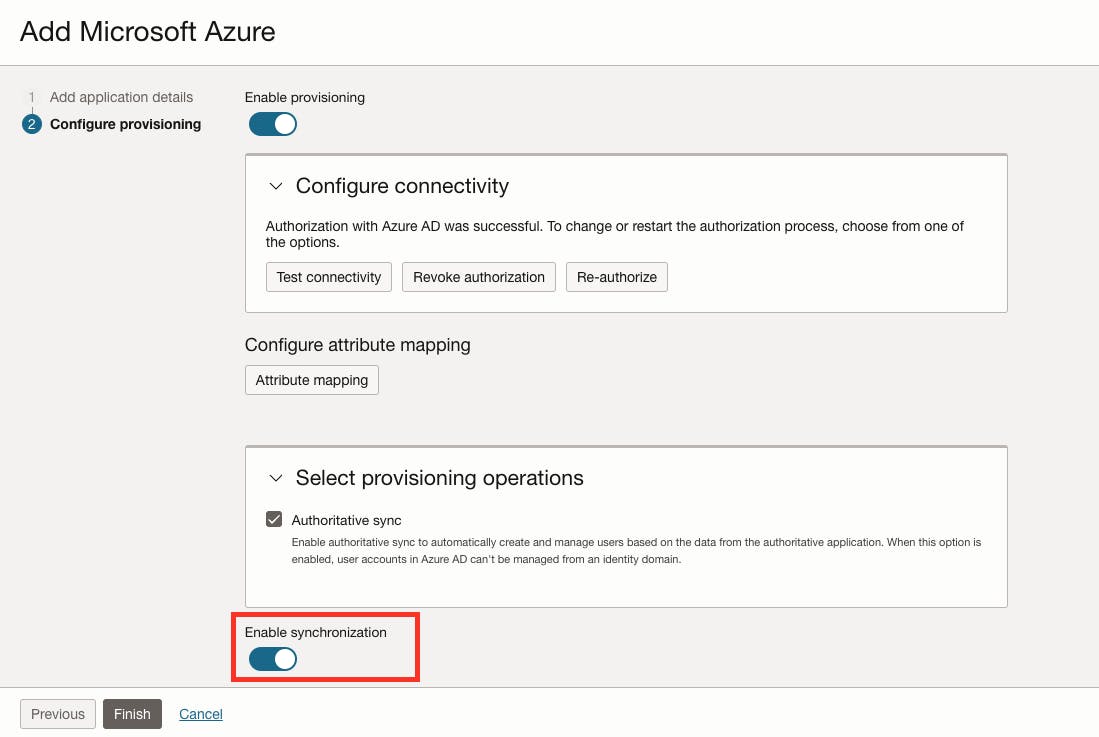
The Add Microsoft Azure page will appear, where we'll need to do some configuration. Begin by giving your application a name, like Azure AD. Then, click Next. On the Configure provisioning page, enable provisioning and confirm that you want to enable it. To set up connectivity, click Authorize with Microsoft Azure. A browser window will open with the Microsoft Azure login page. Simply sign in using your Microsoft Azure credentials, and when you see the Permissions requested dialog, click Accept. You'll know everything went smoothly when the Console displays the message Authorization completed successfully.
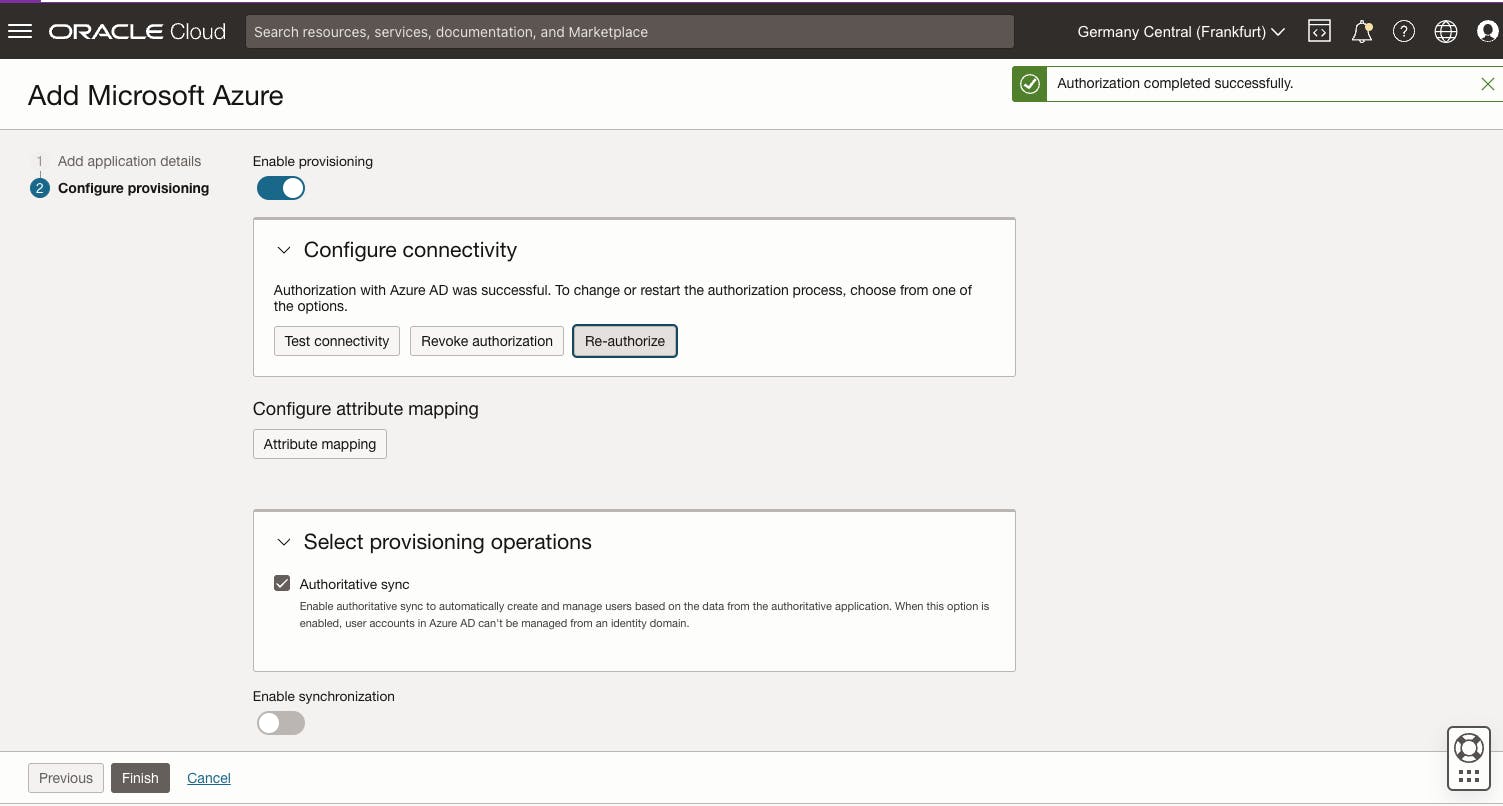
Go ahead and click Enable synchronization to make sure users are synced between OCI IAM and Microsoft Azure. Then, just click Finish and you're all set!
On the application overview page, click Activate and confirm that you want to activate the application. If everything works well it should look something like this.

And there you have it! We're all set to migrate users between Azure AD and OCI IAM.
Let's move on! 🚀
Migrate Users between Azure AD and OCI IAM
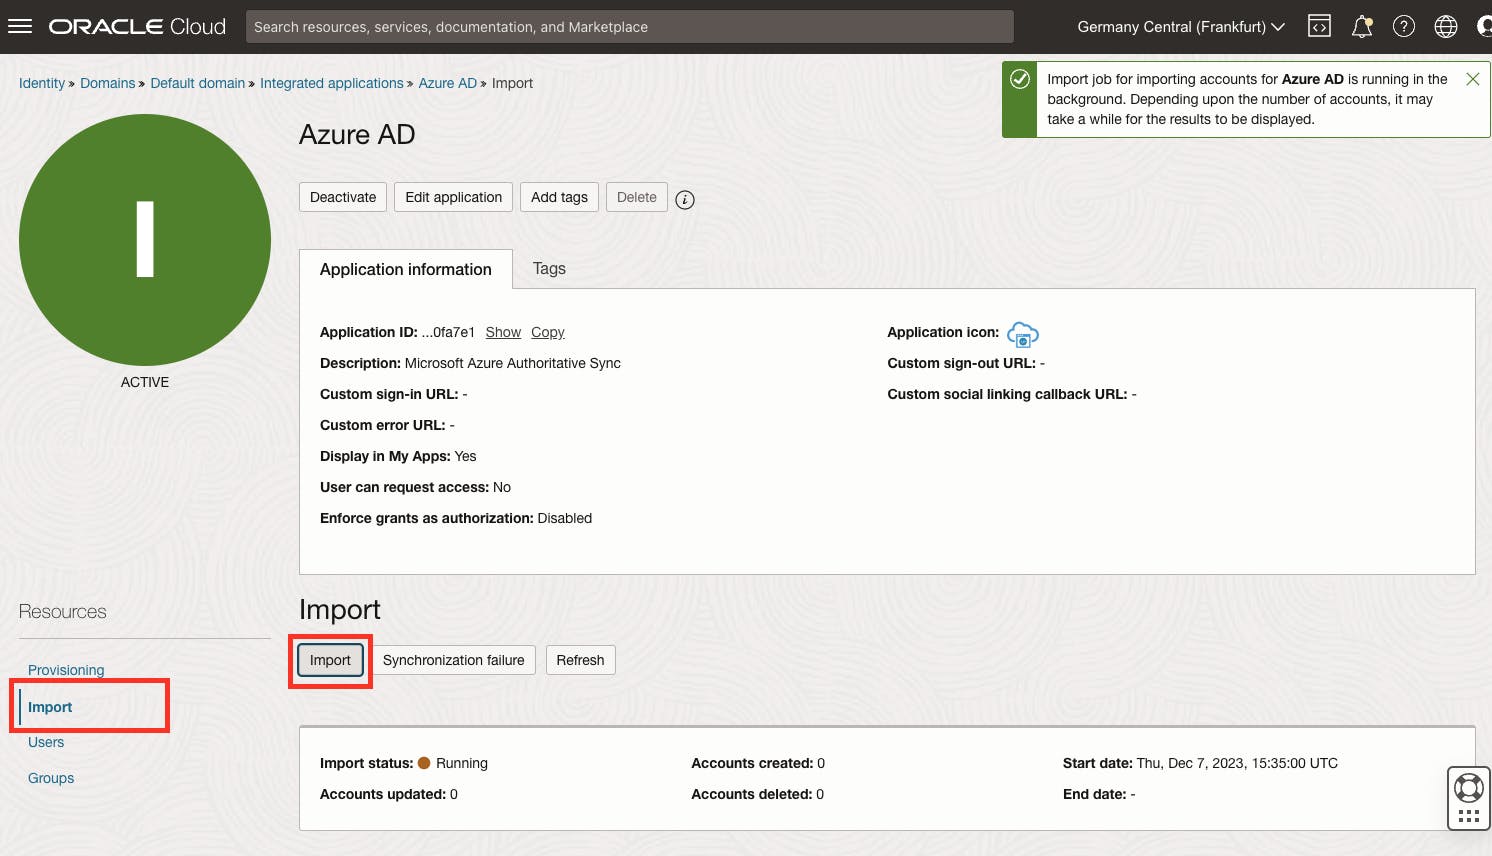
To bring Azure AD users into the Azure AD app in OCI IAM, all you need to do is navigate to the Import section in the left-navigation menu from the Azure AD Application and click Import Button.
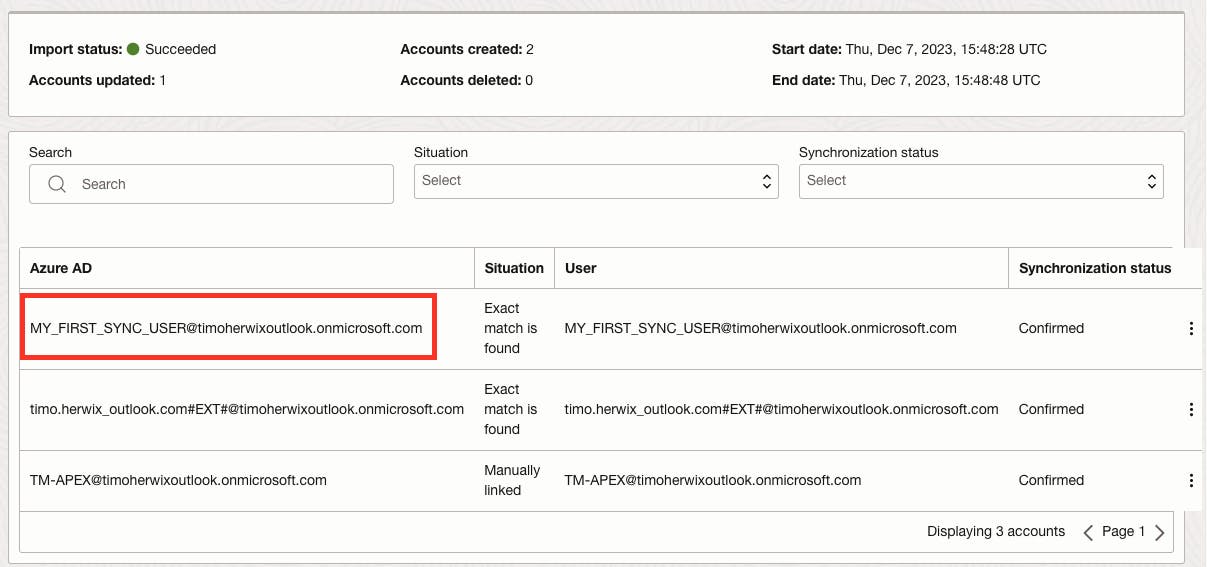
Just give the Refresh Button a click to check if the job is finished. Once the status switches to Succeeded, you'll see a list of users displayed! And there you have it! The user from Azure AD, who wasn't in OCI IAM, is now synchronized. 😎
To make sure the user was actually created, go back to the Domain Overview and click on the Users link in the left-side navigation menu. Now you'll be able to see that the user was indeed created.

That's it! You've successfully imported users from Azure to OCI IAM. 👍
Conclusion
In conclusion, we've shown how to automate the process of synchronizing user accounts between OCI IAM and Azure AD, eliminating the need for manual intervention. By using the SCIM protocol and OCI's app template, we've streamlined identity lifecycle management, making secure access both efficient and easy. Now, with Azure AD as the primary identity store, OCI IAM can seamlessly pull users, groups, and group memberships.