

Running Oracle 23c in a docker container on an OCI compute instance

I'm Mohamad, a versatile software developer with a passion for creating innovative solutions and solving complex problems. Throughout my career, I've had the opportunity to work on a variety of projects and technologies, such as JavaScript, Oracle APEX, PL/SQL, and SQL. I'm not just a developer; I'm a problem solver who enjoys tackling challenges head-on. I thrive in collaborative environments and am constantly exploring new technologies to stay at the forefront of the industry.
Introduction
In a previous post, we showed you how to install Oracle 23c on a compute instance running in OCI. In this post, we will go a step further and we will show you how to run Oracle 23c in a docker container hosted in a compute instance on OCI. So be ready and stay tuned ;).
For this demo, you will need a free OCI account with credits or a paid OCI account.
Installation process
To run Oracle 23c, we need first to provision a compute instance on our OCI account. The Compute instance needs to have at least 2 GB RAM, so it is required to have a paid account or some credits in your free account. We will also set up and configure a Virtual cloud network and subnet to place our instance in it. Then we will SSH into the compute instance from our local pc and install the required software such as docker. After we install docker we can install oracle23c.
Creating a virtual network
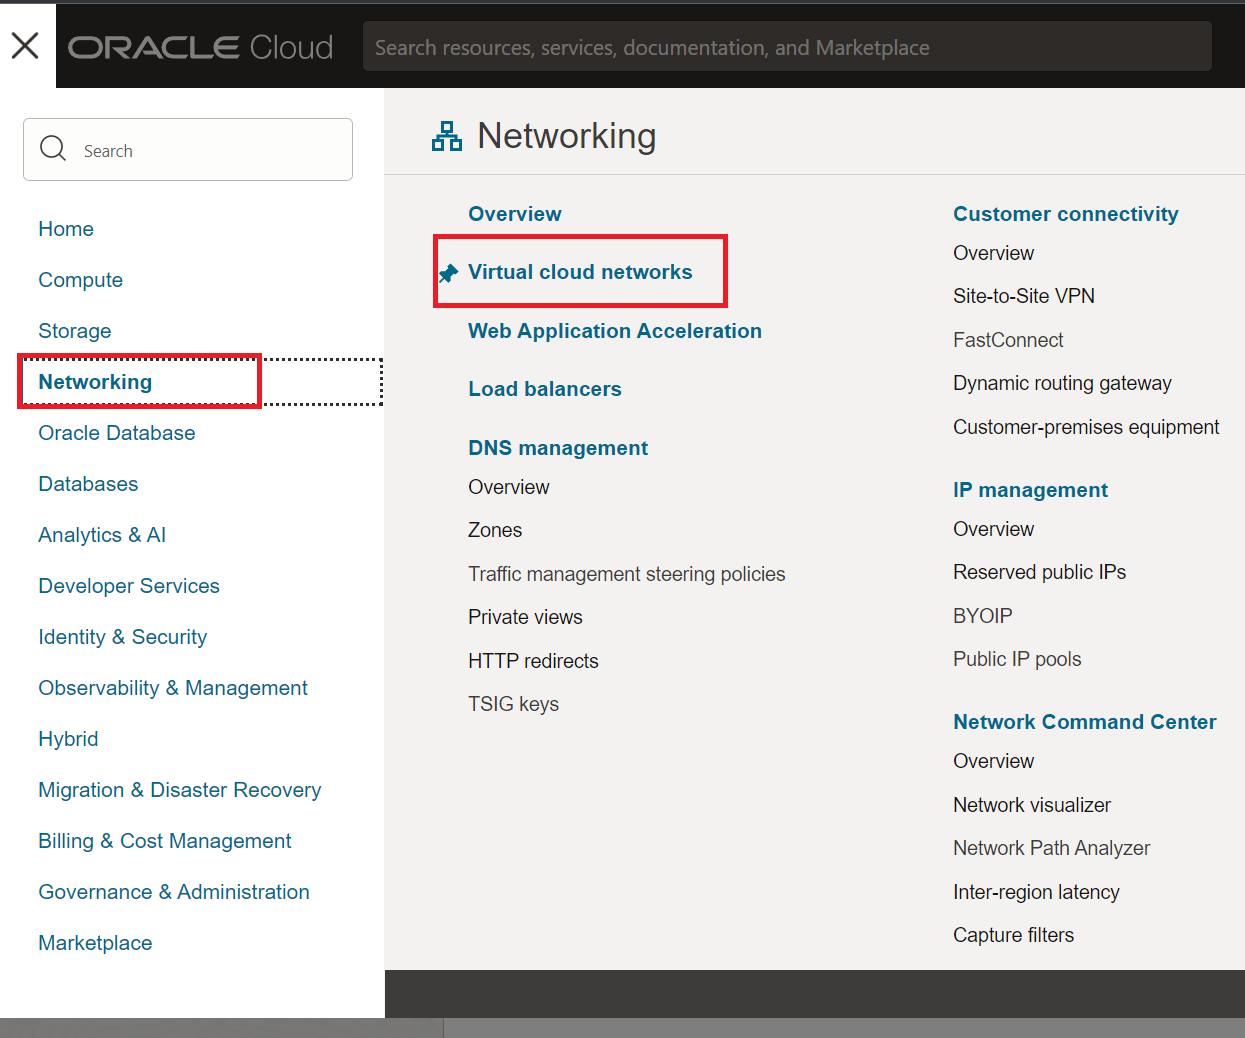
As a first step, we will create a virtual network, where our resources will be located. So navigate to your OCI tenant and go to networking and choose virtual cloud network.
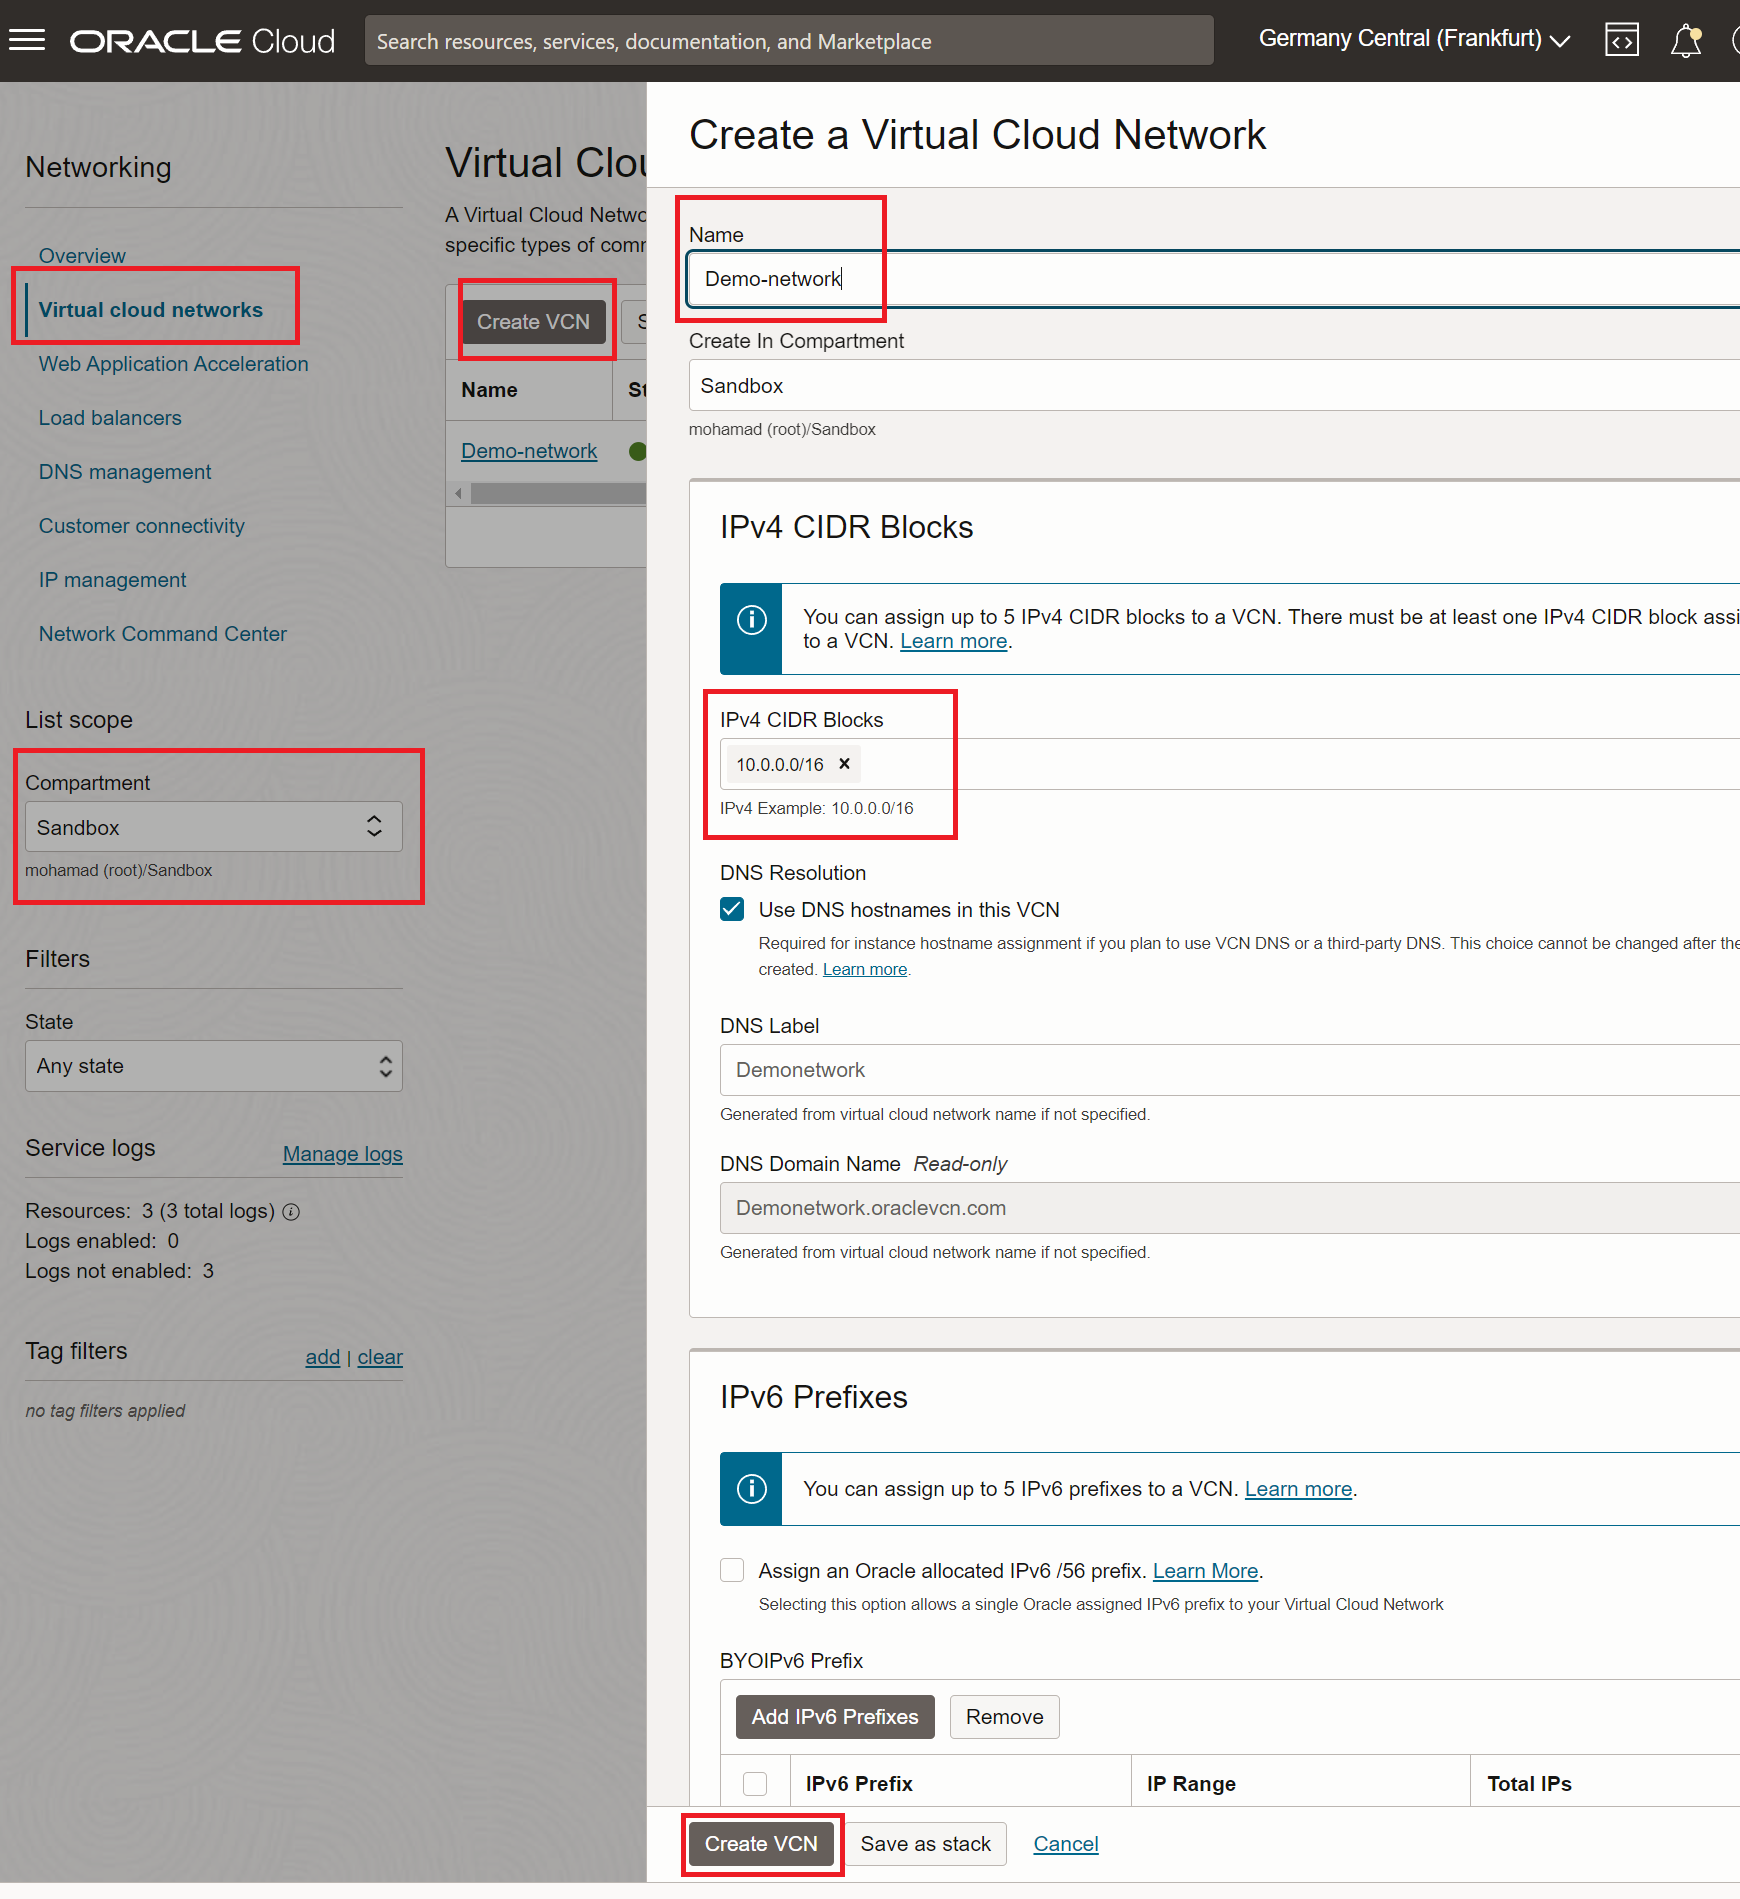
Make sure you are in the right compartment and click on create vcn, give your vcn a name and choose a CIDR block then keep everything else as default and click Create.
As we already know, we can't put an instance directly in a network. Instead, we need to create subnetworks. So, go into the vcn you have just created and click Create subnet.
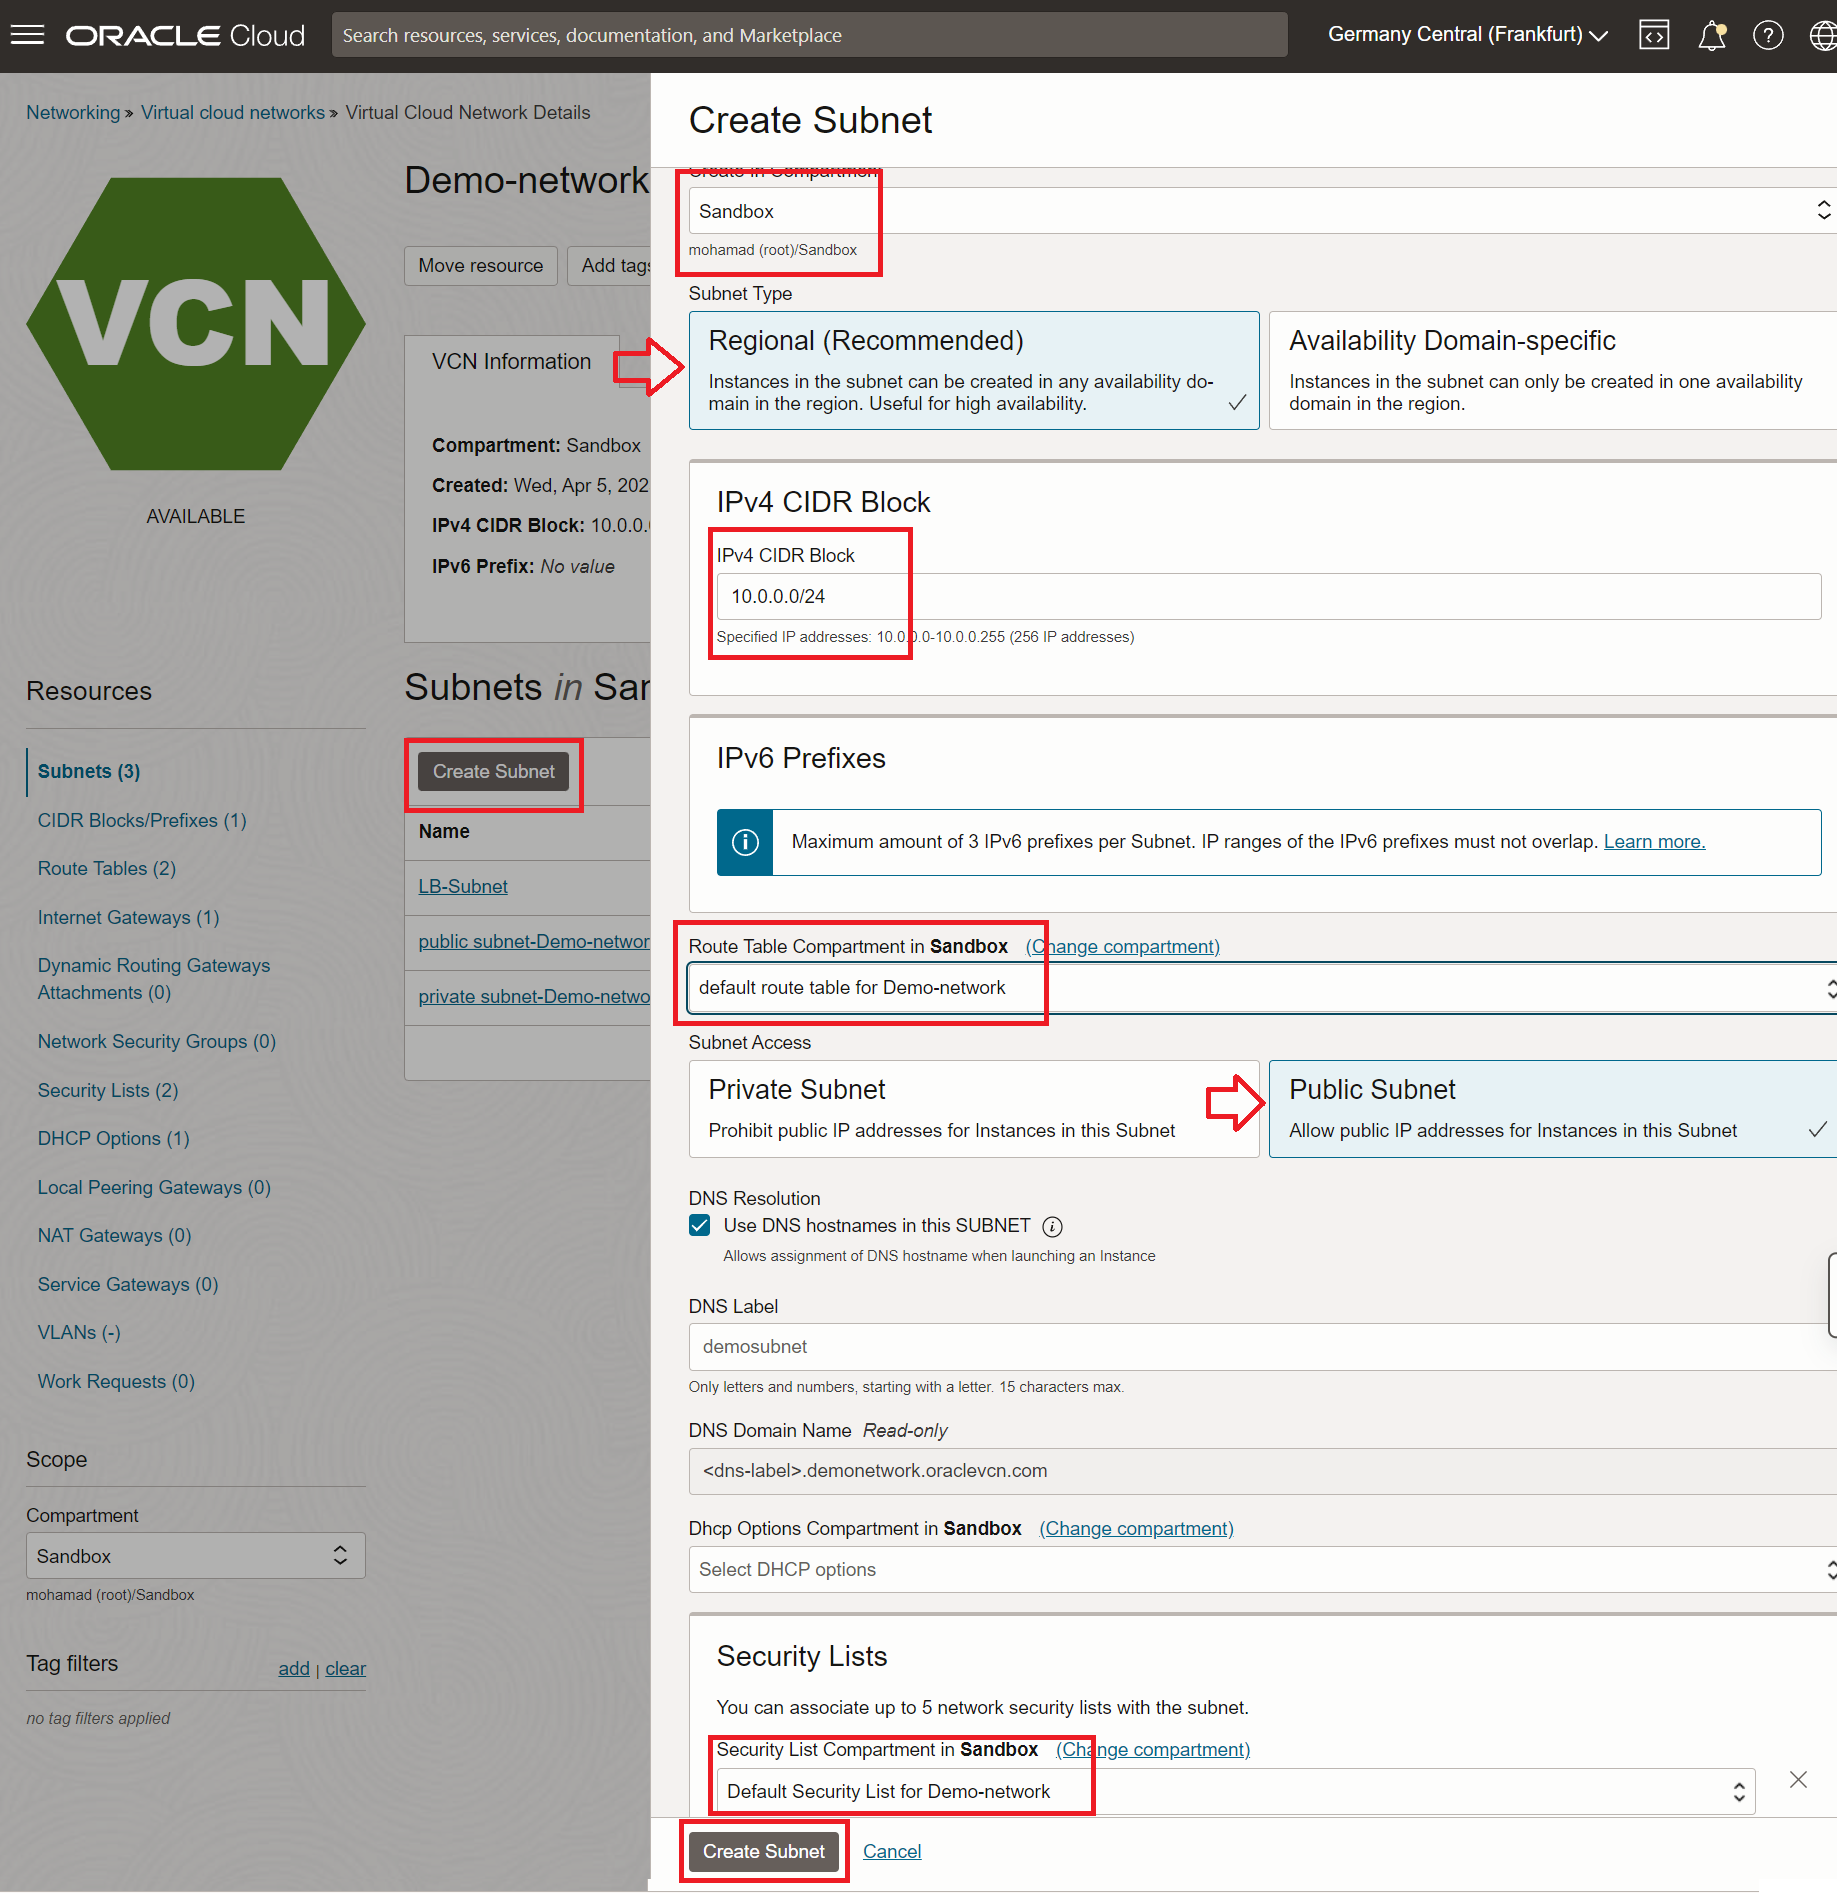
Give your subnet a name and choose whether you want it a regional or availability domain-specific subnet. Then choose a CIDR block for the subnet. For the purpose of this demo, we will make our subnet public so choose the public option and select the default route table and security list.
💡 The default route table and security list are automatically created when you create a new vcn.
Provisioning a compute instance
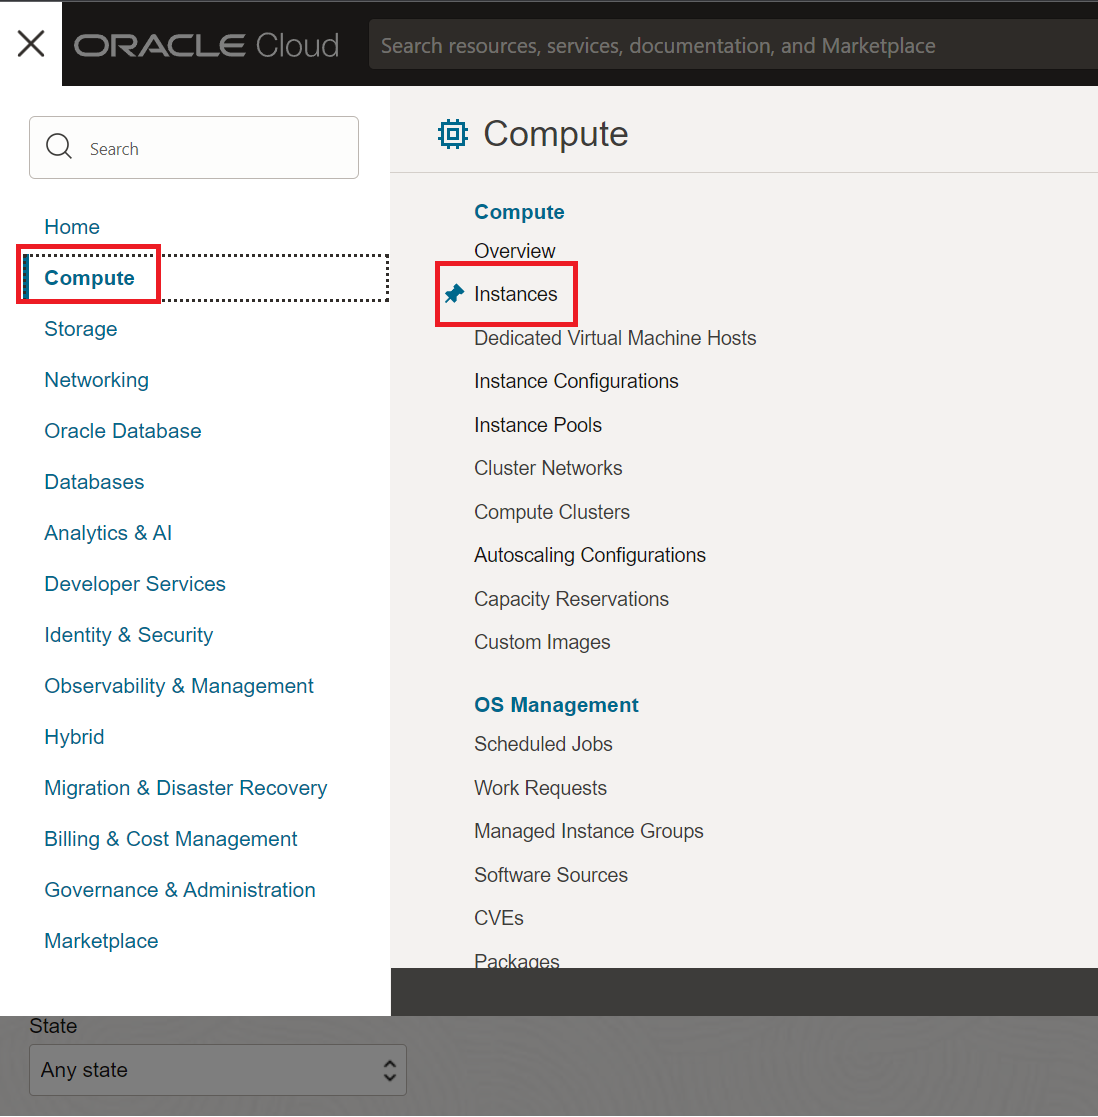
Next, we will need a compute instance where we will install docker. So, from the burger menu, choose the compute option and click on instances.
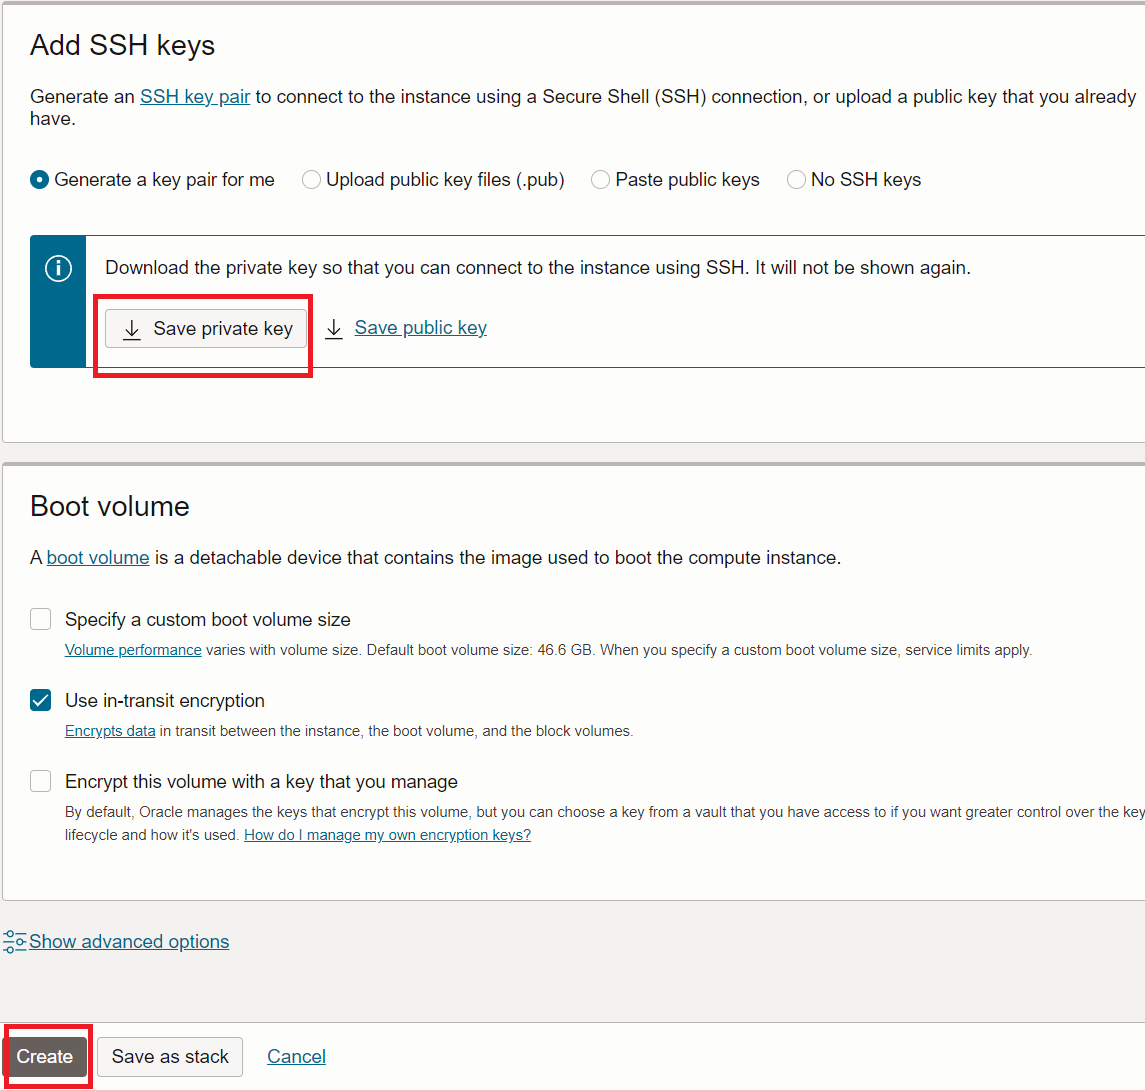
Click on Create instance, it will open a dialog for you to configure the compute instance. Give your instance a name and choose the right compartment, for the availability domain keep it as default, and for the image choose Oracle Linux 8 with the shape VM.Standard.E3.Flex (AMD, 1 CPU and 16 Gb memory). In networking, choose the network and subnetwork that we have created in the previous step.

Don't forget to download the SSH private key to connect to the instance later and then click Create.
Updating the security list
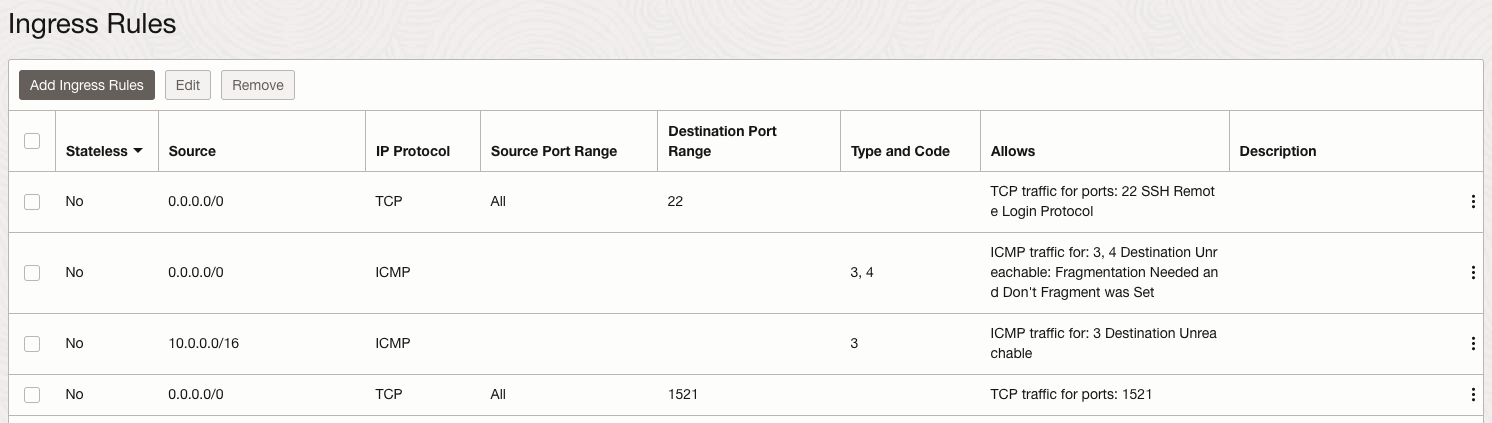
To connect to the database from our local "sql developer" tool, we need to configure our security list that is attached to the subnet. Again, for the purpose of this demo, we will allow connections on port 1521 which is the default port for the Oracle database.
⚠ In a real scenario, you won't put your database in a public network or expose the database port to the public.
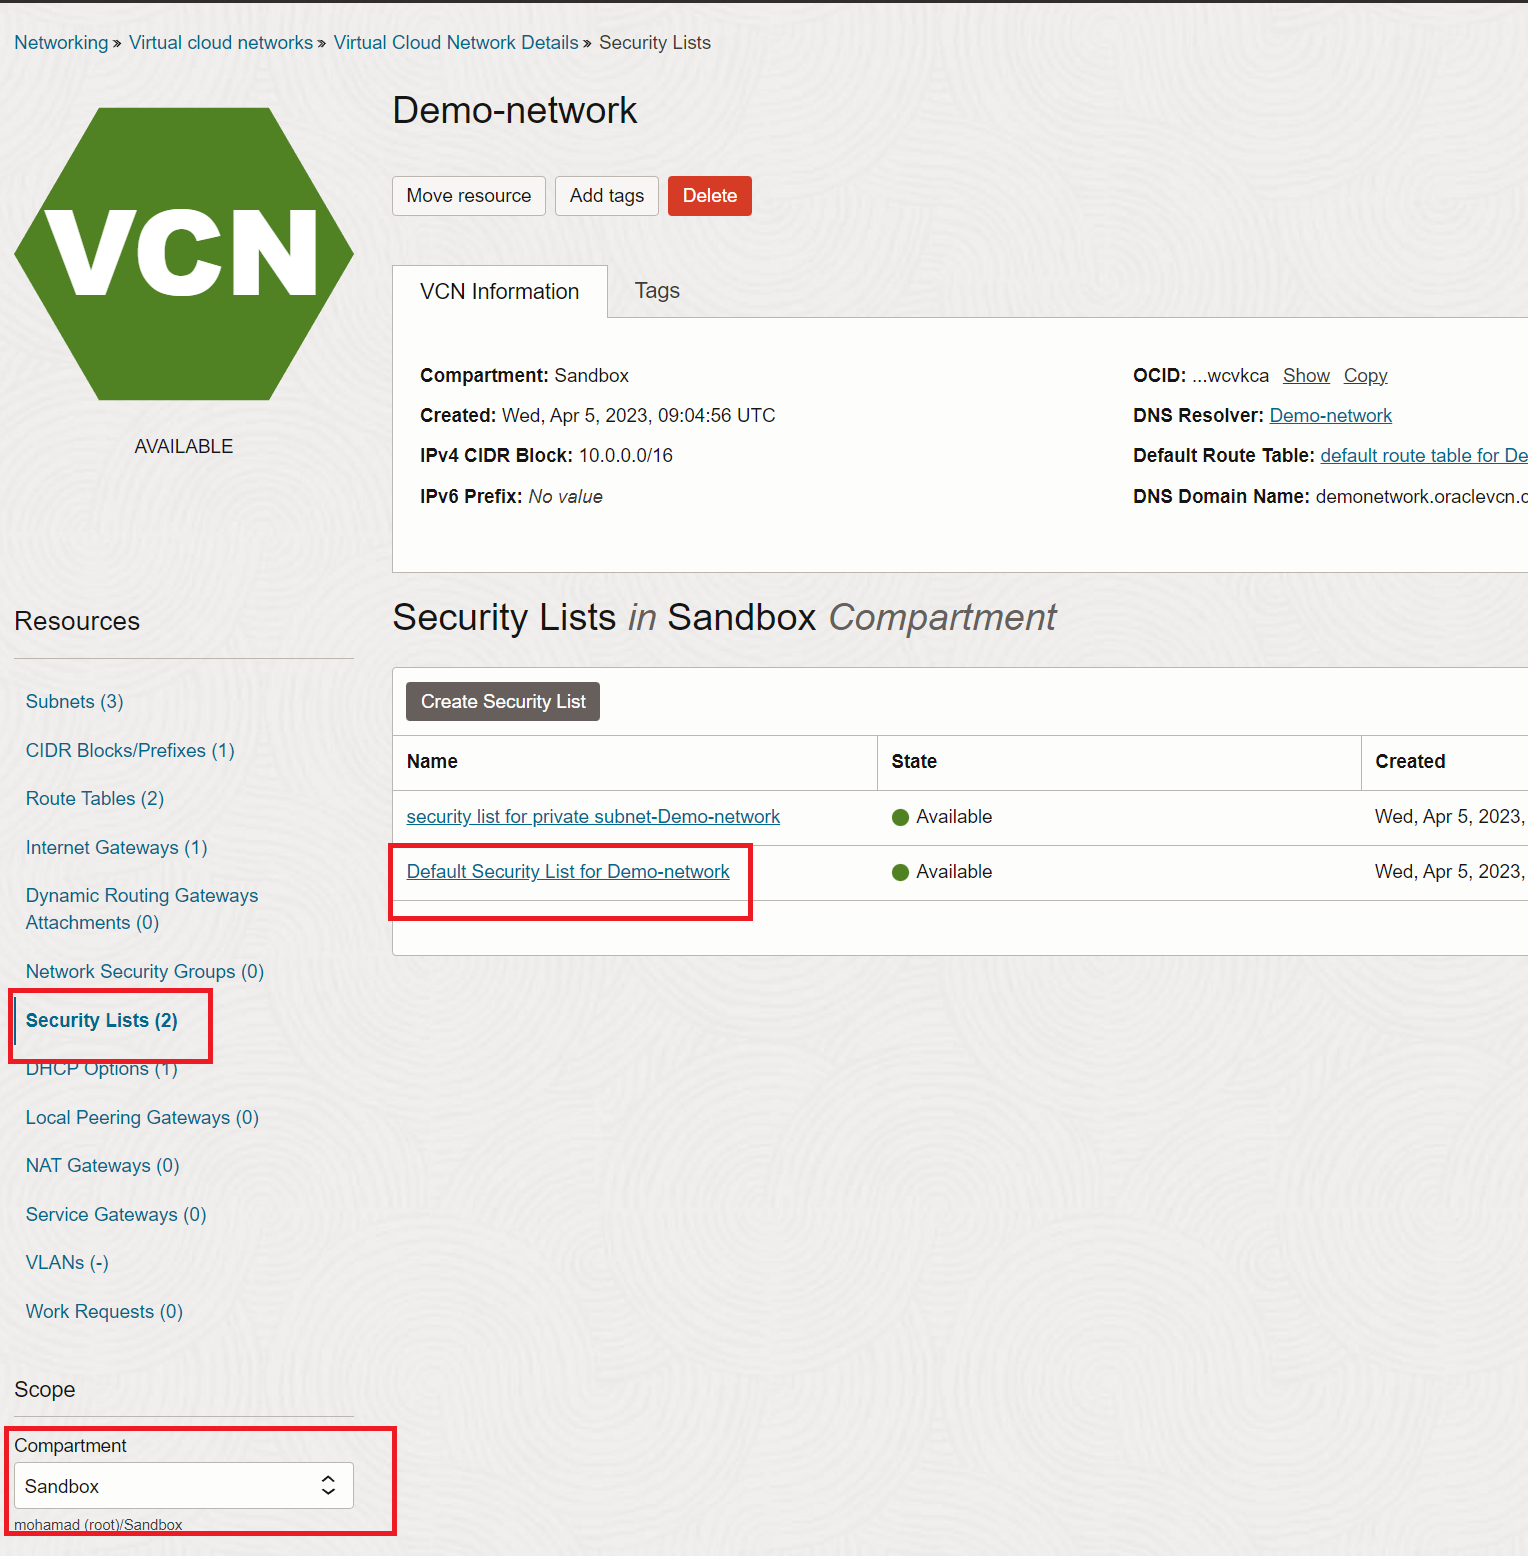
Navigate back to the networking, and go into the vcn we created (if you can't find it, make sure you are in the right compartment). On the left-side menu click on Security Lists and choose the default security list.
On the left-side menu choose Ingress Rules and click Add Ingress Rules button which will open a dialog to add the new rule. In the dialog add the following rule and click Add Ingress Rules.

In the end, your security list should look something like this one
Install docker
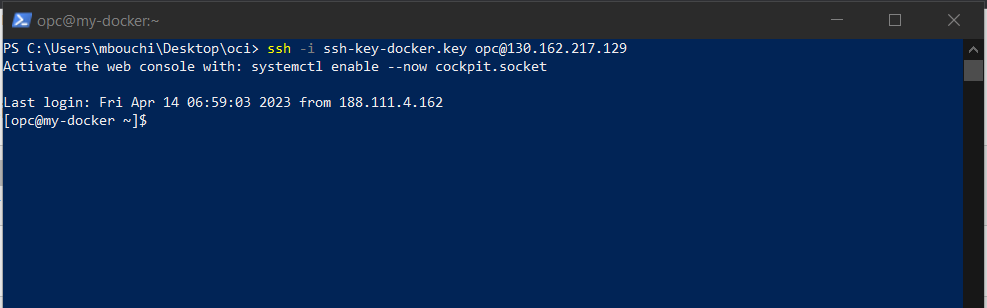
Next, we will install docker on the compute instance that we have provisioned. To do that, we will need to ssh to the instance using the private key. So, open PowerShell on your pc and navigate to the folder where your private key is located and write the following:
ssh -i <private-key-name> opc@<your-instance-public-ip>
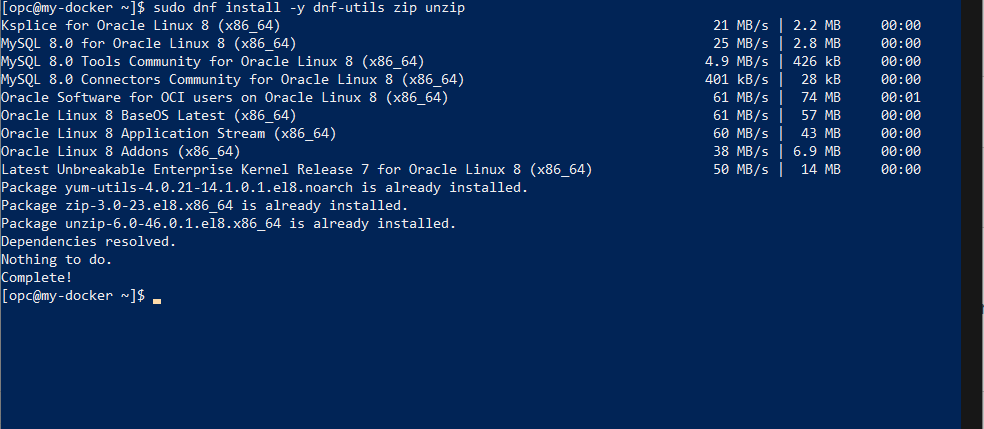
Now, we are in the compute instance and the first step is to install and enable some repositories that are needed for installing docker. To do that run the following:
sudo dnf install -y dnf-utils zip unzip
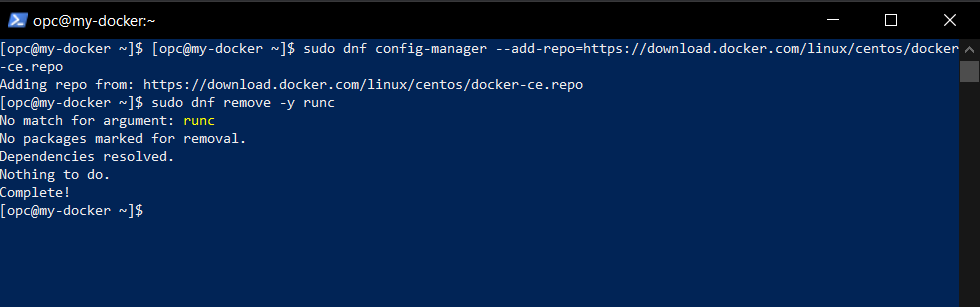
Then we will download and install the configuration repository for Docker
sudo dnf config-manager --add-repo=https://download.docker.com/linux/centos/docker-ce.repo

sudo dnf remove -y runc
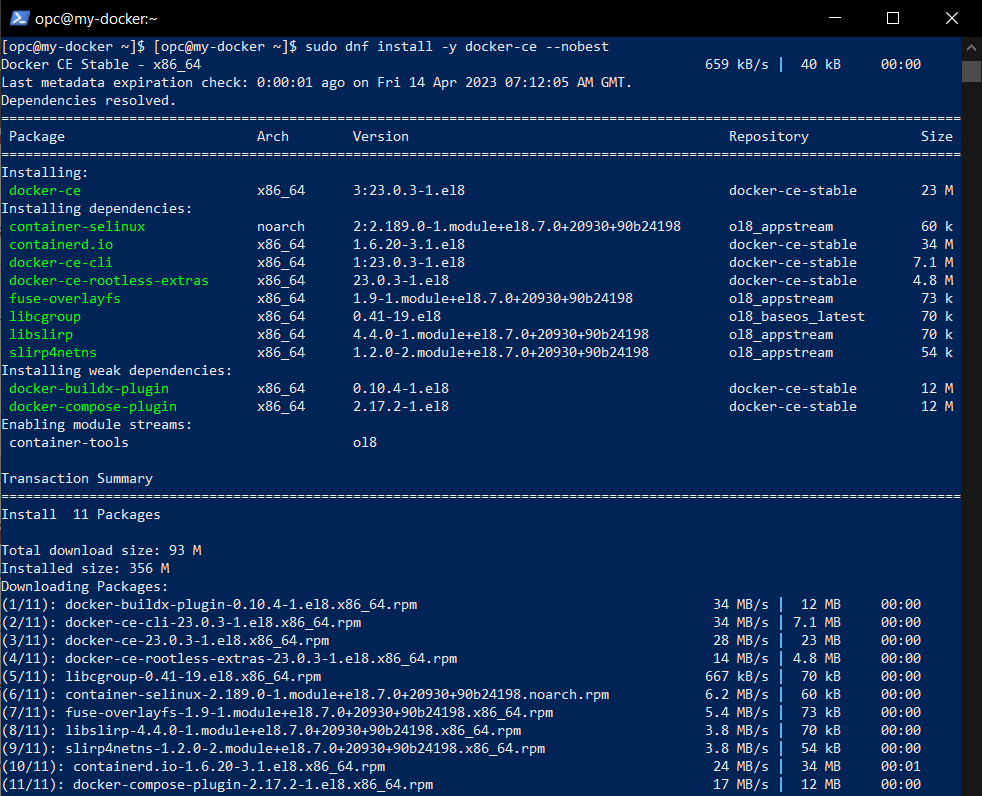
And finally, install docker
sudo dnf install -y docker-ce --nobest
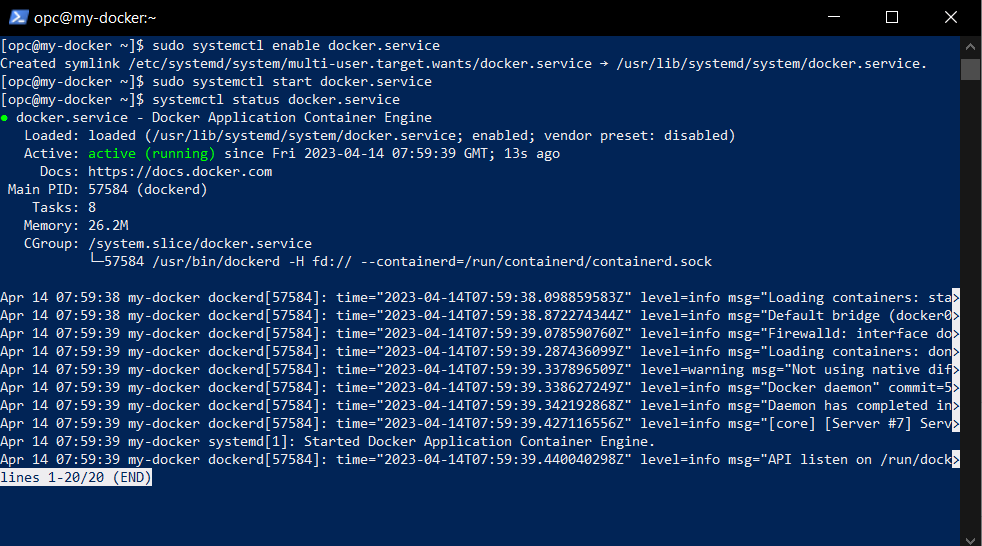
Congratulations! You have just installed docker on your Compute instance. Now, you are ready to enable the docker service and pull the Oracle image. To enable docker run this command:
sudo systemctl enable docker.service
sudo systemctl start docker.service
You can see the service status by running this command:
systemctl status docker.service
The last thing to do here is to pull the Oracle 23c image.
sudo docker pull container-registry.oracle.com/database/free
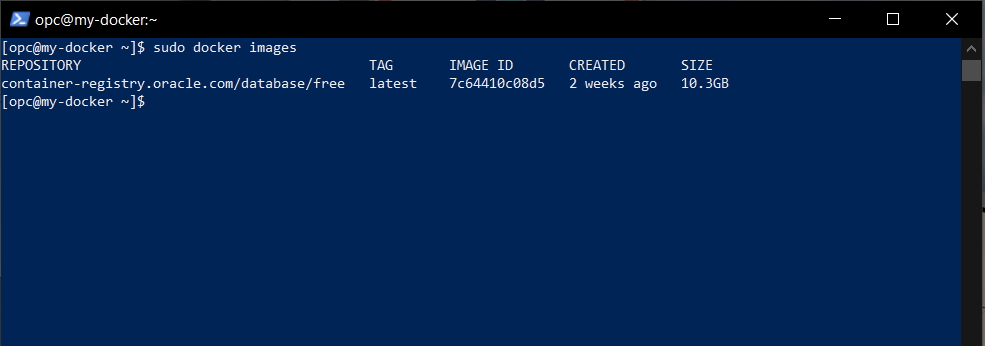
After the request is done, list your docker images and you should see the Oracle image.
sudo docker images
Spinning up an Oracle container
Now, it is time to create a container from the image we downloaded. To do that run the following command
sudo docker container create -it --name oracle23c -p 1521:1521 -e ORACLE_PWD=oracle23c container-registry.oracle.com/database/free
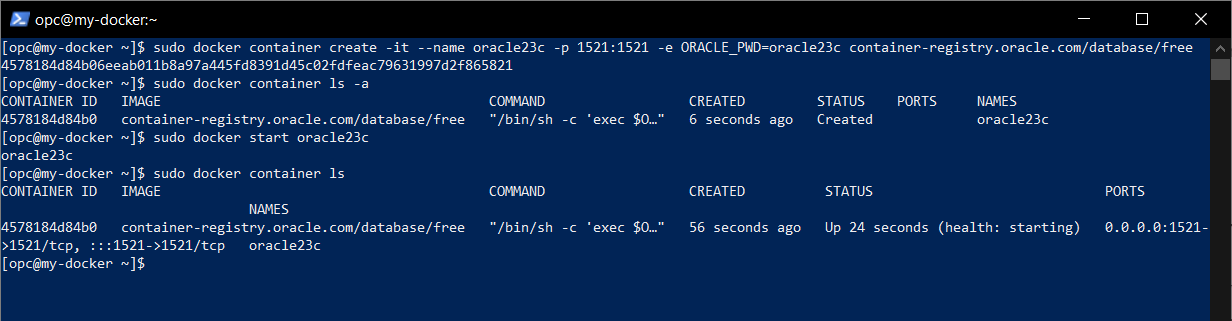
💡 You will need the password to connect to the Database, so try to choose a password you remember later.
Then run
sudo docker container status
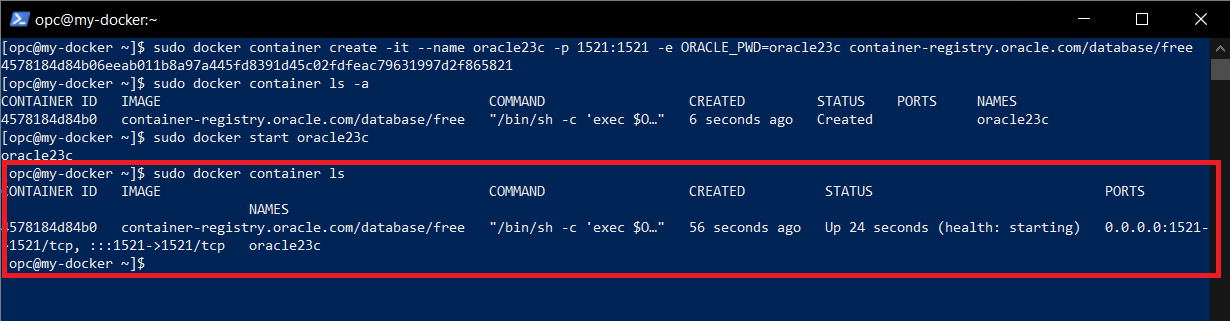
And here is your Oracle instance running in a docker container :).
Connecting to the Oracle DB
To connect to your instance from your local PC, open SQL Developer and add a new connection, then write your instance IP, the username and the password we provided in the last step.
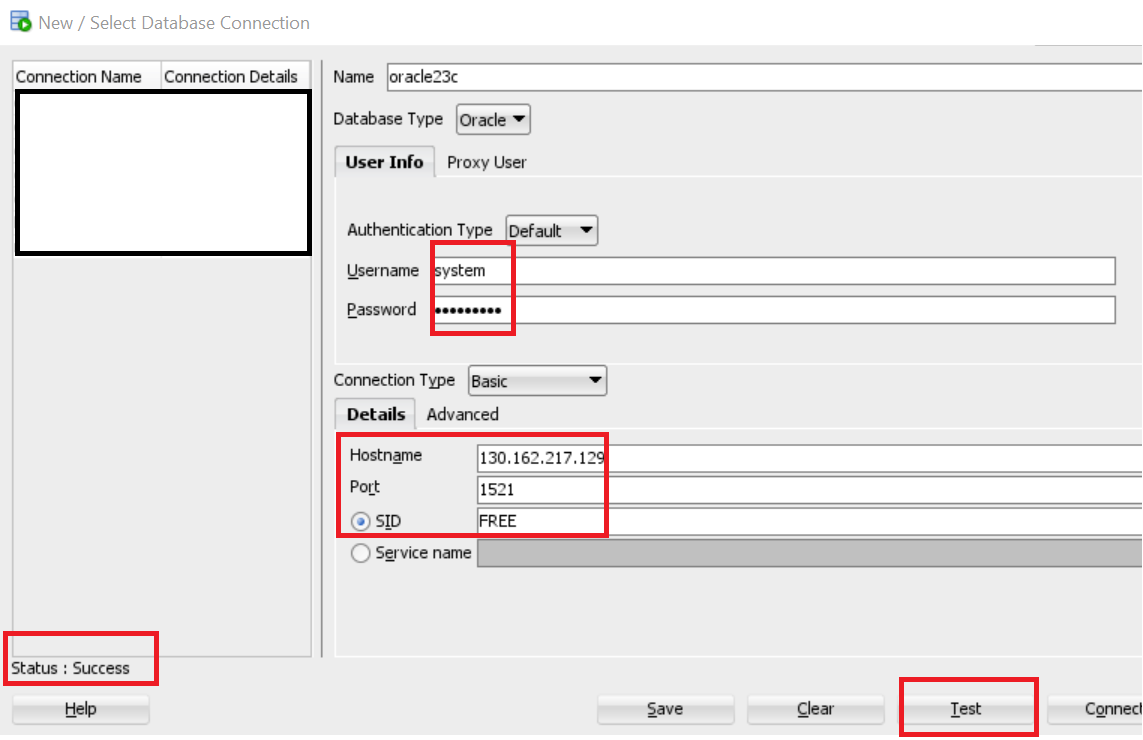
Congratulations, you are connected to Oracle 23c Database and you can enjoy the new awesome new features :).
Conclusion
As we saw, running an Oracle 23c version in a docker container cant be easier. In the next post, we will install ORDS and the latest Oracle APEX version. So stay tuned and be ready :).


