

Single Sign-On between OCI and a third-party Identity Provider like Microsoft Azure
Secure Access Made Easy: A Step-by-Step Guide Part 5


Introduction
In the previous blog posts, we've guided you step by step on how to set up the Authentication and Authorization process, as well as implementing Multi-Factor Authentication (MFA) or Passwordless Authentication for that extra layer of security.
However, in real-life scenarios or projects, one of the most common use cases is to integrate a third-party Identity Provider, such as Microsoft Azure Active Directory (or Entra-ID). By setting up a federation between Azure AD and OCI IAM, you allow users to access services and applications in OCI using their Azure AD Credentials.
Isn't that great? 😎
What needs to be done?
Well, to get started with integrating Azure AD, we'll need to set up OCI as a basic SAML Single Sign-On Application in Azure. This way, OCI IAM will act as a service provider (SP), while Azure AD takes on the role of an identity provider (IdP).
As you can see in the flow diagram below, the Service Provider (OCI) creates a SAML request and forwards the user and the SAML request to the Identity Provider (Azure AD). Once the user is authenticated, the Identity Provider sends back a signed SAML response with an assertion to the Service Provider's Assertion Consumer Service endpoint. This whole process starts with a simple click of a Sign-In button on the Service Provider's side.

Now that we understand the architecture for this process, we'll need to follow a few steps in the Oracle Cloud Infrastructure Console and a couple more in Azure.
So, let's dive into that! 🔎
Prerequisites
Before we dive in, please make sure you have completed the following prerequisites listed below. This will enable you to move through this guide seamlessly.
OCI Tenancy ✅
Azure AD Account ✅
All set? Let's go! 🚀
Get the OCI Federation metadata document for download
First, we'll need the Service Provider metadata from the OCI IAM identity domain to import it into the SAML Azure AD application we will create later. Just follow these steps to download the metadata.
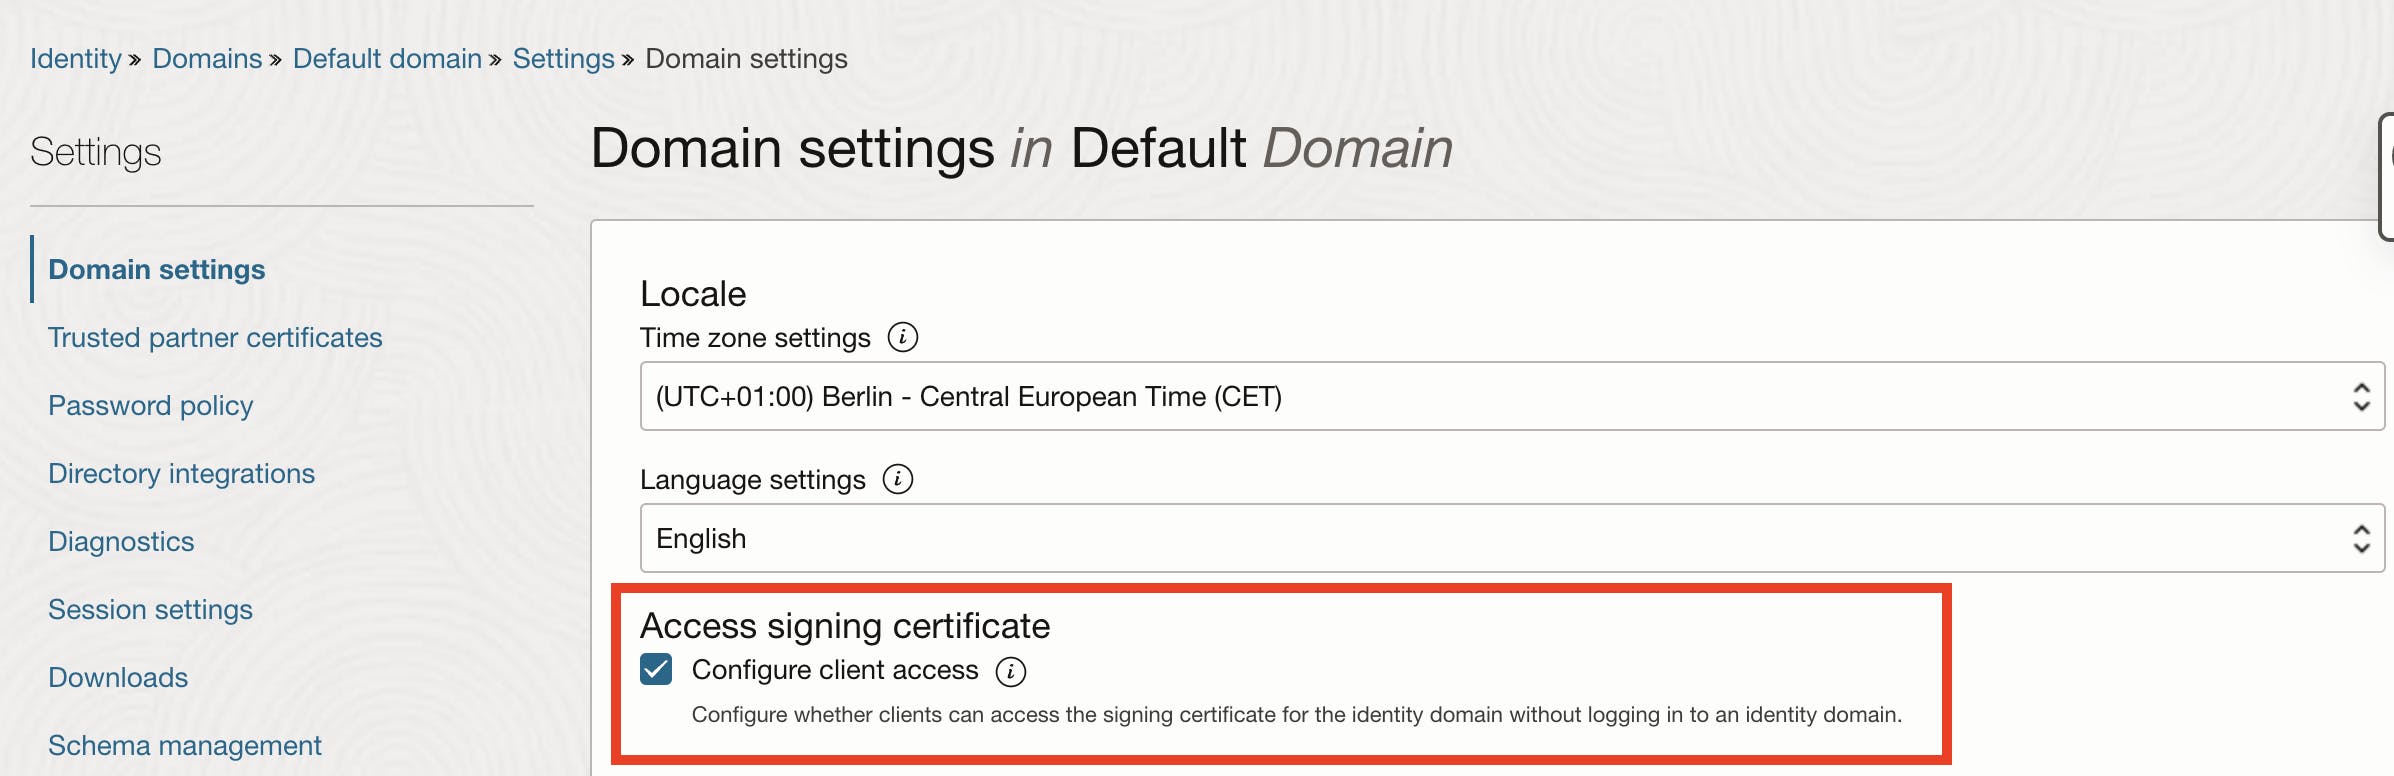
So, log in to your OCI tenancy and click on the hamburger menu. From there, go to Identity & Security, and then choose Domains. Select the default domain and find the Settings link in the left navigation menu and click on it. Under Access signing certificate, make sure to check the Configure client access box, and then click Save changes.
This allows a client to access the signing certificate for the identity domain without needing to log in to the domain itself.
After you've selected the default domain and saved your changes, go back to the Default domain Overview. Look for the Security link in the left navigation menu and click on it. In the Security Overview, you'll find the Identity providers link in the same left navigation menu - click on that too. Finally, click the Export SAML metadata button to download the metadata document.

Click the Download XML button and save the file. Then click Close and move on to the next step, where we'll create a Microsoft Azure Application.
Set Up Azure Active Directory
First up we have to do some things in Azure Active Directory (Entra ID), such as creating an Enterprise application and managing Users and Groups.
So let´s start with that 😉
Create an Azure AD Enterprise App for Single Sign-On
The first step that we want to do is to create a new Enterprise App in Azure and get the metadata that we will later upload to OCI as an Identity Provider.
Go to https://Portal.azure.com and click on Microsoft Entra ID. Next, click Enterprise Applications, and then choose New Application. Select Oracle Cloud, and then specify Oracle Cloud Infrastructure Console.

Specify a name, for example, OCI Federation, and then click Create.

In a few seconds, the application will be ready to configure. So, let's move forward and set it up.
Configure Single Sign-On for the Azure AD Enterprise App
In this part, we need the OCI IAM metadata file that we saved earlier!
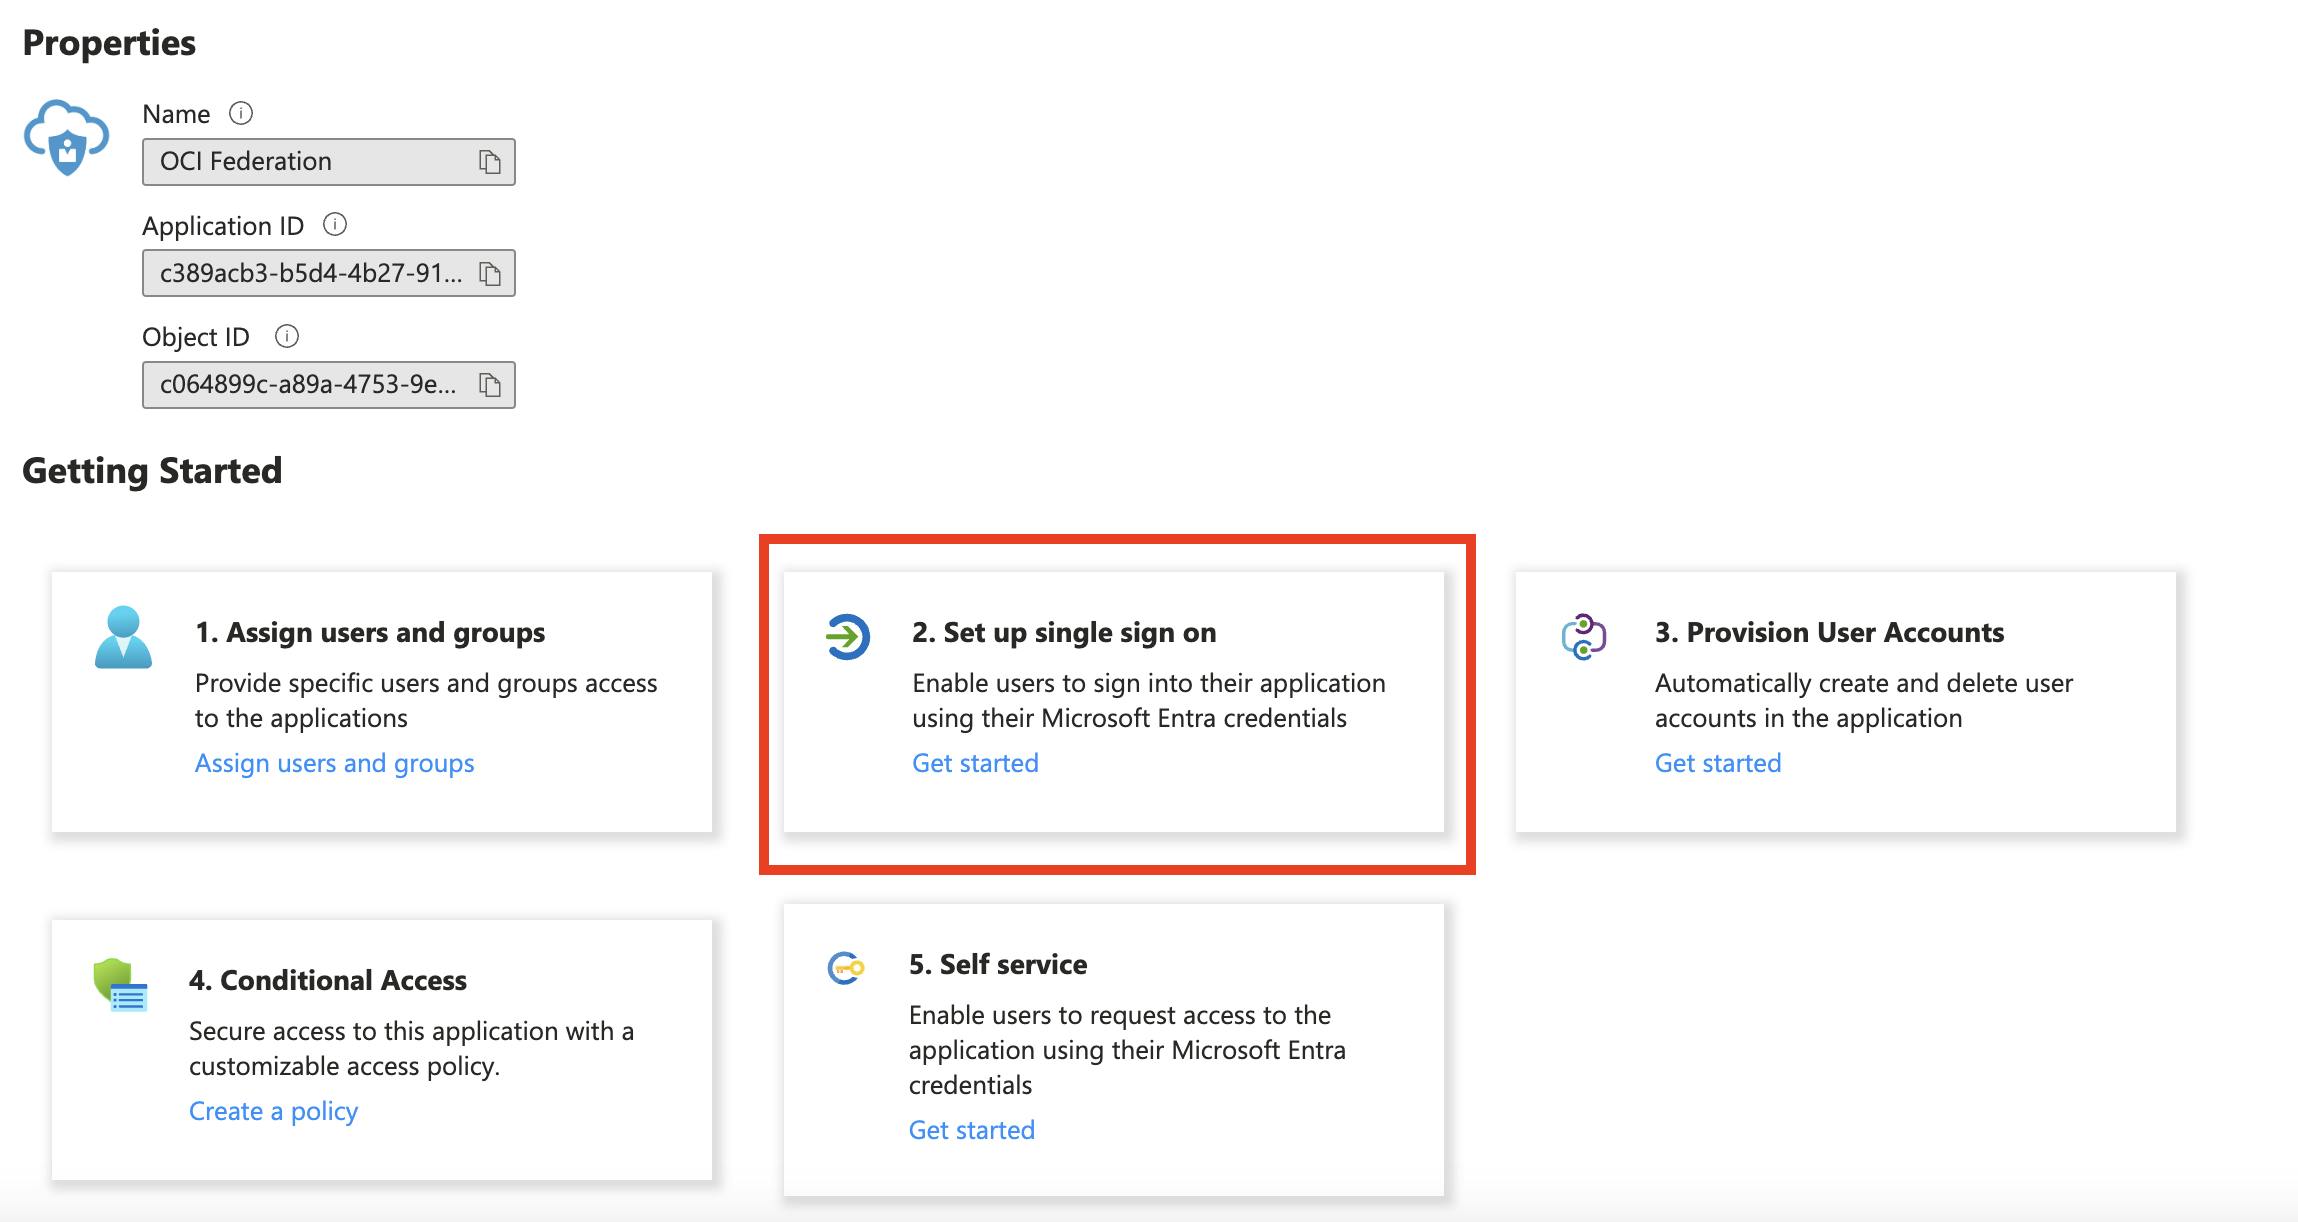
Alright, now that we're on the Getting Started page, let's go ahead and select Set up Single sign-on.
Then select SAML as a Single Sign-On method.

The Set up Single Sign-On with SAML page is displayed. At the top of the page, click on Upload metadata file. Locate the metadata file we downloaded from OCI in the previous Step and upload it here. Once you've done that, these Basic SAML Configuration fields will be filled in automatically:
Identifier (Entity ID)
Reply URL (Assertion Consumer Service URL)
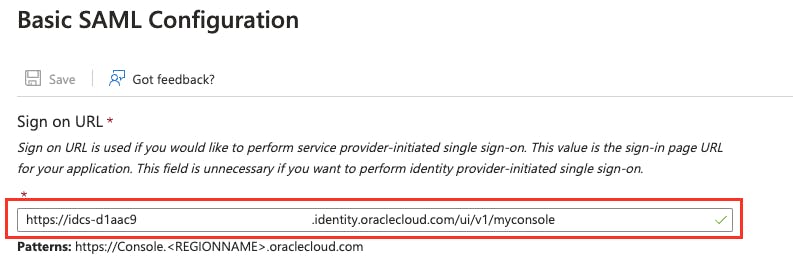
Now, on the Basic SAML Configuration pane, enter the Sign on URL using this format:
https://idcs-<domain_ID>.identity.oraclecloud.com/ui/v1/myconsole
Then click Save and move on to configure the User Attributes and Claims.
Configure User Attributes & Claims
The Oracle Cloud Infrastructure Console Enterprise Application template already comes with the necessary attributes, so you won't have to add any. But, you'll still need to tweak the Attributes and Claims in your new Azure AD SAML Application to make sure the user email address is used as the username.
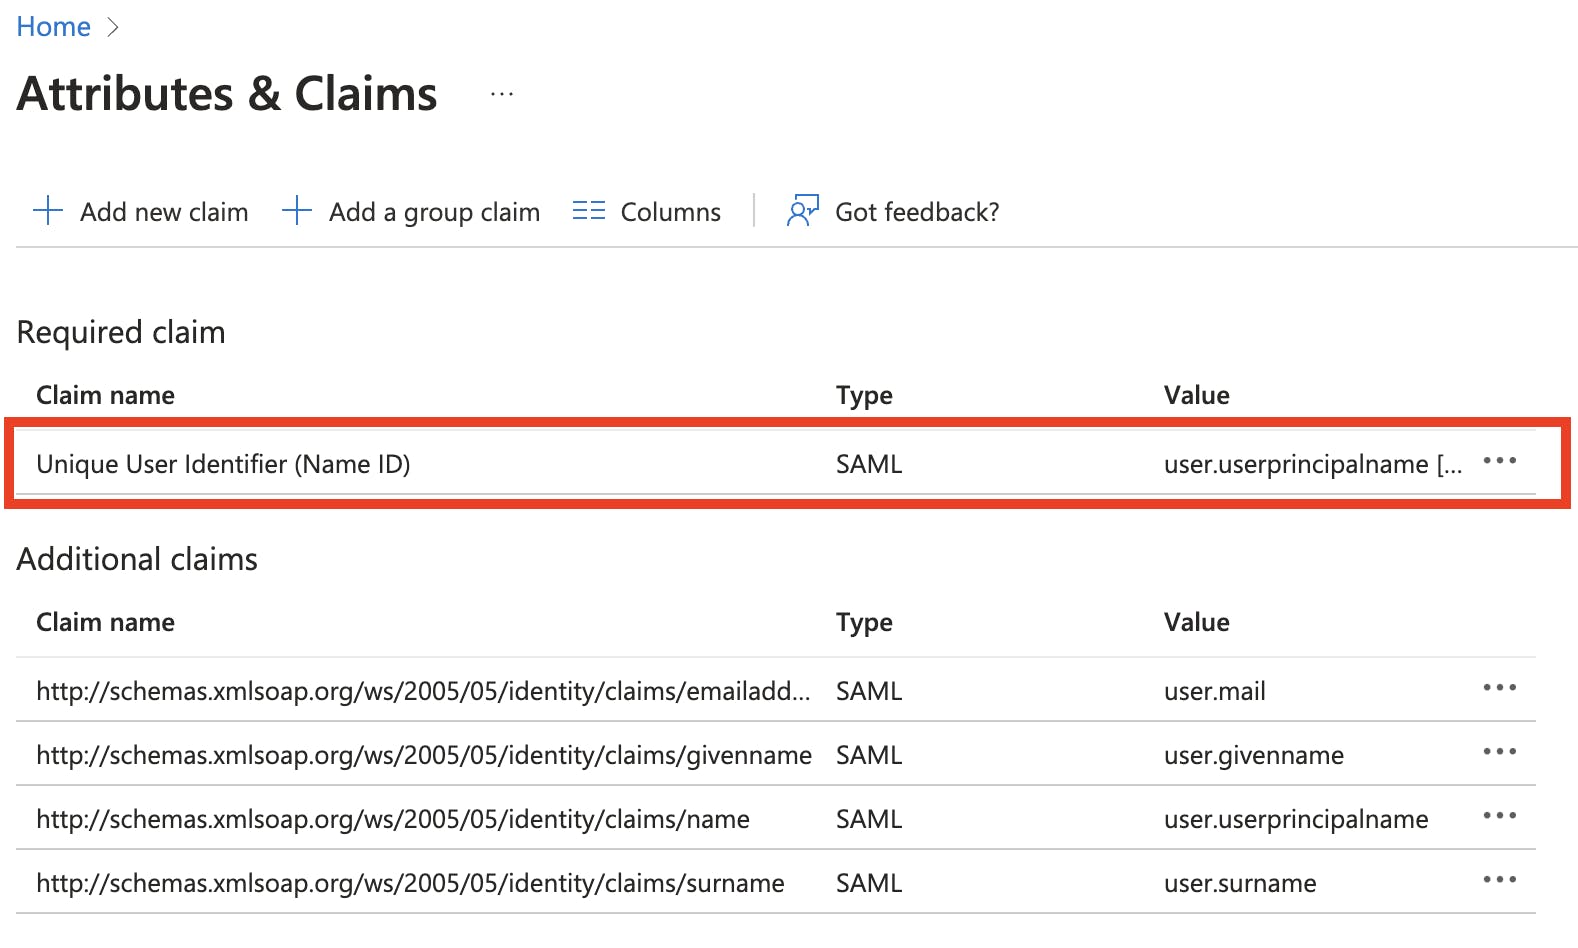
Scroll to the Attributes & Claims section and click Edit in the upper-right corner.

Now you'll see the Attributes & Claims panel. Under Required claim, click on Unique User Identifier (Name ID).
In the Manage claim page, change the Source attribute from user.userprinciplename to user.mail.
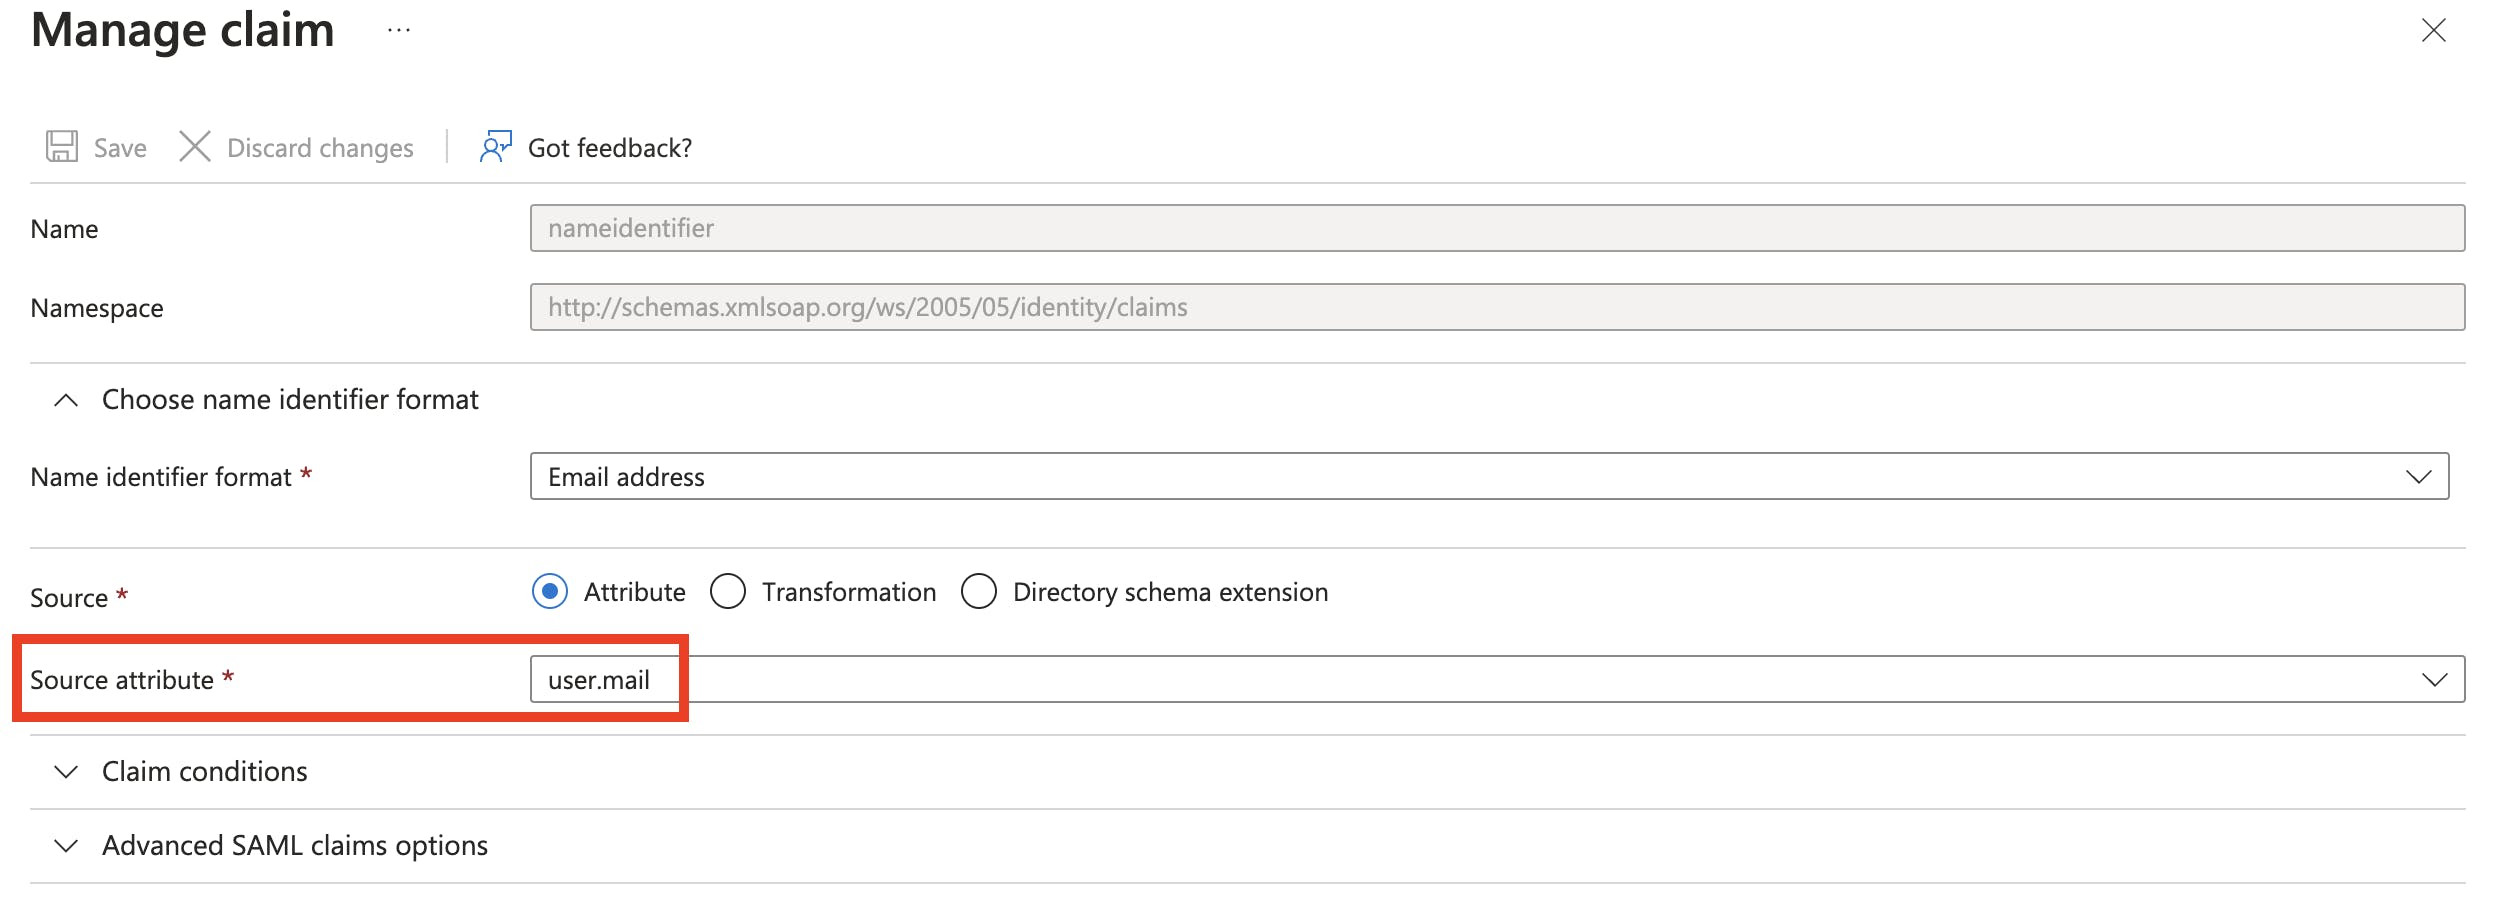
Then click Save and close the page.
Get the SAML metadata document for download
Finally, we need the SAML metadata file. Scroll to the SAML Certificates section and click the Download link next to Federation Metadata XML.

Make a note of where you saved it. You will upload it to the OCI console later, so keep it handy!
Optional: Create a Test-User
Let's create a user for your Entra ID application. This way, they'll be able to use their Azure AD credentials to sign in to the OCI Console later on.
To do this, navigate to the Entra ID Overview and click on Users. Then, click New user. In the Create new user panel enter a User principal name, Display name and Password.
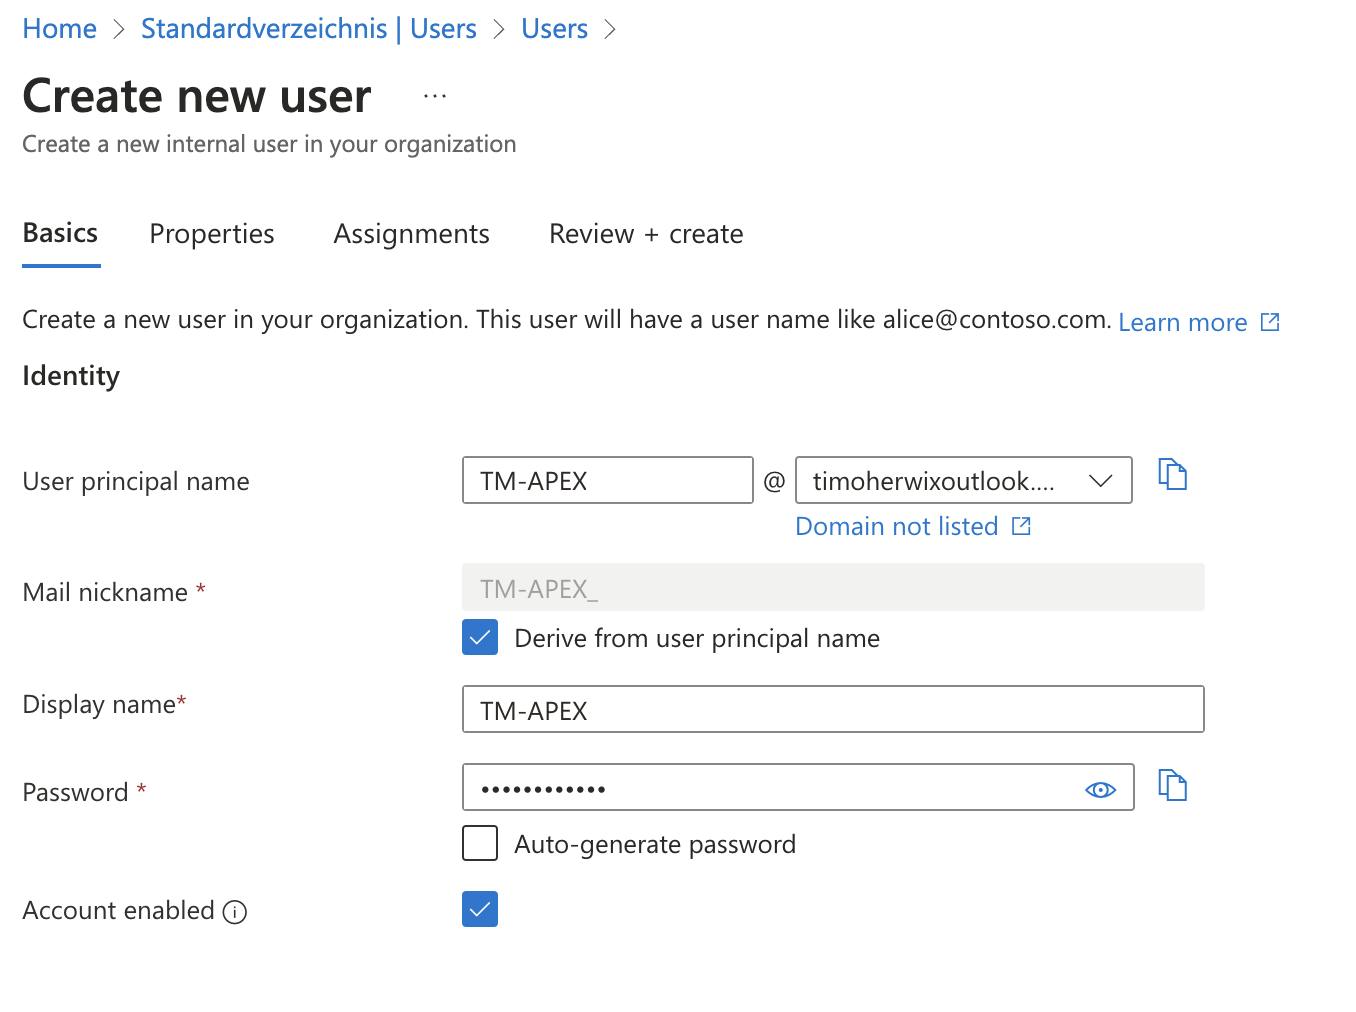
Then click Review + create.
Assign user groups to the application
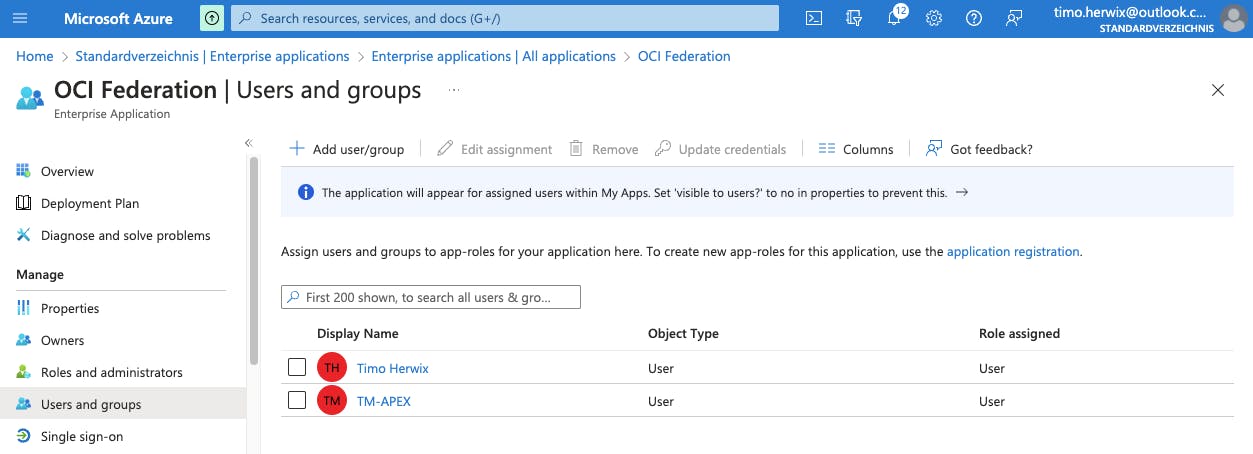
To let your Azure AD users sign in to OCI, you'll need to assign the right user groups to your new enterprise application.
On the left navigation pane, under Manage, click on Users and Groups. Then, click Add user/group to open the Add Assignment pane. From there, you can choose the User(s) or Group(s) you want to assign, and click Assign to link the application to the selected users/groups.
That´s it. You've completed the configuration part for Azure AD. Now we can move on to setting up the configuration in OCI.
Set up Azure AD as an Identity Provider for Oracle Cloud Infrastructure
In this part, we need the Azure AD metadata file that we saved earlier!
For these steps, we'll be working in OCI IAM. So, go back to your OCI Console and navigate again to the Identity Provider Overview*(Identity > Domains > Default domain > Security > Identity providers)*.
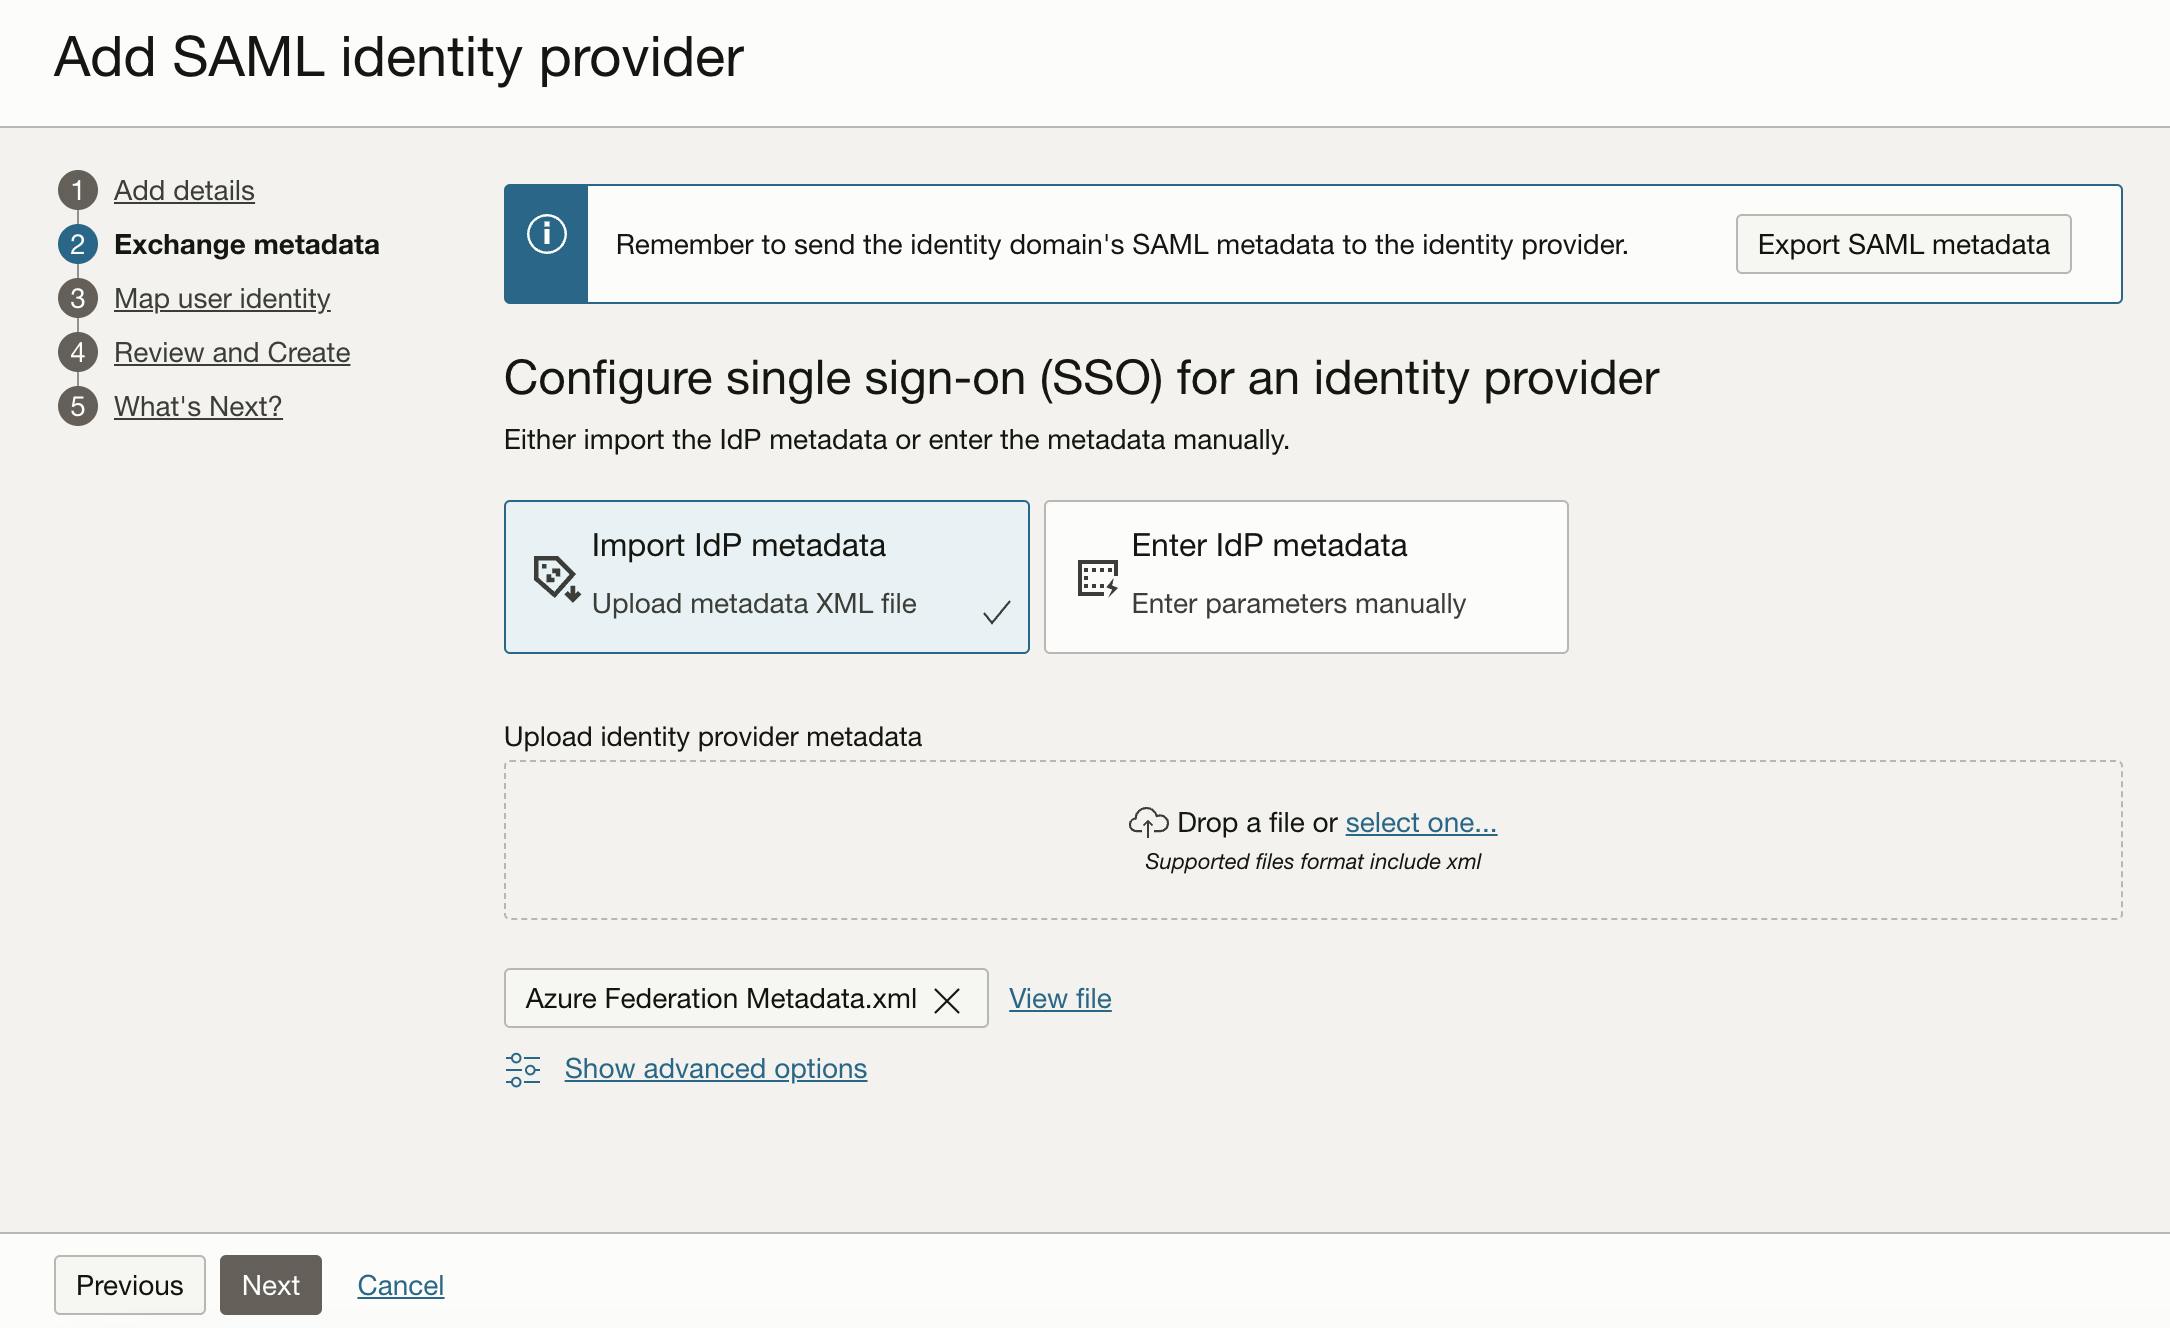
Next, click the Add IdP button and choose Add SAML IdP.

Then the Add SAML identity provider page is displayed. Enter a name e.g. Azure Federation and click Next. In the next step, upload the XML metadata file from Entra ID and click Next.
The next step is to Map user identity. Set the following here:
For the Requested NameID format, choose
Email addressFor the Identity provider user attribute, select
SAML assertion Name IDAnd finally, for the Identity domain user attribute, select
Primary email address

Click Next, and you'll see a summary in the final step. Just go ahead and click Create IdP.
To do this, click on the Test login Button.

Now, you'll be prompted to choose a Microsoft Sign-In account. Pick the one you'd like to use!

Select your user, then click on it to check if the Sign-In works.
If everything is running smoothly, you'll see something like this:

Now you're ready to activate the IdP. Just click the Activate Button. 😎

Finally, we add an IdP policy! To do this, click on the Add to IdP policy Button. Next, click on the Default Identity Provider Policy to open it up, and then click the Actions menu followed by Edit IdP rule. Now, click Assign identity providers and choose Azure Federation to add it to the list.

Lastly, give that Save Changes button a click, and you're all set! 😊
Final Test ✅
Now let's give the Single Sign-On one final test.
To do this, open a new "Incognito" browser and type in the OCI Console URL:
https://www.oracle.com/de/cloud/sign-in.html
On the Sign-in page, you'll notice an option to Sign-in with Azure Federation. That's just what we're looking for and what we've been working on lately. Give it a try! 👍

Choose Azure Federation. You'll be redirected to the Microsoft login page. Just enter your Azure AD credentials, and once you're successfully authenticated, you'll be logged into the OCI Console.

And there you have it! That wraps up our step-by-step guide. Enjoy! 😎
Conclusion
In conclusion, integrating OCI with a third-party Identity Provider such as Microsoft Azure AD can significantly streamline your authentication process. By setting up a federation between Azure AD and OCI IAM, you allow users to access services and applications in OCI using their Azure AD-authenticated credentials. Once completed, it provides a seamless and secure Single Sign-On experience for your users.