

Using REST-enabled SQL in OCI Autonomous DB for On-Premise APEX Applications


This tutorial will walk you through the process of exposing your schema objects in an Autonomous database that runs on OCI by using the REST-enabled SQL feature and then using those schema objects in an external APEX running on a different environment.
Introduction
Oracle APEX offers you the ability to execute SQL and PL/SQL on a remote database, where you might have stored your data. This is a very powerful feature because you no longer have to create a REST API to handle each specific client request. You simply expose the schema and allow the clients to interact with the schema objects just as if they were in their local database. The only thing you have to do is have ORDS 20.3 or later installed on the remote server and have "REST-enabled SQL" enabled for that specific schema.
Prerequisites
Before we start, you will need the following to be able to walk through this demo:
OCI Free account ✅
Access to an APEX Workspace ✅
Setting up
In this demonstration, we will utilize the Autonomous database hosted in OCI as our remote database to leverage the advantages offered by this powerful database and the tools in OCI.
Task1: Setup the Autonomous database on OCI
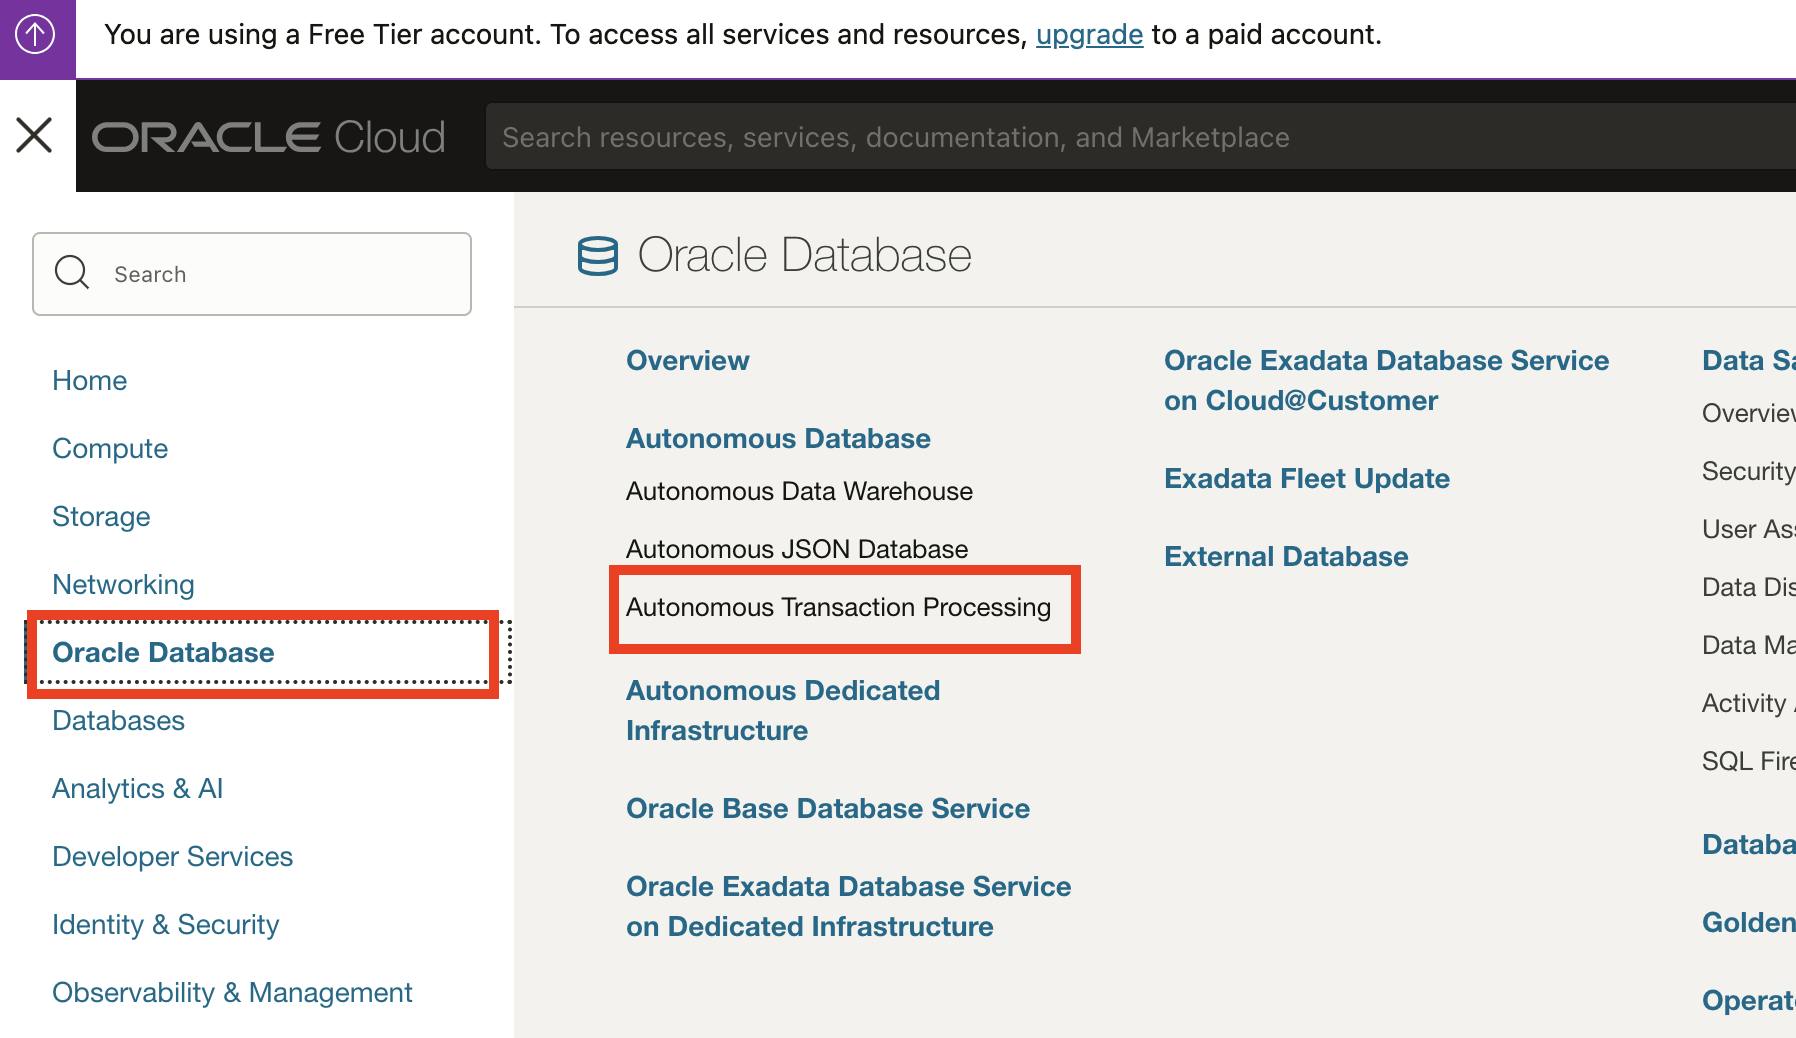
The first thing we need to do is to create our remote database. Login to your OCI account, and use the search bar or the hamburger menu to navigate to the Autonomous Transaction Processing database.
💡 Oracle Autonomous Data Warehouse (ADW) is tailored to Data Warehousing, Data Marts, Data Lakes, and Machine Learning workloads. Oracle Autonomous Transaction Processing (ATP) is tailored to On-Line Transaction Processing, Batch, reporting, IoT, application development, machine learning, and mixed workload environments.
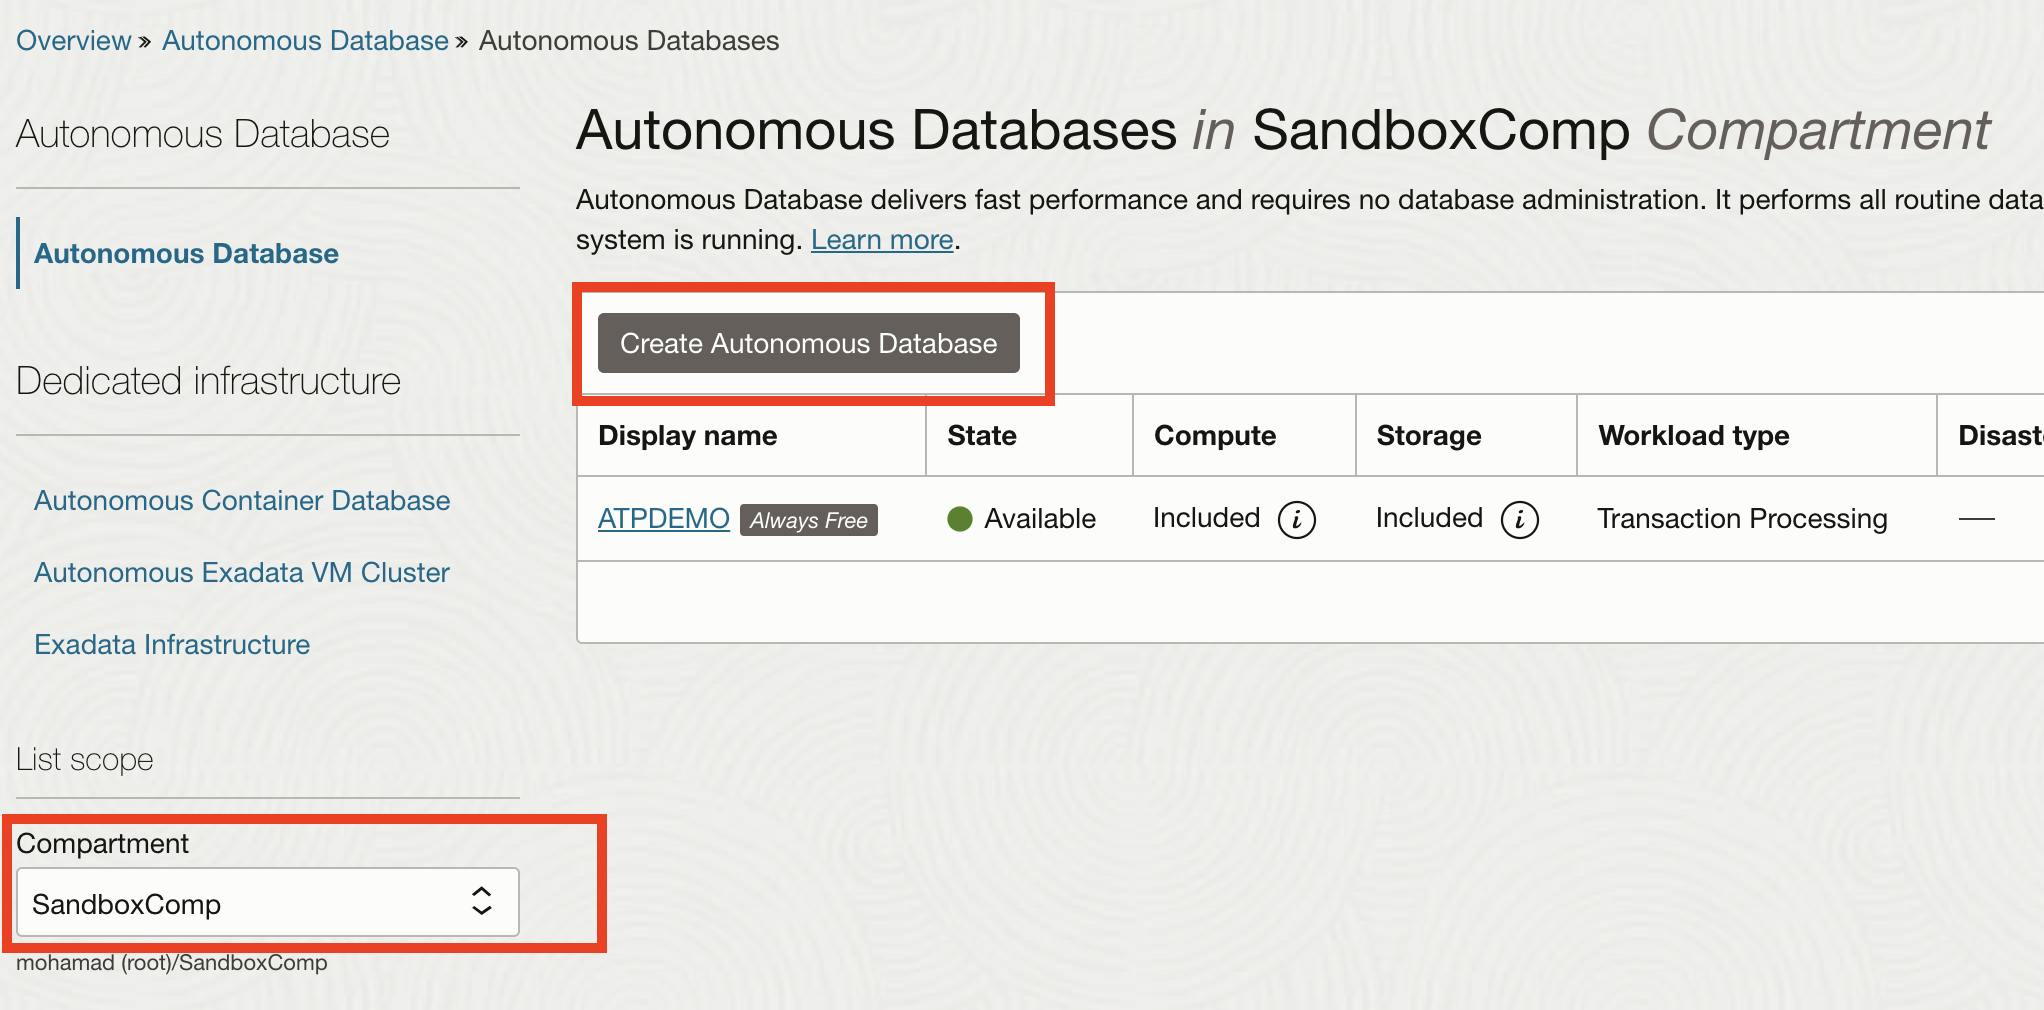
Choose the right compartment and create an Autonomous database.
Give your instance a name and give a name to the database, then choose the workload type of the Autonomous database. Because we are using the free tier, we can only choose a serverless deployment tape; next, make sure to check the always free toggle button and choose the database version.
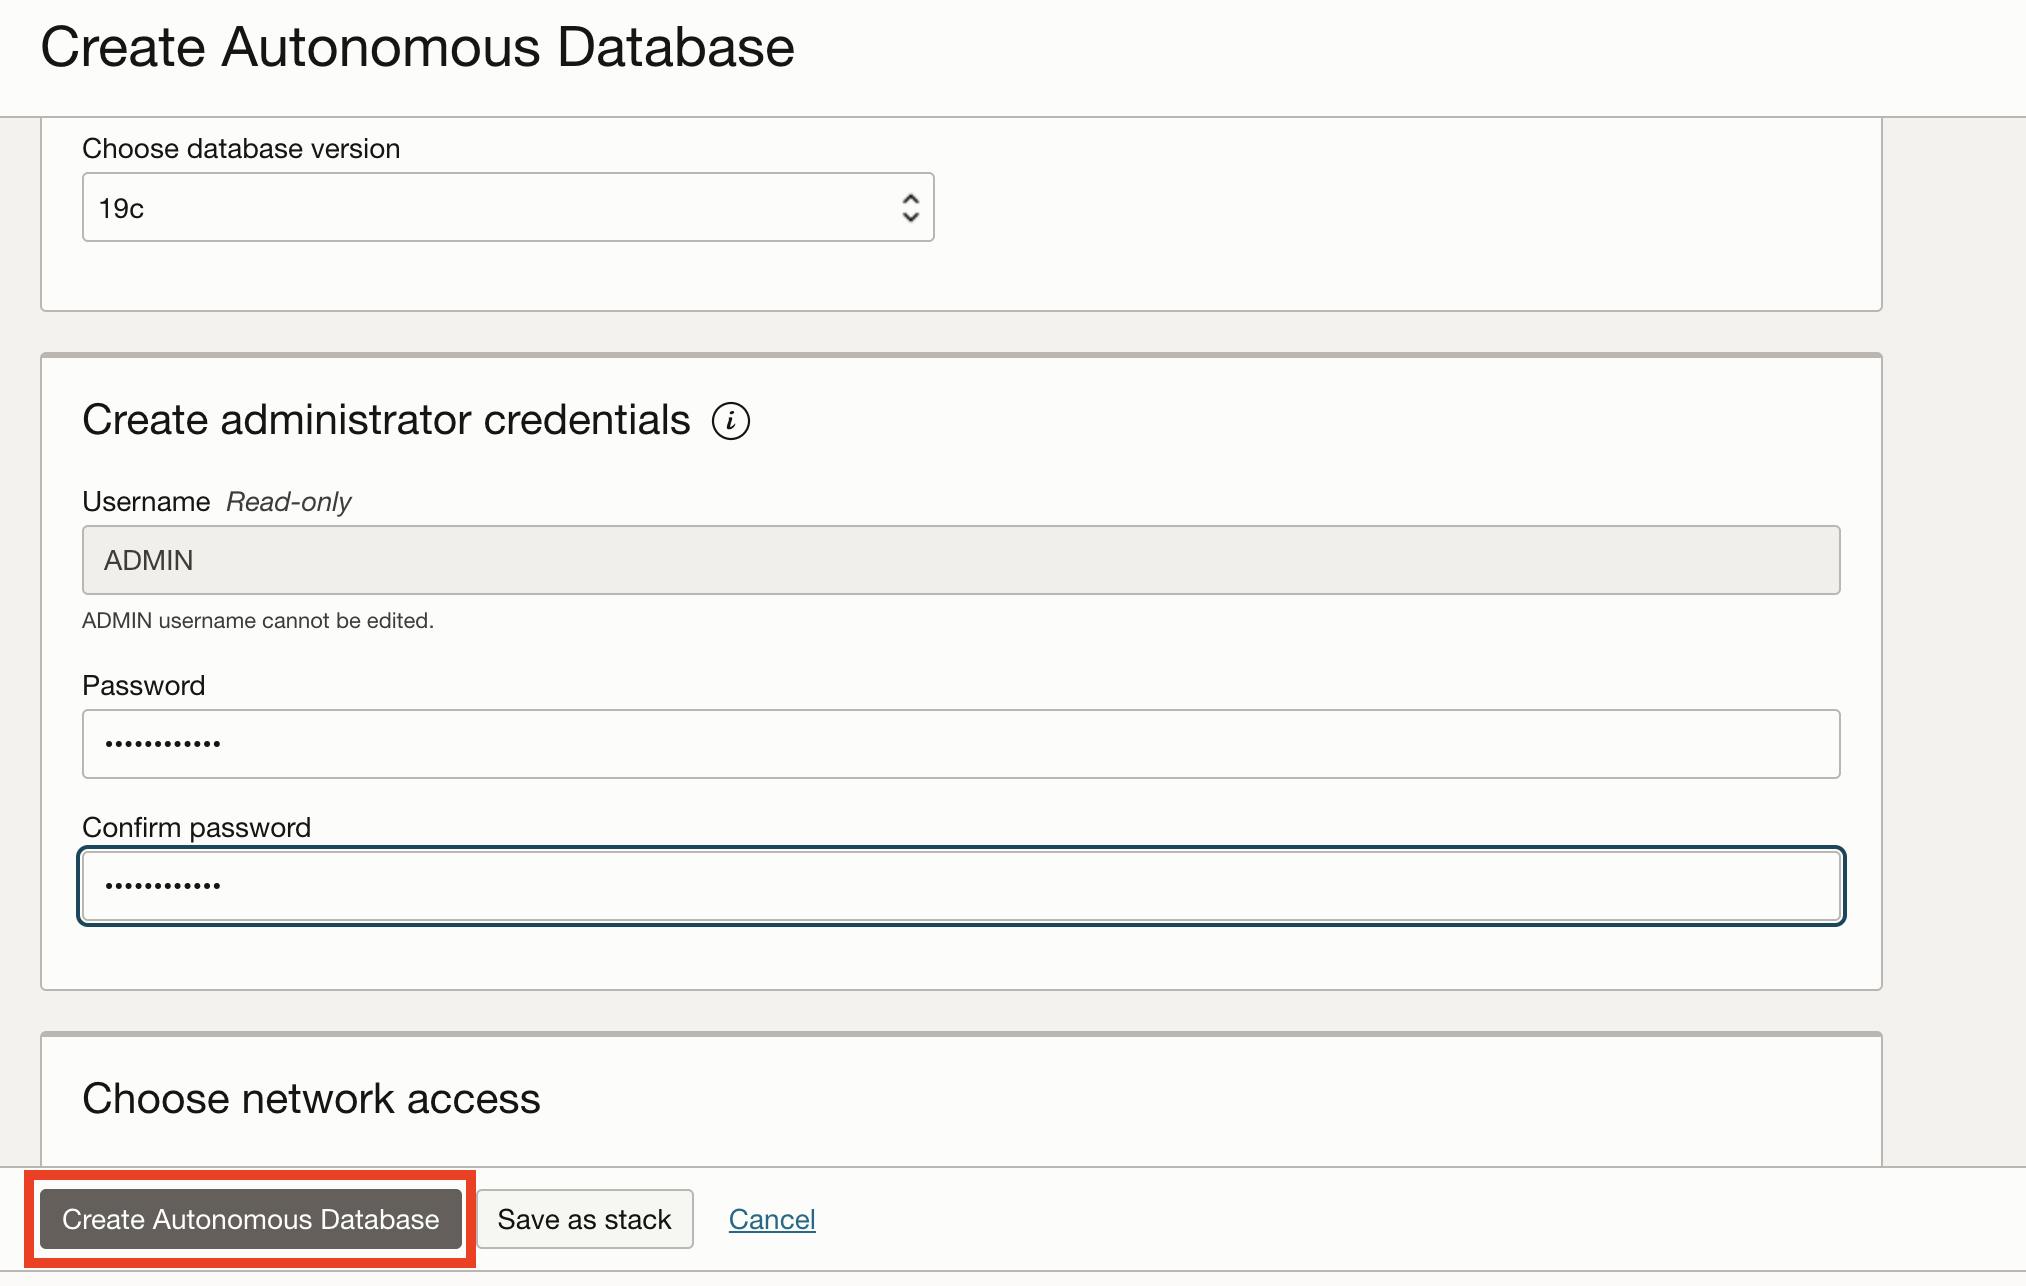
When you provision a new Autonomous database, an ADMIN user is created for you, so you need to provide a password for the ADMIN user. Give your ADMIN a password then click Create.
It will take a minute for your database to be provisioned before we can proceed with the next task.
Task2: Create the database User/Schema and enable the "REST enabled SQL"
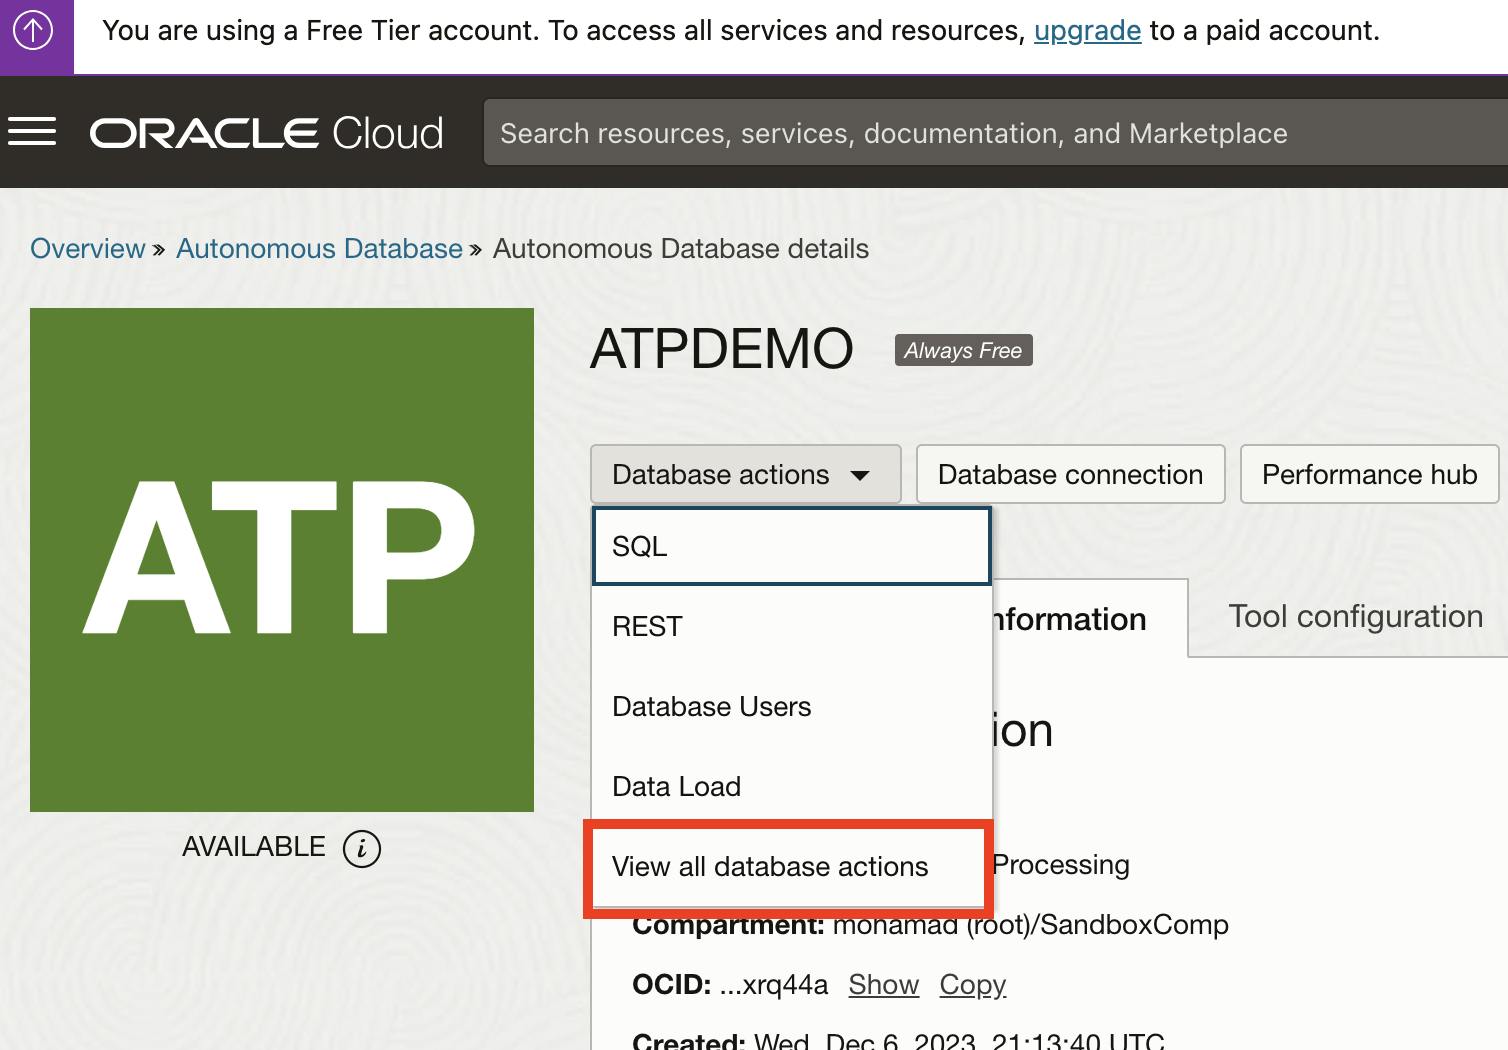
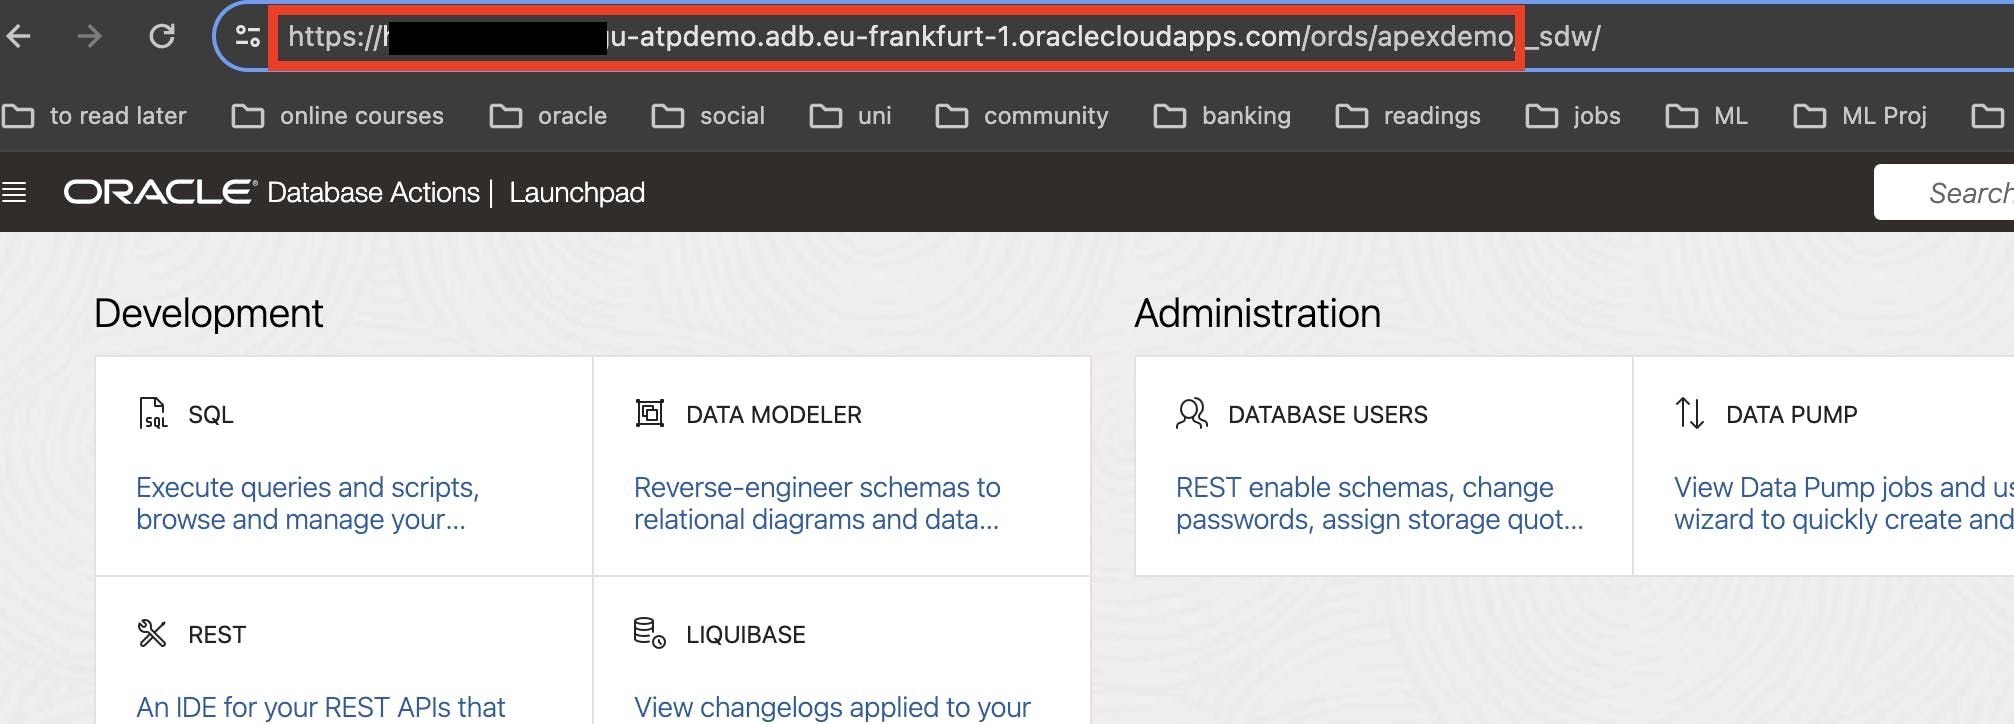
After your database has been provisioned, click on the database action dropdown button and choose "View all database actions"
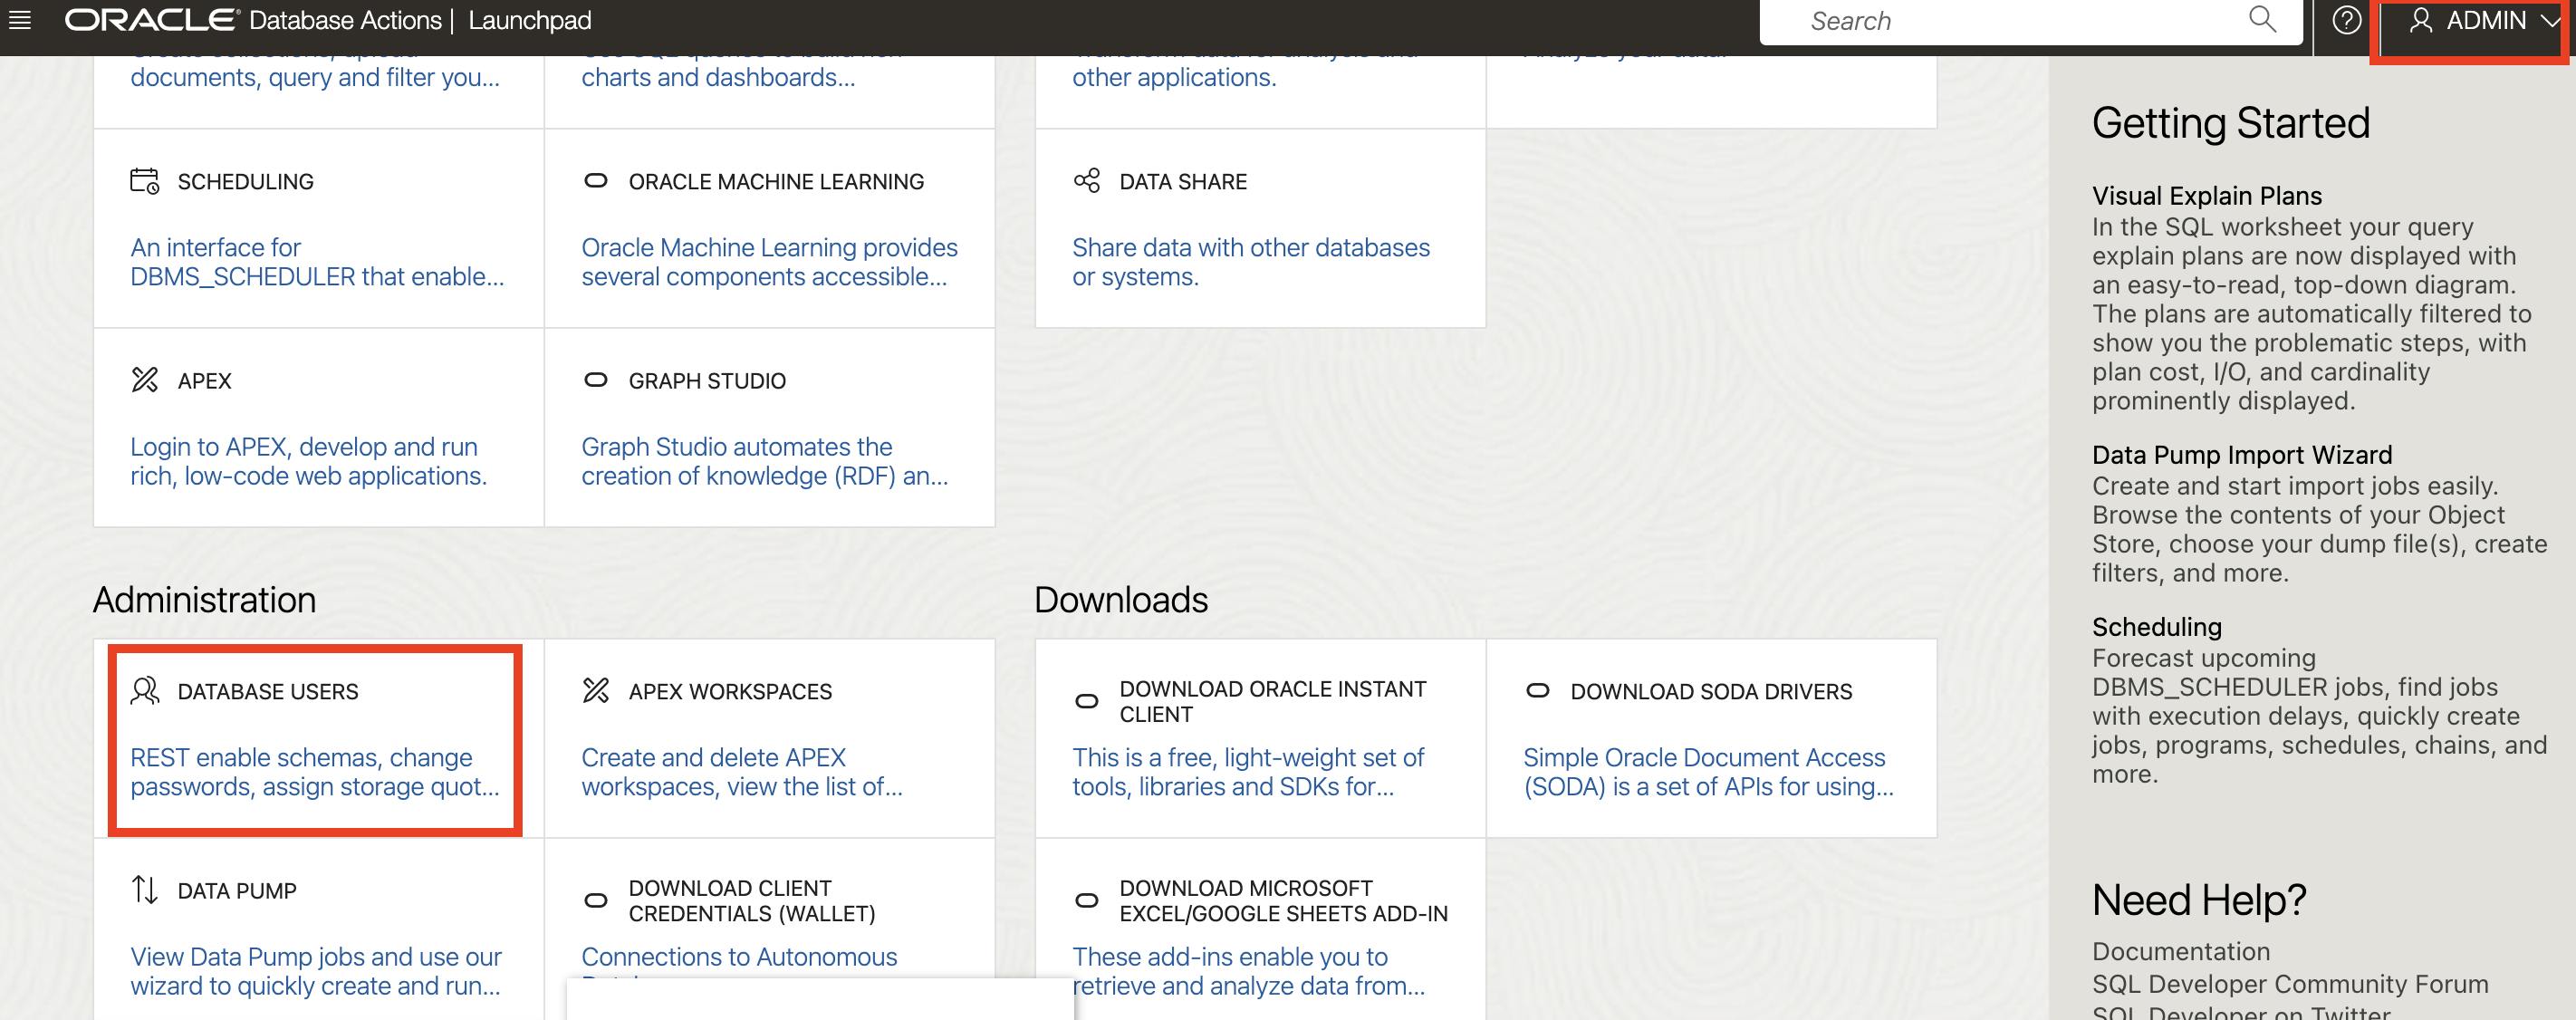
A new window will automatically open and log you in as an ADMIN user. Scroll down to the administration section and navigate to "DATABASE USERS"
In the user management page, create a new user.
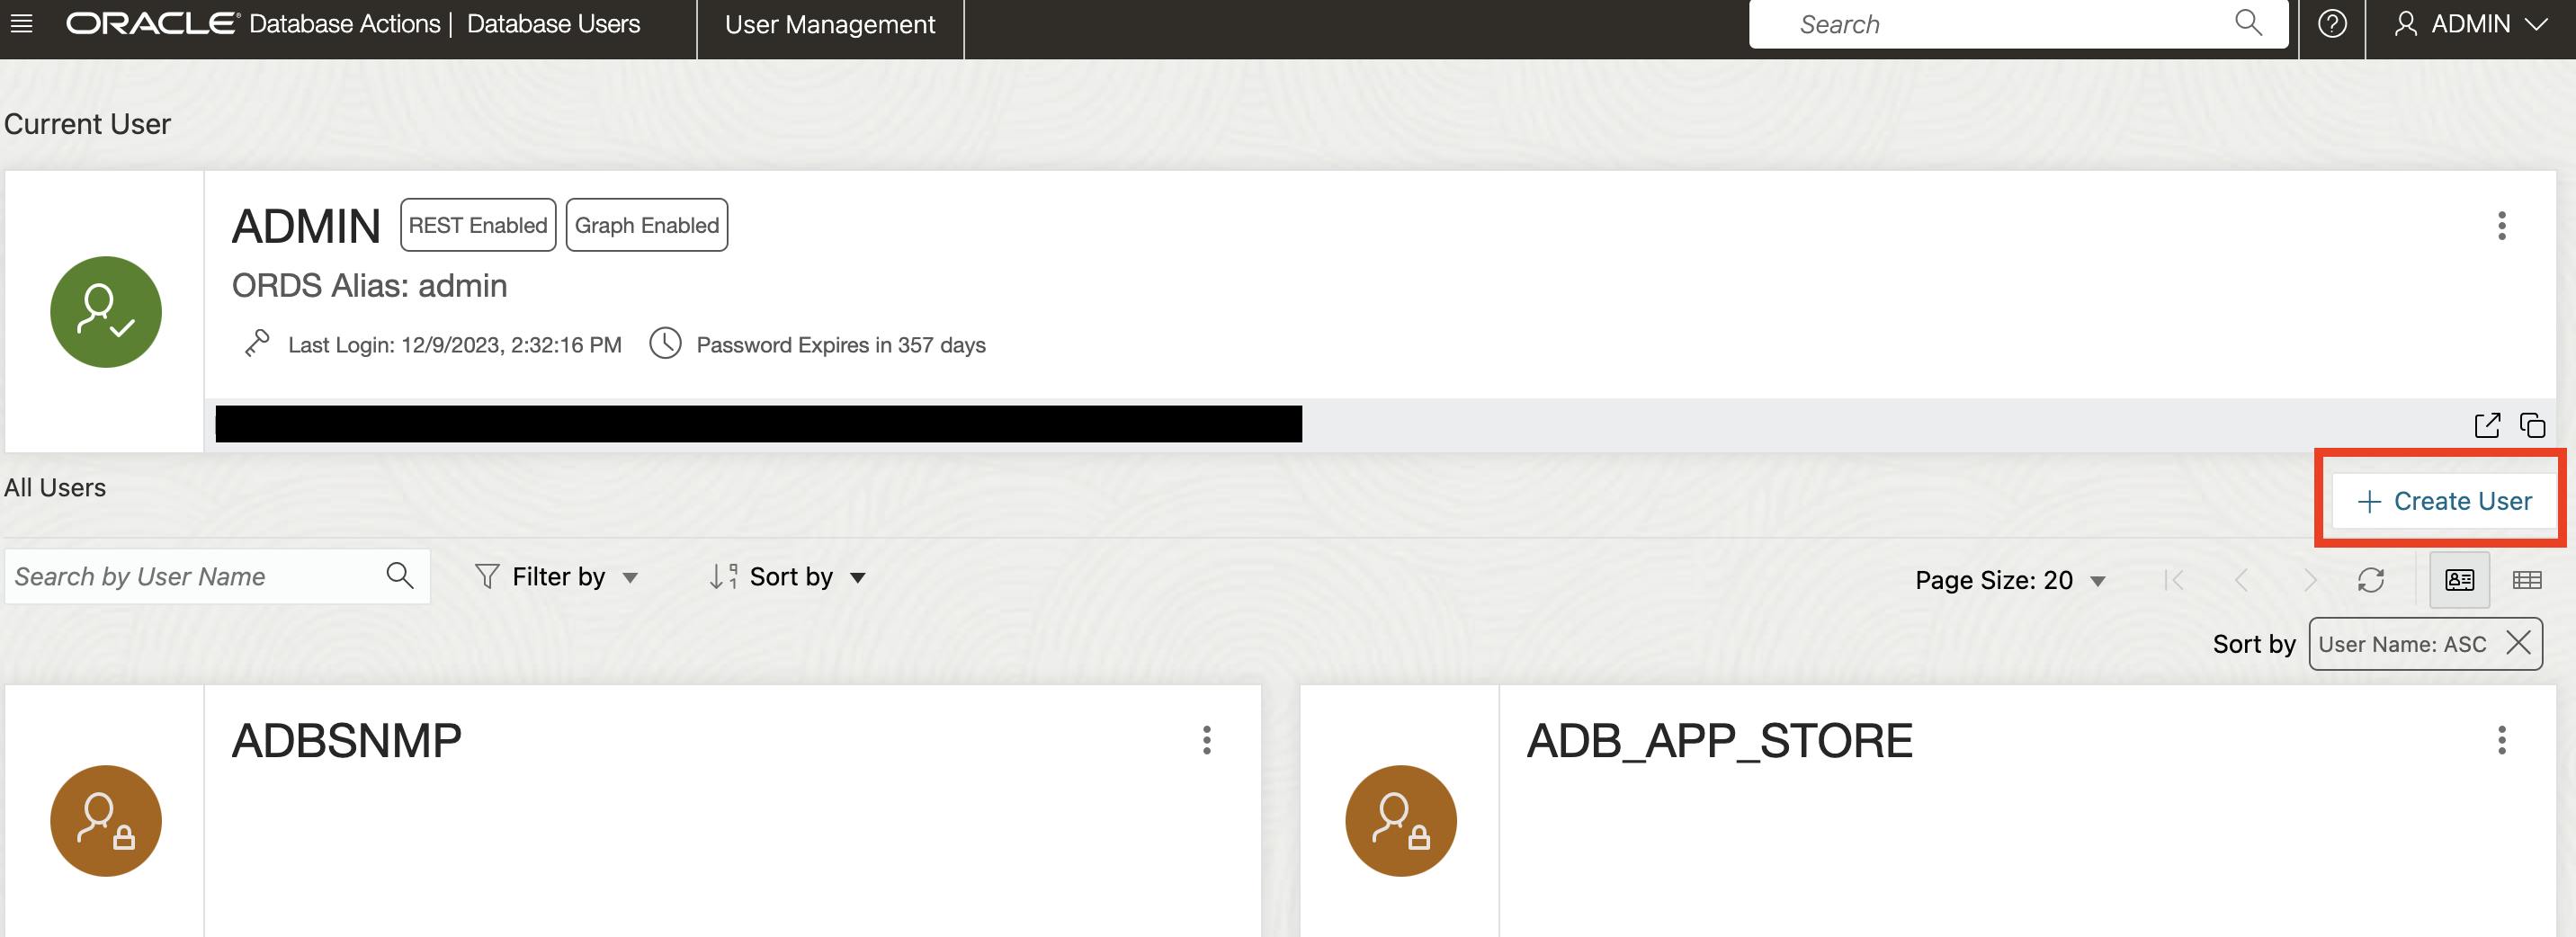
Give the User/Schema a name and password, enable the "Web Access" option, and keep all other options as default then click Create.

Your user now should appear on the "User management" page, open the user page in a new tab and log in using the username and password you just created.

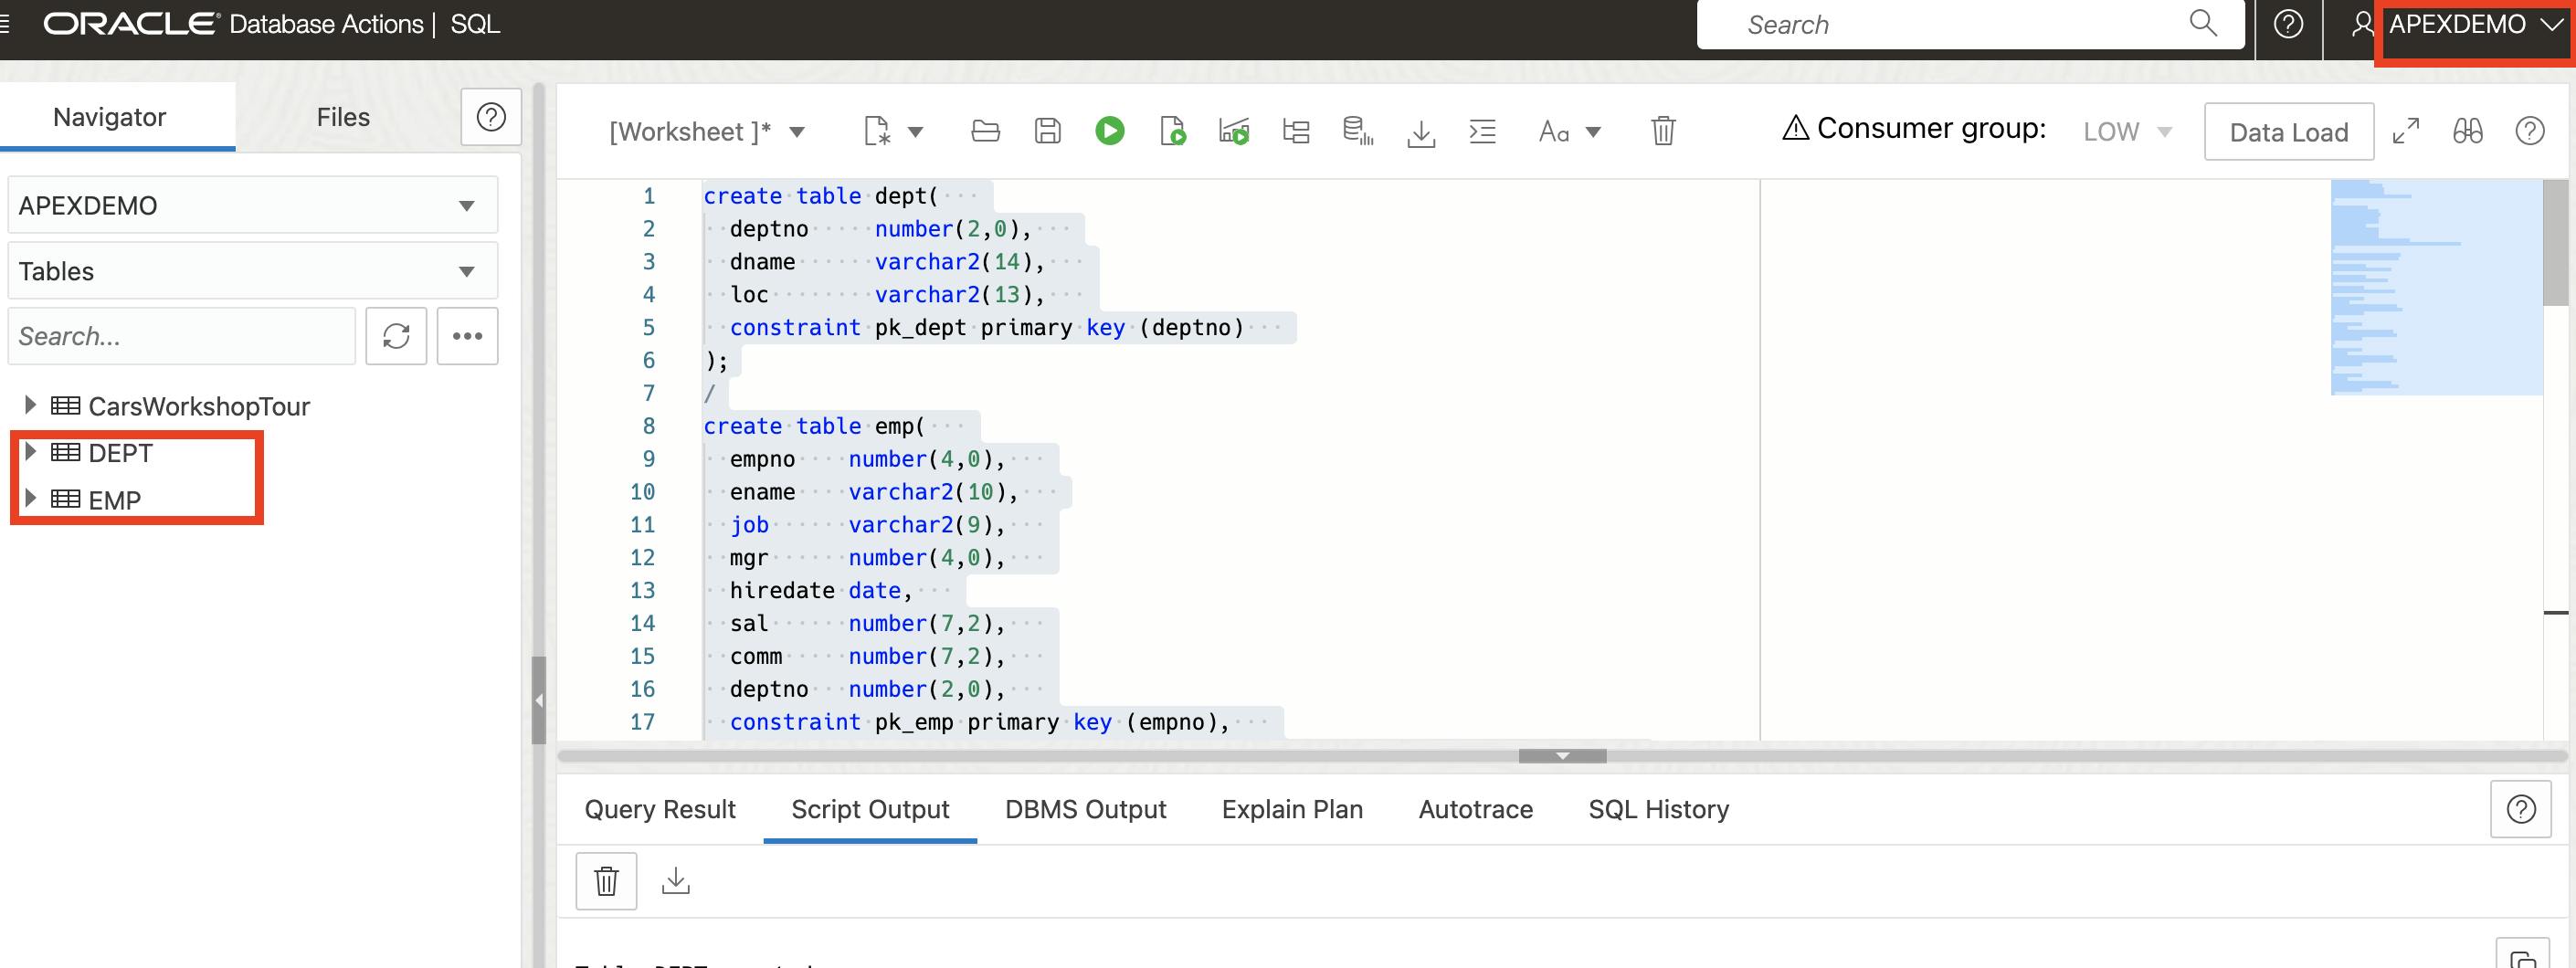
Click on the hamburger menu and choose "SQL" under development, you will be redirected to the web-based SQL developer environment. Run the following script, to create the "DEPT" and "EMP" tables and insert some data.
create table dept(
  deptno     number(2,0),
  dname      varchar2(14),
  loc        varchar2(13),
  constraint pk_dept primary key (deptno)
);
/
create table emp(
  empno    number(4,0),
  ename    varchar2(10),
  job      varchar2(9),
  mgr      number(4,0),
  hiredate date,
  sal      number(7,2),
  comm     number(7,2),
  deptno   number(2,0),
  constraint pk_emp primary key (empno),
  constraint fk_deptno foreign key (deptno) references dept (deptno)
);
/
insert into DEPT (DEPTNO, DNAME, LOC)
values(10, 'ACCOUNTING', 'NEW YORK');
/
insert into dept
values(20, 'RESEARCH', 'DALLAS');
/
insert into dept
values(30, 'SALES', 'CHICAGO');
/
insert into dept
values(40, 'OPERATIONS', 'BOSTON');
/
insert into emp
values(
 7839, 'KING', 'PRESIDENT', null,
 to_date('17-11-1981','dd-mm-yyyy'),
 5000, null, 10
);
/
insert into emp
values(
 7698, 'BLAKE', 'MANAGER', 7839,
 to_date('1-5-1981','dd-mm-yyyy'),
 2850, null, 30
);
/
insert into emp
values(
 7782, 'CLARK', 'MANAGER', 7839,
 to_date('9-6-1981','dd-mm-yyyy'),
 2450, null, 10
);
/
insert into emp
values(
 7934, 'MILLER', 'CLERK', 7782,
 to_date('23-1-1982','dd-mm-yyyy'),
 1300, null, 10
);
Task3: Set up the client side (The APEX application)
Let's proceed with setting up the APEX application which will utilize the remote database. The application could be running on-prem, or also running in a cloud environment. In this demo, we will use our workspace which is running on apex.oracle.com. Log in to your APEX Workspace and create a new application (Or use an existing one), then navigate to the shared component, under the data sources category choose Rest Enabled SQL.
Click on the create button and give the data source a name. The endpoint URL has the following format: http://host:port/ords/schema so to get the URL of our previously created database, go back to the database action home page and copy the hostname from the URL.
Paste the URL and click next.
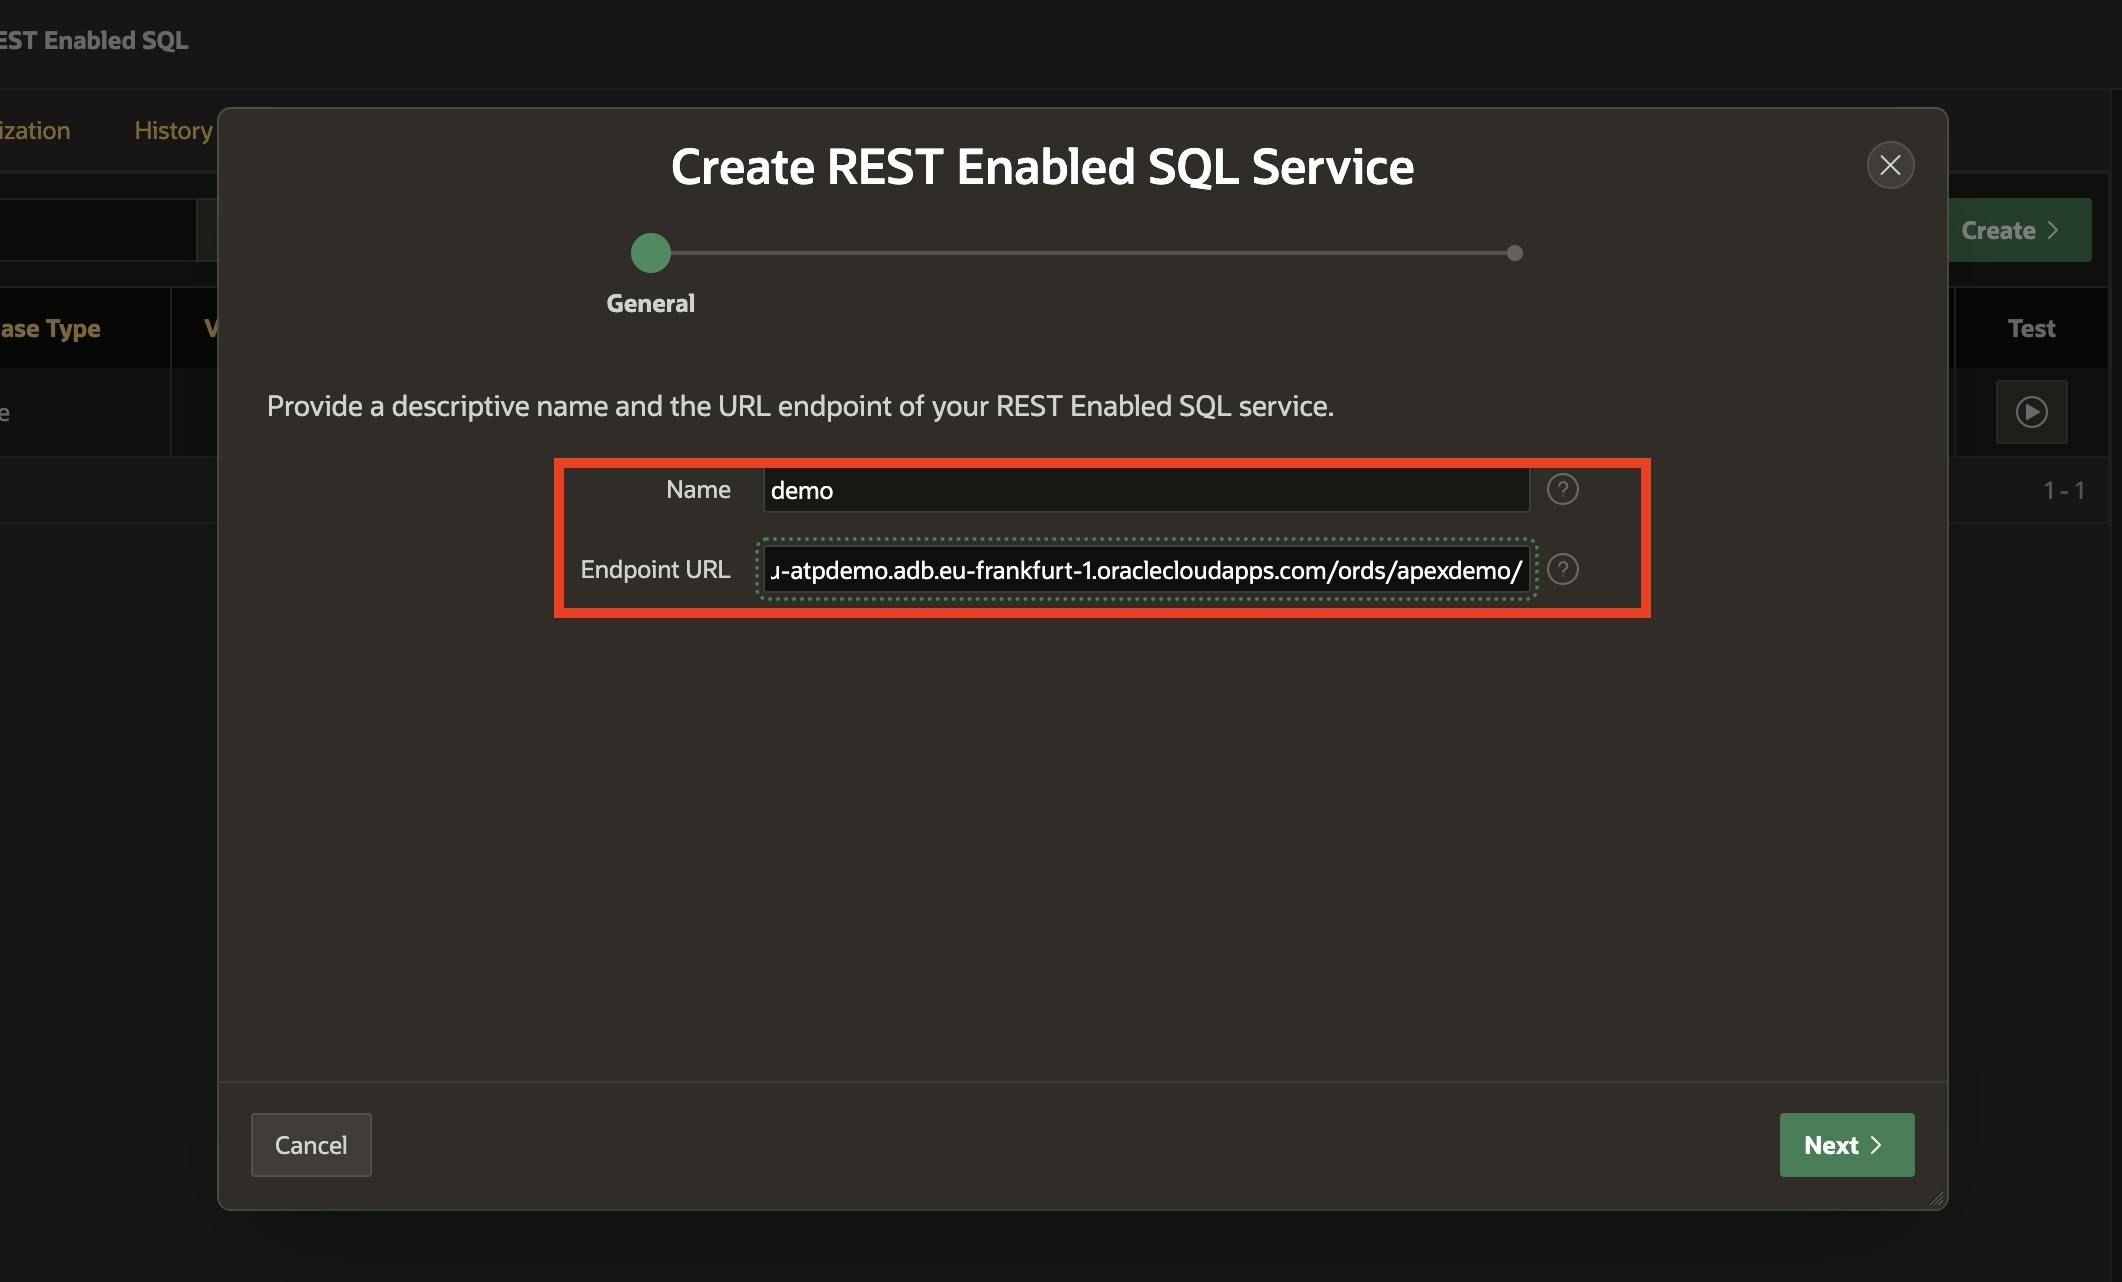
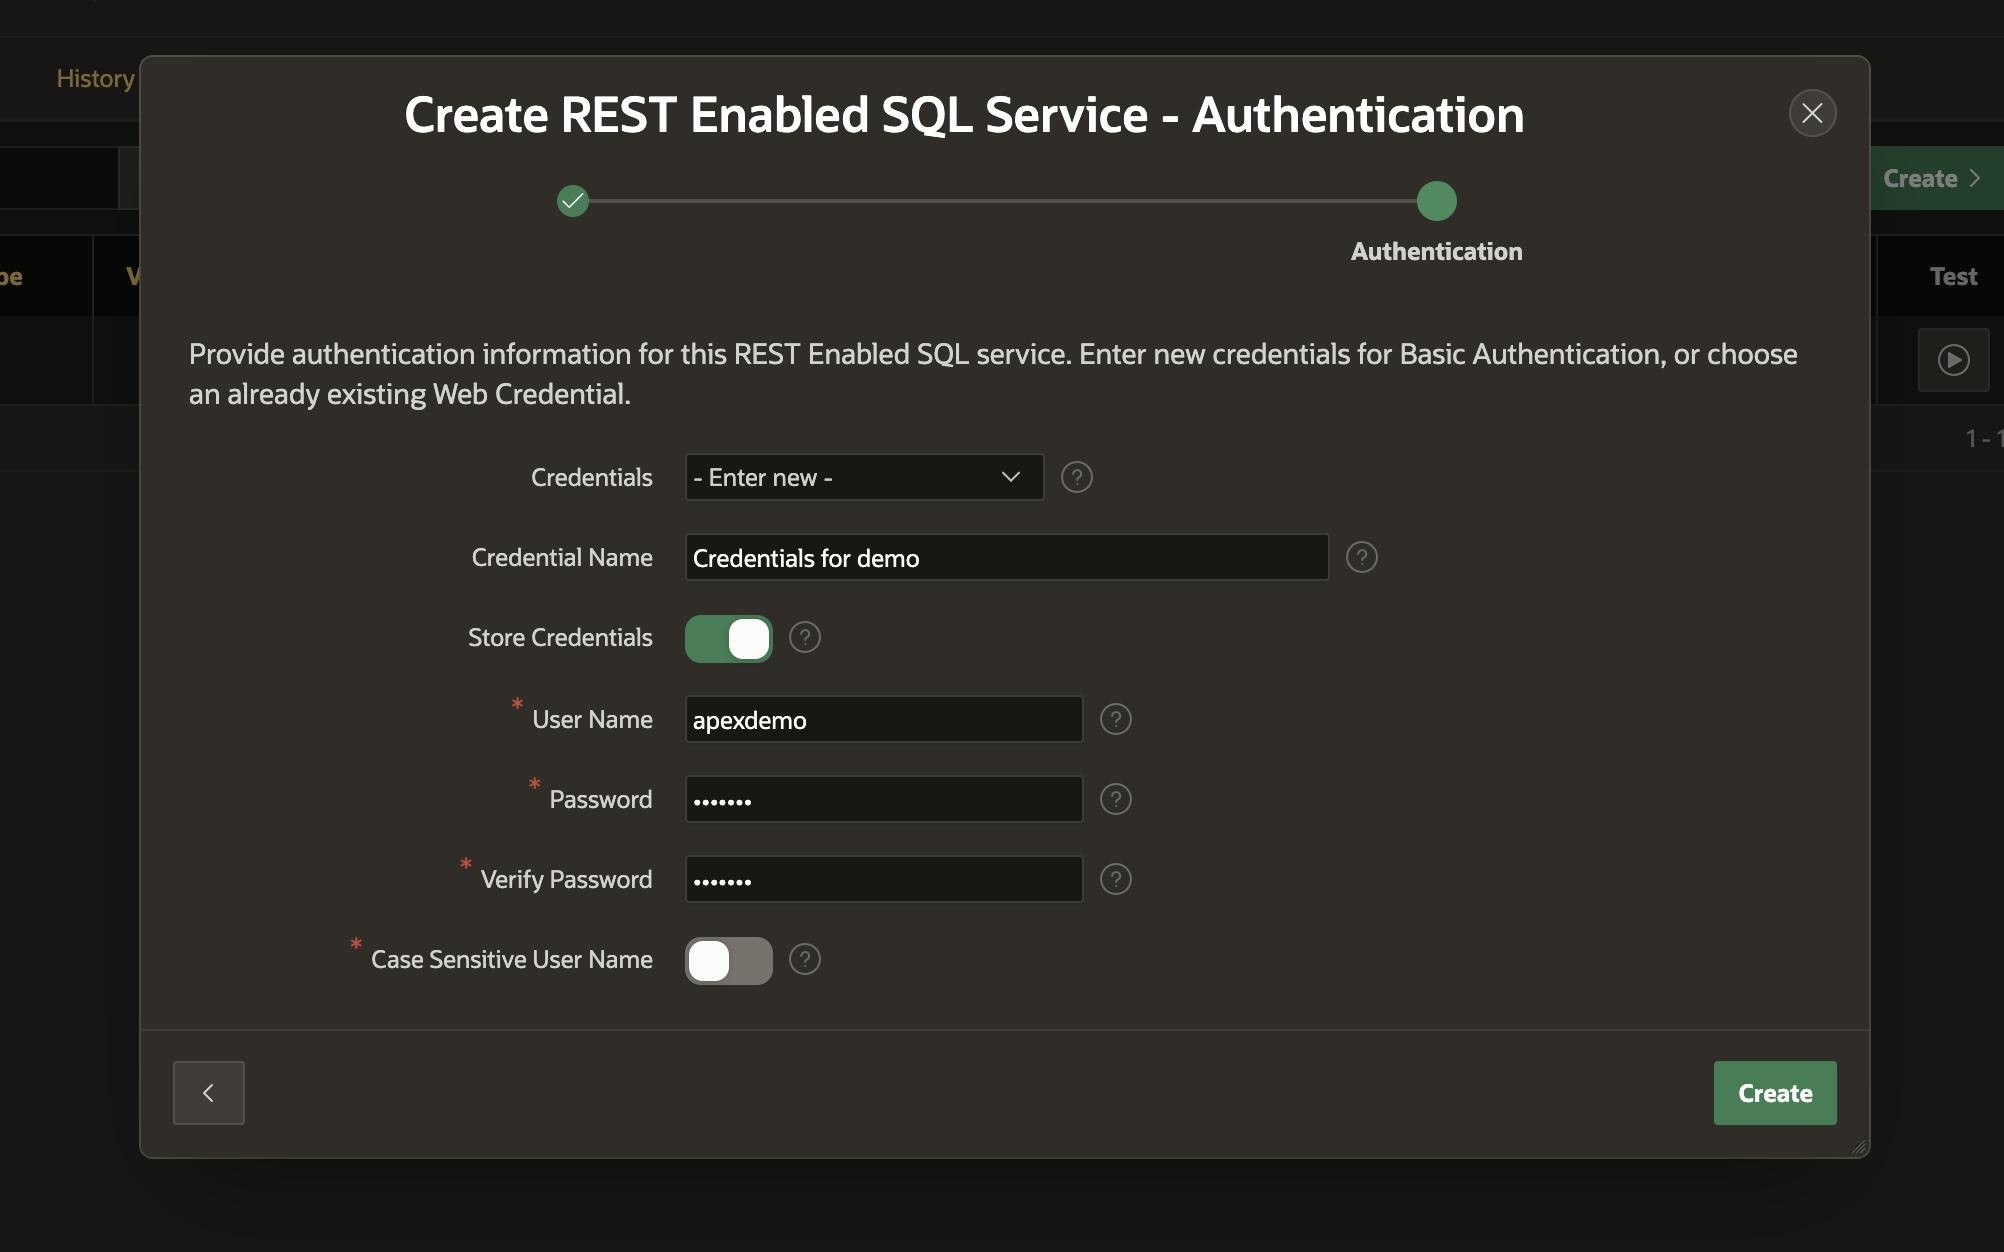
In this step, give the database username and password you created before (In our demo is "apexdemo"), then click create.
Now we are almost done setting up our client, we just have a final step which is to consume this endpoint.
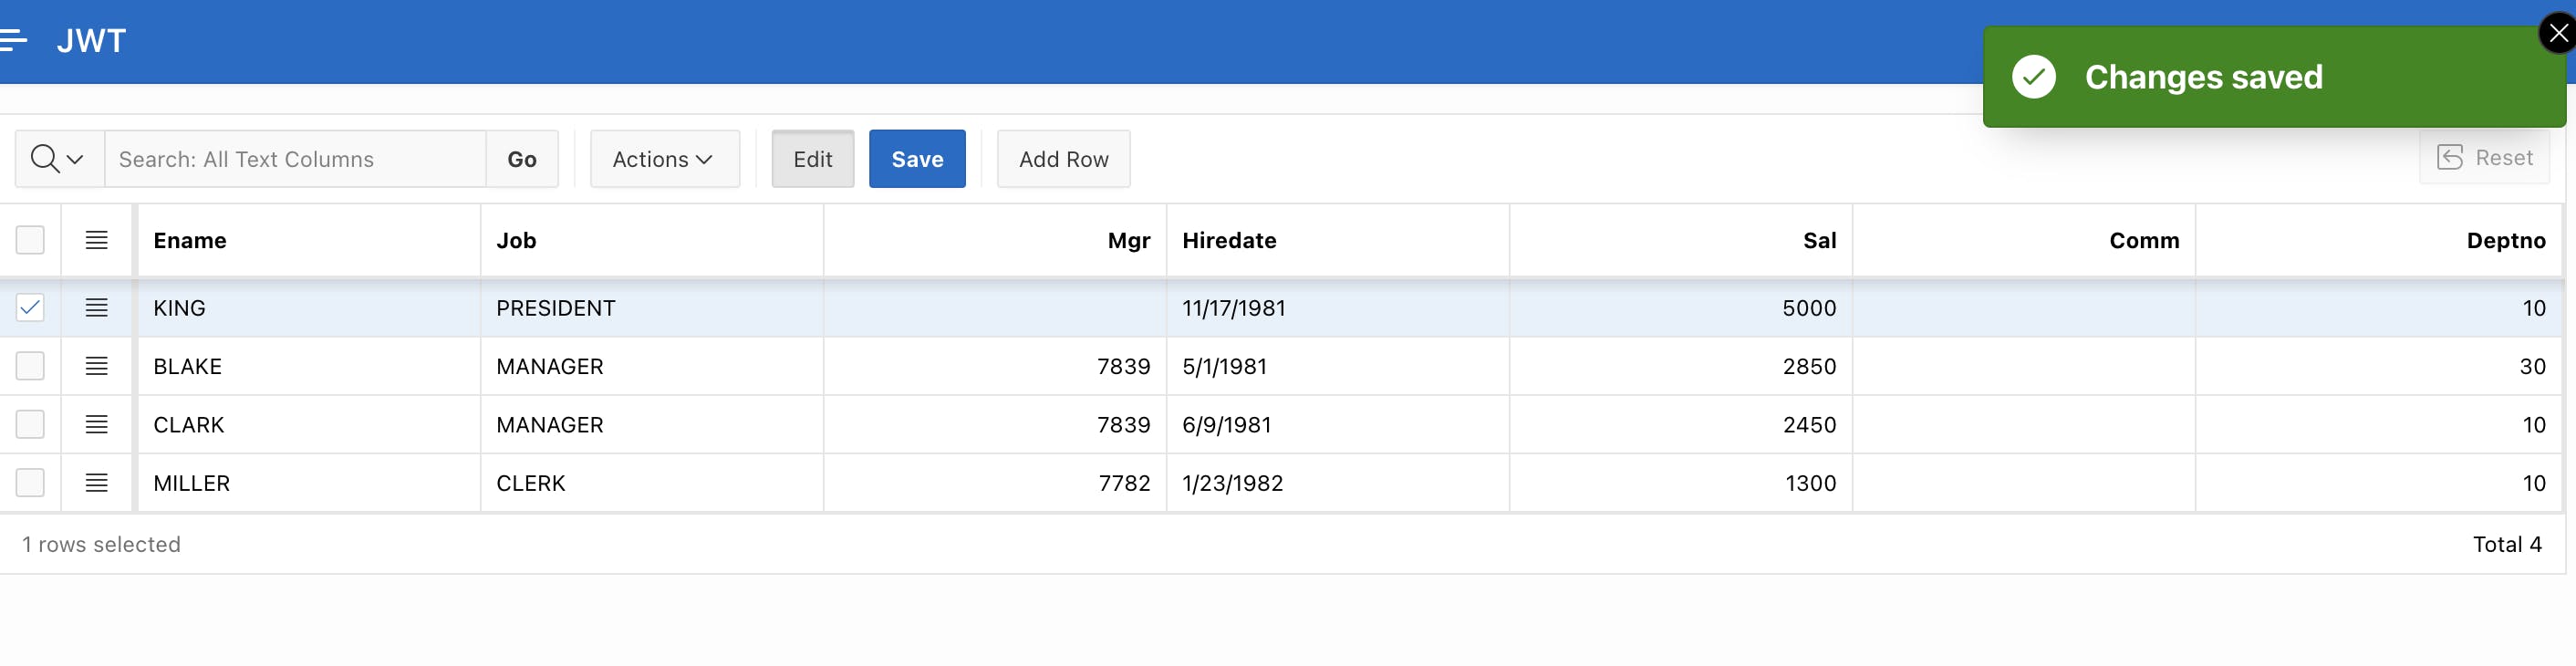
Go to your application, create a new page (Or navigate to an already existing page), and add a new Interactive grid region with the following configurations.
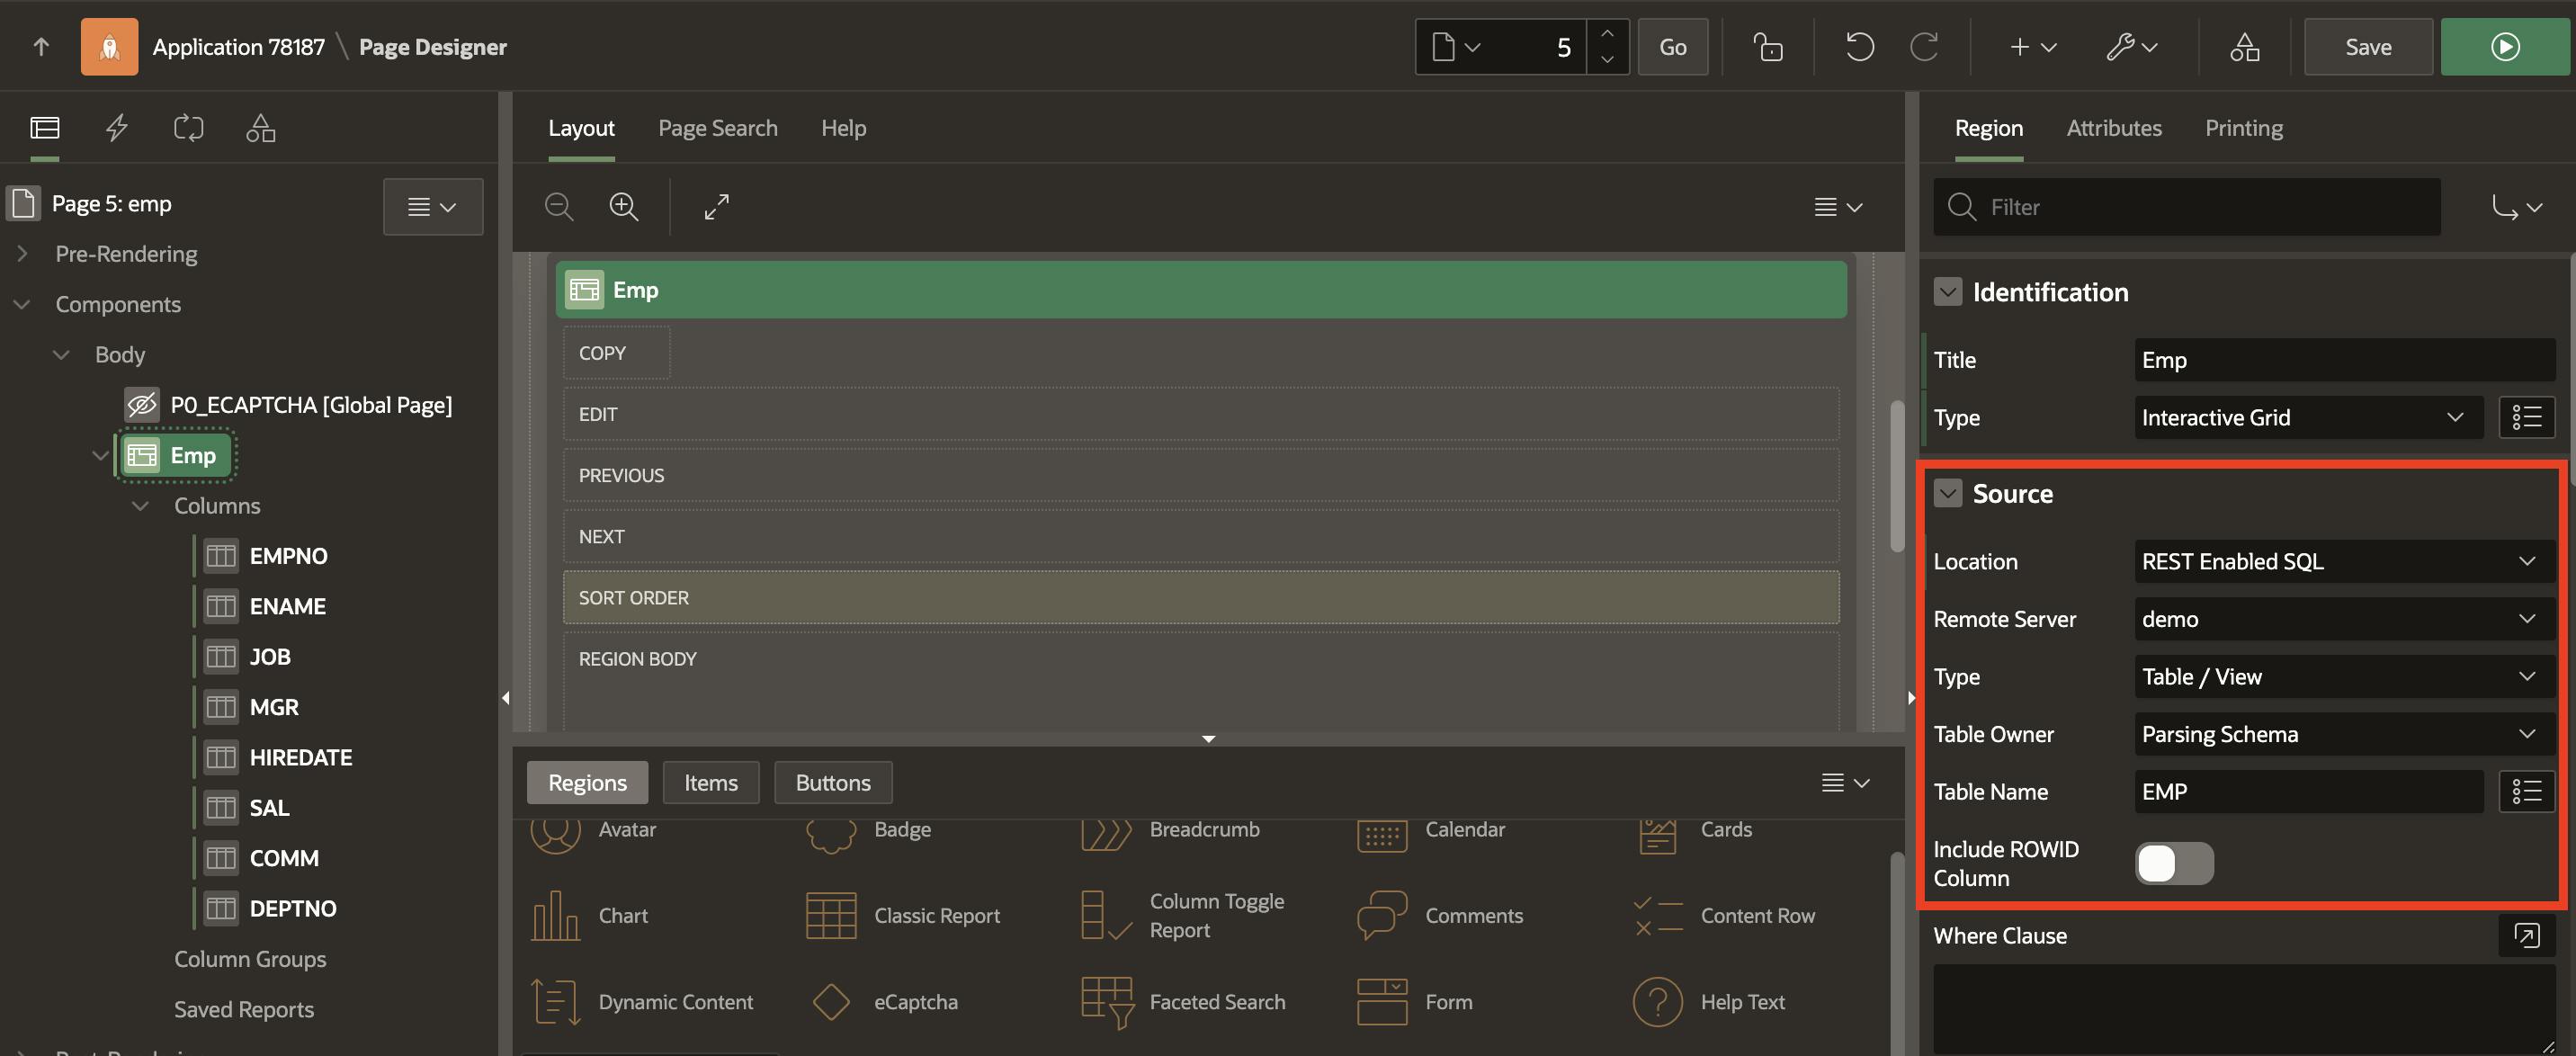
Make your IG editable before you run the application, and you are all set to start viewing and editing the data :).
Conclusion
The REST-enabled SQL service enables you to define SQL statements dynamically and run them against the database without predefined SQL statements. This makes your data more accessible over REST. By leveraging REST-enabled SQL in Oracle APEX, you can streamline data access, improve interoperability, and enhance the overall efficiency of your application development process.