

Reserve and assign a Public IP in OCI

Timo joined Hyand in Ratingen, Germany, as a Senior Consultant in 2019, focusing on Oracle databases and APEX applications. With a background as a Data Warehouse Specialist, he has expertise in Database Administration, performance tuning, and SQL development. Timo is passionate about web development, cloud computing, and the architecture behind it, and became part of the Oracle ACE Community in 2023. He enjoys sharing his knowledge at conferences and through blog posts. When he's not working, you can find him traveling, hanging out with his family, or cooking up something in the kitchen.
Introduction
A public IP address is an IPv4 address that is reachable from the internet. If a resource in your tenancy needs to be directly reachable from the internet, it must have a public IP address. OCI automatically assigns an IP address for public resources. The best example of this is an autonomous database or compute instance. However, if you don't want the IP address to be random, you can reserve public IP addresses and use them over and over again.
This article gives you an overview of the Reserved Public IP Service in OCI and an example scenario to help you understand how the service works.
Types of Public IPs
First of all, there are two types of public IPs:
Ephemeral: Only temporary and existing for the lifetime of the instance.
Reserved: Exists permanently and not for the lifetime of the instance to which it is assigned. You can unassign it and reassign it to another instance whenever you want.
The table below shows the differences between the two types.
| Characteristic | Ephemeral Public IPs | Reserved Public IPs |
| Allowed assignment | To a VNIC's primary private IP only | To either a primary or secondary private IP |
| Creation | Optionally created and assigned during instance launch or secondary VNIC creation. You can create and assign one later if the VNIC doesn't already have one. | You create one at any time. You can then assign it when you like. |
| Unassignment | You can unassign it at any time, which deletes it. You might do this if whoever launched the instance included a public IP, but you don't want the instance to have one. | You can unassign it at any time, which returns it to your tenancy's pool of reserved public IPs. |
| Moving to a different resource | You cannot move an ephemeral public IP to a different private IP. | If assigned to a secondary private IP: If you move the private IP to a different VNIC (must be in the same subnet), the reserved public IP goes with it. |
| Automatic deletion | Its lifetime is tied to the private IP's lifetime. Automatically unassigned and deleted when: | Never. Exists until you delete it. |
| Scope | Availability domain | Regional (can be assigned to a private IP in any availability domain in the region) |
| Compartment and availability domain | Same as the private IPs | Can be different from the private IPs |
By default, when you provision an instance into a public subnet, the instance gets an Ephemeral Public IP unless you directly deny it.
Reserve a Public IP
In an OCI Free tier, you can provide two public IP addresses. However, before we begin, make sure the following resources exist.
VCN with a Public subnet
An Instance that is placed in this VCN
If not, you can read here how to create an instance into a public subnet.
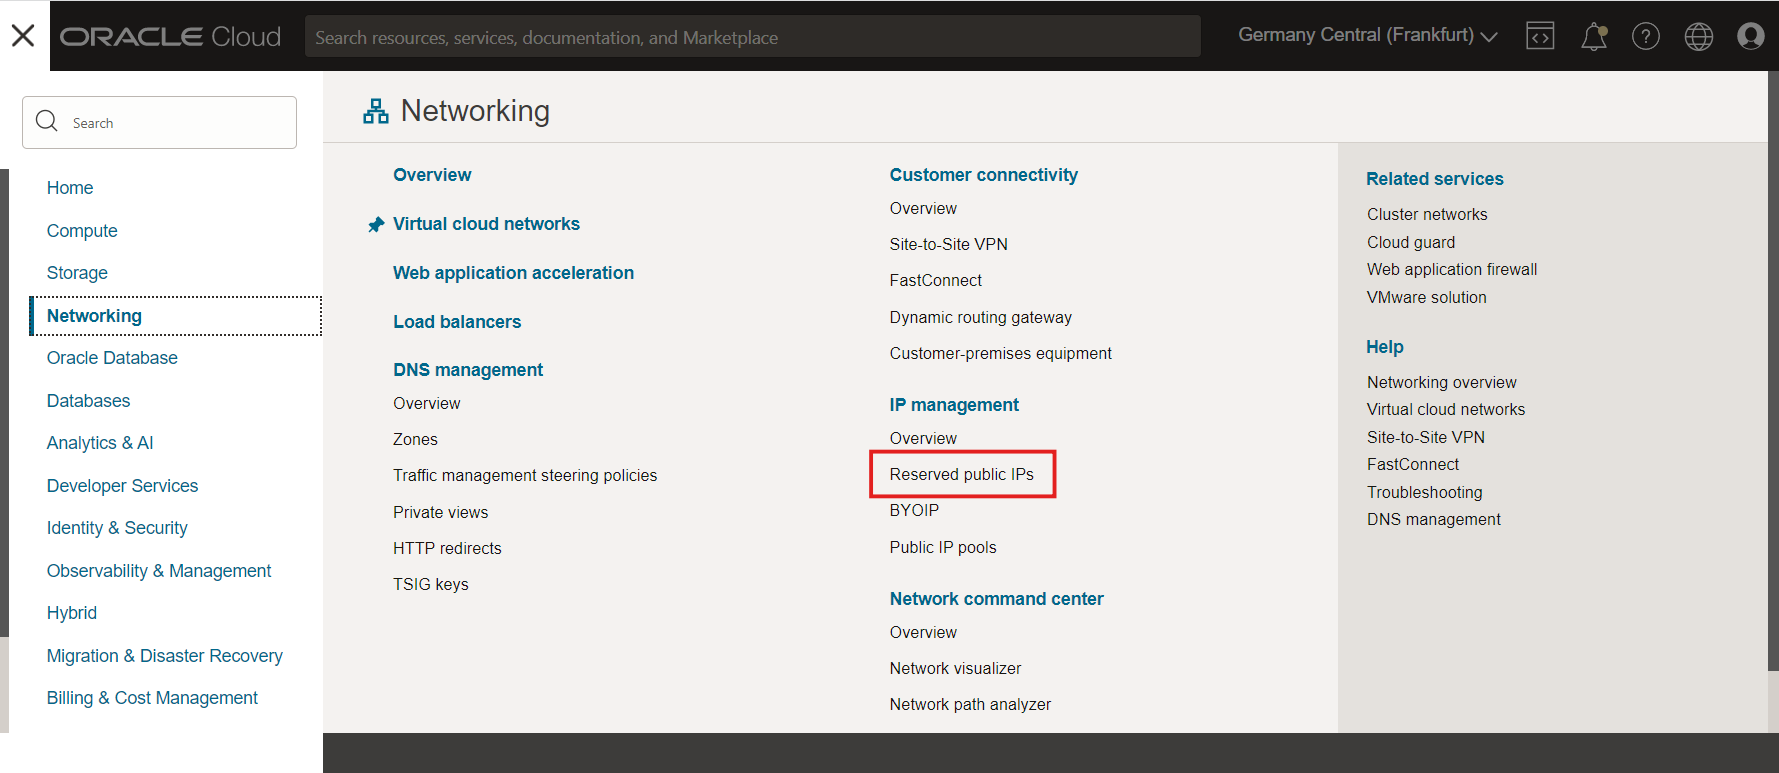
Login to your OCI console and open the OCI navigation menu. Go to Networking, IP Management and click Reserved public IPs.
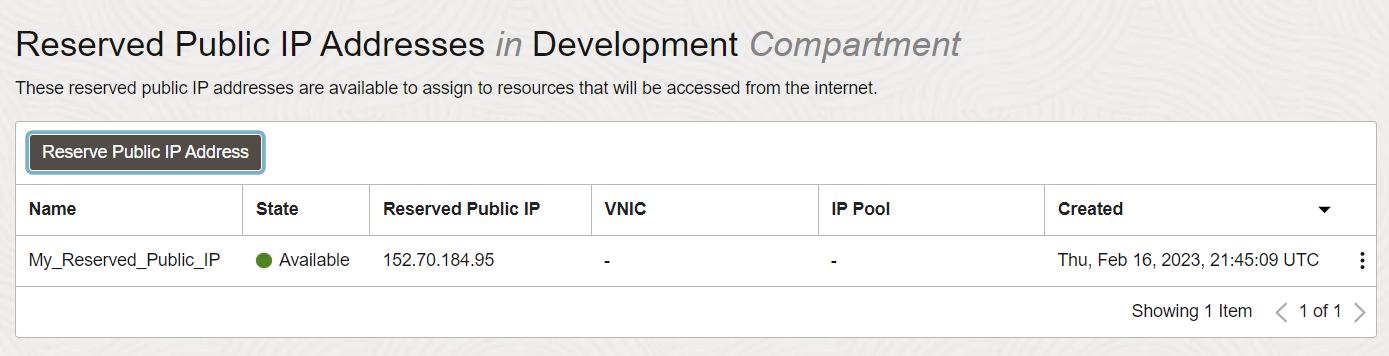
Now, all reserved public IP addresses are listed, which are available to assign to resources that will be accessed from the internet. Click Reserve Public IP Address.
To create a reserved IP address enter the following:
Reserved Public IP Address Name: Enter a name for your reserved IP address.
Create in Compartment: Select the desired compartment.
IP Address Source in <Compartment Name>: Select Oracle or your own IP pool.

Click Reserve Public IP Address.
The new reserved public IP is created and displayed on the page.
Now let's assign the reserved IP to an OCI compute instance.
Assigning the Reserved IP to a Compute Instance
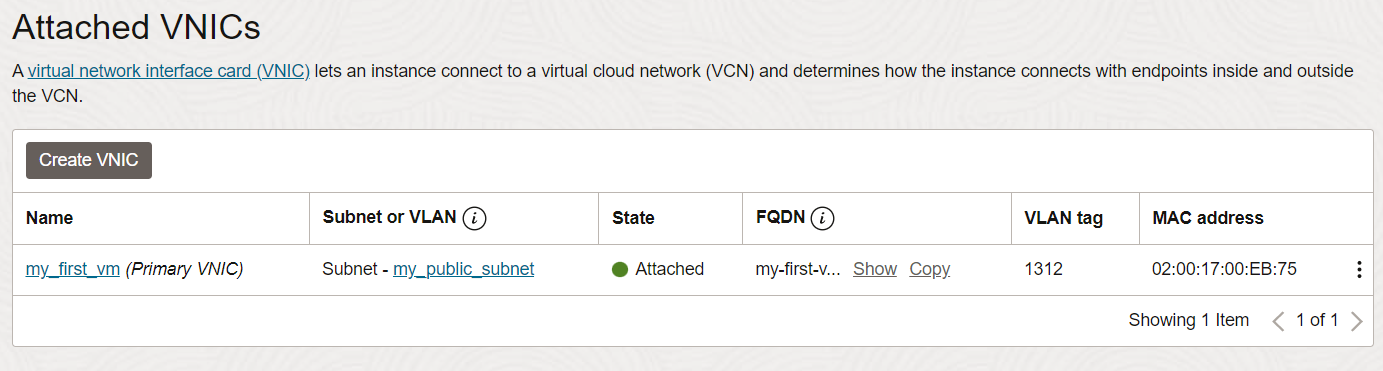
Open the OCI navigation menu and navigate to Compute and click Instances. Click the Instance name to which you want to assign the reserved IP address. Scroll down to Resources and click Attached VNICs. Click on the VNIC name that has (Primary VNIC) after its name.
You will be taken to the VNIC’s details. Scroll down to Resources and click IPV4 address. Click on the 3 dots icon (at the end of the line) and then select Edit.
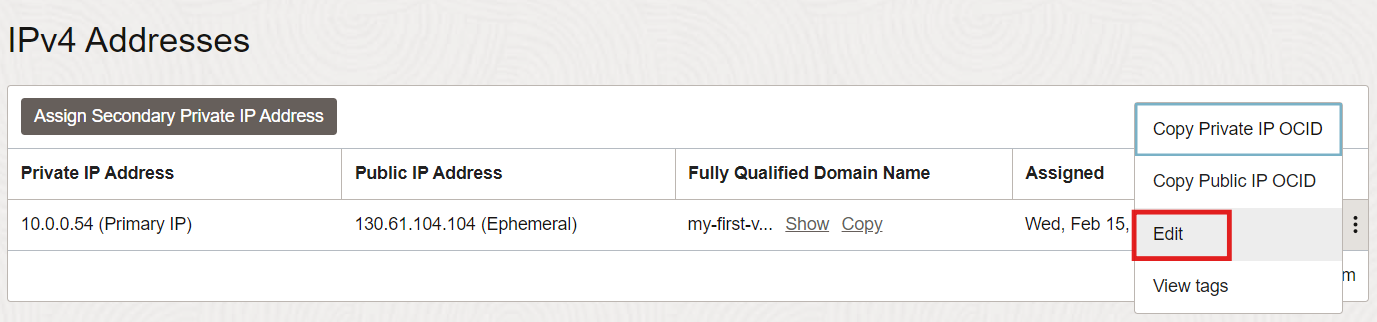
Under Public IP Type, select Reserved public IP and select one that you previously created.
It is not allowed if the instance had an Ephemeral public IP. In this case, you must first unassign the existing public IP!
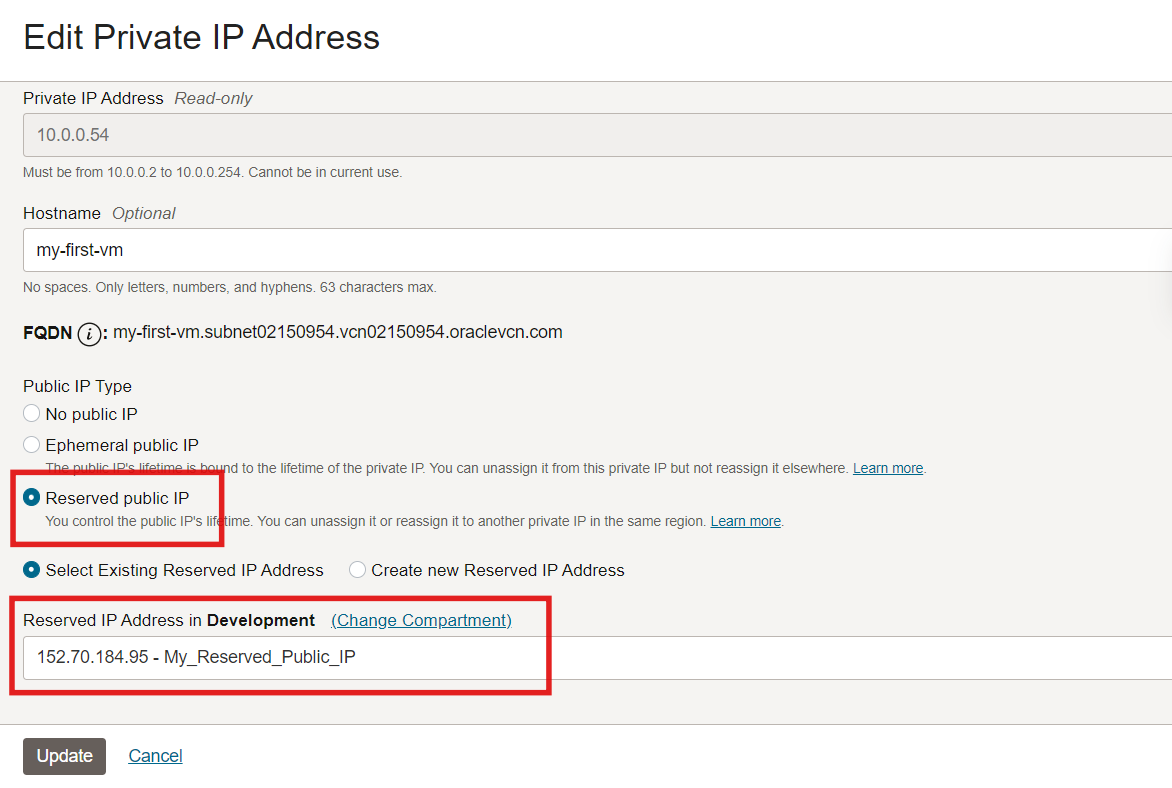
Click Update to finish.
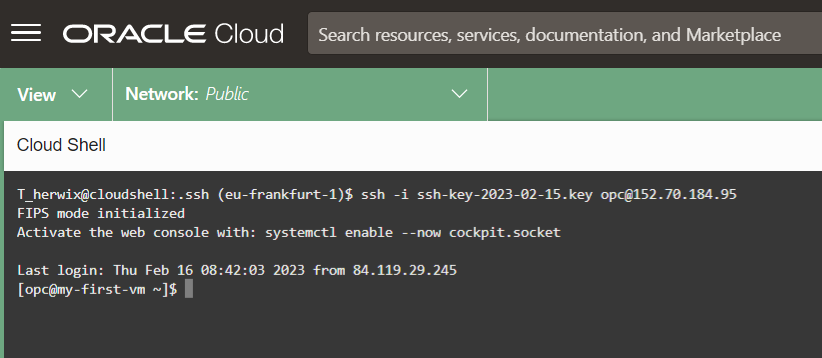
That's it! You have successfully assigned a reserved public IP to your instance.
Now you should be able to access the instance via SSH using the newly reserved public IP.
Conclusion
A Reserved IP address is a public IPv4 address. Reserving an IP address ensures that an IP address is reserved for you. With a reserved IP address, you can mask the failure of a resource due to increased system load or a website by rapidly remapping the address to another instance. Or, you can dynamically update the backend resources of your applications and websites by reassigning the Reserve IP address with an insignificant downtime if at all. For example, since DNS propagation takes time when A records of a domain name are changed, reserving an IP address allows you to reassign the IP address to a new resource without updating your domain name A records.


