

How to Configure Custom URLs for Oracle Autonomous Database using NginX and Let's Encrypt

Timo joined Hyand in Ratingen, Germany, as a Senior Consultant in 2019, focusing on Oracle databases and APEX applications. With a background as a Data Warehouse Specialist, he has expertise in Database Administration, performance tuning, and SQL development. Timo is passionate about web development, cloud computing, and the architecture behind it, and became part of the Oracle ACE Community in 2023. He enjoys sharing his knowledge at conferences and through blog posts. When he's not working, you can find him traveling, hanging out with his family, or cooking up something in the kitchen.
Introduction
Looking to set up custom URLs for your Oracle Autonomous Database? In this blog post, we'll explore how to achieve this using an NginX reverse proxy server. While vanity URLs are a popular option, they require a private endpoint for your ADB and a certificate, which can be costly and are not supported in the Free Tier. Instead, we'll show you how to create a compute instance that forwards requests to APEX on ADB, using Let's Encrypt to install a free, automated, and open certificate authority for HTTPS (SSL/TLS) encryption.
Setting up a Custom URL
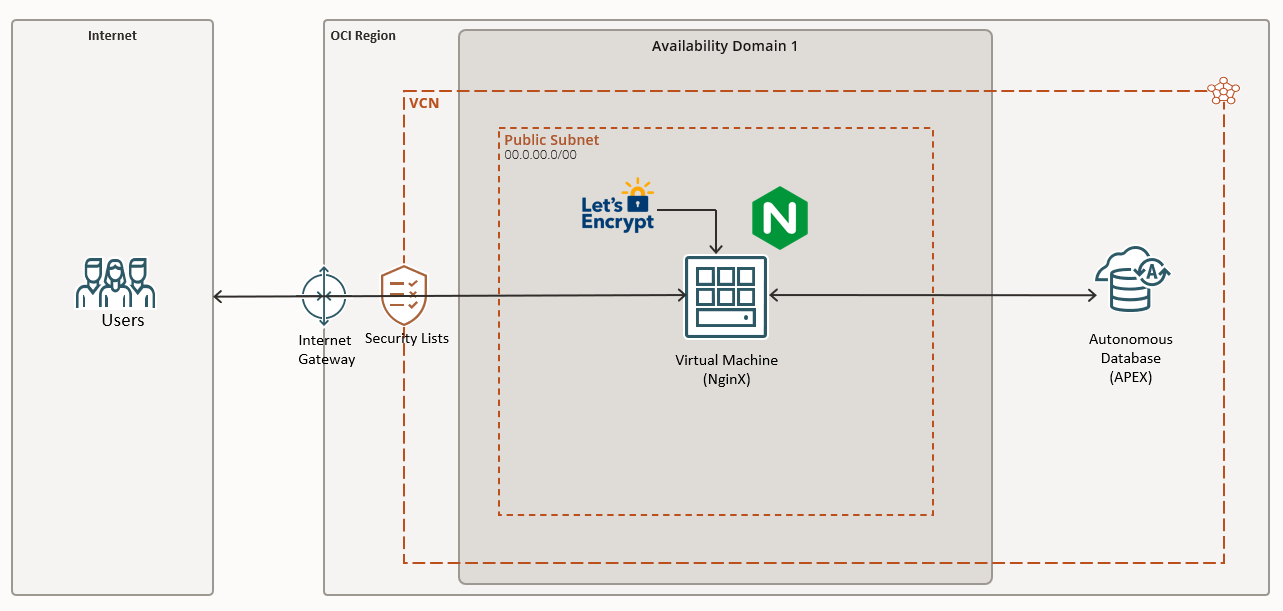
In order to use your own Custom URL, a few basic requirements need to be set up in the Oracle Cloud infrastructure. The diagram below shows that you'll need a Virtual Cloud Network (VCN) with an NginX Reverse Proxy Server. SSL certification is necessary for encrypted communication from the client, and we employed Let's Encrypt - a free, automated, and open certificate authority (CA) that provides digital certificates for enabling HTTPS (SSL/TLS) on websites.
Create a Compute Instance
To start, let's create a new Compute Instance using Oracle Linux 8. Simply log in to your OCI console and open the OCI navigation menu. Navigate to Compute and click Instances, then click on Create instance.
Make sure you are in the right Compartment!
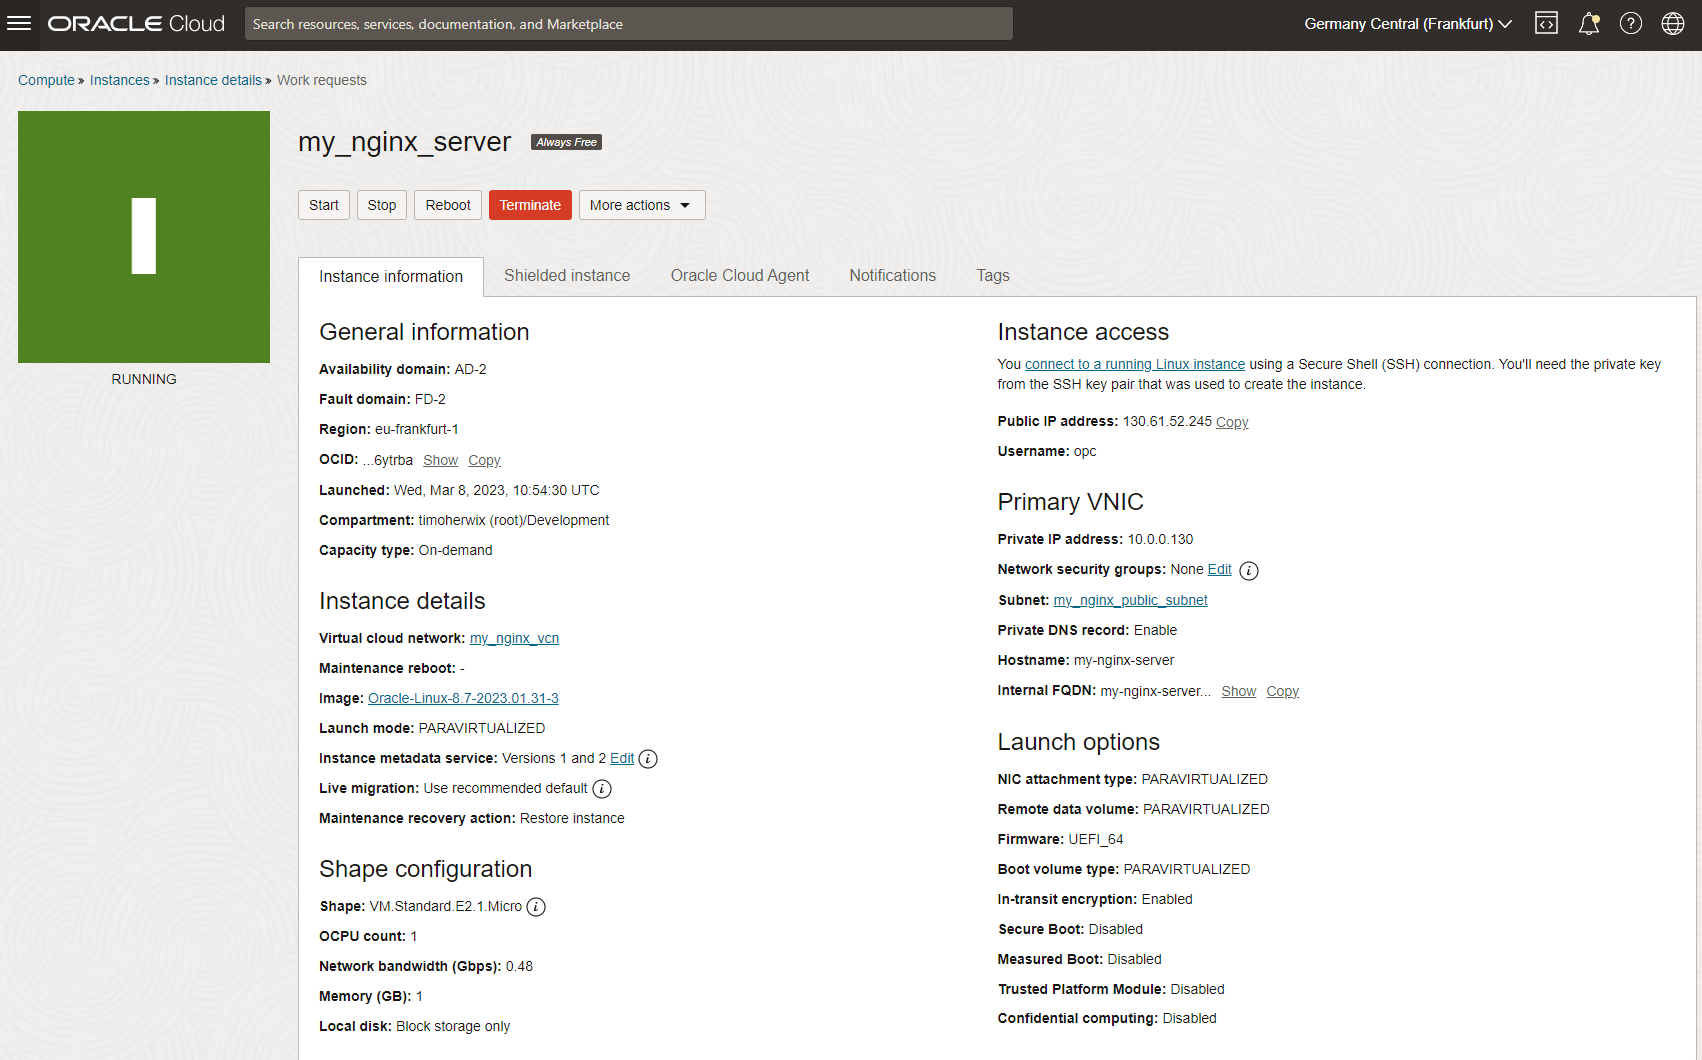
For this Tutorial, you can use the always-free shape e.g. VM.Standard.E2.1.Micro. Under Networking, select your VCN if it exists, or create a new one with a public subnet. Ensure that you download your SSH keys and store them in a secure location, as they will be necessary to connect to your instance during the installation of NginX.
For more details, you can read how to create a new instance on a public subnet here.
Now that the first step is done, we can start setting up the web server.
If you prefer to assign a Public Reserved IP address to the instance you can read here how to do it.
Install NginX

Let´s start with connecting to our Instance.
In this example, we used Cloud Shell. So launch Cloud Shell, upload your private key and connect to your compute instance with the following command.
ssh -i my_private_proxy_vm_key.key opc@130.61.52.245
You can read here how to connect to your instance in three different ways (Cloud Shell, PuTTY and Bastion).
Next, we switch to the root user by using the following command.
sudo su

Instead, you can add
sudoto any command, but it is easier to switch to the root user, right?
As a standard procedure, it is recommended to update the system with the latest software when working on a VM. Simply execute the following command to achieve this.
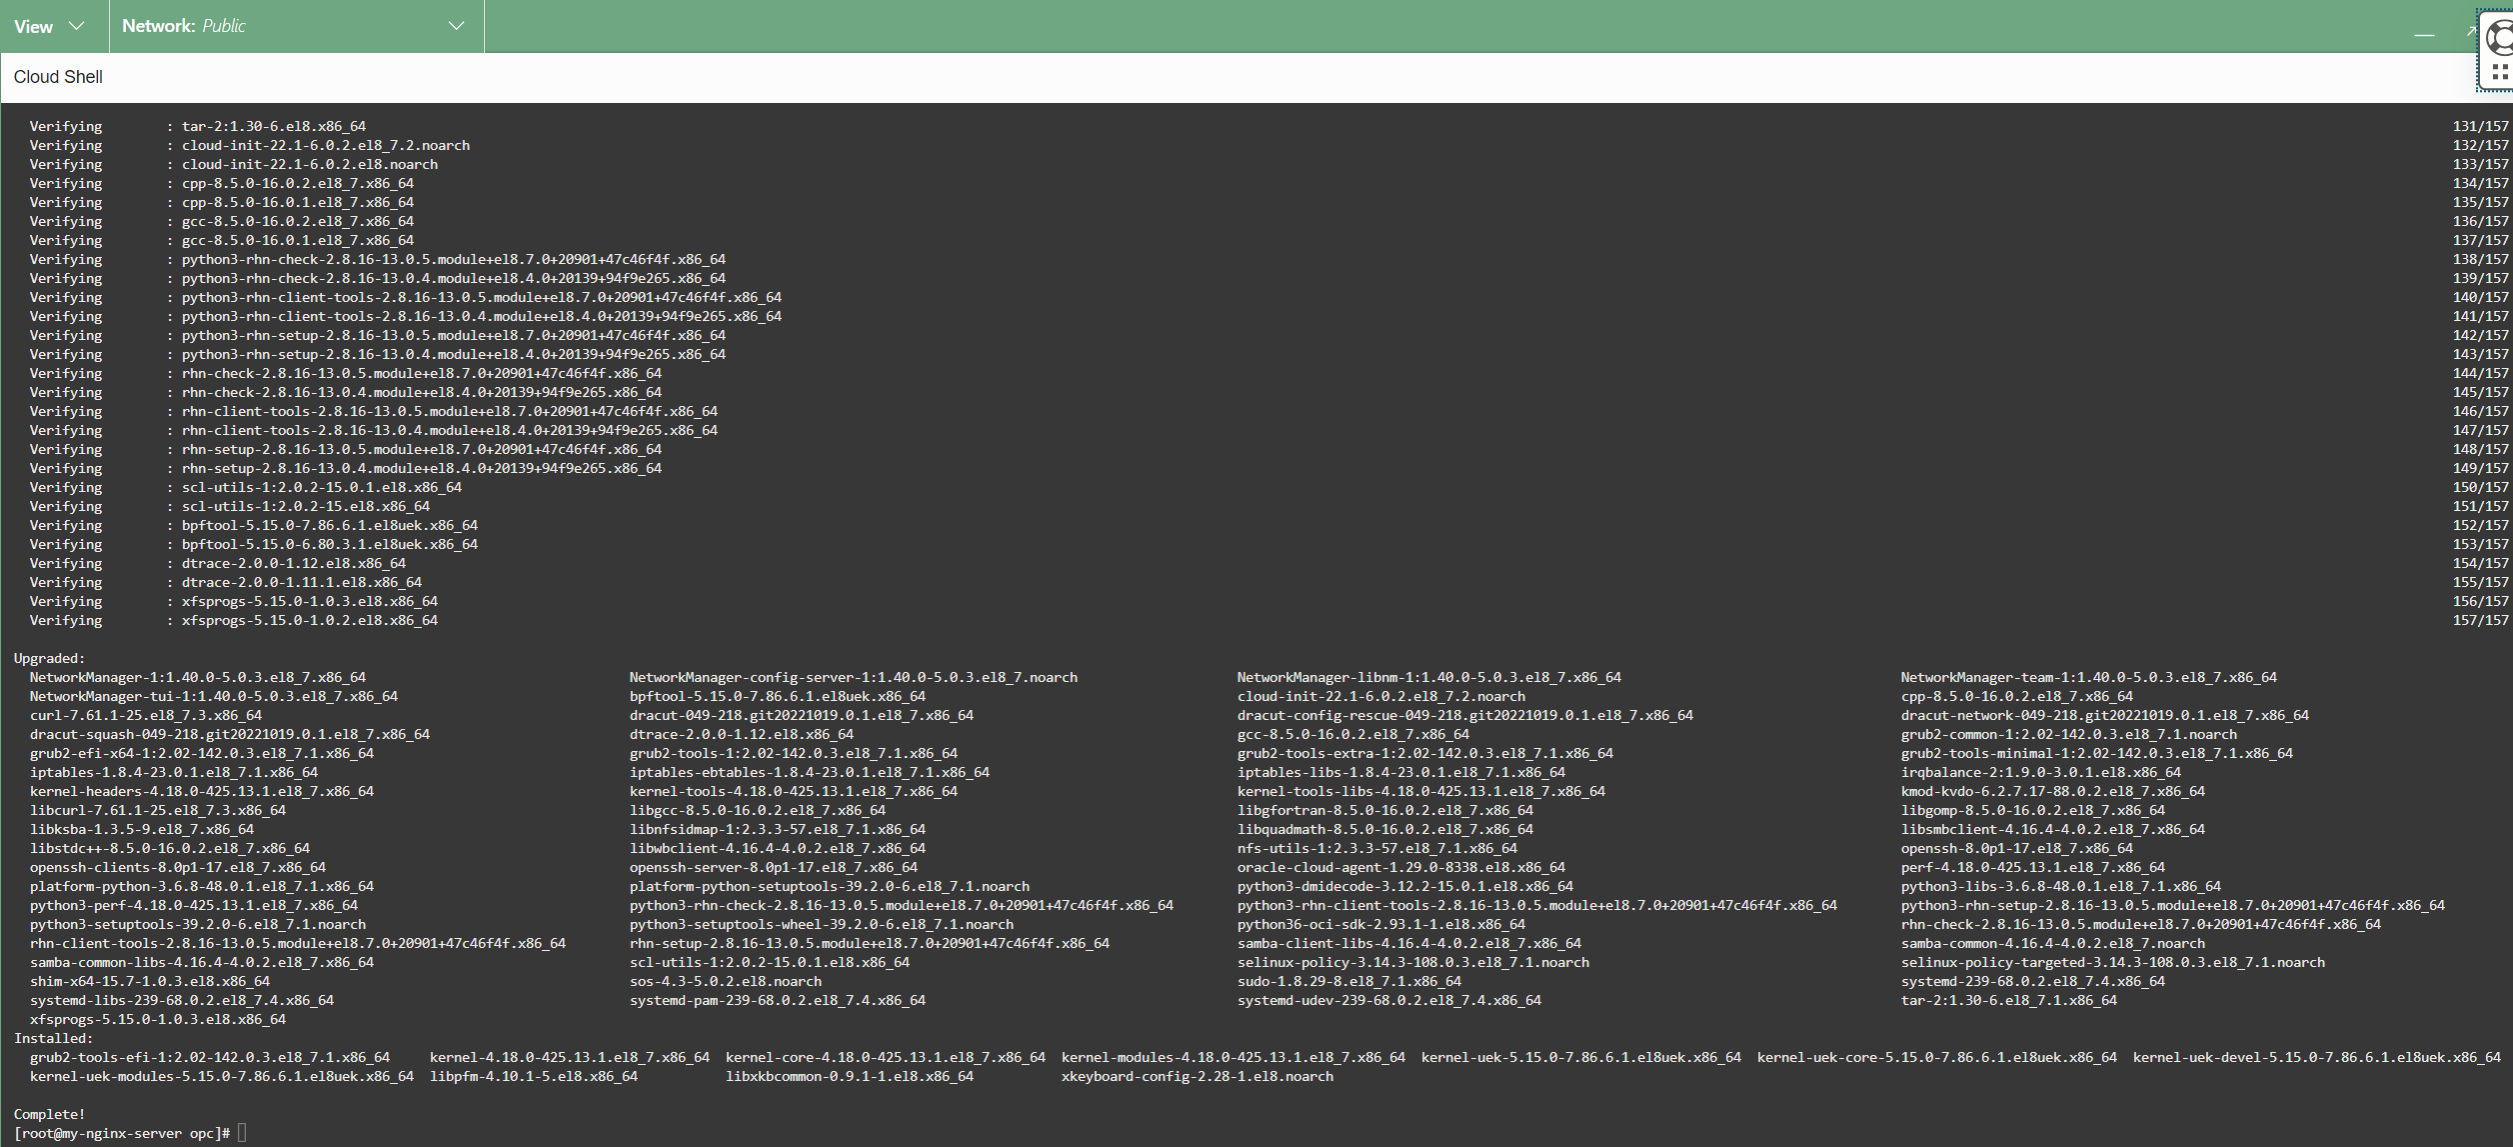
yum update
This will take a few minutes! After that, you will see a summary of the updates.
It's time to set up the web server. As indicated by the article's title, we'll be using NginX, but Apache is also an option. It's up to you. NginX is a lightweight, high-performance web server that has smaller footprints on your system than Apache, which has a broader range of functions. Additionally, NginX is easy to configure due to its straightforward configuration file structure. That's why we often prefer it.
So, execute the command below to install NginX.
yum install nginx

Then we can start the web server by using the following command.
systemctl start nginx
And with the following command, we can check the status.
systemctl status nginx
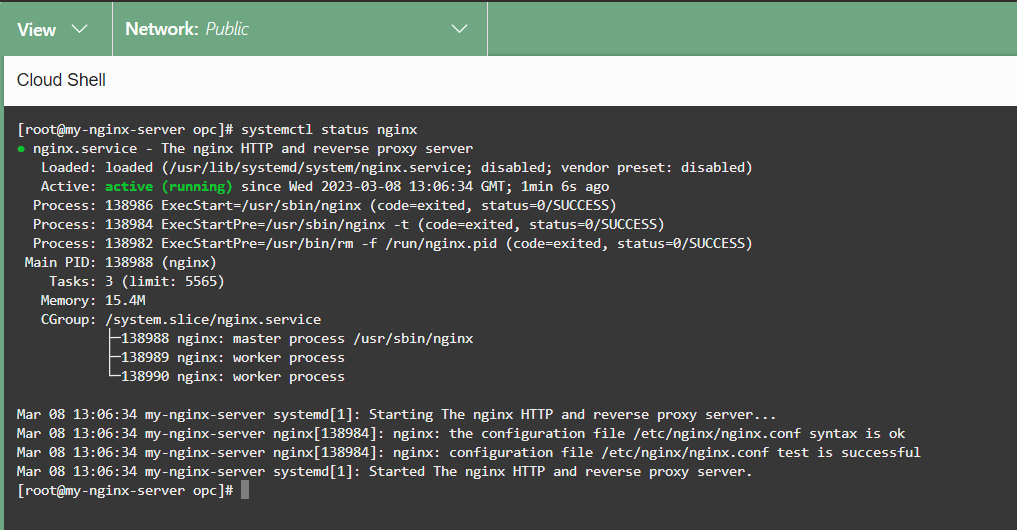
That's it. NginX is installed.
Configure Firewall and Ingress Rules
We'll be using NginX as a Reverse Proxy for HTTPS traffic to APEX that's running on your autonomous database. So for that, we have to open the firewall to allow incoming connections. To do this, run the following command.
sudo firewall-cmd --permanent --zone=public --add-service=http
sudo firewall-cmd --permanent --zone=public --add-service=https
sudo firewall-cmd --reload
Next, we need to update the Ingress Rules for the VCN to allow incoming HTTP and HTTPS traffic. So it is not enough to open the VM's firewall.
Minimize the Cloud Shell and navigate to "Networking > Virtual Cloud Networks" and select the VCN where the VM is located. Under "Resources" click on "Security Lists" and there on the "Default Security Lists" of your network. As you can see, there are three rules by default.
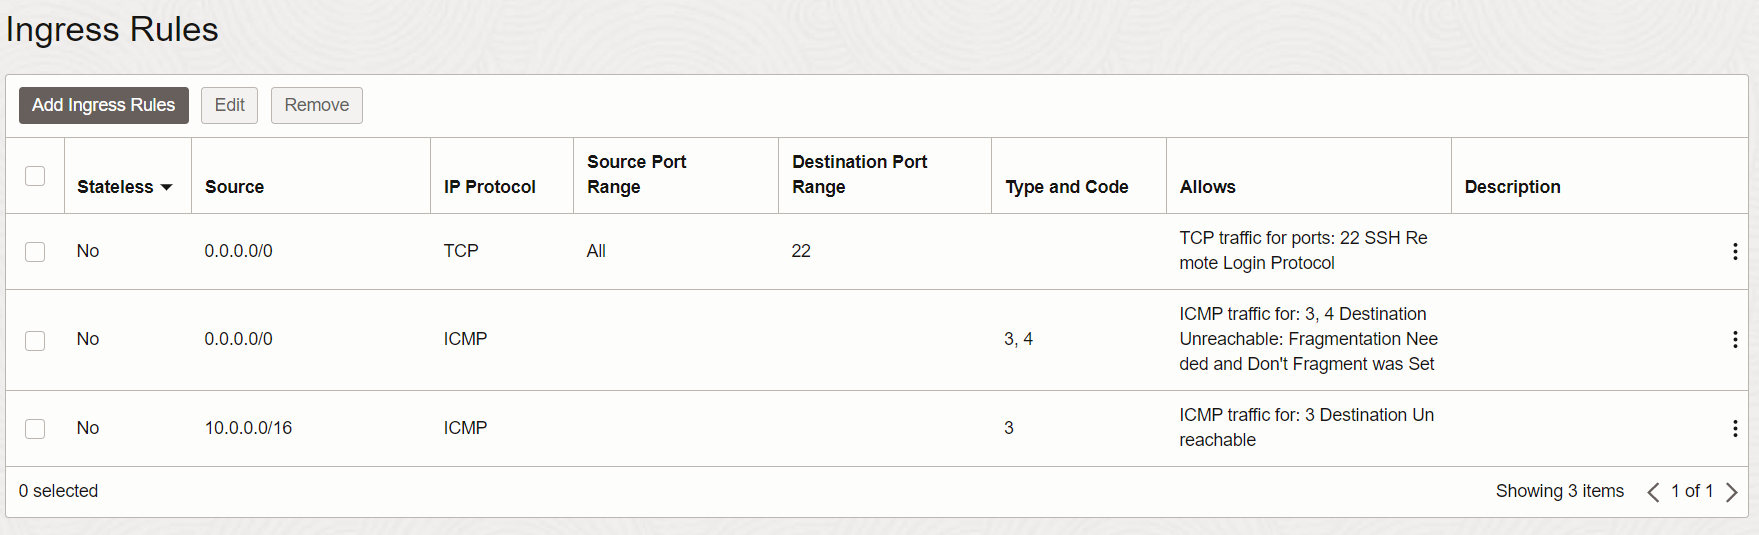
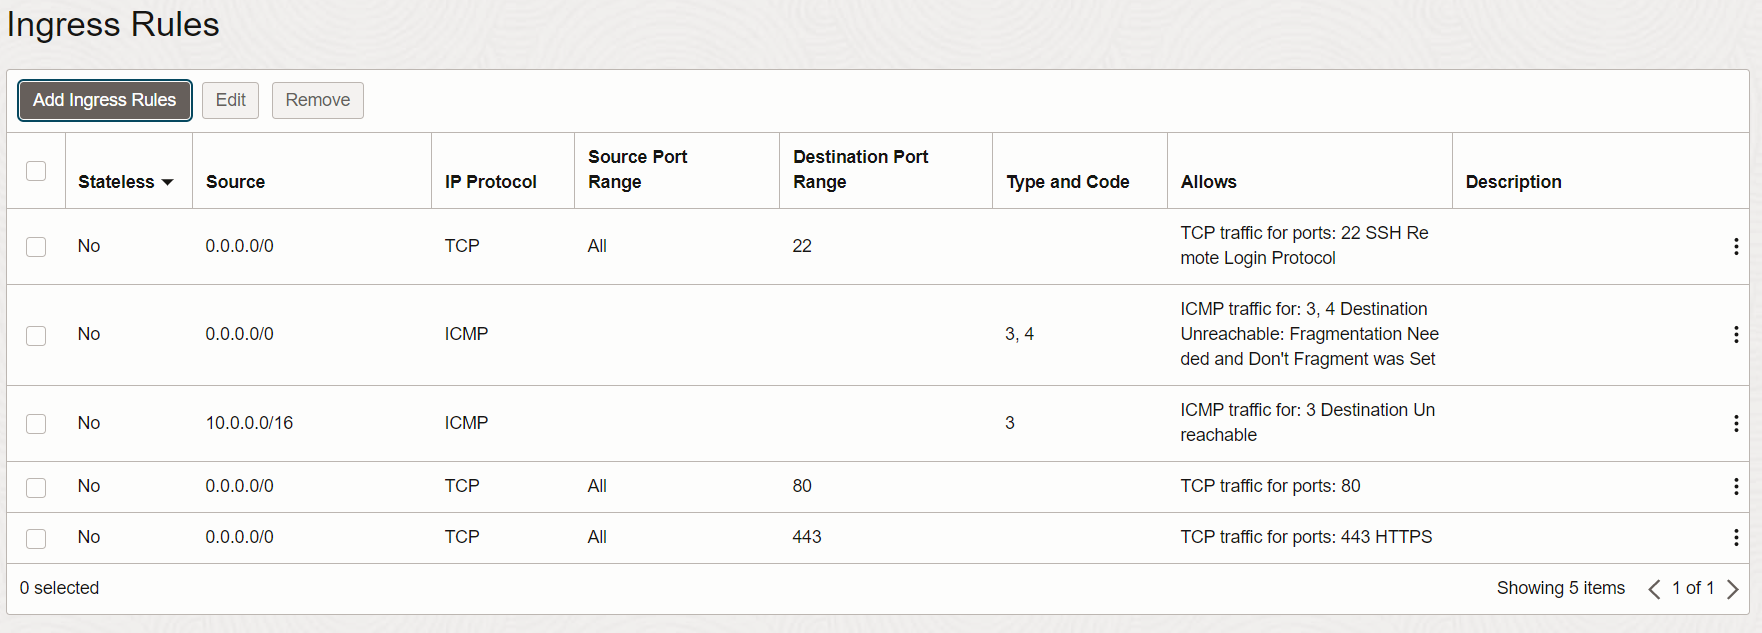
For HTTP and HTTPS traffic, we need two more rules. So click on "Add Ingress Rules".
Select CIDR as Source Type and as Source CIDR enter 0.0.0.0/0 so that everything can connect to it, and as Destination Port Range enter 80 for the first rule (HTTP) and 443 for the second rule (HTTPS).
You can now verify if the NginX web server is accessible by typing your IP address into a browser using HTTP. For instance, if your Compute Instance's Public IP address is 130.61.52.245, you would enter "http://130.61.52.245" in your web browser.
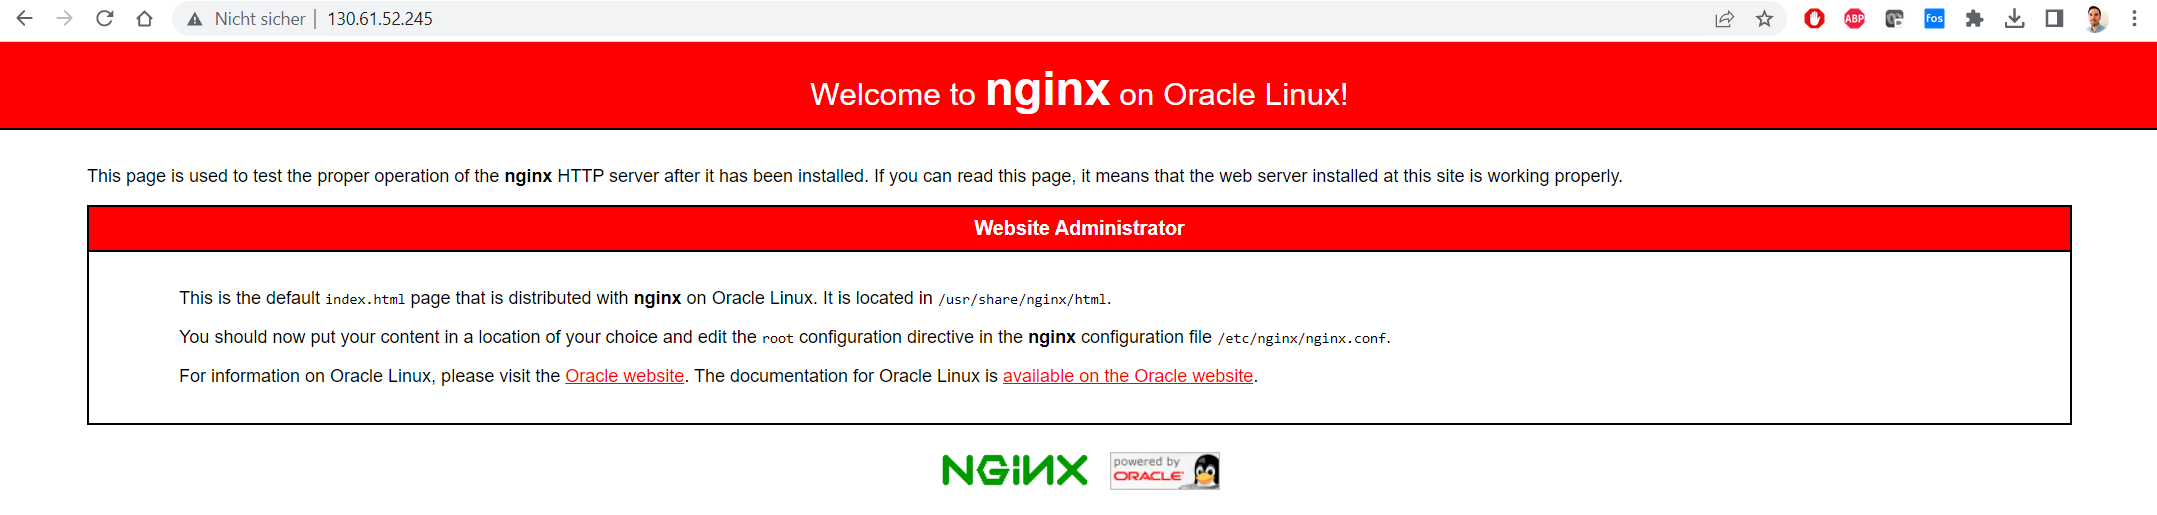
As you can see, the web server is now accessible.
DNS Setting
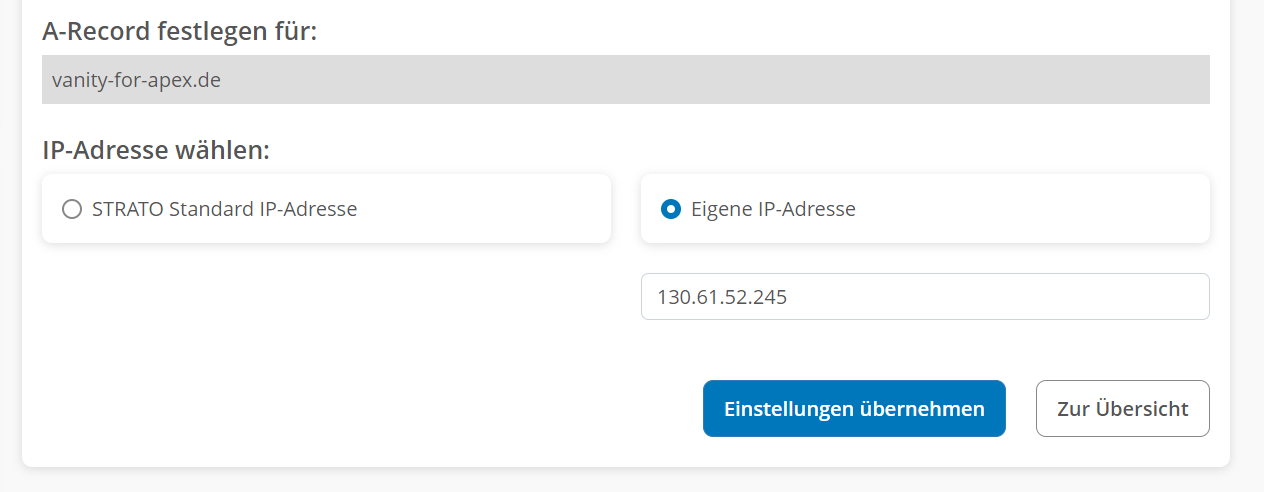
Before we can continue, we need to make our DNS settings. To do this, go to your domain provider and add an "A" record in the DNS settings with the Public IP address of the compute instance so that the VM is mapped to the domain.
Configure NginX for APEX
Next, we need to configure the NginX web server. In this tutorial the domain is vanity-for-apex.de. So, if we want to use our NginX web server as a reverse proxy for our APEX environment, we need to add a reverse proxy entry for the domain in the conf.d directory by replacing the URL to your APEX instance and your domain name. Run the following command in your Cloud Shell (or Terminal) to enter the configuration.
vi /etc/nginx/conf.d/vanity-for-apex.de.conf
In the vi editor, add the following:
server {
    server_name vanity-for-apex.de;

    location / {
        rewrite ^/$ /ords permanent;
    }

    location /ords/ {
        proxy_pass your_apex_url/ords/;
        proxy_set_header Origin "" ;
        proxy_set_header X-Forwarded-Host $host:$server_port;
        proxy_set_header X-Forwarded-For $proxy_add_x_forwarded_for;
        proxy_set_header X-Real-IP $remote_addr;
        proxy_set_header X-Forwarded-Proto $scheme;
    }

    location /i/ {
        proxy_pass your_apex_url/i/;
        proxy_set_header X-Forwarded-Host $host;
        proxy_set_header X-Real-IP $remote_addr;
        proxy_set_header X-Forwarded-For $proxy_add_x_forwarded_for;
    }
}
Finish the entry in the vi editor with ESC and leave it by entering :wq to save and exit.
Before we continue, let's break it down piece by piece:
Server Block
A server block is a subset of Nginx’s configuration that defines a virtual server used to handle requests of a defined type. Administrators often configure multiple server blocks and decide which block should handle which connection based on the requested domain name, port, and IP address. If there is a server_name defined that exactly matches the Host header value, that server block is selected to process the request.server_name vanity-for-apex.de;Location Block
Similar to the process that Nginx uses to select the server block that will process a request, Nginx also has an established algorithm for deciding which location block within the server to use for handling requests.The initial location block is a straightforward rewrite rule that directs the domain name to the designated Oracle APEX Builder.
 location / {
         rewrite ^/$ /ords permanent;
     }
The main setup for the proxy server is defined in the second location block. This results in passing all requests processed in this location to the proxied server at the specified address. So in our case to the URL of the autonomous database.
 location /ords/ {
         proxy_pass your_apex_url/ords/;
         proxy_set_header Origin "" ;
         proxy_set_header X-Forwarded-Host $host:$server_port;
         proxy_set_header X-Forwarded-For $proxy_add_x_forwarded_for;
         proxy_set_header X-Real-IP $remote_addr;
         proxy_set_header X-Forwarded-Proto $scheme;
     }
proxy_pass – The most important configuration step in an NginX reverse proxy configuration is the addition of a
proxy_passsetting that maps an incoming URL.proxy_set_header - Apart from
proxy_pass, NginX offers many other directives to handle requests to your server blocks. One of these directives isproxy_set_header, which lets you pass/rewrite headers to handle proxied requests.
The third location block refers to our APEX image files.
 location /i/ {
         proxy_pass your_apex_url/i/;
         proxy_set_header X-Forwarded-Host $host;
         proxy_set_header X-Real-IP $remote_addr;
         proxy_set_header X-Forwarded-For $proxy_add_x_forwarded_for;
     }
Install Let´s Encrypt

In the last part, we need to add a certificate for the HTTPS traffic. Let’s Encrypt is an SSL certificate authority managed by the Internet Security Research Group (ISRG). It utilizes the Automated Certificate Management Environment (ACME) to automatically deploy free SSL certificates that are trusted by nearly all major browsers. For most situations, the recommended method for installing Let’s Encrypt certificates is the official Certbot tool. Certbot automates the process of obtaining and installing a certificate, and can also automatically update your web server configuration.
Tim Hall has written a great article on this topic (read here).
In summary, we need to do the following steps. First, enable the EPEL repository for your Oracle Linux version.
cd /tmp
wget https://dl.fedoraproject.org/pub/epel/epel-release-latest-8.noarch.rpm
rpm -Uvh /tmp/epel-release-latest-8.noarch.rpm
Next, we will install snapd which is an App Store for Linux.
# install snapd
dnf install -y snapd
systemctl enable --now snapd.socket
systemctl start snapd
ln -s /var/lib/snapd/snap /snap

# install and refresh core
snap install core
snap refresh core
Finally, we have to install CertBot.
# install certbot
snap install --classic certbot
ln -s /snap/bin/certbot /usr/bin/certbot
Now we can run CertBot with the following command.
# run certbot
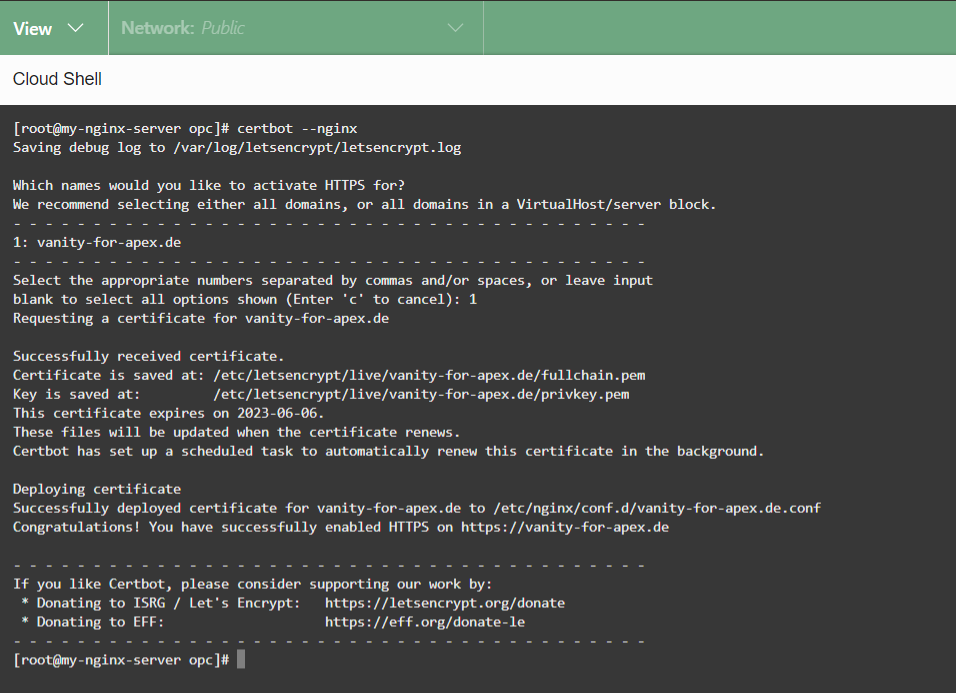
certbot --nginx
You will be asked a few things to answer. In the end, it should look something like this:
Renew Certificates
Once Let's Encrypt is installed, we would like to set up automatic renewal so that you do not have to manually check and renew. This prevents your certificates from expiring and can be done with cron.
Let’s Encrypt certificates expire after 3 months!
Of course, you can also renew the Let´s Encrypt certificates manually with the following command.
/usr/bin/certbot renew
However, it is easier to renew the certificates automatically by using a cron job. To do this, run the following command.
crontab -e
0 0 * * * /bin/certbot renew --quiet --post-hook "systemctl restart nginx"
Let’s break down the entry to see what some of the elements mean. The syntax of each line expects a cron expression made of five fields which represent the time to execute the command, followed by a shell command to execute.
In this example, 0 0 * * * is the schedule part that is executed every day at midnight (0:00am). In short, the 5 fields indicate the following.
Minute (0-59)
Hour (0-23)
Day-Month (1-31)
Month (1-12)
Day-Week (1-7)
So from now on the certificates will be renewed daily at midnight.
The final NginX Config File
If everything was ok the final configuration file looks something like this. As you can see, some new lines have been added automatically by CertBot.
server {
    server_name vanity-for-apex.de;

    location / {
        rewrite ^/$ /ords permanent;
    }

    location /ords/ {
        proxy_pass https://gfc4fe40cd2a327-apex1.adb.eu-frankfurt-1.oraclecloudapps.com/ords/;
        proxy_set_header Origin "" ;
        proxy_set_header X-Forwarded-Host $host:$server_port;
        proxy_set_header X-Forwarded-For $proxy_add_x_forwarded_for;
        proxy_set_header X-Real-IP $remote_addr;
        proxy_set_header X-Forwarded-Proto $scheme;
    }

    location /i/ {
        proxy_pass https://gfc4fe40cd2a327-apex1.adb.eu-frankfurt-1.oraclecloudapps.com/i/;
        proxy_set_header X-Forwarded-Host $host;
        proxy_set_header X-Real-IP $remote_addr;
        proxy_set_header X-Forwarded-For $proxy_add_x_forwarded_for;
    }

    listen 443 ssl; # managed by Certbot
    ssl_certificate /etc/letsencrypt/live/vanity-for-apex.de/fullchain.pem; # managed by Certbot
    ssl_certificate_key /etc/letsencrypt/live/vanity-for-apex.de/privkey.pem; # managed by Certbot
    include /etc/letsencrypt/options-ssl-nginx.conf; # managed by Certbot
    ssl_dhparam /etc/letsencrypt/ssl-dhparams.pem; # managed by Certbot
}

server {
    if ($host = vanity-for-apex.de) {
        return 301 https://$host$request_uri;
    } # managed by Certbot

    server_name vanity-for-apex.de;
    listen 80;
    return 404; # managed by Certbot
}
Final Step
At this point, we get a 502 Bad Gateway Error!

Read more here, written by Scott Spendolini 💡
To work around the error we need to open one more thing using the audit2allow command. If we bounce the errors off this command, Linux will create exceptions and allow these calls instead of blocking them. So run these two commands:
cat /var/log/audit/audit.log | grep nginx | grep denied | audit2allow -M apex_proxy
semodule -i apex_proxy.pp
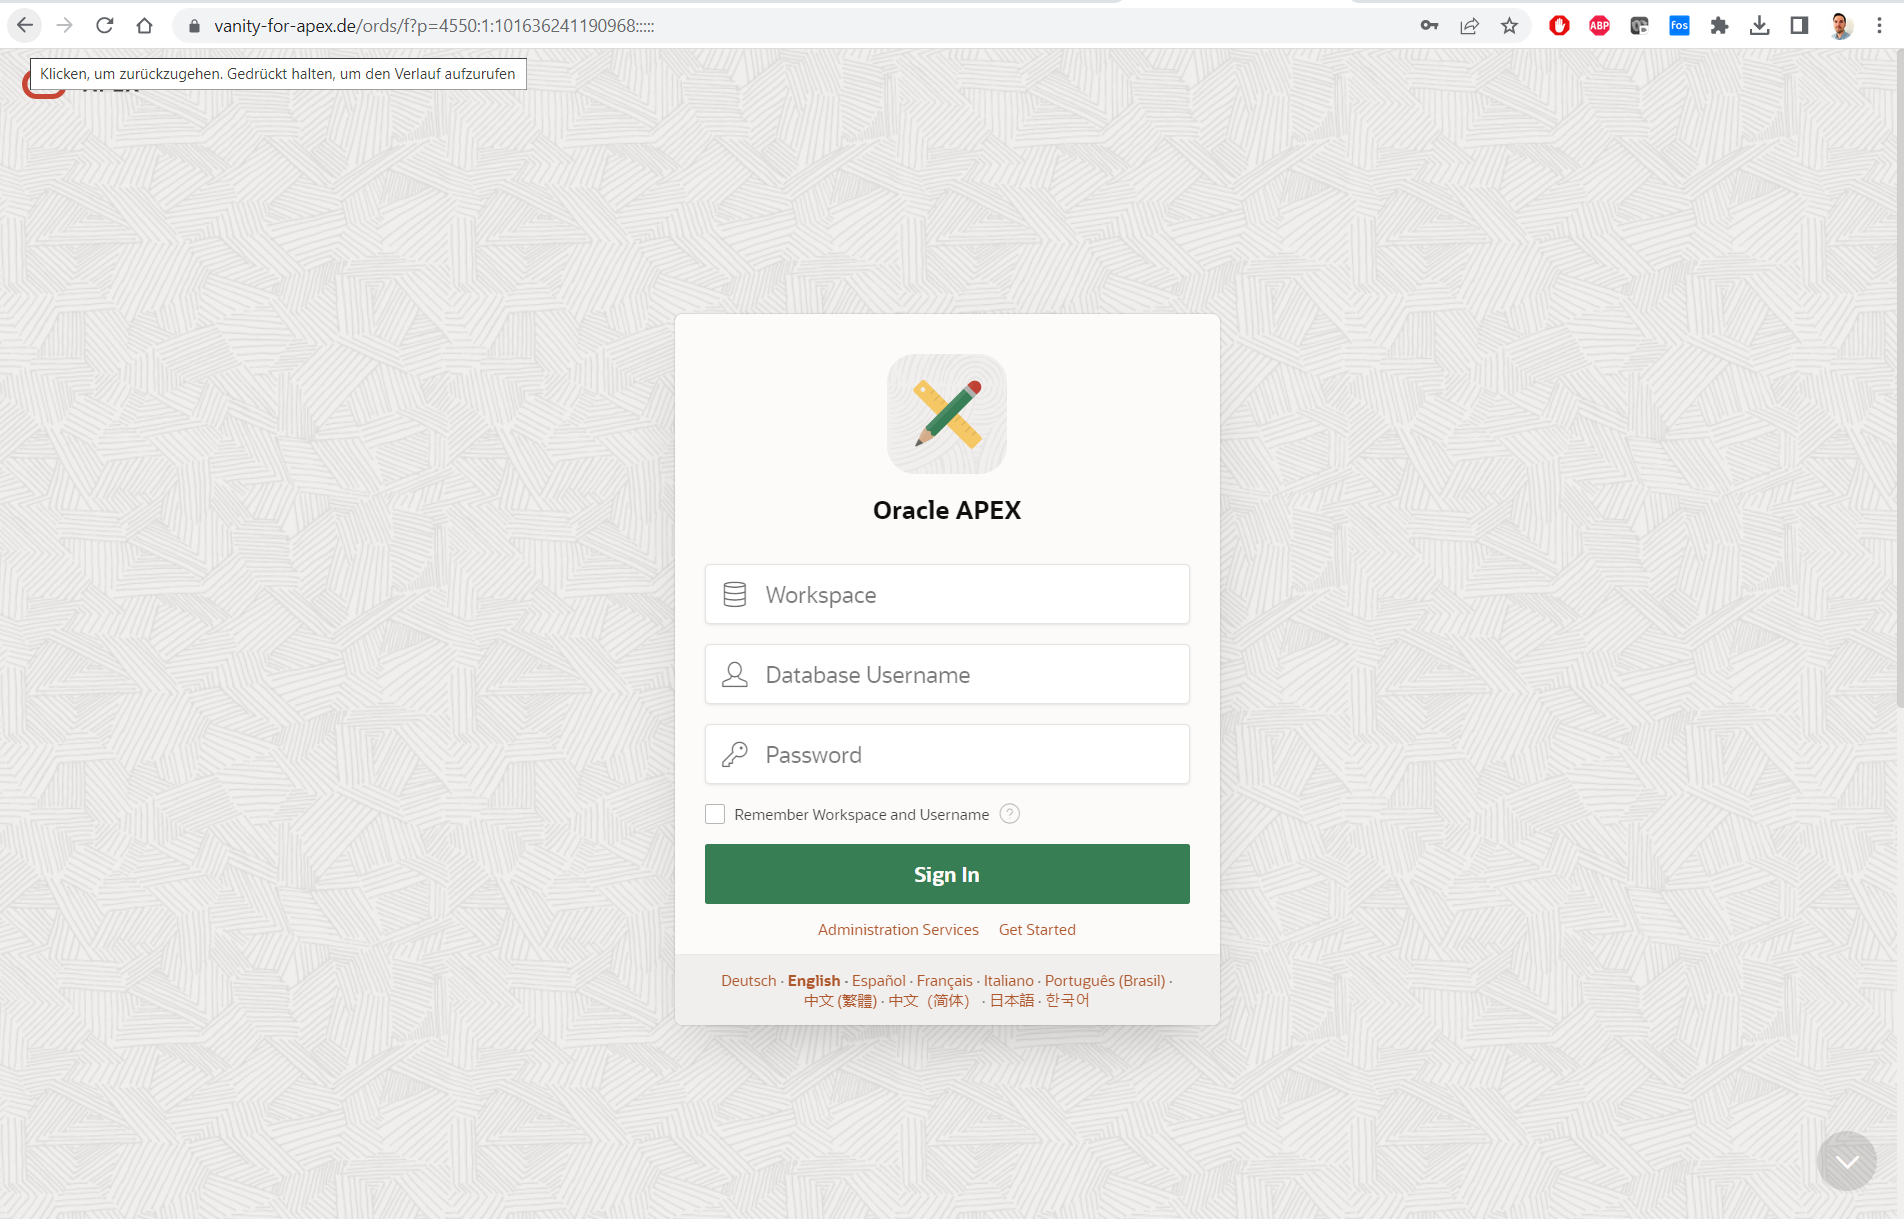
The final Test
From now on, the Custom URL can be accessed in the web browser over HTTPS 😎
Summary
✔️ Can be implemented in a Free Tier
✔️ The renewal of the certificate is automated
❌ Use not only OCI services managed by Oracle
❌ Social Sign-on didn´t works
Conclusion
In conclusion, setting up custom URLs for Oracle Autonomous Database using NginX and Let's Encrypt is a great way to achieve HTTPS (SSL/TLS) encryption for your website without incurring high costs. By creating a compute instance that forwards requests to APEX on ADB, you can use Let's Encrypt to install a free, automated, and open certificate authority for HTTPS encryption. While there are some limitations to this approach, such as the inability to use social sign-on, it is a viable option for those looking to implement HTTPS encryption in a Free Tier.


